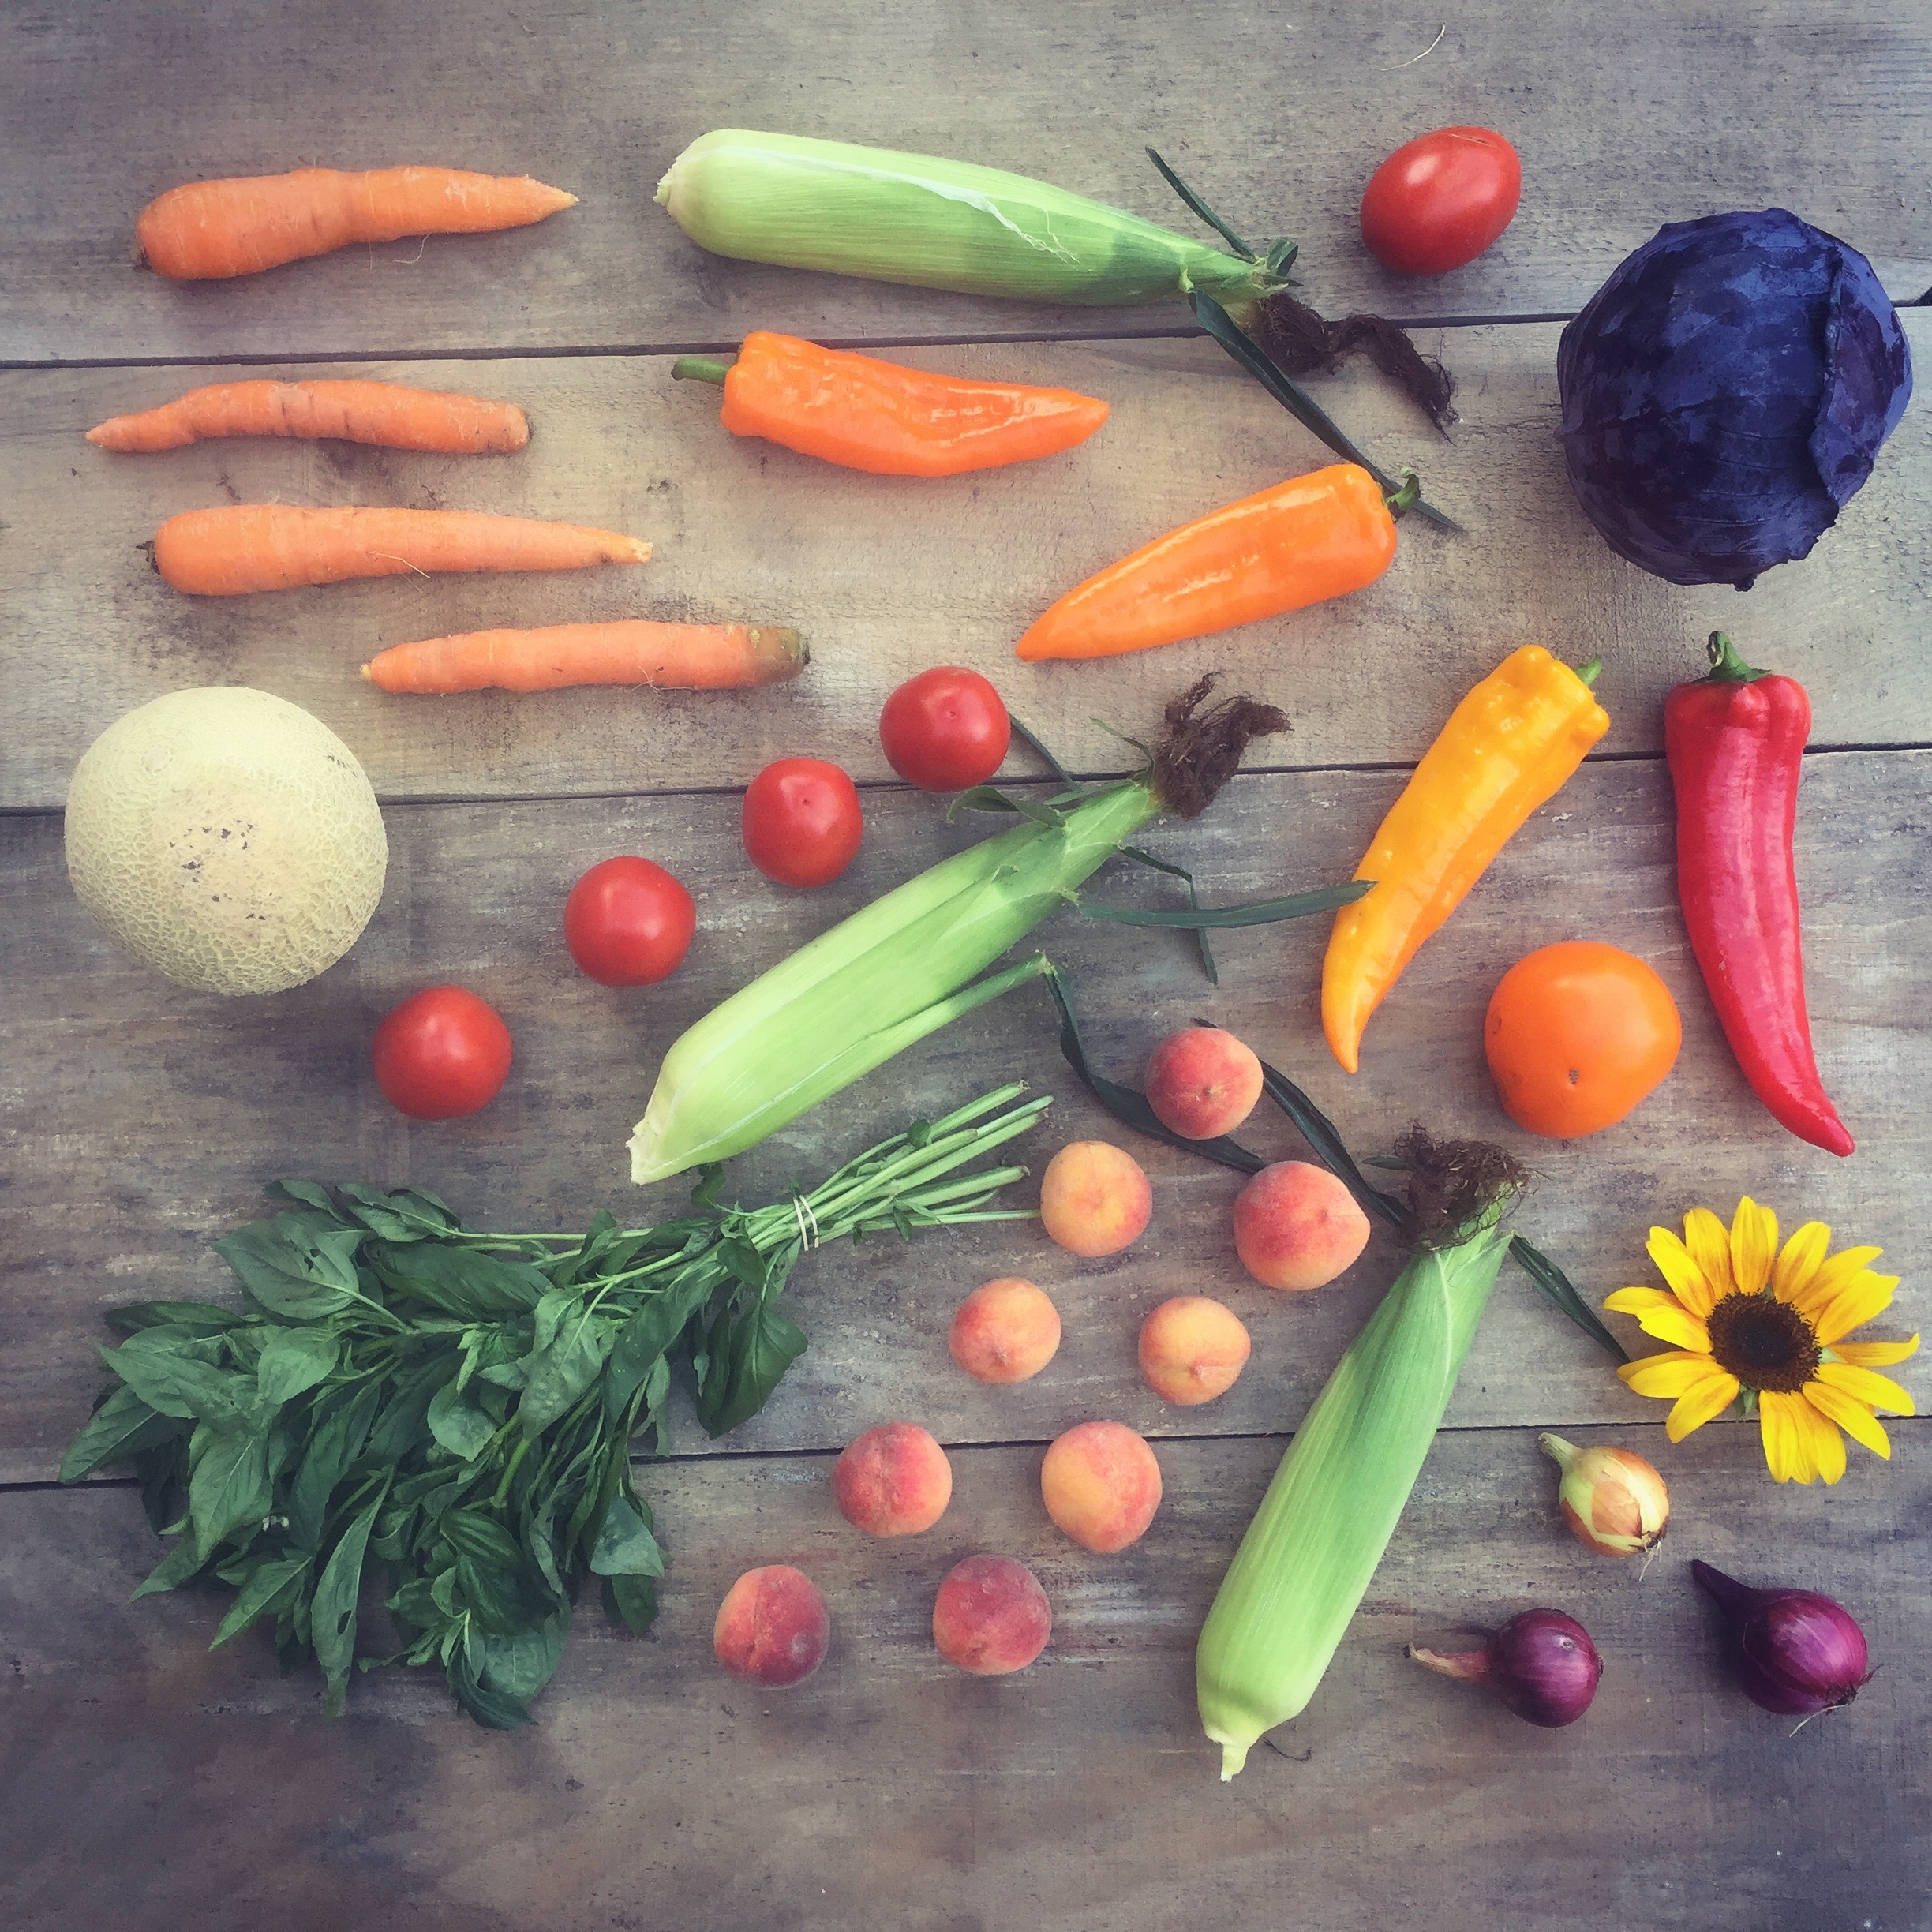
week 13

Pick List:

Yellow Tomatoes - Cherry Tomatoes - Carmen Pepper - Poblano - Peaches - Dill -

     Shishito & Cherry Pick Pepper Pints - Asian Eggplant Varieties - Corn - Green Beans

KITCHEN SHARE:      Homemade (of course) Hot- Sauce

IMG_8345.JPG

This week the temps seriously shifted reminding everyone about the impending arrival of first frost.  Though a few of our neighbors across town got hit that one extra cold night last week in August, we remain in the clear.  This weather is pretty shocking to all of us, humans and crops alike.  Suddenly we are back to our slow ripening June predicament- remember when we were all waiting on strawberries?  But this cool weather does allow us to play catch up a bit with crops like eggplant, tomatoes, etc...

In other news, Anne’s cut flower field is bumping with flowers- especially zinnias.  In order to keep up with the harvest, and keep the plants producing, she cuts them back and as a result the CSA is gifted (this week) 3 zinnias per CSAer.  Proving a symbiotic relationship between CSAer and zinnia plant super mutualistic- everyone benefits.

But enough about weather and flowers and my personal anguish with these end of Summer temps and the bittersweet (mostly bitter) arrival of fall, let’s talk about food.

Consider this an extended  

TIPS - TRICKS - RECIPES

For one, hello Peppers!!!  In your share this week you have 5 different pepper varieties- all uniquely different, let’s break them down

  1. SHISHITO (my new fave pepper): Holy smokes, these peppers are awesome. These are the green or red smallish crinkly peppers in the pints.  For the most part they are sweet peppers, but 1 in 50 are hot.  It’s a total crapshoot.  They have super thin walls which allow for quick frying, roasting, etc… here is what to do with them:

5-Minute Blistered Shishito Peppers Recipe

A hot cast iron pan creates the perfect char for this bite-sized pepper appetizer tossed with flavored salts.

8 ounces shisito peppers ½ lemon, sliced Extra virgin olive oil Kosher or flavored salts

Heat a large cast iron skillet over high heat until the pan is hot. Add the peppers to the hot skillet and cook the peppers, turning occasionally then add a few slices of lemon. Cook until the peppers become fragrant and begin to blister, and the nudge the lemons so they don't stick, about 5 minutes. Transfer to a serving bowl and drizzle with a little olive oil plus a squeeze more lemon then sprinkle with flavored salts. Serve immediately.

Otherwise, roast or straight grill the shishitos.  You will be so pumped.  just paint with olive oil and season with salt- so f”ing good.  

2) Cherry Pick: these are the little red balls- sweet as can be, great for stuffing

3) Poblano: Dark green pepper with mild heat- this pepper is excellent for frying or stuffing.  It is the pepper behind the classic Mexican dish, Chili Rellenos (google for details if you are unfamiliar).

4) Red Carmen:  by this point in the season, you should know and love this one, it comes in the shape of a bull’s horn and it is as sweet as can be.  I LOVE this pepper.

5)   Lunch Box Pepper:  This sweet pepper only made it into some of the pints.  It’s a mini sweet bell pepper- great for snacking.  

Moving on from peppers, DILLY BEANS!!

SEE DILLY BEAN RECIPE below

52633984628__DAD3A4FA-E802-4FB6-B96C-8A0ADDEE7BCF.JPG.jpeg
  • Ignore, the wax beans suggested and use your 1# bag of green beans!  

  • Substitute your red carmen pepper for the red bell.

  • And throw in anything else in the box- most everything can be pickled, though i’ve never messed with pickled eggplant and i am not sure i want too…

Eggplant CHIPS:

- 1 eggplant - Olive oil - Salt

Step 1: Slice the eggplant into SUPER thin (maybe using a mandoline on its thinnest setting) disks and place them on a lined baking sheet.

Step 2: Use a pastry brush to lightly coat the slices with olive oil. Be sure to flip them to brush both sides.

Step 3: Sprinkle salt to taste.

Step 4: Bake in the oven for 15 minutes at 400°F. Serve warm or store them in an airtight container to snack on later.

Alright I covered all the vegetables I wanted to highlight this week- off to pick dill!

week 12

Pick List:

Heirloom Tomatoes - Cherry Tomatoes - Orange Carmen - Red Carmen - Onion - Peaches! -

Zucchini - Summer Squash - Eggplant - Hungarian Hot Wax Pepper - Zinnias!!

KITCHEN SHARE:      Pesto

IMG_8084.JPG

YALL- OUR FALL CSA IS FAST APPROACHING, AND IF YOU’VE DONE THIS BEFORE YOU KNOW IT IS THE ACTUAL BEST.  READ ON FOR MORE INFO:

WHO:  this CSA is open to all seasonal food lovers

WHAT:  FALL CSA... our most beloved CSA.  

This year we intend to include fresh bread - fresh eggs - prepared foods (think pesto, salsa, soup, sauce, etc...) - a treat of local apples - along with our abundance of fall vegetables (root veggies, winter squash, etc..) - newsletter + recipes.

WHERE:  at our FARM STAND up on 12A.

WHEN:  Wednesdays, 5-6 p.m (and one Tuesday 5-6pm before Thanksgiving)

Beginning October 11- November 21

With a special end of season Holiday Pick-up on TUESDAY, NOVEMBER 21ST

HOW:  We harvest, and prep, and bake- you arrive at the farmstand with a box or bag to collect your share.

WHY:  Though the farmstand closes for business around Indigenous Peoples Day, we still have so much food in the fields- let's dig it, pick it, cook it, and eat it!

HOW TO SIGN UP

You can sign up for 1, 2, 3, 4, 5, or 6, or 7 weeks.

COST PER WEEK: $44      COST FOR 7 WEEKS: $285 (savings of $23)

Sign up at the stand- bring check or cash!

TIPS - TRICKS - RECIPES:

 (the following recipe is a bit more time consuming then i like to mess with this time of year- but I swear it is worth it)

STUFFED EGGPLANT WITH SUNFLOWER ROMESCO thefirstmess.com (Serves: 4)
Notes: If you want to keep this more traditional or “authentic” (not my fave word lol), use toasted almonds or even a mix of almonds and hazelnuts in place of the sunflower seeds.
-Romesco is good in a sealed jar in your refrigerator for 5-7 days. I dare you to even TRY making it last that long though. I love it with grilled/roasted vegetables, tossed with pasta and chickpeas and herbs, and swooped up with crusty bread.
-If you’re starting from scratch with this recipe and finishing it to the end, no need to wash the food processor out after you make the romesco. You’ll need it for the eggplant!

SUNFLOWER ROMESCO (makes extra):
½ cup toasted sunflower seeds 2 roasted sweet peppers (homemade or from a jar)
2 cloves of garlic, chopped 1 teaspoon smoked paprika
½ teaspoon aleppo pepper, or a pinch of cayenne 2 tablespoons sherry OR apple cider vinegar
1 tablespoon tomato paste small handful flat parsley leaves
sea salt and ground black pepper scant ½ cup virgin olive oil

STUFFED EGGPLANT:
2 medium eggplants olive oil
sea salt and ground black pepper 1 small shallot, chopped
1 clove garlic, chopped ¼ cup romesco
2 tablespoons fresh lemon juice 2 tablespoons tahini
4 servings cooked grain of choice (I used quinoa) toasted sunflower seeds or dukkah, for topping
big handful of fresh and leafy herbs, chopped (I used cilantro, parsley & a bit of dill)


Make the sunflower romesco: In the bowl of a food processor, combine the sunflower seeds, roasted red peppers, garlic, paprika, aleppo pepper, vinegar, tomato paste, parsley, salt, and pepper. Pulse the mixture until all ingredients are finely chopped and lightly pasty. Scrape the bowl down. Then, with the motor on low, drizzle the olive oil in through the feed tube until fully incorporated. Check the sauce for seasoning. Transfer sauce to a sealable jar, and set aside in the fridge until ready to use.

Preheat the oven to 350 degrees F.

Cut the eggplants in half lengthwise, right through the stem. Using a paring knife, carve into the eggplant flesh all the way around the perimeter. Pry the eggplant flesh out of the eggplant halves with your fingers or a spoon and set it aside. Place eggplant halves on a baking sheet, facing up. Brush the eggplant halves with olive oil and season with salt and pepper. Bake eggplant for 20 minutes, or until golden brown and lightly tender.

Roughly chop the scooped out eggplant. Heat a bit of oil in a medium-large saute pan over medium heat. Add the shallots and garlic to the pan and saute until fragrant and slightly soft, about 2 minutes. Add the chopped eggplant, and season with salt and pepper. Stir. Saute the eggplant, stirring occasionally, until tender, browned, and slightly reduced in size, about 4 minutes.

Carefully transfer eggplant to the food processor. Add the ¼ cup of romesco, lemon juice, and tahini to the food processor as well. Pulse the mixture until you have a chunky paste.

To serve, divide the warm eggplant filling evenly among the eggplant “boats.” Then, spoon your cooked grain of choice on top along with a sprinkle of chopped herbs. Garnish the tops of the stuffed eggplants with more romesco and toasted sunflower seeds or dukkah. Enjoy warm.

Pick List:

Heirloom Tomato - Yellow Carmen - Onion - Peaches! -

Melon - Corn - Basil - Cukes - Cayenne Pepper - Sunflower

         KITCHEN SHARE:      

ROSEMARY RHUBARB SAUCE- for toast or ice-cream or yogurt, etc..

IMG_7891.JPG

The harvest is in serious full swing!  I feel like all the crops are coming on at once and I have zero time to process for winter  (i.e. can, freeze, dry, etc…).  During these times I am so grateful for our staggered plantings and all the 100’s of varieties of tomatoes intended to produce during different times of the season.  Please do not do as I do and put off your canning adventures until the day before the first frost- get on it hasta pronto.  If you are amped on winter storage, know that we sell vegetables in bulk for a discounted rate through our farmstand- most notable is our deal on tomato seconds.  Curious about that price?  See next week’s newsletter (mostly because it is Wednesday morning at 6am and i do not have that info on me)- you can also call the farmstand or email info@edgewaterfarm.com for any wholesale inquiries.   

 In other news, there is a cultural change of seasons happening over here.  School season is upon us and we are losing- what feels like- half of our staff.  One of the good folks heading back to school is Pete Jaarsma.  Pete has been working at the farm since he was a sophomore in high-school.  Pete is an absolute peach of a human and he has grown up so much since he arrived on River Road.  Best part about Pete?  His consistency- always shows up on time, always asks what more he can do, and always comes to the field with the sunniest of dispositions and a story to tell.  Also noteworthy, Jaarsma packs his lunch with a mason jar of milk.  He is heading into his Junior year of college at UNH, we miss him already.

 Much love to all the crew heading back to school and abroad! We really appreciate all the good energy they put into the season.

 TIPS - TRICKS - RECIPES:


What you need:

3 peaches (2 diced, 1 sliced) 2 tablespoons butter, at room temp

1/2 – 3/4 cup maple syrup, according to taste (or ~1 cup sugar) 1 egg

1 cup of flour, sifted 1 teaspoon baking powder

pinch of salt

What to do:

+ Grease a square or round baking dish (the original recipe calls for a 9-inch pan, but an 11-inch dish worked just fine, too—just keep an eye on the time.) Preheat the oven to 350 degrees F.

+ Dice two peaches, removing the pit. For the topping, slice the third peach into thin slices and set aside.

+ In a large bowl, by hand or by mixer, beat softened butter and maple syrup or sugar. Add the egg and beat until well mixed.

+ In a different bowl (or if you’re as lazy as I am, right on top of the liquid ingredients), sift together the flour, baking powder, and salt. Add the dry ingredients to the wet and mix well. (If using maple syrup, the batter will be slightly runny, if using sugar, it will be quite thick. Both will turn out just fine after baking. Carry on.)

+ Mix diced peaches into the batter.

+ Spread batter into your pan.

+ Sprinkle with cinnamon and sugar and arrange peach slices in as pretty a spiral as you can manage.

+ Bake the cake until the edges pull away from the pan and it’s a rich golden brown (if you use syrup instead of sugar, your batter will be browner from the get-go, so account for that), about 60 minutes.


serves 6

notes: I opt for white balsamic vinegar because it doesn’t impart a dark colour onto the bread. Feel free to use the darker, regular balsamic vinegar if that’s what you have though. The flavour is quite similar.

croutons:

4-5 cups tore up pieces of bread 2-3 tbsp extra virgin olive oil

salt and pepper

 salad:

1 big shallot, peeled and thinly sliced 4-5 cups chopped tomatoes

2 peaches, pitted and roughly chopped 1-2 cups of greens

2 big sprigs of basil, leaves finely sliced (reserve some whole leaves for garnish if you like)

1/4 cup + 2 tbsp extra virgin olive oil 1/4 cup white balsamic vinegar

salt and pepper

Preheat the oven to 350 degrees F.

Place the tore up bread on a large, parchment lined baking sheet. Drizzle with the olive oil and season with salt and pepper. Toss to coat bread evenly in the oil. Bake for 15 minutes, flipping croutons at the halfway point to promote even browning. Remove from the oven and set aside.

Place the chopped tomatoes, peaches, kale and basil in a large bowl. Drizzle the oil and white balsamic vinegar on top and season the mixture with salt and pepper. Toss to combine. Add the cooled croutons and toss once more.

Let this mixture sit for 10 minutes or so so that the bread can soak up the juiciness from all the veggies and fruit. Serve with a big sprig of basil on top if you like.

week 10

PICK LIST:

Plum Tomatoes - Heirloom Tomato - Red Carmen - Yellow Carmen - Orange Carmen -

- Onion - Peaches! - Melon - Corn - Carrots - Basil - Sunflower!

IMG_7789.jpg

This week we begin our two other CSA options- the donation box and the kitchen share.  Both these shares come at the last 8 weeks of the Summer CSA season when the harvest comes on so hard and we are completely overwhelmed with abundance.  This makes for the perfect opportunity to process (i.e. the kitchen share) and pick a little extra for those who need it the most (i.e. donation box).

For the kitchen share, Em and the good folks in the kitchen come together to process crops in mass quantity and pint them up for future eats.  For example, the kitchen share can expect sauces from tomatoes, jams from berries, etc.  This week I believe they are taking advantage of our amazing cilantro crop that is growing so beautifully this summer (cooler conditions slow down early bolting) and making my fave addition to literally everything (toast, meat, veggies, soup, etc…), chimichurri.

 For the donation share, we team up with Willing Hands.  Their mission, is to

“recover food in order to reduce waste, improve health, and provide reliable access to nutritious food for our neighbors in need.

Willing Hands distributes free, wholesome food to our neighbors in need. We pick up donated food, primarily fruits and vegetables, that might otherwise go to waste. We deliver this food to local human service organizations and collaborate with them to provide nutritional education.

Willing Hands is a non-profit, charitable organization operating throughout the Upper Valley region of Vermont and New Hampshire.”

Throughout the season we donate thousands of pounds of produce to the organization through not only a weekly pickup of surplus crops at our pack shed, but also through weekly gleanings.  I think last week they picked beets from our field.  It’s a pretty remarkable team of humans behind willing-hands and i am so grateful they exist in our community.  The donation share is just another way that we are able to set aside that much more food for families that probably need it the most.  And in light of all the madness surfacing in America right now, Willing Hands is a reminder of actual community and support that keeps bellies full because access to food is a human right and no one should go HANGRY.    

TIPS - TRICKS - RECIPES:

Charred Corn Salad With Basil And Tomatoes

  • 12 ears of corn, husked 6 tablespoons olive oil, divided

  • 1 cup thinly sliced red onion 2 large tomatoes, chopped

  • 1 cup (loosely packed) fresh basil leaves, large leaves torn 1/3 cup (or more) fresh lime juice

  • 2 tablespoons chopped fresh thyme Kosher salt, freshly ground pepper

Build a medium-hot fire in a charcoal grill, or heat a gas grill to high. Rub corn with 1 Tbsp. oil. Grill, turning frequently, until corn is charred and heated through, 10-12 minutes. Remove from grill; when cool enough to handle, cut kernels from cobs and transfer to a large bowl. DO AHEAD: Corn can be made 3 hours ahead. Let stand at room temperature.

Place onion in a strainer and rinse with cold water to mellow its flavor. Drain well. Mix onion, remaining 5 Tbsp. oil, tomatoes, basil, 1/3 cup lime juice, and thyme into corn. Season to taste with salt, pepper, and more lime juice, if desired. DO AHEAD: Salad can be assembled 1 hour ahead. Let stand at room temperature.

RICE NOODLE AND CRISP PEACH SALAD

(this is basically another variation on my fave summer meal)

Those addictive Southeast Asian noodle salads usually star Asia’s crisp, sweet/tart green papaya or mango. So why not use our own summer peaches or nectarines? When they’re firm and slightly underripe but still fragrant, they’re ideal for salads like this.

Light, cool and refreshing, it’s perfect summertime food as not a lick of heat is needed to make it.

Make the dressing a couple of days ahead and refrigerate, but use it at room temperature. The salad can be assembled hours ahead and refrigerated, but dress it shortly before setting it out.

Dressing:

2 large garlic cloves, minced Generous pinch hot red pepper flakes (optional)1/3 cup Asian fish sauce 1/4 to 1/3 cup water

1/3 cup fresh lime juice 1/3 to 1/2 cup sugar, or to taste

1/2 medium red onion, cut into thin strips

Salad:

  • 2 to 3 medium to large slightly underripe peaches or nectarines, peeled and sliced into 3-inch by 1/2-inch sticks

  • Juice of 1/2 lime

  • 1/2 of a red cabbage, cut into 1/8-inch strips

  • 1 small carrot, shaved with a vegetable peeler into strips

  • 8 whole scallions, thinly sliced on the diagonal

  • 1 to 2 fresh Serrano chiles, thinly sliced, or to taste

  • 1/2 pound vermicelli (thin) rice noodles, soaked in very hot water to cover until soft (about 8 minutes), rinsed and drained

  • 1/3 cup each coriander and spearmint leaves, torn

  • 1/2 cup roasted cashews or peanuts

Instructions

1. Make the dressing. In a medium bowl, stir together the dressing ingredients, tasting for sweet-tart balance. Let the onions soak in the sauce.

2. Make the salad. In a large bowl, combine the peaches with the lime juice and the rest of the salad ingredients except the herbs and nuts. Chill until about 20 minutes before serving. Then toss the salad with the dressing and onions. Heap on a platter and scatter with the herbs and nuts.


week 9

Pick List:

Plum Tomatoes - Green Pepper - Xanthi (long orange sweet pepper) - Cucumber -

Peaches! - Melon - Eggplant - Corn - Lettuce - Garlic

First of all, this might be the best week so far- Peaches? Corn? Melon?  Big beautiful Eggplant? Dynamite harvest and a symbol of the abundance that August brings.  

Second of all, the blueberry glean…  Some might say it was a “wash” but for those that sat tight through the thunder and lightning got an hour of picking, and took home a good amount of blues.  I know that your free time is so sacred (i completely get this) and no one wants to be looking at a field full of blueberries from their car- but I thank all of you that played by the farm lighting rules- and moreover, now you know where we hang out in case of storms- cars, barns, somewhere other than a field.  It is still unknown if we will reschedule, as my dear friend Mrs. T is still out of town, and she would be the one to host for me.  Stay tuned- and check your email.

 If you have not been receiving emails, let me know!!!   jenny@edewaterfarm.com

 A note on the peaches:  Peaches are one crop at this farm that we completely ignore- because of our climate, to yield a worthy harvest, they take some messing around that none of us have time for, so for the most part, we let them grow wild.  I am in love with this crop and saw it as a huge selling point when I first arrived on River Road 10 years ago.  My father-in-law, Pooh feels the opposite and would like to see them turn into woodchips.  Regardless, this year, they produced an amazing amount of fruit!!!  Also noteworthy, their teeny-tiny size due to zero pruning, makes for the most adorable quarts- I see this as a win.  ALSO, if your peaches are hard let them sit out on your counter until ripe :)

 Lastly, boxes.  Farmstand CSAers, ignore the following message:  

Please return your boxes every week at the site where you pick up your share!!

To cut back on waste and because it just makes sense, we reuse them! Thankyou!  


TIPS - TRICKS - RECIPES:  

Israeli Couscous, Eggplant and Tomato Gratin, 6 servings

This is an eggplant Parmesan of sorts on top of a bed of Israeli couscous. If you’ve made fresh tomato sauce over the summer or you’re still getting wonderful tomatoes at the farmers’ market, use fresh tomato sauce; otherwise, use canned tomatoes for your marinara sauce. You can substitute cooked grains for the Israeli couscous; if you don’t tolerate gluten, try the recipe using cooked brown rice instead.

  • 1 ½ pounds eggplant (2 medium globe eggplants or 4 to 6 smaller or Japanese eggplants), sliced into rounds, about 1/3 inch thick

  • Salt to taste

  • 3 tablespoons extra- virgin olive oil(plus additional for oiling the foil and baking dish)

  • 2 cups cooked Israeli couscous (see below). You can also use regular couscous or any other cooked grain.

  • 2 cups fresh tomato sauce or marinara sauce made from canned tomatoes

  • 2 ounces Parmesan cheese, grated (1/2 cup, tightly packed)

  • Torn or slivered basil leaves for garnish


  1. Preheat oven to 450 degrees. Line a baking sheet with foil and coat foil generously with olive oil. Toss eggplant slices with salt to taste and 2 tablespoons of the olive oil. Line baking sheet with the slices in a single layer (you may need 2 baking sheets, or do this in batches). Place in oven and roast for 15 minutes. Eggplant will look dry on surface but should be soft when pierced with a knife. Remove from oven and, wearing oven mitts, carefully fold the foil up in half over the eggplant and crimp edges to create a sealed packet. Allow eggplant to steam inside the packet for another 15 minutes (you can cook couscous during this time). Turn oven down to 375 degrees.

  2. Oil a 2-quart gratin or baking dish with olive oil. Place cooked Israeli couscous in a bowl and stir in 1/2 cup of the tomato sauce. Spoon into baking dish in an even layer.

  3. Remove eggplant slices from foil packet (they should be thoroughly tender), and layer on top of couscous, overlapping slices slightly. Cover with remaining tomato sauce and sprinkle on Parmesan cheese. Drizzle on remaining tablespoon of olive oil. Place in oven and bake 30 minutes, until browned and bubbling. Allow to sit for at least 10 minutes before serving. Sprinkle with torn or slivered basil leaves just before serving.

Tip:  Heat a large saucepan over medium-high heat and add 1 cup Israeli couscous. Toast the couscous, shaking the pan or stirring often, until it colors very lightly and smells aromatic and toasty, a bit like popcorn. Immediately add 2 quarts water and salt to taste (be generous, as if you are cooking pasta) and boil 10 minutes, until the couscous is al dente; it should not be mushy and there should still be plenty of water in the pot. Drain through a strainer and rinse with cold water. Tap the strainer against the sink to drain well, then return the couscous to the pot, cover the pot with a kitchen towel, and return the lid. Let sit for 10 minutes. Measure out 2 cups and proceed with recipe.


Smoky Eggplant Spread (BABA GHANOUSH!!!)

about 2 cups

Essentially a delightful eggplant schmear to eat with warm pita triangles, this spread gets its pleasant smoky flavor from a deliberate charring of the eggplant skin. Whether over hot coals or under the broiler, the eggplant must be mercilessly blackened (the inner sweet flesh gets steamed to softness in the process). Tahini, olive oil, cumin, lemon and hot pepper take care of the rest.

3 medium eggplants, about 2 pounds Salt

¼ cup tahini paste ¼ cup lemon juice

4 garlic cloves, mashed to a paste 3 tablespoons olive oil ½ teaspoon cumin seed, toasted until fragrant and coarsely ground ½ teaspoon paprika

1 tablespoon finely chopped parsley 1 tablespoon chopped mint

Pita or other flatbread, for serving (optional)


PREPARATION

  1. Prepare a charcoal fire or heat the broiler. Pierce eggplants here and there with the point of a paring knife. Place eggplants 2 inches from heat source. Allow skins to blister and char, turning with tongs until entire surface is blackened and eggplants are completely soft, about 10 to 12 minutes. Set aside until cool enough to handle.

  2. Slice eggplants in half lengthwise and lay skin side down on a cutting board. Carefully scrape away flesh with a knife and put it in a colander. Discard burned skins. Do not rinse eggplant flesh — a few bits of remaining char is fine. Salt flesh lightly and leave for 5 to 10 minutes, then squeeze into a ball to remove liquid.

  3. Blitz eggplant, 1/2 teaspoon salt, tahini, lemon juice, garlic and cayenne in a food processor or blender to obtain a creamy purée. (For a more rustic spread, beat with a whisk instead.) Taste and adjust salt and lemon juice if necessary. Transfer mixture to a shallow serving bowl.

  4. Just before serving, stir together cumin and olive oil, and spoon over the mixture’s surface. Sprinkle with paprika, parsley and mint. Serve with warm pita cut into triangles if desired.


WEEK 8

-pick list-

savoy cabbage - asian greens - plum tomatoes - green beans - blueberries - summer squash - zucchini - patty pan - peppers - hot pepper - cucumber

Alright team CSA,  Pop-up PYO Blueberry “glean” this Saturday Afternoon!  I put the glean in quotations, because it is not the end of the season by any means, and these berries are terrific- so it’s more like a PYO til your heart’s content (or until 5pm, whatever comes first).  Why are we doing this?  Because, why not- yall are great and tis the season to harvest!  I will tell you one thing about the selection of blueberry bushes set aside for you, though they are sweet and bare a heavy yield, these berries do not hold that well, so i encourage you to pick and eat fresh in the next few days or freeze or bake or jam or smoothie, etc…

 AND now, the details:

 WHO:  Open to the entire Edgewater Farm C.S.A. community

WHERE:  if you are coming from the North End of River Road, go past the Greenhouses and McNamara Dairy- turn at the Cemetery.  

 THE ADDRESS for all your googling: 355 River Road/ Plainfield, NH

 WHEN: This Saturday Afternoon!!!, August 5th.. 3-5 ;  rain or shine though we will cancel in case of thunder and lightning

HOW: You pick.  Bring your own containers, we will have zero supplies for you to pick into.

WHY: So many reasons, here are a few... because it's awesome, the berries are free and delicious, it's the beginning of August and this is what you do at the beginning of August pick and preserve!

OTHER NOTES: it is so hot- especially underneath the blueberry net- come prepared! Large brim hats and water bottles are strongly encouraged!!

 email me if you have any questions at all (jenny@edgewaterfarm.com)

Cheers!

 Also, as an important aside, our Kitchen is HIRING!  We are looking for an energetic person to work 3-4 days a week (including 1 weekend day) in our fast paced kitchen using some of the best summer ingredients the Upper Valley has to offer- tell your friends and have them email emsedibles13@gmail.com for more info.  
 

TIPS - TRICKS - RECIPES:  

Crushing and smashing green beans and cucumbers sounds crazy, but it creates nooks and crannies to soak up as much umami-rich miso sauce as possible. And this is a dressing you'll want a lot of.

1 cucumber Kosher salt

1 pound green beans, trimmed 1 1½-inch piece ginger, peeled, finely grated

1 serrano or Fresno chile, finely grated 1 garlic clove, finely grated

⅓ cup unseasoned rice vinegar ¼ cup white miso

¼ cup olive oil ½ teaspoon toasted sesame oil

Toasted sesame seeds and sliced scallions  and chopped cilantro (for serving)

Lightly smash cucumbers with a rolling pin, then tear into bite-size pieces. Toss with a pinch of salt in a medium bowl. Let sit to allow salt to penetrate.

Meanwhile, place green beans in a large resealable plastic bag, seal, and smash with rolling pin until most of the beans are split open and bruised. Whisk ginger, chile, garlic, vinegar, miso, olive oil, and sesame oil in a medium bowl until smooth. Add dressing to beans and toss around in bag to coat; season with salt.

Drain cucumbers and add to bag with beans. Shake gently to combine. Transfer salad to a platter and top with sesame seeds and scallions.


3 large eggs 1 cup olive, vegetable oil or melted butter (I use a mix)

1 1/3 to 1 3/4 cups granulated or turbinado sugar (the latter is the original amount)

2 teaspoons (10 ml) vanilla extract 2 teaspoons ground cinnamon

1/8 teaspoon ground or freshly grated nutmeg 1 teaspoon baking soda

1/2 teaspoon baking powder 1 teaspoon fine sea or table salt

2 cups grated, packed zucchini (from about 10 ounces or 2 smallish zucchini)

3 cups (390 grams) all-purpose flour

Heat your oven to 350°F. Generously grease and flour or (coat with a nonstick spray) two loaf pans (8×4 or 9×5; this doesn’t fill the pans so smaller is fine). Alternatively, you can grease 24 standard muffin cups or line them with paper liners.

Whisk eggs, oil or butter, sugar and vanilla in the bottom of a large bowl. Sprinkle cinnamon, nutmeg, baking soda, baking powder and salt over wet ingredients and whisk them in well. Stir in zucchini. Gently stir in flour, mixing only until flour disappears. Stir in any add-ins, from nuts to chocolate.

Divide between prepared pans and bake for 55 to 65 minutes, until a toothpick inserted into the center comes out clean. [Muffins will bake far more quickly, approximately 20 to 25 minutes.] You can let them cool for 10 minutes on a rack before inverting and removing cakes from pans, or just let them cool completely in pans. Store it wrapped in foil at room temperature for up to 5 days.


Olive oil (for brushing) 2 cups yellow and green pattypan squash (halved)

Zucchini and Summer Squash halved lengthwise tomatoes, halved through cores

Prepare barbecue (high heat). Brush grill rack with oil. Brush pattypan squash, zucchini, and tomatoes with olive oil; sprinkle generously with salt and pepper. Grill until vegetables are blistered and slightly charred, about 10-12 minutes for squash and zucchini, turning occasionally, and about 6 minutes for tomatoes, shifting occasionally. Transfer to platter.


week 7

-pick list-

KALE - BEANS - BLUEBERRIES - SUMMER SQUASH - BEETS - POTATOES -

PEPPER - HOT PEPPER - CUCUMBERS - EGGPLANT - PARSLEY - SNAP DRAGONS :)

Vital Communities and Edgewater Farm are in cahoots making rad things happen for kids.  Below you will read a little blurb written by Lauren of Vital Communities, bottomline- it’s an opportunity to engage kids on eating local seasonal food in a seriously interactive way.  For example, last week the POP folks were somehow able to get kids excited about Kol-Rabi- KOL F’ing RABI, one of the most undesirable vegetables out there.  read on!

 Families: bring the kiddos to the farm stand for our POP Club!
POP Clubs Help Kids Learn About and Eat Local Produce
Kids can get a taste of local fruits and vegetables this summer—plus their very own money to spend on fresh, local produce— with our new Power of Produce (POP) Club, happening every Wednesday from 11am-1pm right here at the farm stand, through August 16th !
Power of Produce Clubs are simple, fun, and free. Children sign up at the POP table and start the day’s activity—a farm stand scavenger hunt, a vegetable quiz, an art project, or another produce-related activity. Once they complete the activity, they return to the POP table to receive their POP Bucks: $3 tokens just for kids to spend on local fruits and vegetables here at the farm stand. Kids ages 5-12 can participate once or all summer. So bring the kids and get a taste for POP! They just might start shopping for their own vegetables. Every Wednesday this summer from 11-2.
Vital Communities is supporting our POP Club this summer, as well as another at the Newport Farmers’
Market in Newport, N.H., with funding from the New Hampshire Department of Agriculture, Markets and
Food, HNH Foundation and the New Hampshire Charitable Foundation.


In other news, I am writing this newsletter at 6 am next to my woodstove, dreaming about lighting a little fire in it to stay warm and it’s July 25th- For all of you wondering when the tomatoes will be rolling in, please take a second and have a conversation with the sun- ask her to stick around for awhile, because, C’MON!

 TIPS - TRICKS - RECIPES:  

Turn on your grill.  Especially for the summer squash, eggplant, beets, peppers, and wax beans!

KALE: an actual superhero vegetable rich in antioxidants.  According to Greek myth, “the first crucifers sprang from beads of sweat on the brow of the god Zeus.”  While, the family of crucifers includes not only kale, but also cabbage, broccoli, radish, mustard greens, etc- I believe that if any of those vegetables acted as beads of sweat springing from Zeus’ brow, it was undoubtedly the kale plant. More than myth,  the kale plant is packed with glucosinolates- a cancer fighting compound.  Bottomline, embrace these leafy green powerhouses.  

Ideas for kale:

Smoothie: A serious staple in our family… chop up small, and throw in a smoothie- the kale haters will never know!!!  I swear- It’s been tested.  I usually do one kale leaf chopped teeny tiny and thrown into a mix of berries, bananas, yogurt, nutbutter- immersion blend, and enjoy.

Eggs: Again, a staple in my family.  Without fail, every morning for the past 2 months we’ve been eating this breakfast with zero complaints (thankfully, one of the eaters is an easily impressionable toddler). Chop and sautee the kale in your favorite oil of choice - we like coconut- once slightly browned, throw in the eggs, grated cheddar, scramble and serve.  

KALE CHIPS:  If you are feeling up for turning on your oven… do this!  These little chips are awesome.

Baked Kale Chips:  www.smittenkitchen.com

1 bunch 1 tablespoon olive oil Sea salt, to taste

Preheat oven to 300°F. Rinse and dry the kale, then remove the stems and tough center ribs. Cut into large pieces, toss with olive oil in a bowl then sprinkle with salt. Arrange leaves in a single layer on a large baking sheet (I needed two because mine are tiny; I also lined mine with parchment for easy clean-up but there’s no reason that you must). Bake for 20 minutes, or until crisp. Place baking sheet on a rack to cool.

Kale-Dusted Popcorn If you’re making the chips with the intention to grind them up for popcorn, I’d use less oil — perhaps half — so they grind without the “powder” clumping. I ground a handful of my chips (about half) in a mortar and pestle (well, actually the “pestle” was MIA so I used the handle of an OXO reamer, not that anyone asked) and sprinkled it over popcorn (1/4 cup popcorn kernels I’d cooked in a covered pot with 1 1/2 tablespoons oil over medium heat, shaking it about with potholders frequently). I seasoned the popcorn with salt. I liked this snack, but I think Parmesan and Kale-Dusted Popcorn would be even more delicious. Next time!

INGREDIENTS

2 cups packed tender young basil leaves ¼ cup pine nuts

1 teaspoon salt 2 plump garlic cloves, peeled and crushed with flat of a knife

½ cup extra-virgin olive oil, or more to taste ½ cup grated Parmigiano Reggiano cheese, or more to taste

Salt to taste ½ #  small potatoes, peeled and sliced about 1/4-inch thick

¼ pound wax/green beans, cut into 1-inch lengths 1 pound trenette, or other long, thin pasta

  1. Make pesto (see last week’s share!!!): in bowl of food processor, add basil, pine nuts, salt and garlic. Pulse until mixture is coarse and grainy. With motor running, add oil in slow, steady stream. Add cheese; process just enough to mix well. If sauce is too dry, add a little more oil. Taste; add more cheese or salt, if desired.

  2. Bring 6 quarts water to rolling boil. Add at least 2 tablespoons salt and the potato slices. Cook for about 5 minutes, or until potatoes have started to soften but are not cooked through. Add green beans, and continue boiling another 5 minutes.

  3. Add pasta, and stir. Start testing pasta at 5 minutes. When it is done, and when potatoes and beans are tender, drain and turn pasta and vegetables immediately into preheated bowl. Add pesto, and mix thoroughly. Serve immediately.

Week 6

PICK LIST:

Carrots - Green Beans - Cucumbers - Bok Choy - Basil -Garlic - Arugula - Cabbage - Dill - Pepper

I am going to make this newsletter the short and the sweetest because the sun was too hot today while cleaning carrots for what feels like actual hours and now my brain is fried- but before I completely check out…

Let's celebrate the beginning of BLUEBERRY season down in Cornish Town with a double feature! We will eat seasonal treats, (some sort of out-of-sight Blueberry baked good) and enjoy the warm summer nights while we still got'em-

!!!!!!!!!!!!!!!!!!!!!!Double Feature this Friday Night!!!!!!!!!!!!!!!!!!!!!!

poster!.jpg

6:15 MOANA                           8:15 POINT BREAK

All are welcome!

BYOB... AND B AND C....

BRING YOUR OWN BLANKET AND CHAIRS FOR SITTING and beer for drinking.

and cash for snacks

Address for your googling: 949 NH Route 12A/ Cornish NH


TIPS - TRICKS - RECIPES:  

CUCUMBERS: enough for your favorite pickle recipe (yes you can pickle slicers!) or you can try my family’s favorite summer-time soup:

------TANGY CUCUMBER SOUP------

2 cucumbers, halved lengthwise, and chopped 1/2 cup plain fat-free Greek yogurt

3 tablespoons fresh lemon juice 2 small garlic cloves

1/2 cup extra-virgin olive oil, plus more for garnish 1 tablespoon chopped dill

Kosher salt Pepper

In a blender, puree the cucumbers, yogurt, lemon juice and garlic. With the machine on, gradually add the 1/2 cup of oil until incorporated. Transfer to a bowl, stir in the chopped dill and season with salt and pepper. Cover and refrigerate until chilled, 30 minutes. Ladle the soup into bowls and garnish with a drizzle of olive oil and dill sprigs.  The soup can be refrigerated overnight.  

KIMCHI:  (because fermented foods are amazing for too many reasons to list right here.. More on that later)

Baechu (Cabbage) Kimchi (taken from Sandor Katz's Wild Fermentation) Makes 1 quart

sea salt 1 pound mix of bok choy and cabbage

1-­3 carrots 1-­2 onions, leeks, a few scallions, or shallots

3-­4 cloves of garlic 3 tablspn fresh grated gingerroot

3-­4 hot red chilies, depending on how hot you like your food, or any form of hot pepper, fresh, dried, or in a sauce

Mix a brine of 4 cups water and 4 tablespoons of salt. The brine should taste good and salty. Coarsely chop the cabbage, slice the carrots, and let the vegetables soak in the brine, covered by a plate or other weight to keep the vegetables submerged until soft. This can take a few hours or overnight is even better. Add other vegetables to the brine such as snow peas, seaweeds, Jerusalem artichokes, anything you like. Prepare the spices: grate the ginger, chop the garlic and onion, remove seeds from the chilies and chop or crush, or throw them in whole. Kimchi can absorb a lot of spice. Mix spices into a paste. You can add fish sauce to the spice paste, just make sure it has no chemical preservatives which function to inhibit microorganisms. Drain brine of vegetables after soaking. Reserve the brine. Taste the vegetables for saltiness. You want them salty but not unpleasantly so. If they are too salty, rinse them. If you cannot taste the salt, sprinkle a couple teaspoons and mix. Mix the vegetables with the ginger-­chili-­onion-­garlic paste. Mix everything together and stuff it into a clean quart size jar. Pack it lightly, pressing down until brine rises. If necessary, add a little of the reserved, vegetable­ soaking brine to the submerged vegetables. Weigh them down with a small jar, or a zip­lock bag filled with some brine. If you remember, you can just push them down with your fingers. Cover with a dish towel over the jar to keep our dust and flies. Ferment in your kitchen or other warm place. Taste it every day. After about a week, when it tastes ripe, move it to the refrigerator or cool storage space like a root cellar or a hole in the ground.


Fresh Basil Pesto Recipe Yield: Makes 1 cup


Basil pesto darkens when exposed to air, so to store, cover tightly with plastic wrap making sure the plastic is touching the top of the pesto and not allowing the pesto to have contact with air. The pesto will stay greener longer that way.

Ingredients

  • 2 cups fresh basil leaves, packed (can sub half the basil leaves with baby spinach)

  • 1/2 cup freshly grated Romano or Parmesan-Reggiano cheese (about 2 ounces)

  • 1/2 cup extra virgin olive oil

  • 1/3 cup pine nuts (can sub chopped walnuts)

  • 3 garlic cloves, minced (about 3 teaspoons)

  • Salt and freshly ground black pepper to taste


1 Place the basil leaves and pine nuts into the bowl of a food processor and pulse a several times.

Add the garlic and Parmesan or Romano cheese and pulse several times more. Scrape down the sides of the food processor with a rubber spatula.

2 While the food processor is running, slowly add the olive oil in a steady small stream. Adding the olive oil slowly, while the processor is running, will help it emulsify and help keep the olive oil from separating. Occasionally stop to scrape down the sides of the food processor.

Stir in some salt and freshly ground black pepper to taste.

Toss with pasta for a quick sauce, dollop over baked potatoes, or spread onto crackers or toasted slices of bread.

WEEK 5! (better late then never, right??)

THE PICK LIST:

STRAWBERRIES - LETTUCE - ZUCCHINI - PATTY PAN - CUCUMBERS - SWISS CHARD - BROCCOLI - CAULIFLOWER - DILL - CILANTRO - PEPPERS

I think i’m in real denial about strawberry season.  Right now we are in our 4th week of picking and I feel like we should have at least another 2 weeks to go… but the berries are getting soft due to the hot July sun mixed with the constant rain.  Today, the COOP sent back 14 Flats claiming them unsellable.  This put a little gloom in the day knowing that the berries are no match for this unrelenting Summer of terrible weather.  As a result, many of the folks on field crew got to take home flats of berries to process and freeze for their own chest freezer.  Last night Ray and I put up 6 flats feeling grateful to not pick any more berries for the day, but a little sad as we analyzed nearly every berry while we halved and bagged them.  We are not upset with the COOP, we understand their reasoning- this happens with our flats every year towards the end of berry season (particularly when we pick in the rain which we did yesterday morning), but we did not anticipate it happening so soon…  If you do not understand what I mean by soft berry, see your quart- sweet tasting, but soft so quick to mold.  

That said, there is still a ton of fruit in the field- I’m not kidding- people are still walking away from our PYO patch grinning ear-to-ear over their harvest- but it is unknown how much longer we will keep the Pick Your Own Patch open.

So, just to be on the safe side- let’s all go glean some berries!    

Join us Sunday Night for the annual CSA pop-up Strawberry Glean

Pick all you want, for free and enjoy this New England past-time.

WHO:  Open to the entire Edgewater Farm C.S.A. community

WHAT:  A Strawberry Gleaning takes place towards the end of a crop's productive season.  The purpose of the glean is to invite the C.S.A. community down to the farm to pick off any extra berries for their own kitchen.  The gleaning will take place rain or shine (preferably shine).  The field is yours to pick through and whatever berries you can find are yours.  The berries are free- and the experience is priceless.

WHERE:  at Edgewater South (the old Putnam Farm in Cornish, NH)

 THE ADDRESS for all your googling: 949 NH Route 12A/ Cornish, NH

WHEN: This Sunday Night, July 16th... 5:15 pm- 7:00pm

HOW: You pick.  Bring containers!!

WHY: Because it's awesome, and the berries are free and delicious and there is still some really nice fruit out there.

 WARNING:  As it is the end of the season, you are likely to find rot... good luck and enjoy!    

 SEE YALL SUNDAY!!!

TIPS - TRICKS - RECIPES:  

Dear CSAers, I swear I’m not trying to be the CSA that loads you up with zucchini week after week- it’s just been a hard summer and crops are slow to ripen… but the zucchini crop is coming in hot… so, get together all your zucchini recipes- breads, on the grill, fried, etc… and let’s be thankful for this one crop that just won’t quit.  

Zucchini SWISS CHARD Fritters

Yield: About 10 2 1/2 inch fritters

1 pound (about 2 medium) zucchini 1 teaspoon coarse or Kosher salt, plus extra to taste

2 scallions, split lengthwise and sliced thin 1 large egg, lightly beaten

Freshly ground black pepper 1/2 cup all-purpose flour

1/2 teaspoon baking powder Olive or another oil of your choice, for frying

½ bunch of swiss chard leaves chopped

 To serve (optional)

1 cup sour cream or plain, full-fat yogurt 1 to 2 tablespoon lemon juice

1/4 teaspoon lemon zest Pinches of salt

1 small minced or crushed clove of garlic fresh dill!!!

 Preheat oven to 200 degrees. Have a baking sheet ready.

Trim ends off zucchini and grate them either on the large holes of a box grater or, if you have one, using the shredding blade of a food processor. The latter is my favorite as I’m convinced it creates the coarsest and most rope-like strands and frankly, I like my fritters to look like mops.

In a large bowl, toss zucchini with 1 teaspoon coarse salt and set aside for 10 minutes. Wring out the zucchini in one of the following ways: pressing it against the holes of a colander with a wooden spoon to extract the water, squeezing out small handfuls at a time, or wrapping it up in a clean dishtowel or piece of cheese cloth and wringing away. You’ll be shocked (I was!) by the amount of liquid you’ll lose, but this is a good thing as it will save the fritters from sogginess.

Return deflated mass of zucchini shreds to bowl. Taste and if you think it could benefit from more salt (most rinses down the drain), add a little bit more; we found 1/4 teaspoon more just right. Stir in scallions, chard, egg and some freshly ground black pepper. In a tiny dish, stir together flour and baking powder, then stir the mixture into the zucchini batter.

In a large heavy skillet — cast iron is dreamy here — heat 2 tablespoons of oil over medium-high heat until shimmering. Drop small bunches of the zucchini mixture onto the skillet only a few at a time so they don’t become crowded and lightly nudge them flatter with the back of your spatula. Cook the fritters over moderately high heat until the edges underneath are golden, about 3 to 4 minutes. If you find this happening too quickly, reduce the heat to medium. Flip the fritters and fry them on the other side until browned underneath again, about 2 to 3 minutes more. Drain briefly on paper towels then transfer to baking sheet and then into the warm oven until needed. Repeat process, keeping the pan well-oiled, with remaining batter. I like to make sure that the fritters have at least 10 minutes in the oven to finish setting and getting extra crisp.

For the topping, if using, stir together the sour cream, lemon juice, zest, dill, salt and garlic and adjust the flavors to your taste. Dollop on each fritter before serving. These fritters are also delicious with a poached or fried egg on top, trust me.

Do ahead: These fritters keep well, either chilled in the fridge for the better part of a week and or frozen in a well-sealed package for months. When you’re ready to use them, simply spread them out on a tray in a 325 degree oven until they’re hot and crisp again.


WEEK 4

THE PICK LIST:

STRAWBERRIES - LETTUCE - ZUCCHINI - COUSA SQUASH OR PATTY PAN -

FRESH PULLED GARLC! - KOHLRABI - FENNEL - BEETS - PEPPERS - CUCUMBERS


 Honestly, it’s been a hard strawberry season.  With the late arrival of fruit and what-feels-like constant rain, we are working everyday at keeping up with the ripening.   Right now we are into our third week of picking berries and at times if feels like we are on week 5.  Working the strawberry fields row by row, we not only pick the good berries into quarts but also pick off bad berries to avoid rotting out the rest of the fruit and plant.  Our PYO is a huge help here, but it is the field crew- the same 11 of us that show up every morning at 5 am to start with the morning pick.  With heads down, and butts held high, we work the rows 1 strawberry at a time.  

I have a lot of love for field crew this time of year. Though the berry crop is looking a little tired these days, our field crew is up and at ‘em with spirits high.  Presser greets us every morning DJing up a set from his boombox- alot of lazer beam- air horn- reggae tunes mixed with the occasional gospel and we all pick together as the sun rises over the fields into the noon day sun.

But the berry season is not over- and it’s not all doom and gloom- still plenty of fruit in the PYO patch!  And the berries that we are selling in quarts at the Farmstand and around the Upper Valley remain beautiful and sweet and plentiful  Also, though strawberries are our one of our biggest crops at the farm we are lucky to be highly diversified.  We grow a ton of different crops which is insanely helpful when one of our biggest crops does not grow according to plan.  Who knows, maybe it will be a big Bok Choy year…. (this is a joke, it will never be a big bok choy year in Plainfield, NH).  

 TIPS - TRICKS - RECIPES:  

Kohl Rabi- nope, it’s not an alien- it’s a vegetable!  Excellent cooked or raw! Treat like a cabbage and shred into a salad or ferment into a kraut or kimchi or roast.  Also makes a great vehicle for dips, pestos, salsa, etc…

Fennel- food, medicine, and herb!  In ancient Greece, fennel was used to celebrate the gods- planting it in temple gardens and making crowns from the feathery leaves. The ancient Egyptians, Greeks, and Romans believed fennel an aid for digestion, bronchial troubles, and poor eyesight.  

Like Kohlrabi, fennel is an excellent vehicle for dipping.  People love fennel shaved into a salad, the folks at our farmstand are brilliant and chop it up into water sometimes with mint, like a sun tea, so refreshing!  Also, if you dare turn on your oven you can make delicious gratin paring the zucchini and fennel, just ask google.

Fresh Garlic- just pulled- do not put in fridge!  ENJOY WITH EVERYTHING!!!! But maybe not ice cream…

Grated Beet & Kohlrabi Salad

1 ½ pounds kohlrabi & beets peeled and grated on the large holes of a grater or cut in thin julienne (any combination; 4 cups total)

Kosher salt to taste about 1/2 teaspoon 1 ½ cups water 1 tablespoon sugar

½ cup rice vinegar 2 tablespoons slivered mint leaves or chopped cilantro

  1. Combine the grated or julienne vegetables in a large bowl, and toss with about 1/2 teaspoon salt. Place in a strainer or colander set over a bowl or in the sink. Let stand for about 30 minutes.

  2. Meanwhile, combine the water, sugar and vinegar in a saucepan, bring to a boil and remove from the heat. Pour into the bowl in which you combined the vegetables, and allow to cool to room temperature.

  3. Briefly rinse the vegetables, and squeeze dry. Add to the bowl with the vinegar mixture, and stir together. Refrigerate for one hour or longer. To serve, lift from the vinegar bath with a slotted spoon and arrange on a platter. Garnish with the mint or cilantro, and serve.

KOHLRABI, FENNEL, AND Beet SLAW

Kohlrabi is a relative of cabbage and turnips. It tastes similar to broccoli when eaten raw but it can also be cooked. Fennel has a bulb-like stem which grows above ground, sending up shoots and delicate fronds. All parts of the plant can be eaten but the bulb is most commonly used. With a mild anise flavor, fennel can be served crisp in salads and cooked alone or with other vegetables.

1 medium kohlrabi 1 medium BEET 1 small (or 1/2 large) bulb of fennel

2 tablespoons olive oil 1 tablespoon apple cider vinegar 1 tablespoon dijon or grainy mustard

2 teaspoons honey salt and pepper

Remove the kohlrabi stems (which grow out of the bulb) and peel off the tough outer skin. Peel the beet. Slice the kohlrabi and the beet into matchstick sized pieces. Remove the stems, fronds, and any damaged outer layers from the fennel bulb. Slice the fennel into thin pieces, about the same length as the sliced kohlrabi. Combine olive oil, apple cider vinegar, mustard, and honey, and whisk until smooth. Toss the sliced vegetables and apple in a bowl with the dressing. Season with salt and pepper to taste.

LAST MINUTE notes from chef peter of wild roots on your kohlrabi

Kohlrabi "Potato Salad" : A Universal vegetable of sorts....

Being playful and whimsical with food is how any cook stays inspired. We take for granted the abundance of our produce at the height of the season and sometimes forget to continually express new textures and flavors. I greatly enjoy using lesser known or uncommonly found ingredients during this point of the season to highlight their many utilization's.

So now to shine the light on the mysterious kolhrabi... Sometimes affectionately refereed to as Vermont Jamaica, by Mrs.Suzanne Long of Luna Bleu Farm.... Kolhrabi is a Germanic Turnip. It's round bulbous root mass can create a somewhat thick exterior trapping its sweet dense radish like flesh. While at the same time sprouting beautiful broad brassica-like leaves ideal for low and slow braising.

2lbs Kohlrabi (Large Dice 1''x1'') (Stems+Leaves Removed and Reserved)

1/4 cup Garlic Scapes Minced 1/4 cup Dill Minced

1/4 cup Bread & Butter Pickle Minced (Liquid Drained) 2tbl Parsley Minced

2 tbl Scallions Minced 1 Fennel Bulb Thinly Shaved

1 tbl Chili Flake 1/8 cup Apple Cider Vinegar 1 1/4 cup Mayo Salt and Pepper To Taste

  1. Cut Kohlrabi into large uniform cubes. Place in pot of water and fill with cold water. Season water with salt aggressively. Turn to high and allow to come to a boil. Once boiling carefully remove one piece to test doneness. Personal preference but I like a bit of crunch to by "potato salad." Drain water and remove from pan onto baking tray and allow to cool in fridge.

2) Once Kohlrabi is cool to the touch mix all remaining ingredients in large bowl together. And taste for seasoning.

Use reserved stems and leaves to make "collard greens" a traditional low country slow braise of hearty thick brassica leaves with pork shanks and apple cider. Or a healthier route is to saute them with molasses, whole grain mustard, and a touch of brown sugar in olive oil. 

and one more note from Allie OF your fave FARMSTAND

ON FENNEL: 

SHE SAYS ROAST!!!  IT REALLY BRINGS OUT THE SWEETNESS.  


CSA WEEK 3

THE PICK LIST:

STRAWBERRIES - RHUBARB - ARUGULA - CILANTRO - GARLIC SCAPES -

TOMATOES - ZUCCHINI - 2# PASS TO PICK!


For returning CSAers- this week’s newsletter is a lot like last-year-at-this-time’s newsletter, but it is still relevant, so forgive me….

Today I’d like to remember the old days of Edgewater Farm- The days when fruit at the grocery store was not available all year round.  Or if it was available it was incredibly expensive.  Today we can go to almost any chain grocery store in January and buy a quart of California strawberries no matter the season.  

Forty years ago, there was no category of “locavore”, because everyone was a locavore.  No one looked too far from their region for food.  Everyone picked their own strawberries because frozen berries and stored apples were everyone’s winter fruit.  

Now that we have the luxury of imported food items PYO berries is not necessary to fulfill that want of fruit in winter, however for those that prioritize shopping local or knowing your food down to the farmer that grows it, there is a need to head into the fields right now and Pick Your Own Berries by the pound while the picking is good.  

Personally, I farm to eat the food we grow all year long- I know it’s origin, it’s grown with a lot of heart- and that feels good.  I am forever ecstatic in January to open up the chest freezer and pull out the Summer’s harvest and remember that we grew and picked and processed these strawberries.  To the folks that leave our strawberry field with containers and containers filled of fruit to store throughout the winter, I get you.  I also thank you for choosing our farm to help you get through the colder darker months, making December- January- February- March a little sweeter and a little brighter.   

As for you- the CSAers- come winter you will be ecstatic about your freezer or pantry.  Like a strawberry, your weekly share is best enjoyed fresh, but for those of you that need a little pick-me-up-taste-of-summer during winter months, there are plenty of recipes headed your way for freezing, canning, fermenting and preserving (ahem, see Garlic Scape-Cilantro- Pesto recipe below).  

And for the CSAer that is inspired by the season to PYO and get in on the winter-berry challenge… (or if you just want to pick some quarts and call it good)  In your CSA share this week you will find a pass to pick 2#’s of berries out of our PYO patch in Cornish- you can OF COURSE pick more, but the first 2 pounds are on us. The picking right now is insanely good- maybe it’s peak season, or maybe it’s just the berries finally catching up to late June.  

Regardless, please join us in the strawberry patch during picking hours: 7-noon, and again in the afternoon 4-7pm, for your own opportunity to pick and take part in one of the best New England past times.

Address to pick: 949 NH Route 12A/ Cornish, NH

SEE WEBSITE’S PYO PAGE FOR MORE INFO:

TIPS - TRICKS - RECIPES:  

GARLIC SCAPE AND CILANTRO PESTO

1 cup chopped garlic scapes (6 to 8 scapes, or about 1 bunch, cut into 1-inch pieces, tips removed and discarded)

1 bunch cilantro, leaves and stems coarsely chopped ½ cup raw pumpkin seeds, toasted and cooled

1/3 cup local cold-pressed sunflower oil 2 tsp. lime juice or apple cider vinegar

Salt and pepper to taste

  1. Combine scapes and pumpkin seeds in food processor and pulse until coarsely ground.

  2. Add cilantro, lime juice and oil; pulse until evenly chopped.

  3. Season with salt and pepper. Use within a week in the fridge or freeze.

Serve tossed with pasta and fresh grated Parmesan cheese, or try mixing 1/4 cup into alfredo sauce. Also fantastic on a hard cheese platter or in a grilled cheese sandwich… OR REALLY ON ANYTHING.  GO WILD.

The following notes and recipe are from our dear friend, Executive Chef Peter Varkonyi‏ of the New Restaurant in Royalton, WILD ROOTS.  This guy is driven by local farms, therefor everything on the WILD ROOTS menu is sourced within our region.  As a result he works weekly with over 40 farms to bring the very best of the season to the table. The menu changes sometimes daily and the food is dynamite.  So when harvesting mass amounts of Cilantro and garlic scapes, I turn to Peter.  #knowyourchef

Tip of the week: Roots Pack a Punch! (CILANTRO)

 Use the whole herb (leaves, stems, flowers, and root) Almost all herbs experience different moments of flavor and texture throughout the season. In our high heat and humidity climate herbs tend to bolt quickly. Meaning go to seed, so rather then simply use the minimal leave output, use their stems and roots. Cilantro for example has a pungent root similar to horseradish. Using a micro-plain or zester, grate the cilantro root over tacos or fish for the extra bite or over a grilled skirt steak for fajitas. For the homestead type let your cilantro plant go fully to seed producing the freshest green buds of coriander. Then pickle the seed in your favorite dilly bean recipe. Texture and flavor experience!

Greens and Garlic Scape Dumplings (Traditional Term Malfatti) With Cilantro & Aged Goat Cheese

1lb greens (arugula or whatever you have in your fridge left over from earlier weeks
1/2c Minced Cilantro ( Reserve Stems and Root For Garnish)
3/4c Grated Aged Goat Cheese (Spring Ledge Farm Riley's 2x4)
3tbl Olive Oil 1 Medium Onion (Finely Diced) 3ea Garlic Scapes (Finely Diced)2tsp Kosher Salt 1/4tsp Cumin Seed Toasted 1 1/4c Bread Crumbs
4 Whole Eggs 1/2 lb Butter
 1) Heat olive oil in pan, place greens, onion and garlic scapes in pan to slowly sweat and tenderize. Once greens are cooked down and water has evaporated place on sheet pan and in fridge to cool.
2) Place cooled greens mixture in cuisinart and blend until evenly pureed. While blending add salt, toasted cumin seed and eggs.
3) Remove mixture from cuisinart and place in bowl.
4) Add minced cilantro, grated goat cheese, and bread crumbs. Using a rubber spatula fold all ingredients together and incorporate evenly. Place in fridge overnight covered to allow bread crumbs to absorb moisture.
5) In a large fry pan, place butter. Over medium-low heat melt butter and allow to slightly darken (brown butter.) Using a small ice cream scoop or two spoons scoop dumpling mixture into brown butter. Dumpling should be the size of a golf ball. Recommend doing 5-6 dumplings at a time (small batches.) Once dumplings are in use a flat spatula to gently press down, turning round dumplings in disks. Once gold brown on both sides remove from pan and keep warm.
6) Once all dumplings are cooked and ready use a microplane or zester to grate cilantro root over top and minced cilantro stem. A bit more grated goat cheese as well.
7) Serve warm with friends.
 option: if butter is not your friend feel free to substitute 1/2lb of butter for 1/3c Olive oil.

CSA week 2:  JUNE 21st (summer solstice!)

Pick List:

 Strawberries - Lettuce - Asian Greens - Scallions - Cucumbers - Arugula - Radishes - Rhubarb -Garlic Scapes - Fuchsia Plant

Real magic in the fields today as we greet the Summer Solstice.  The only appropriate thing to do on this day is to roll out of bed at 5am (maybe a little groggy)- work til 9pm (still a little groggy?) and take advantage of every single second of sunlight.  We all benefit from the light levels this time of year- especially the plants.  I know first hand that the strawberry fields are especially loving these long days.  Rows and rows of berries soak up all the sunshine while SLLLLOOOWWWLY turning color from green to red.  And on this day, June 21st- I finally see more red in the fields then green.  Should be any day now that we open up for Pick Your Own Strawberries- stay tuned through instagram (@edgewaterfarm), facebook, and our website PYO page for the latest news from the strawberry fields.  

Strawberries aside- i hope you agree with me that the radishes in your share this week are the most beautiful radishes you’ve ever seen.  Or, at least that’s my opinion.  And yes, we are still deep into salad season.

 TIPS - TRICKS - RECIPES:  

Asian Greens: y’all- if you haven’t already gotten into asian greens then look out- you are about to be so pumped.  The beauty behind asian greens is their versatility.  For example, I chop them up and throw them into eggs in the morning and make them into a salad at night.  They are an excellent addition to soups, stir-fries, etc…


 LEMON VINAIGRETTE

2 tsp honey 1 small shallot, peeled & finely diced

¼ c. lemon juice 2 tsp. Dijon mustard

¾ c. extra-virgin olive oil (more if needed to taste)

salt and pepper, to taste

 ROASTED RHUBARB

¾ pound rhubarb, cut into ¾ to 1-inch pieces on a slight diagonal 1/4 c. honey

 SALAD

6 c. of arugula 2 tblsp toasted almond slivers

1/3 c. crumbled fresh goat cheese

 LEMON VINAIGRETTE…. makes approximately 1 1/4 cups

Place honey, shallot, lemon juice and mustard in a blender. Puree until smooth. With blender running, slowly add olive oil in a steady stream. Start with ¾ cup and taste. If the vinaigrette tastes too acidic, add a little more olive oil to taste. Season with salt and pepper. Refrigerate until ready to use.

ROASTED RHUBARB

Preheat oven to 400 degrees, with racks in upper and lower thirds. On a rimmed baking sheet, toss rhubarb with honey. Roast on upper rack until beginning to soften, about 5 minutes. Let cool on baking sheet.

SALAD

Place the greens in bowl. Toss with roasted rhubarb, almonds and enough dressing to just coat. Garnish salad with goat cheese. Refrigerate any leftover dressing for future use.

serves: makes about 1.5 cups of dressing

notes: I would only recommend doing this with the scapes if you’re making the dressing in a blender. Depending on how long they’ve been around, garlic scapes can be quite fibrous so just use the more tender parts. Also, I use grapeseed oil here because its neutral flavour doesn’t overpower the scapes.

1/4 cup white wine vinegar 1/4 cup filtered water

1 tsp salt ground black pepper to taste

1/2 tbsp dijon mustard 1/2 tbsp light agave (or honey)

2 garlic scapes, roughly chopped

3/4 – 1 cup grapeseed oil (I tend to like dressing more on the acidic side so I lean to the 3/4 cup measure)

 Combine the vinegar, water, salt and pepper in the blender pitcher. I like to add the salt with the vinegar so that it gets a head start on dissolving. Then, add the dijon, agave and garlic scapes. Blend the contents until the scapes are more or less pureed.

Put the blender on a low speed, remove the top feeding lid and slowly drizzle in the oil with the motor running until the dressing is thoroughly combined and creamy. Store in the fridge for up to 1 week.

Another note about Garlic Scapes: Each individual scape is cut from the top of the garlic plant.  By Cutting the scape from the plant, the energy it takes to produce the scape (flower) goes back into the plant producing a bigger garlic bulb.  As a result, we get to eat garlic scapes!  They have a mild garlicy flavor- chop saute and add them wherever you might add garlic.  Also noteworthy, they make an excellent addition to an early season bouquet.  For example, i keep my scapes in a vase with a bit of water on our kitchen table simply because it looks cool.   

YOUR FUCHSIA PLANT:

1)  Re-pot or plant in ground.  2) if potted, water but not too heavy 3) put outside in part shade 4) bring inside before the first frost 5) dead-head! Take off the flowers that start to look tired 6) enjoy!!