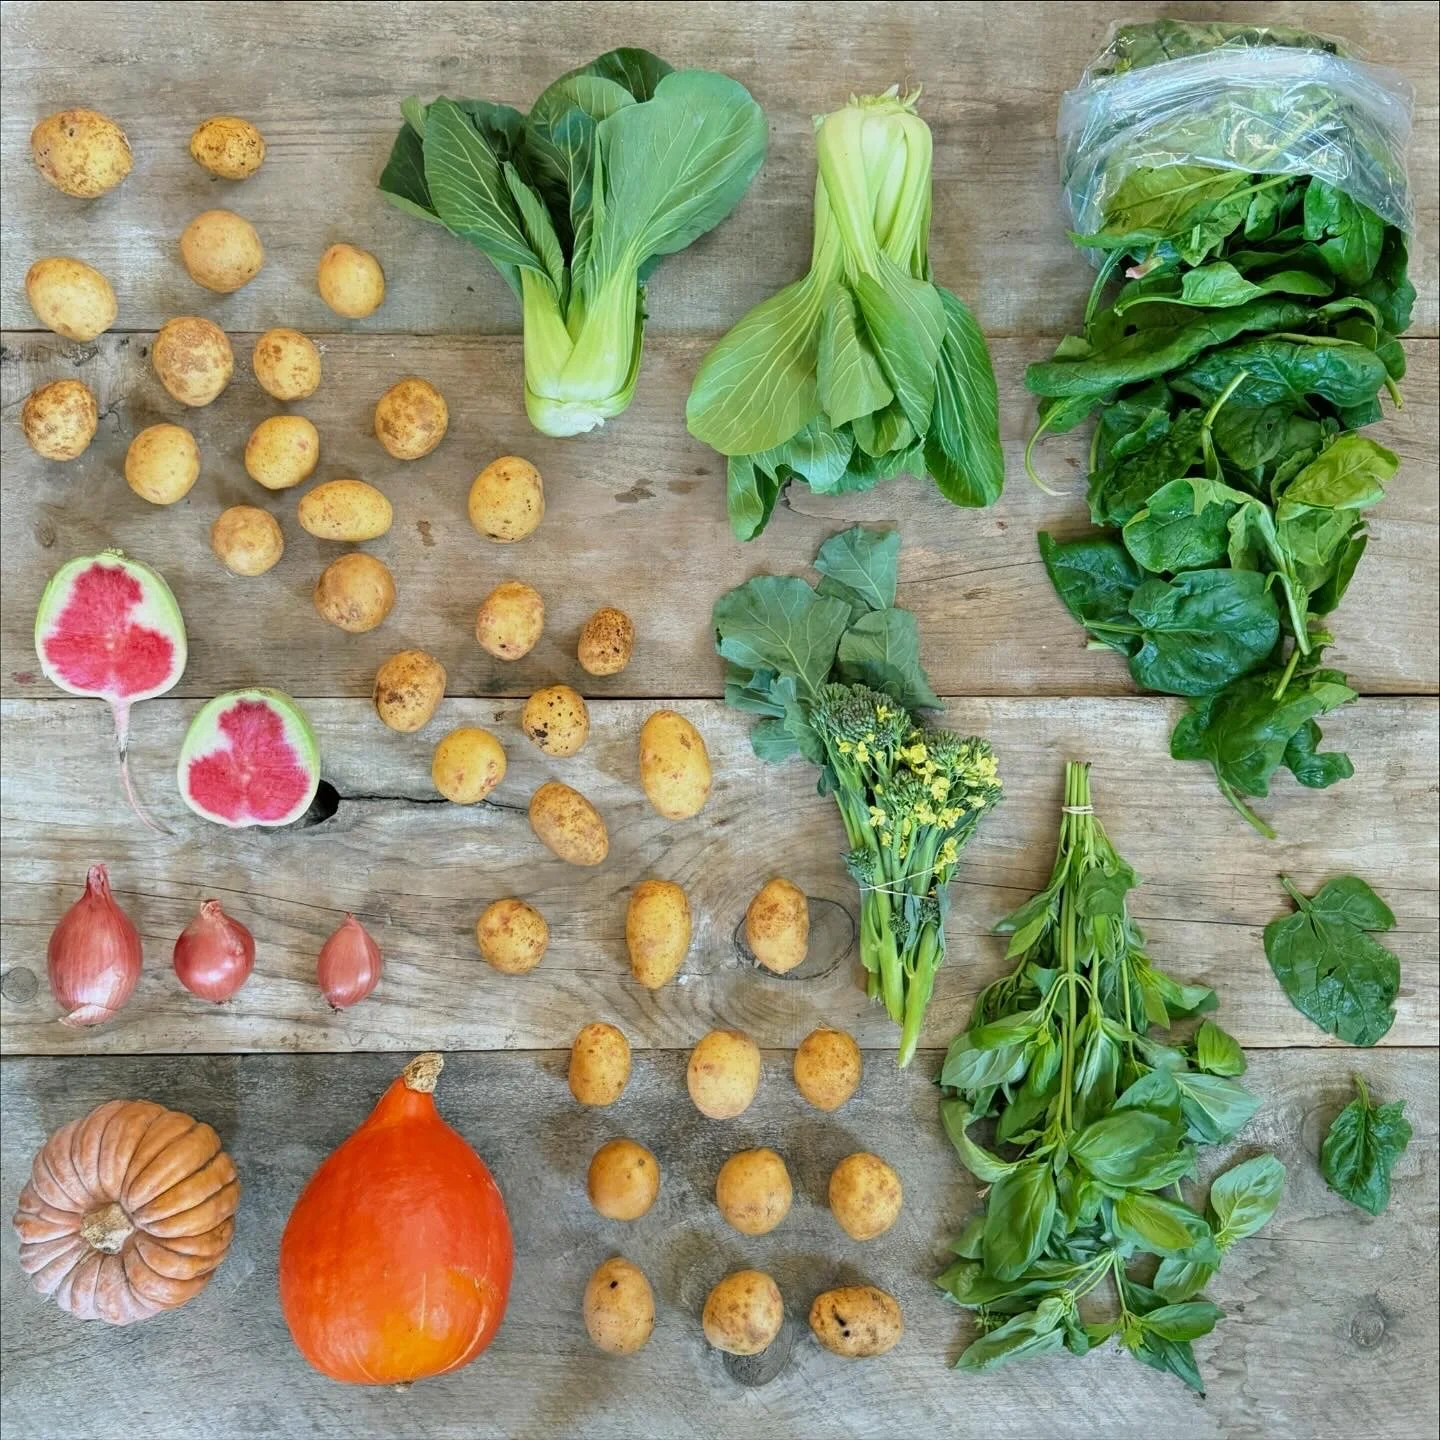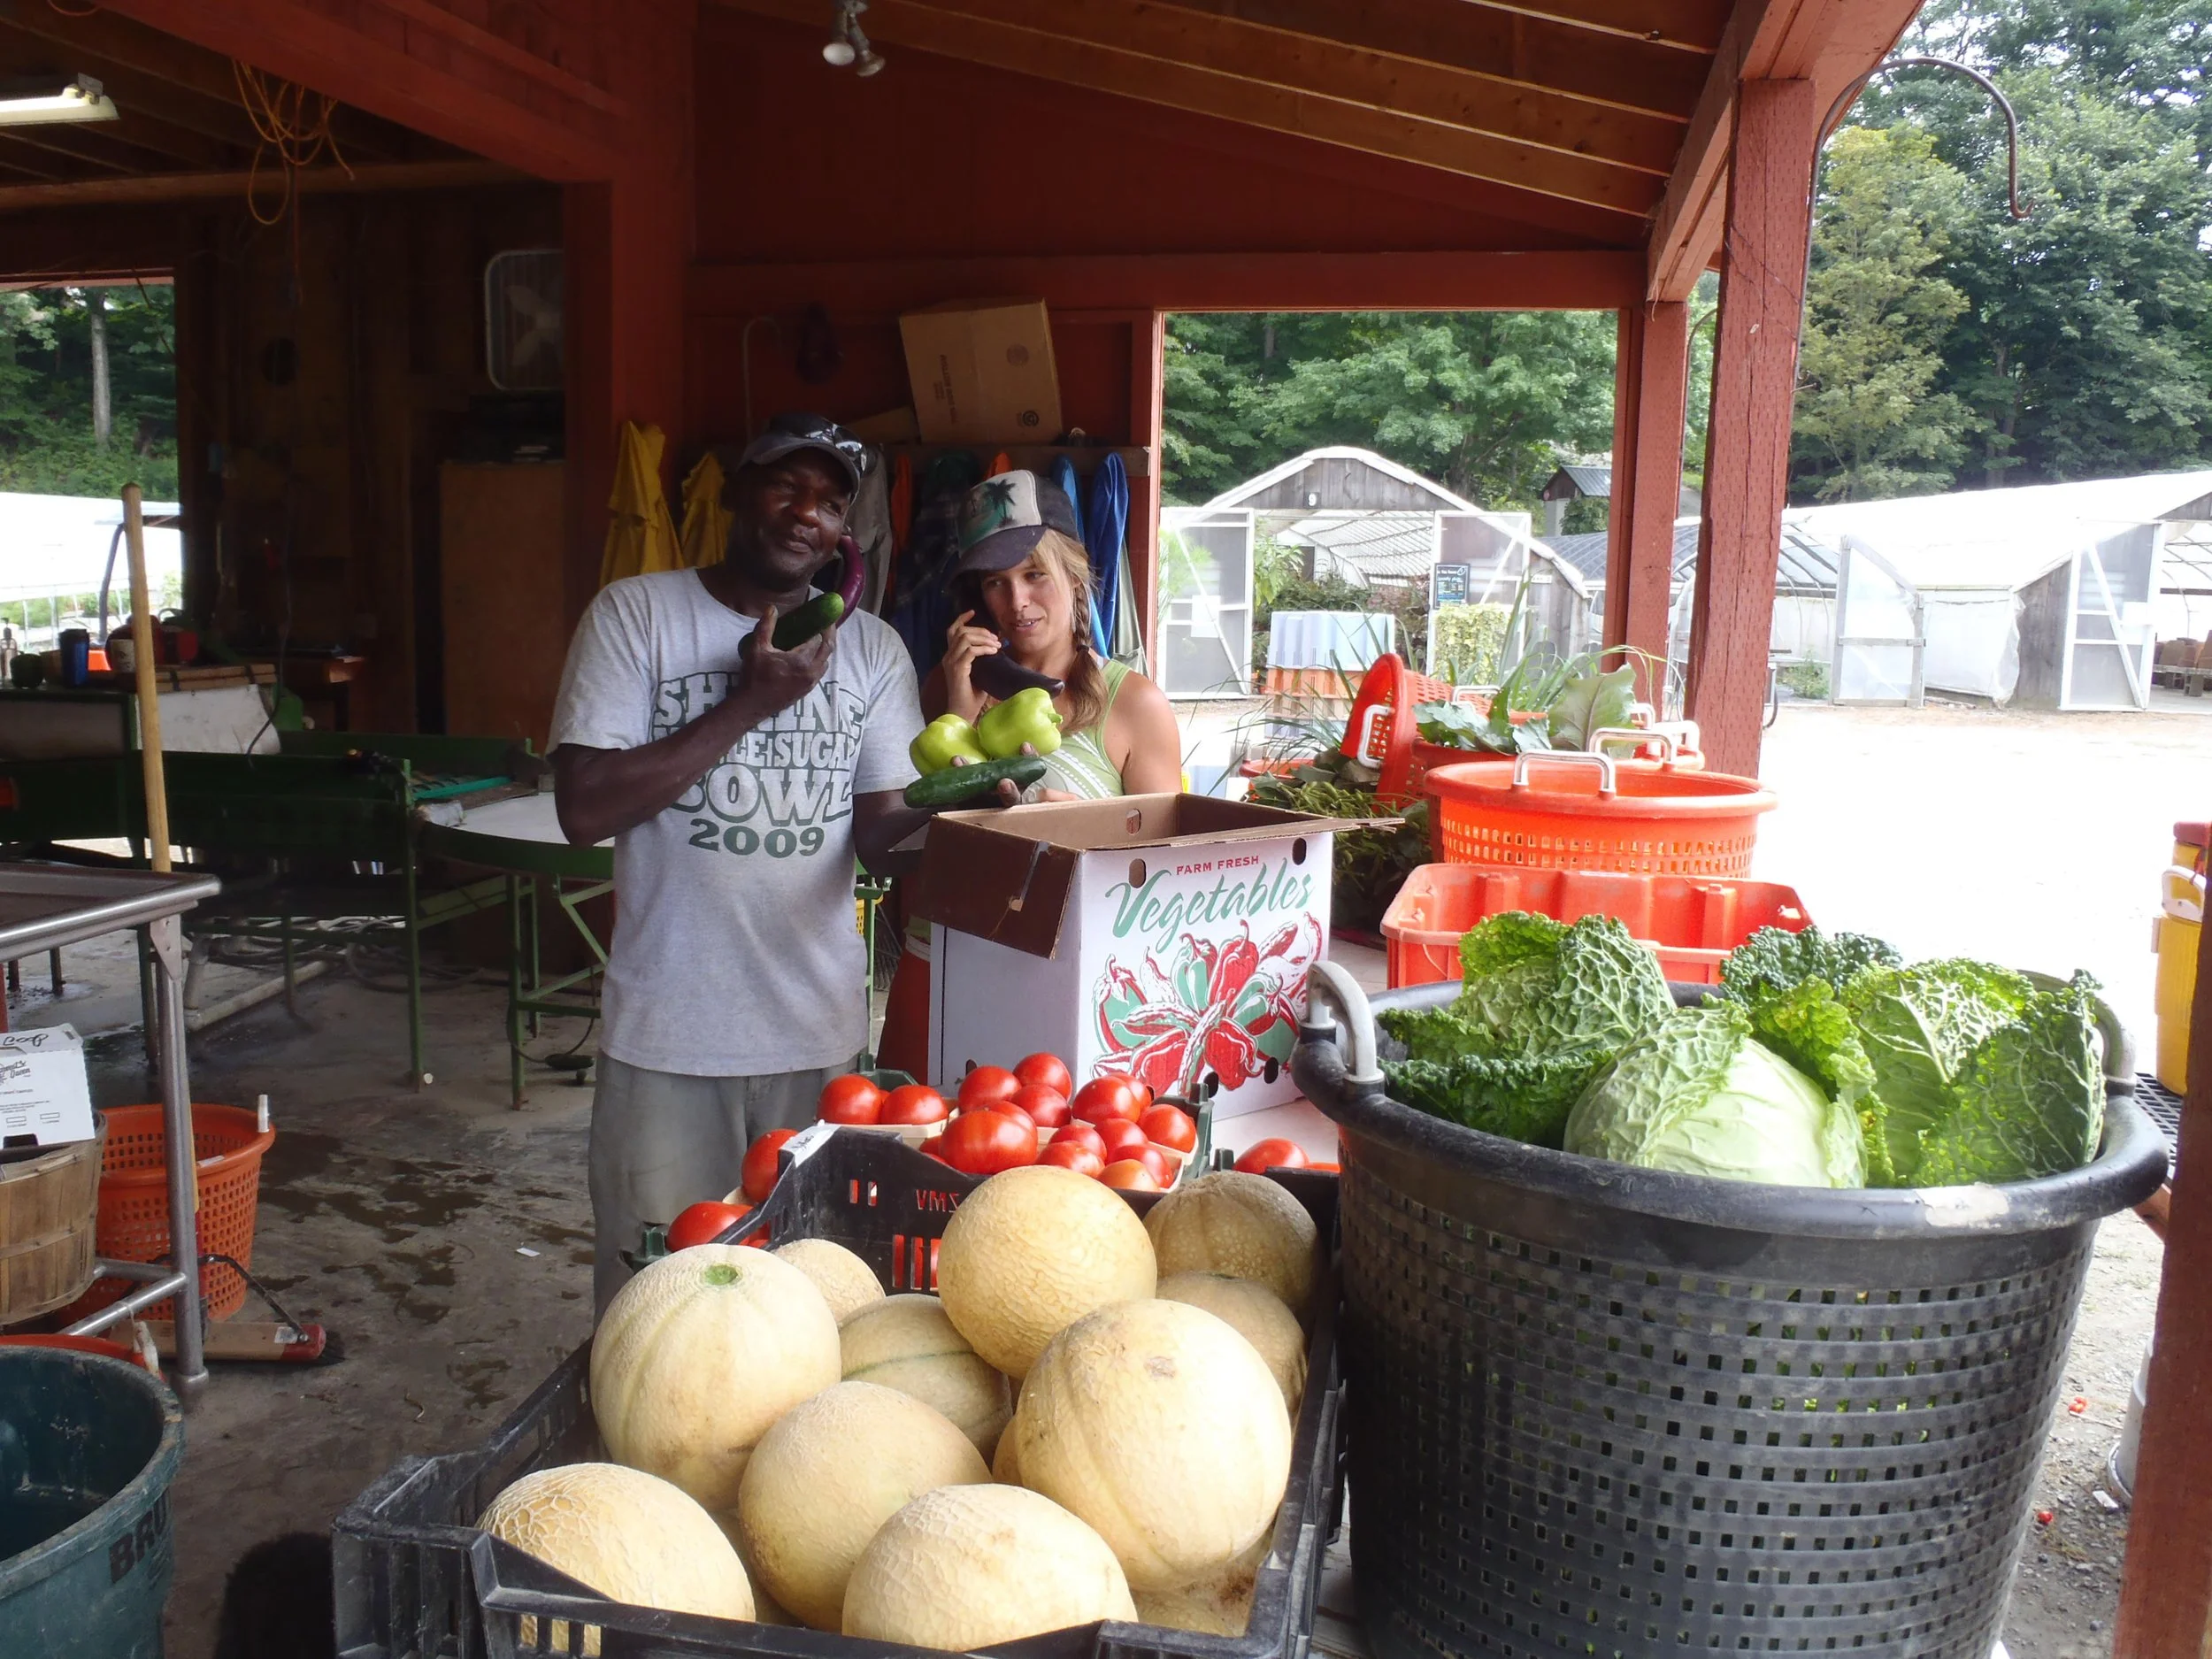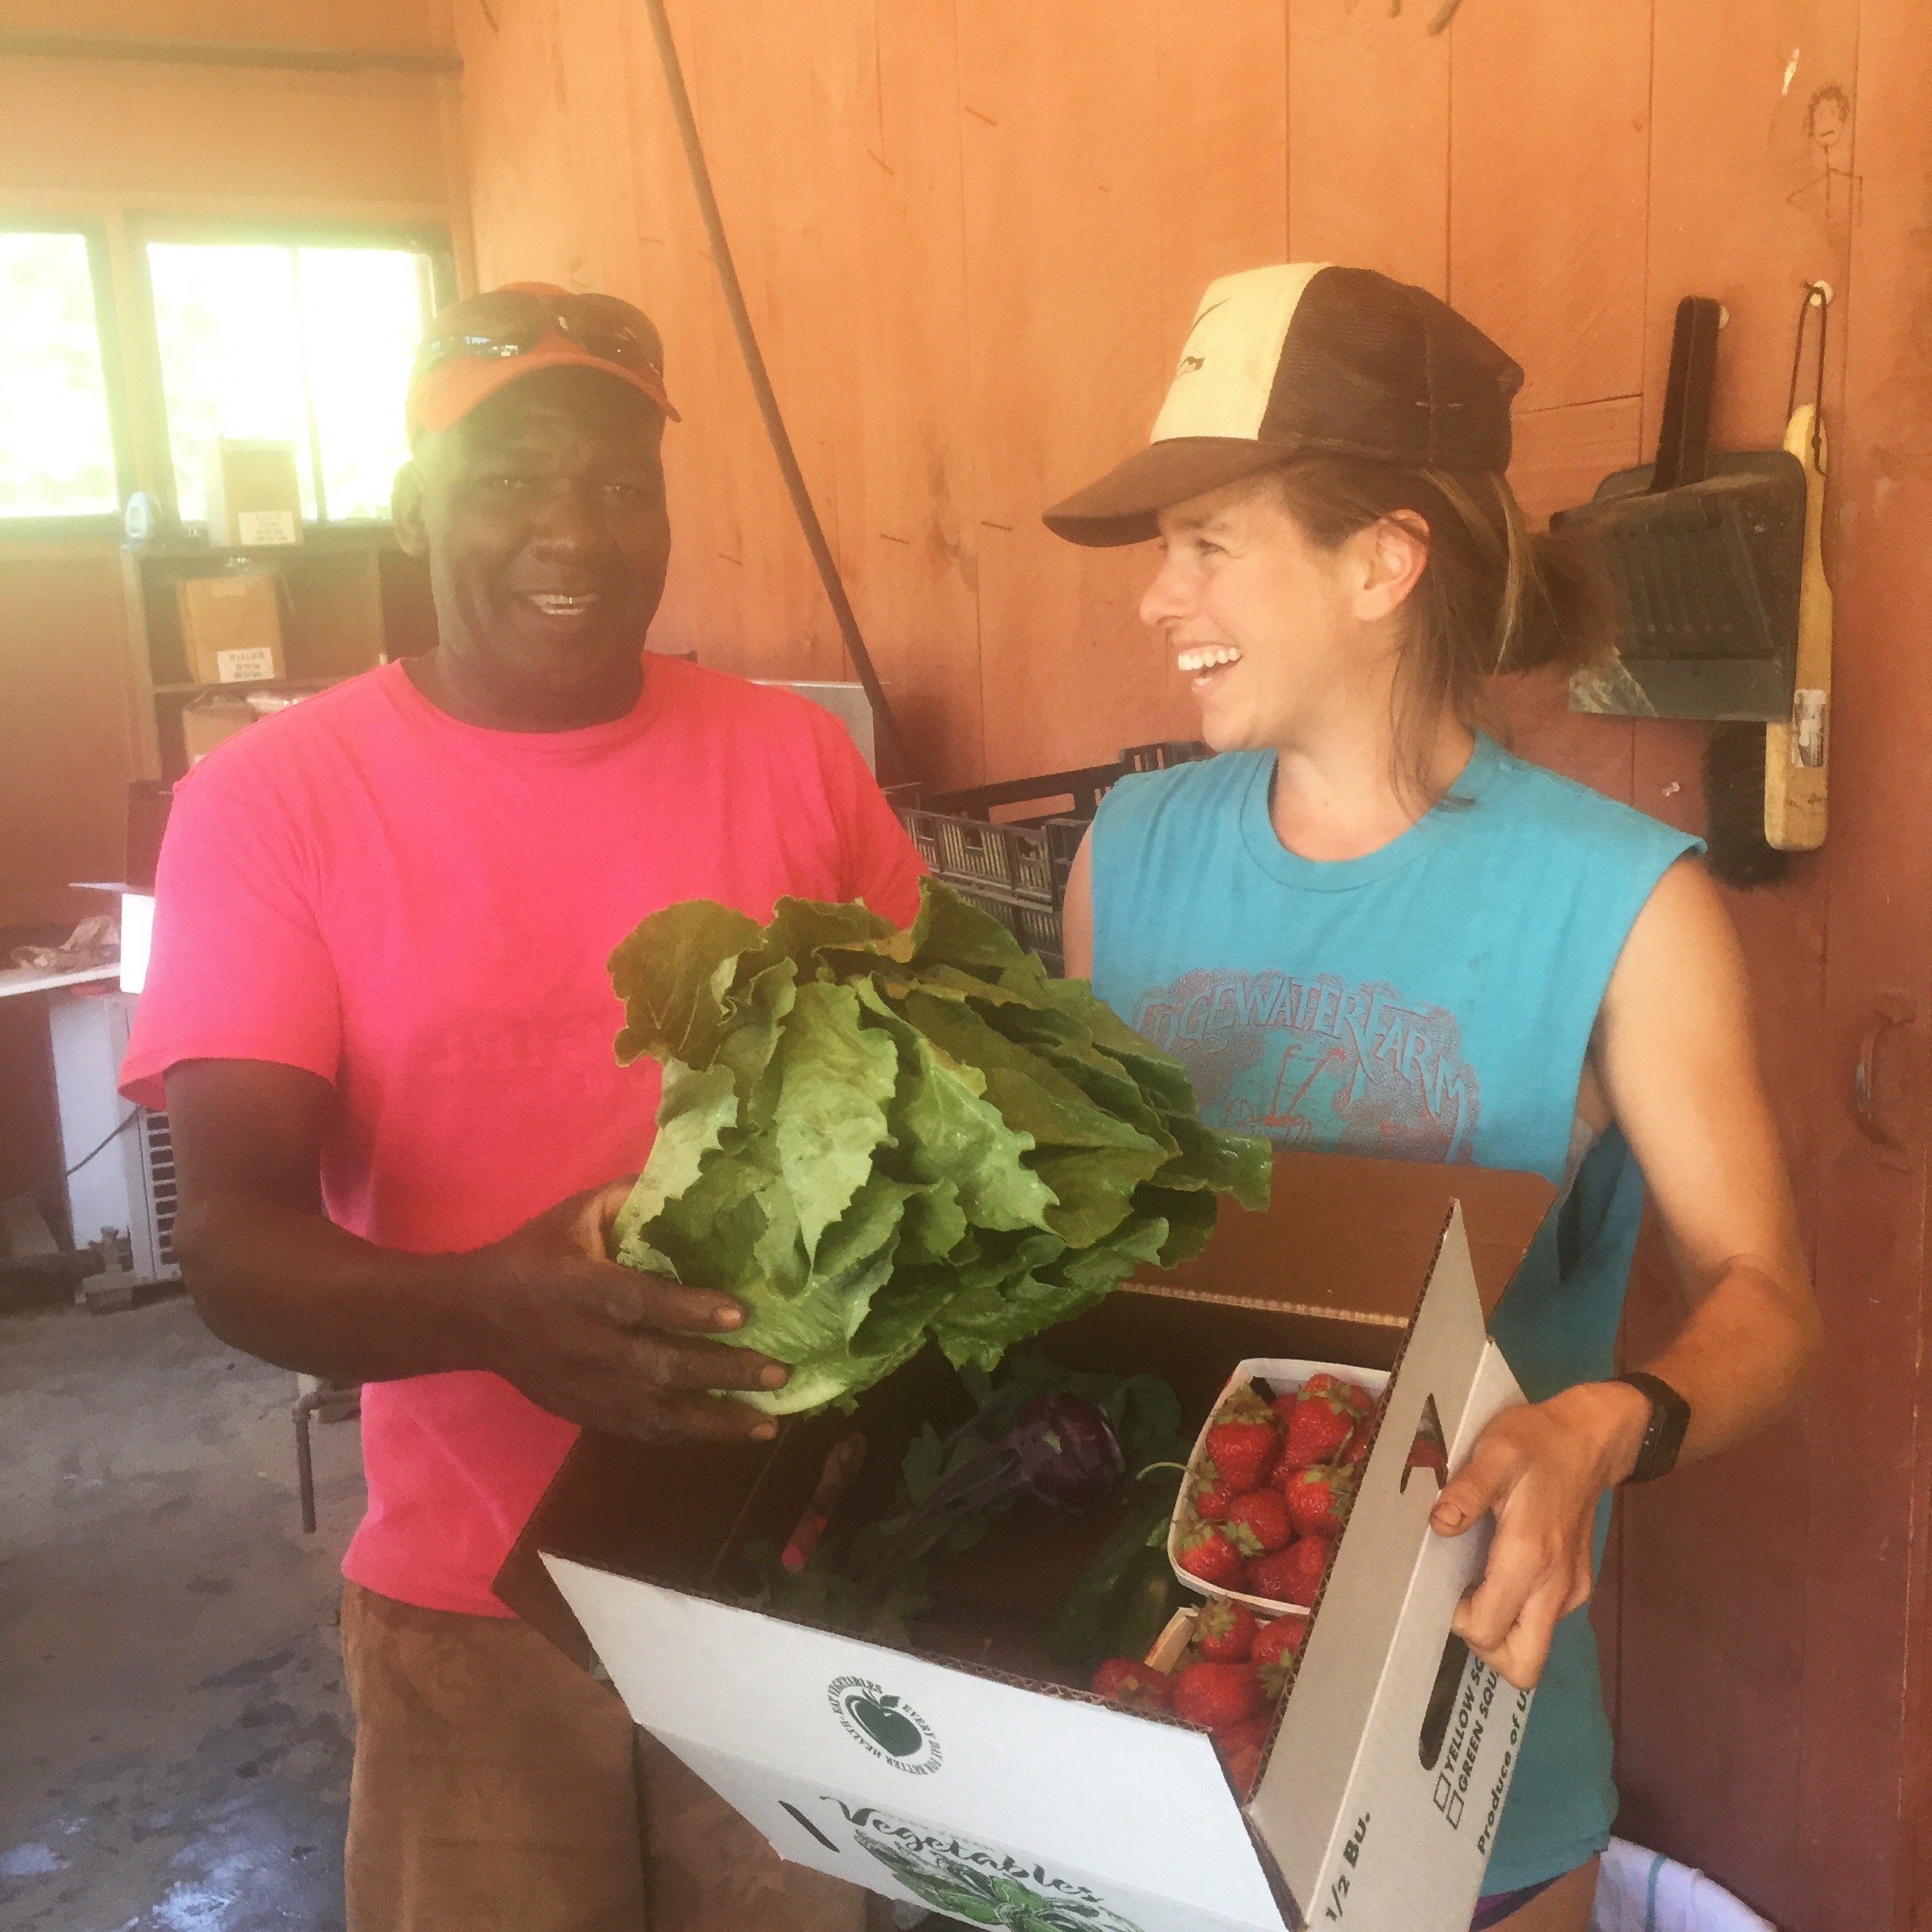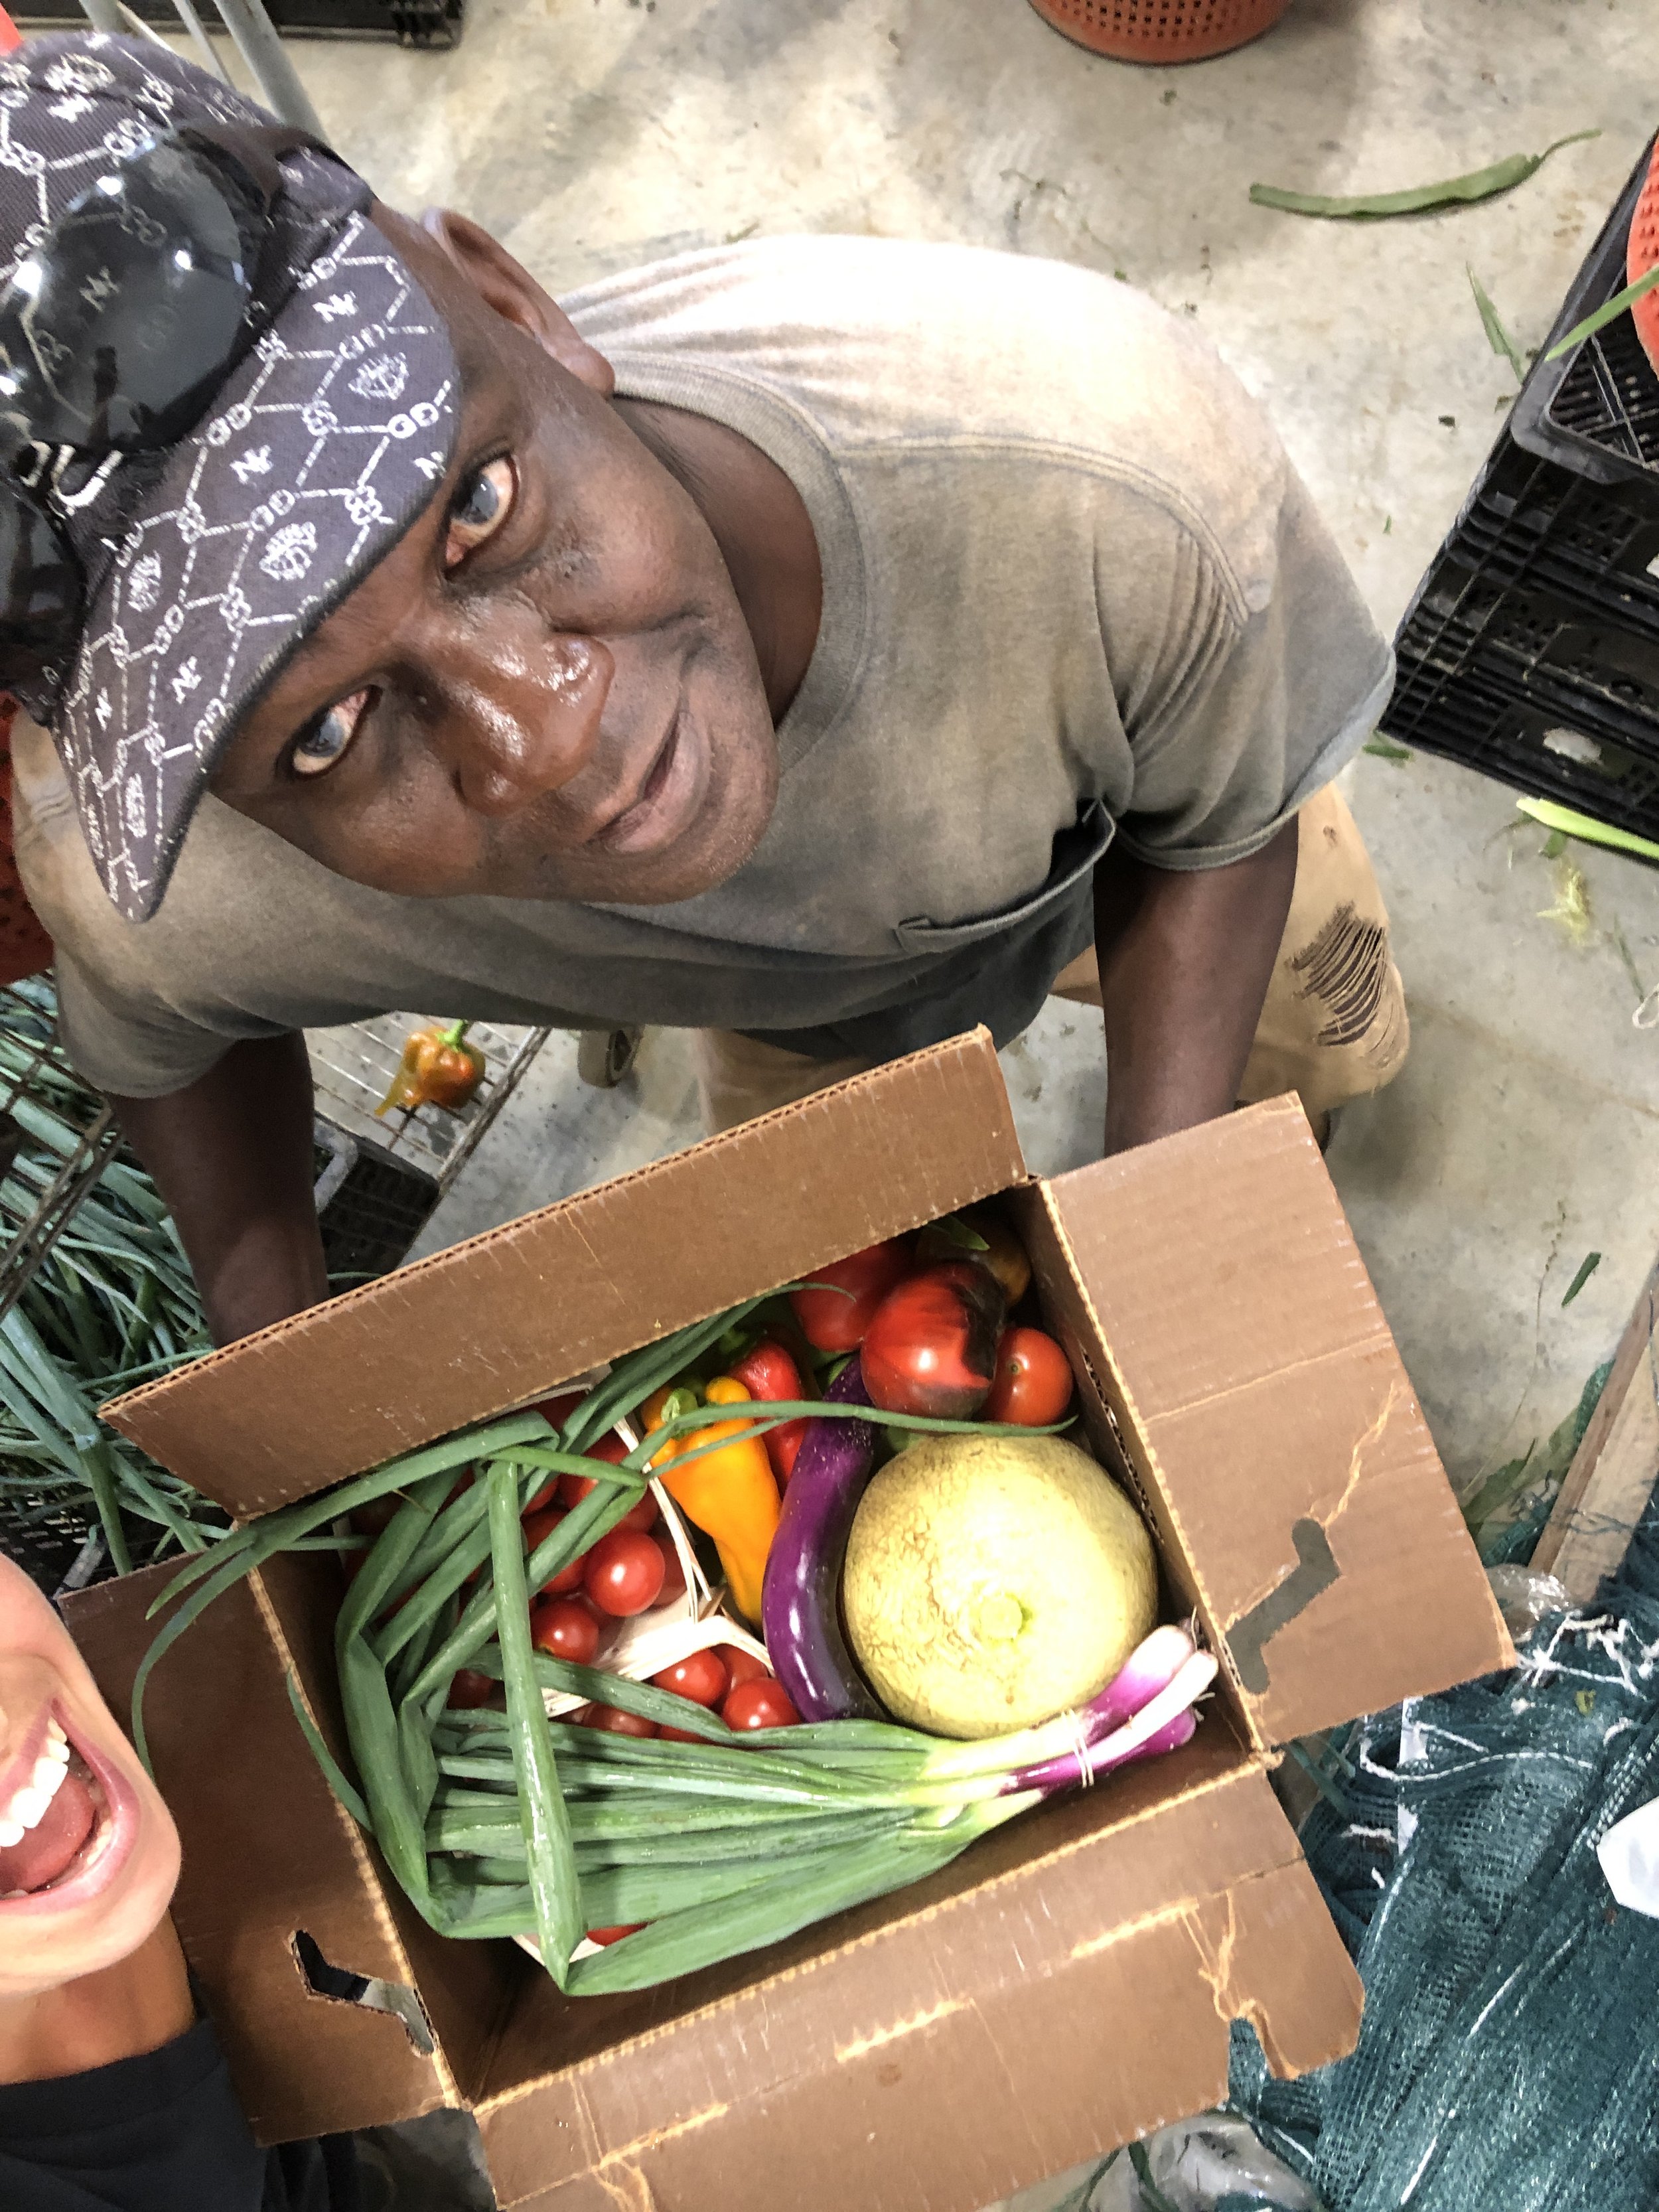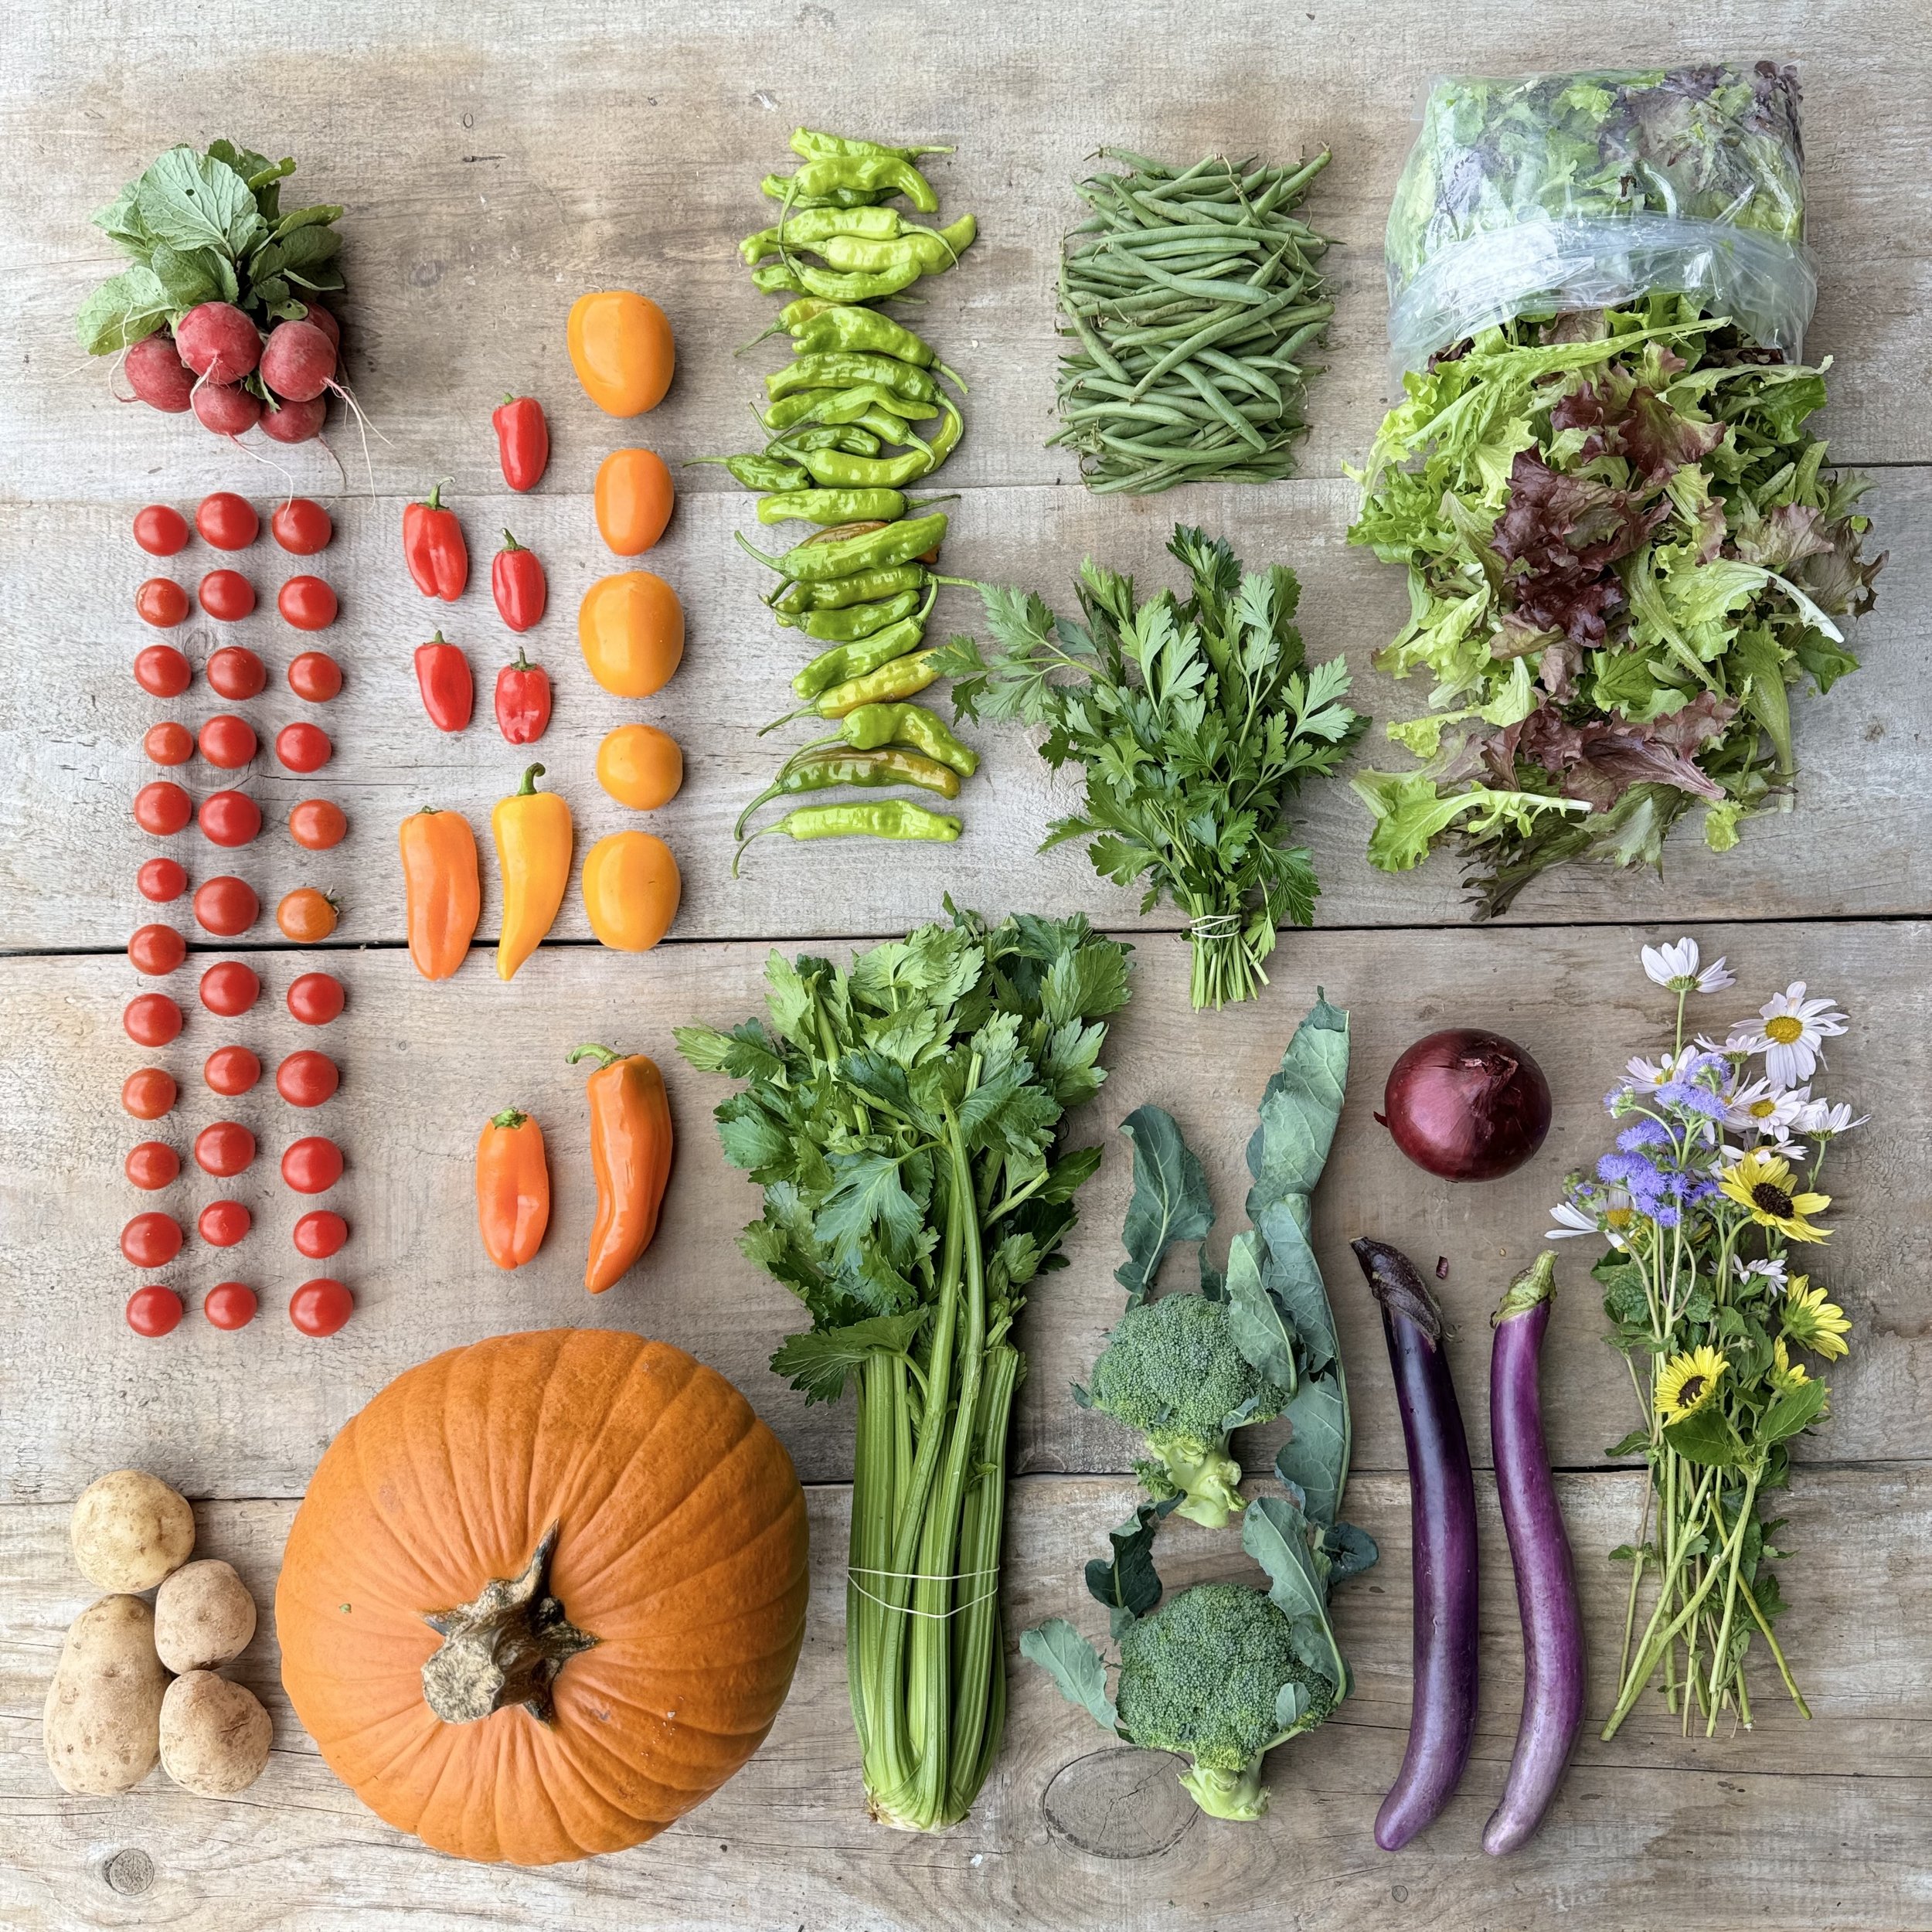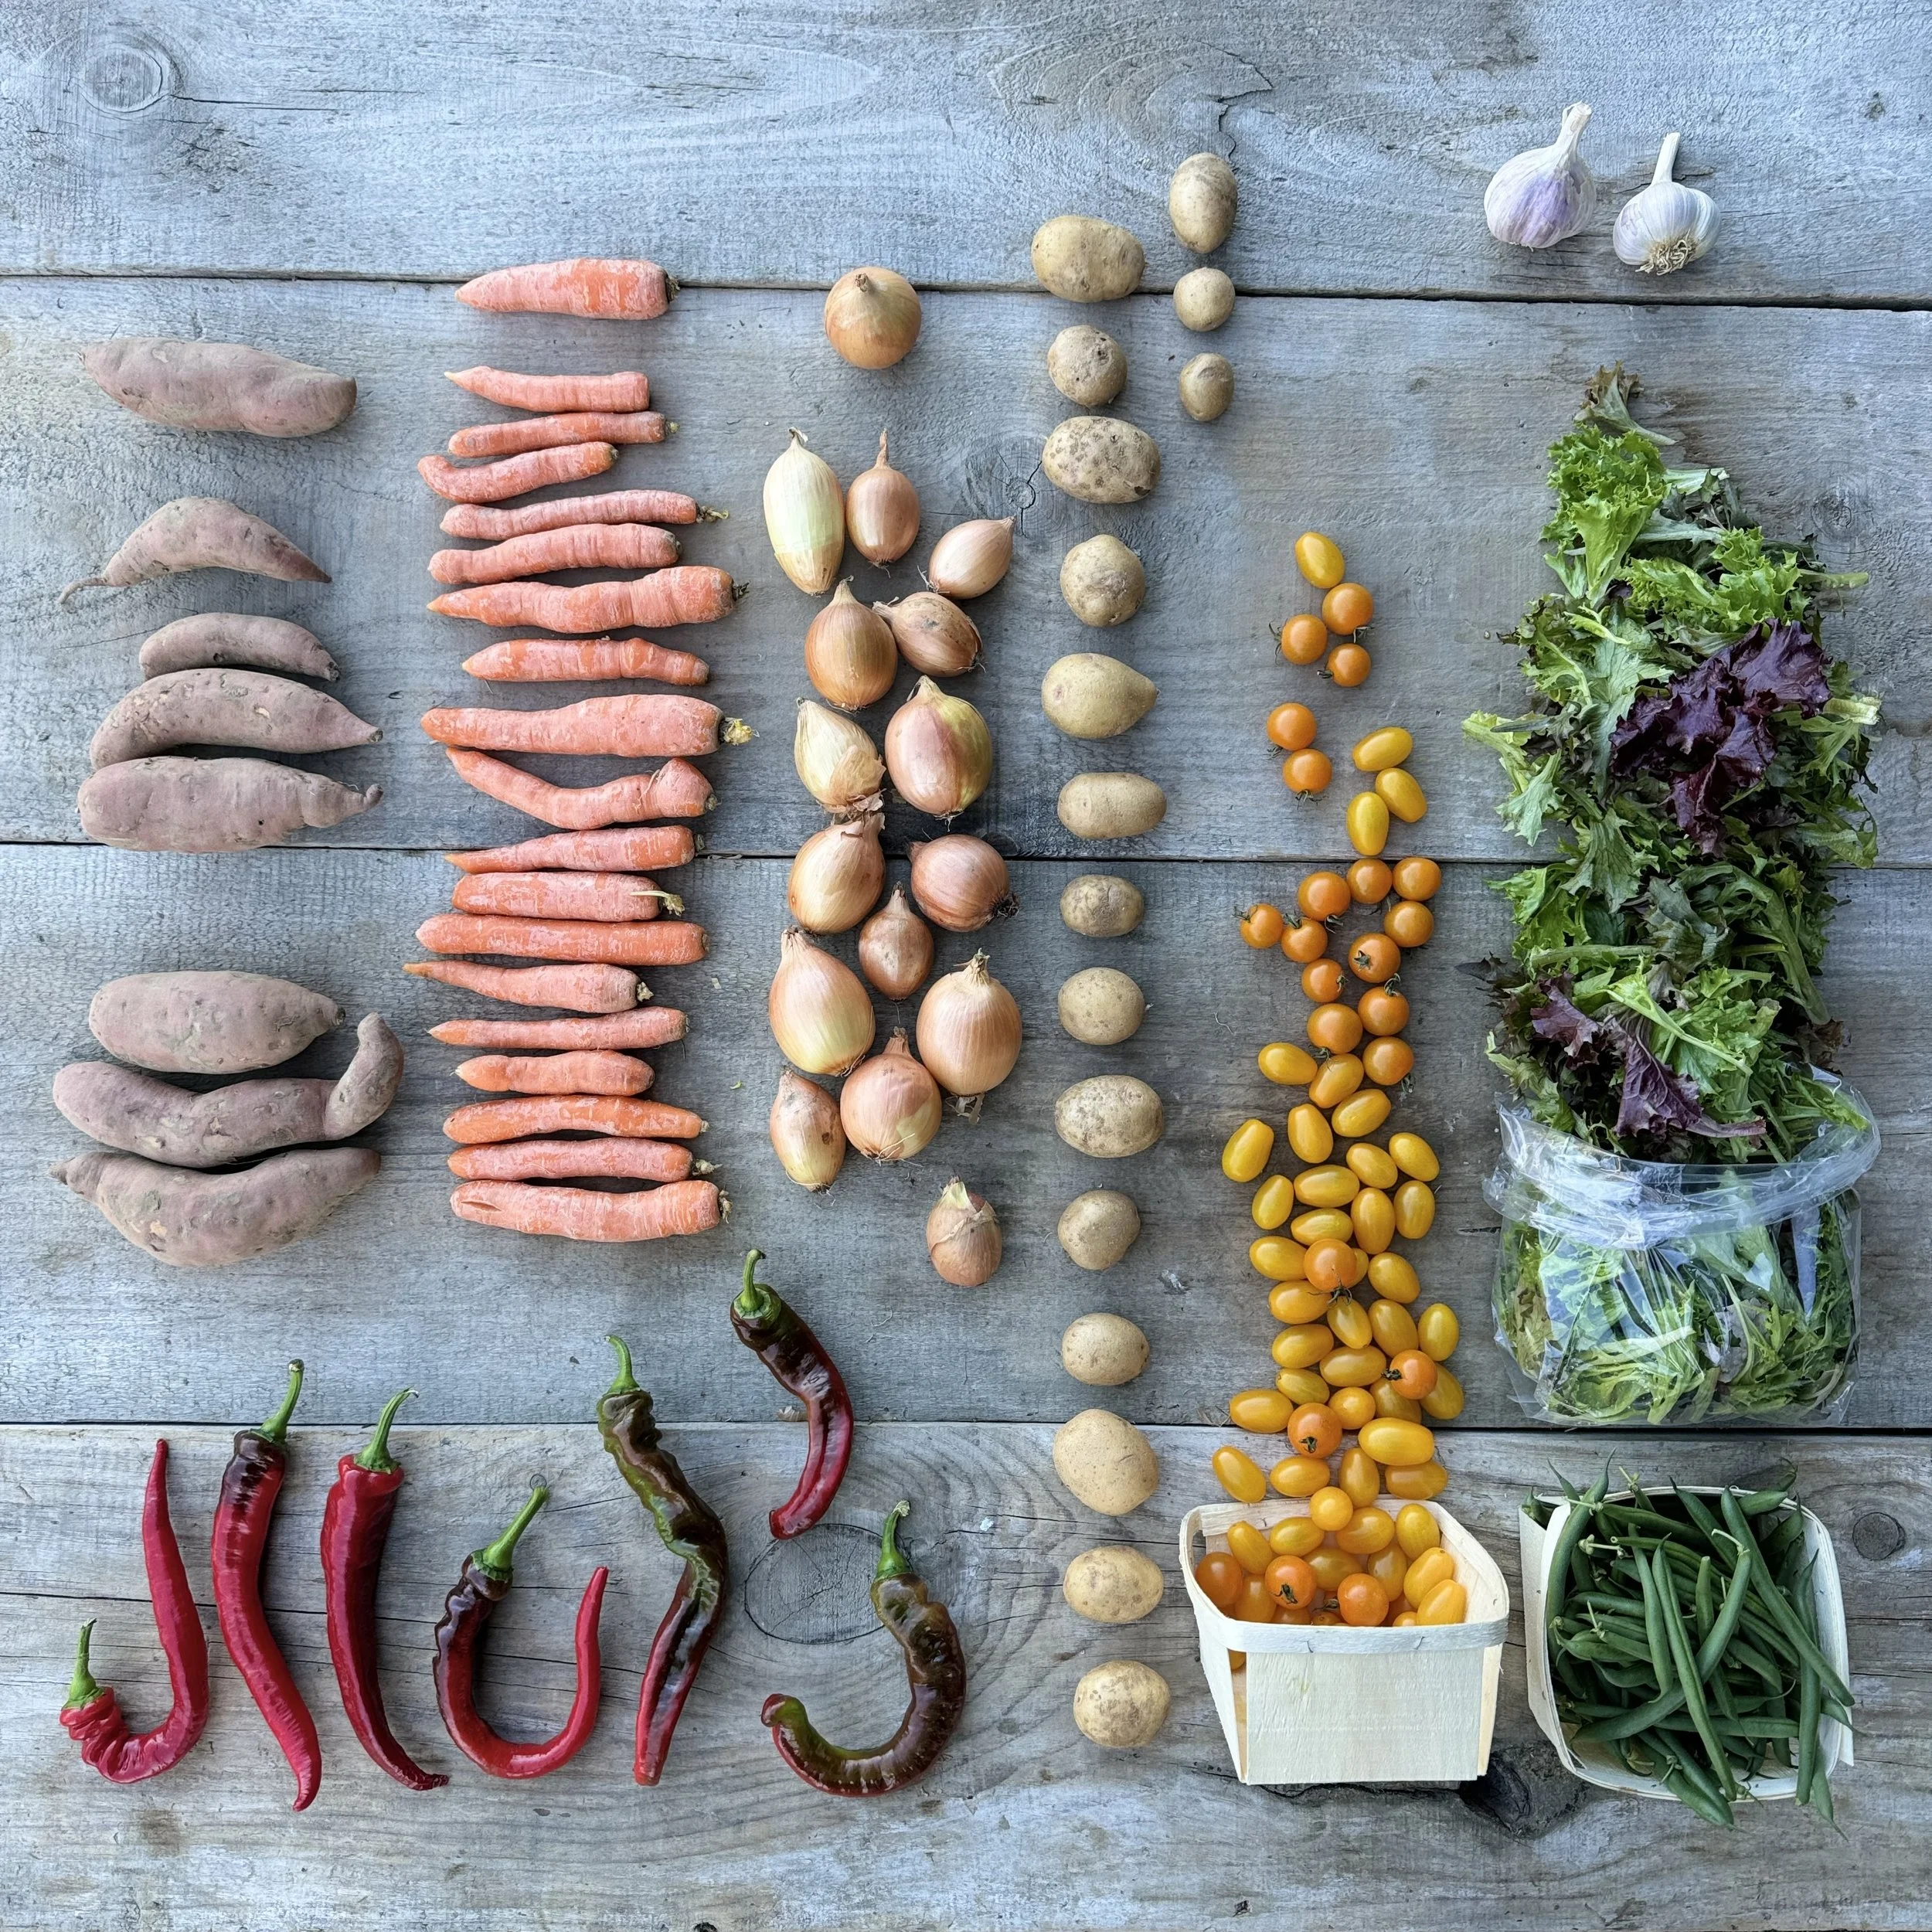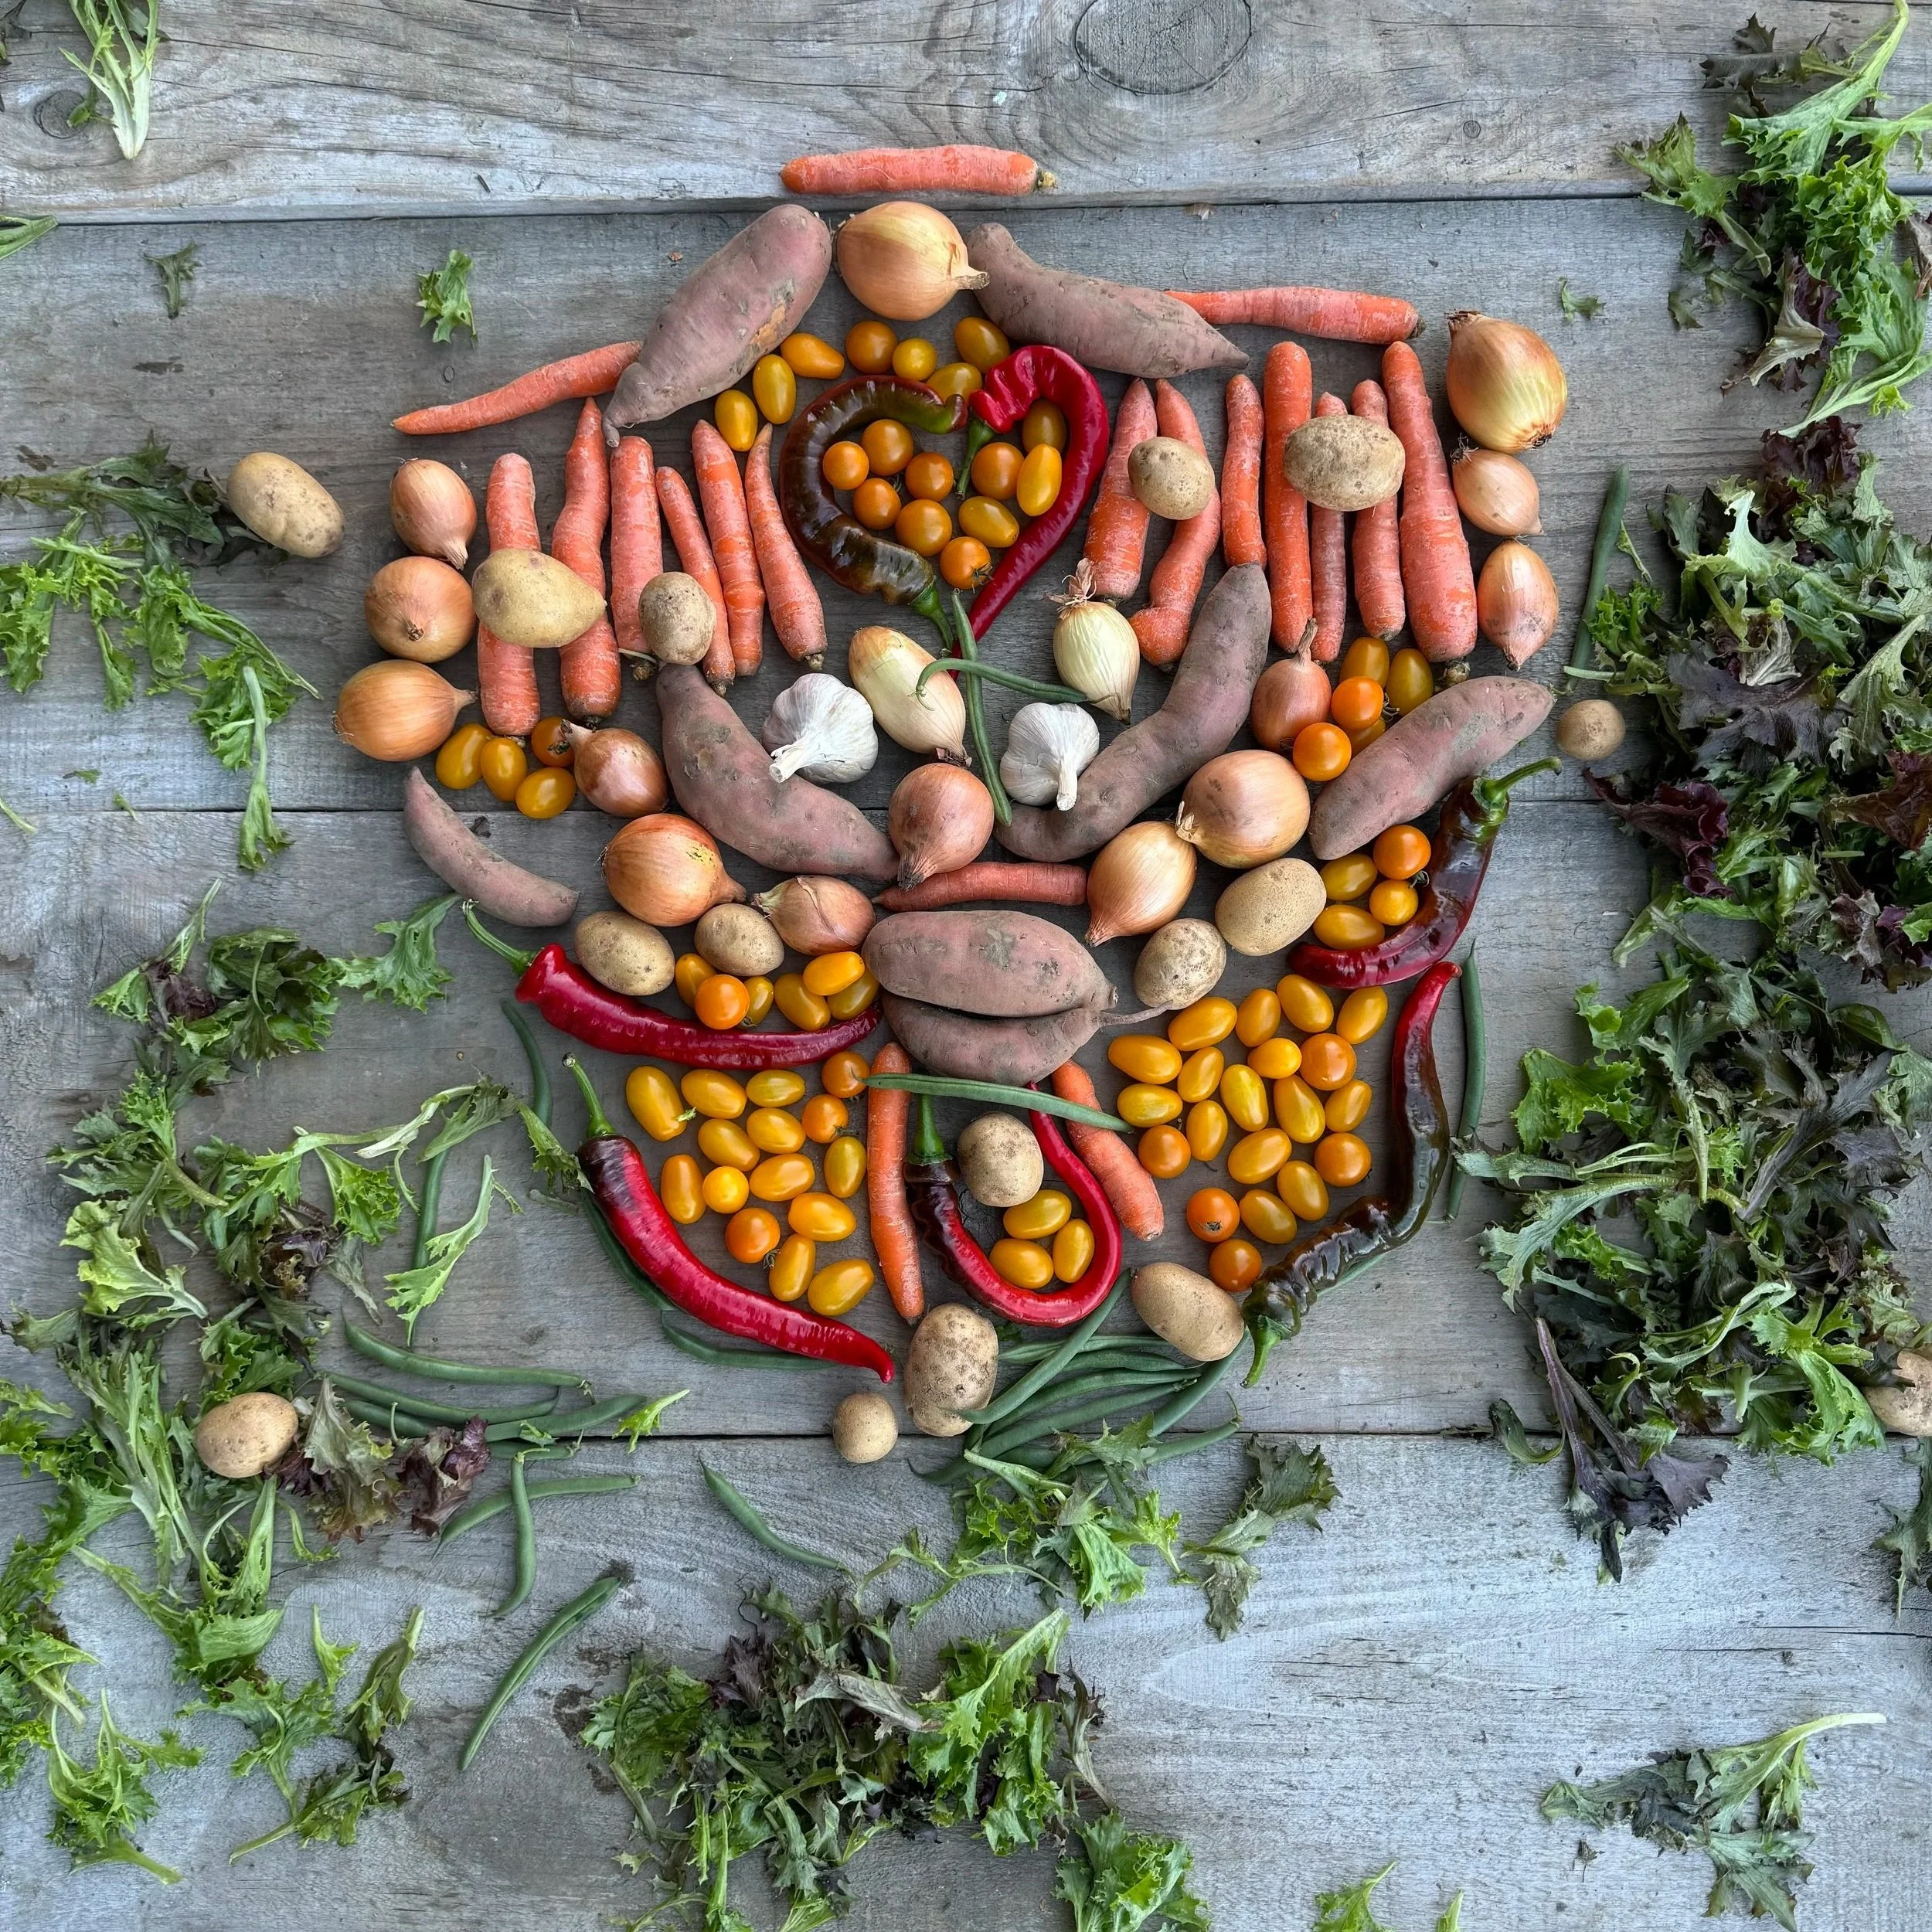
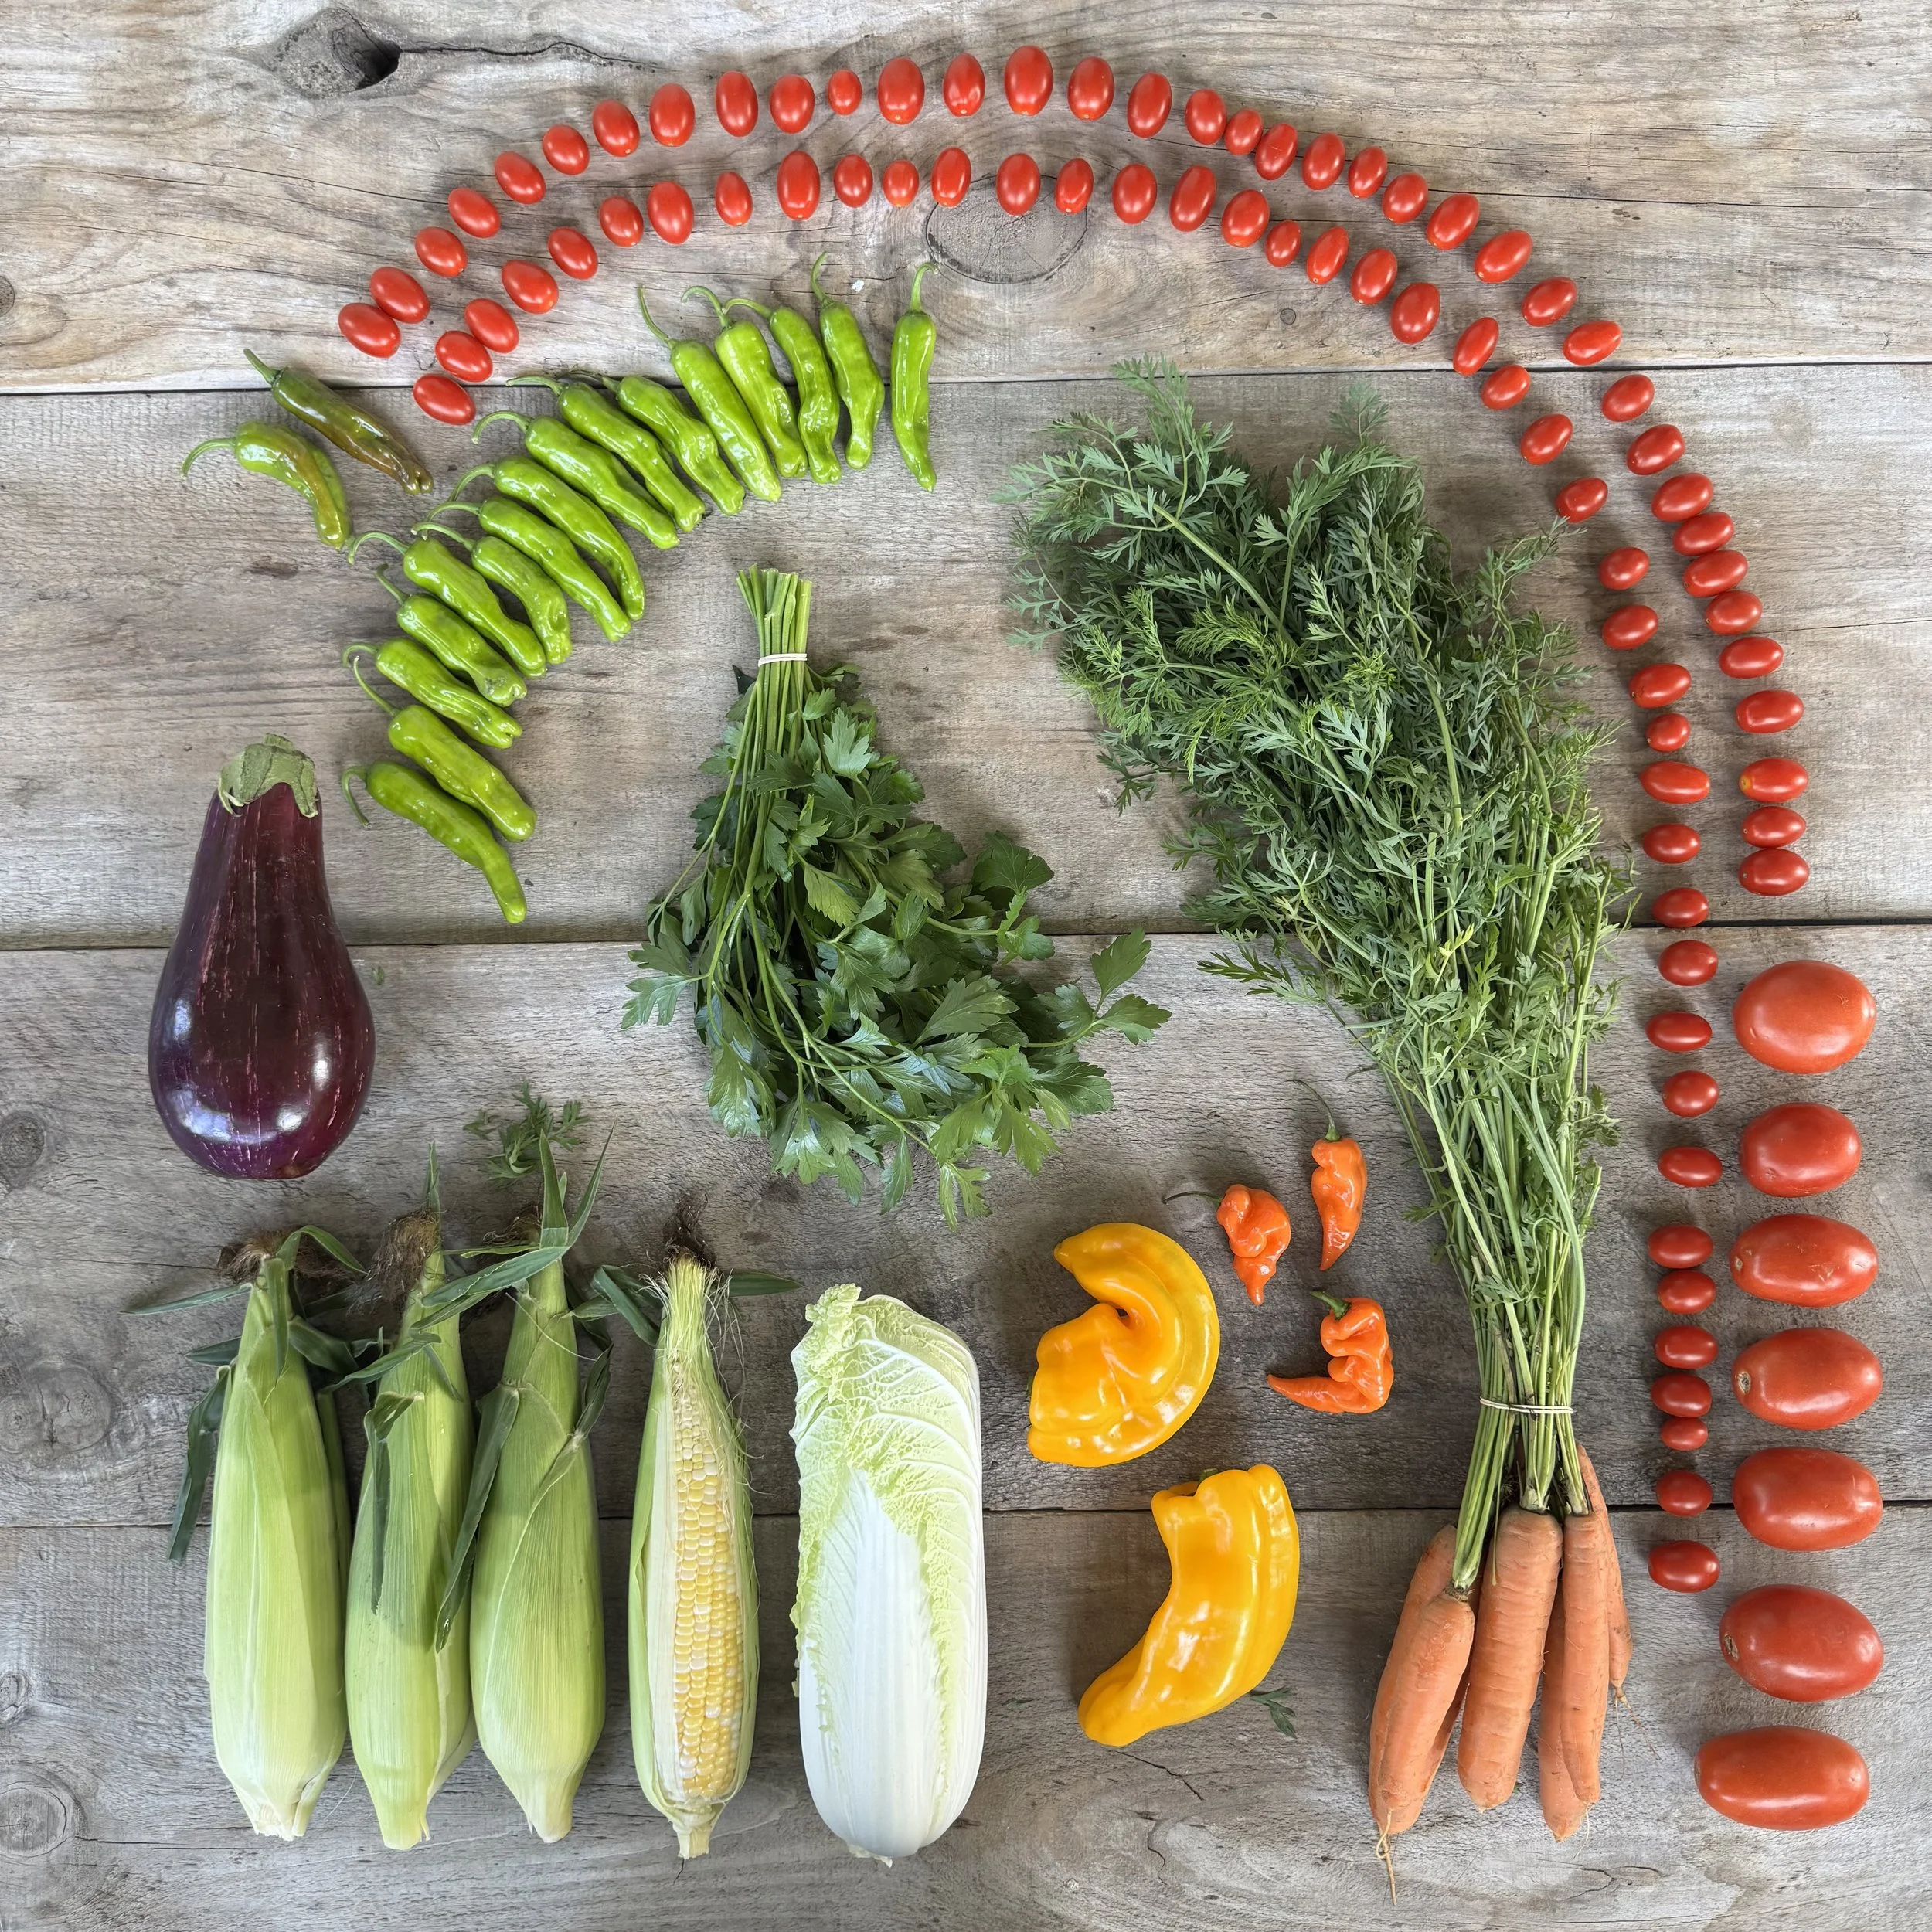
CSA WEEK 14

P i c k l i s t

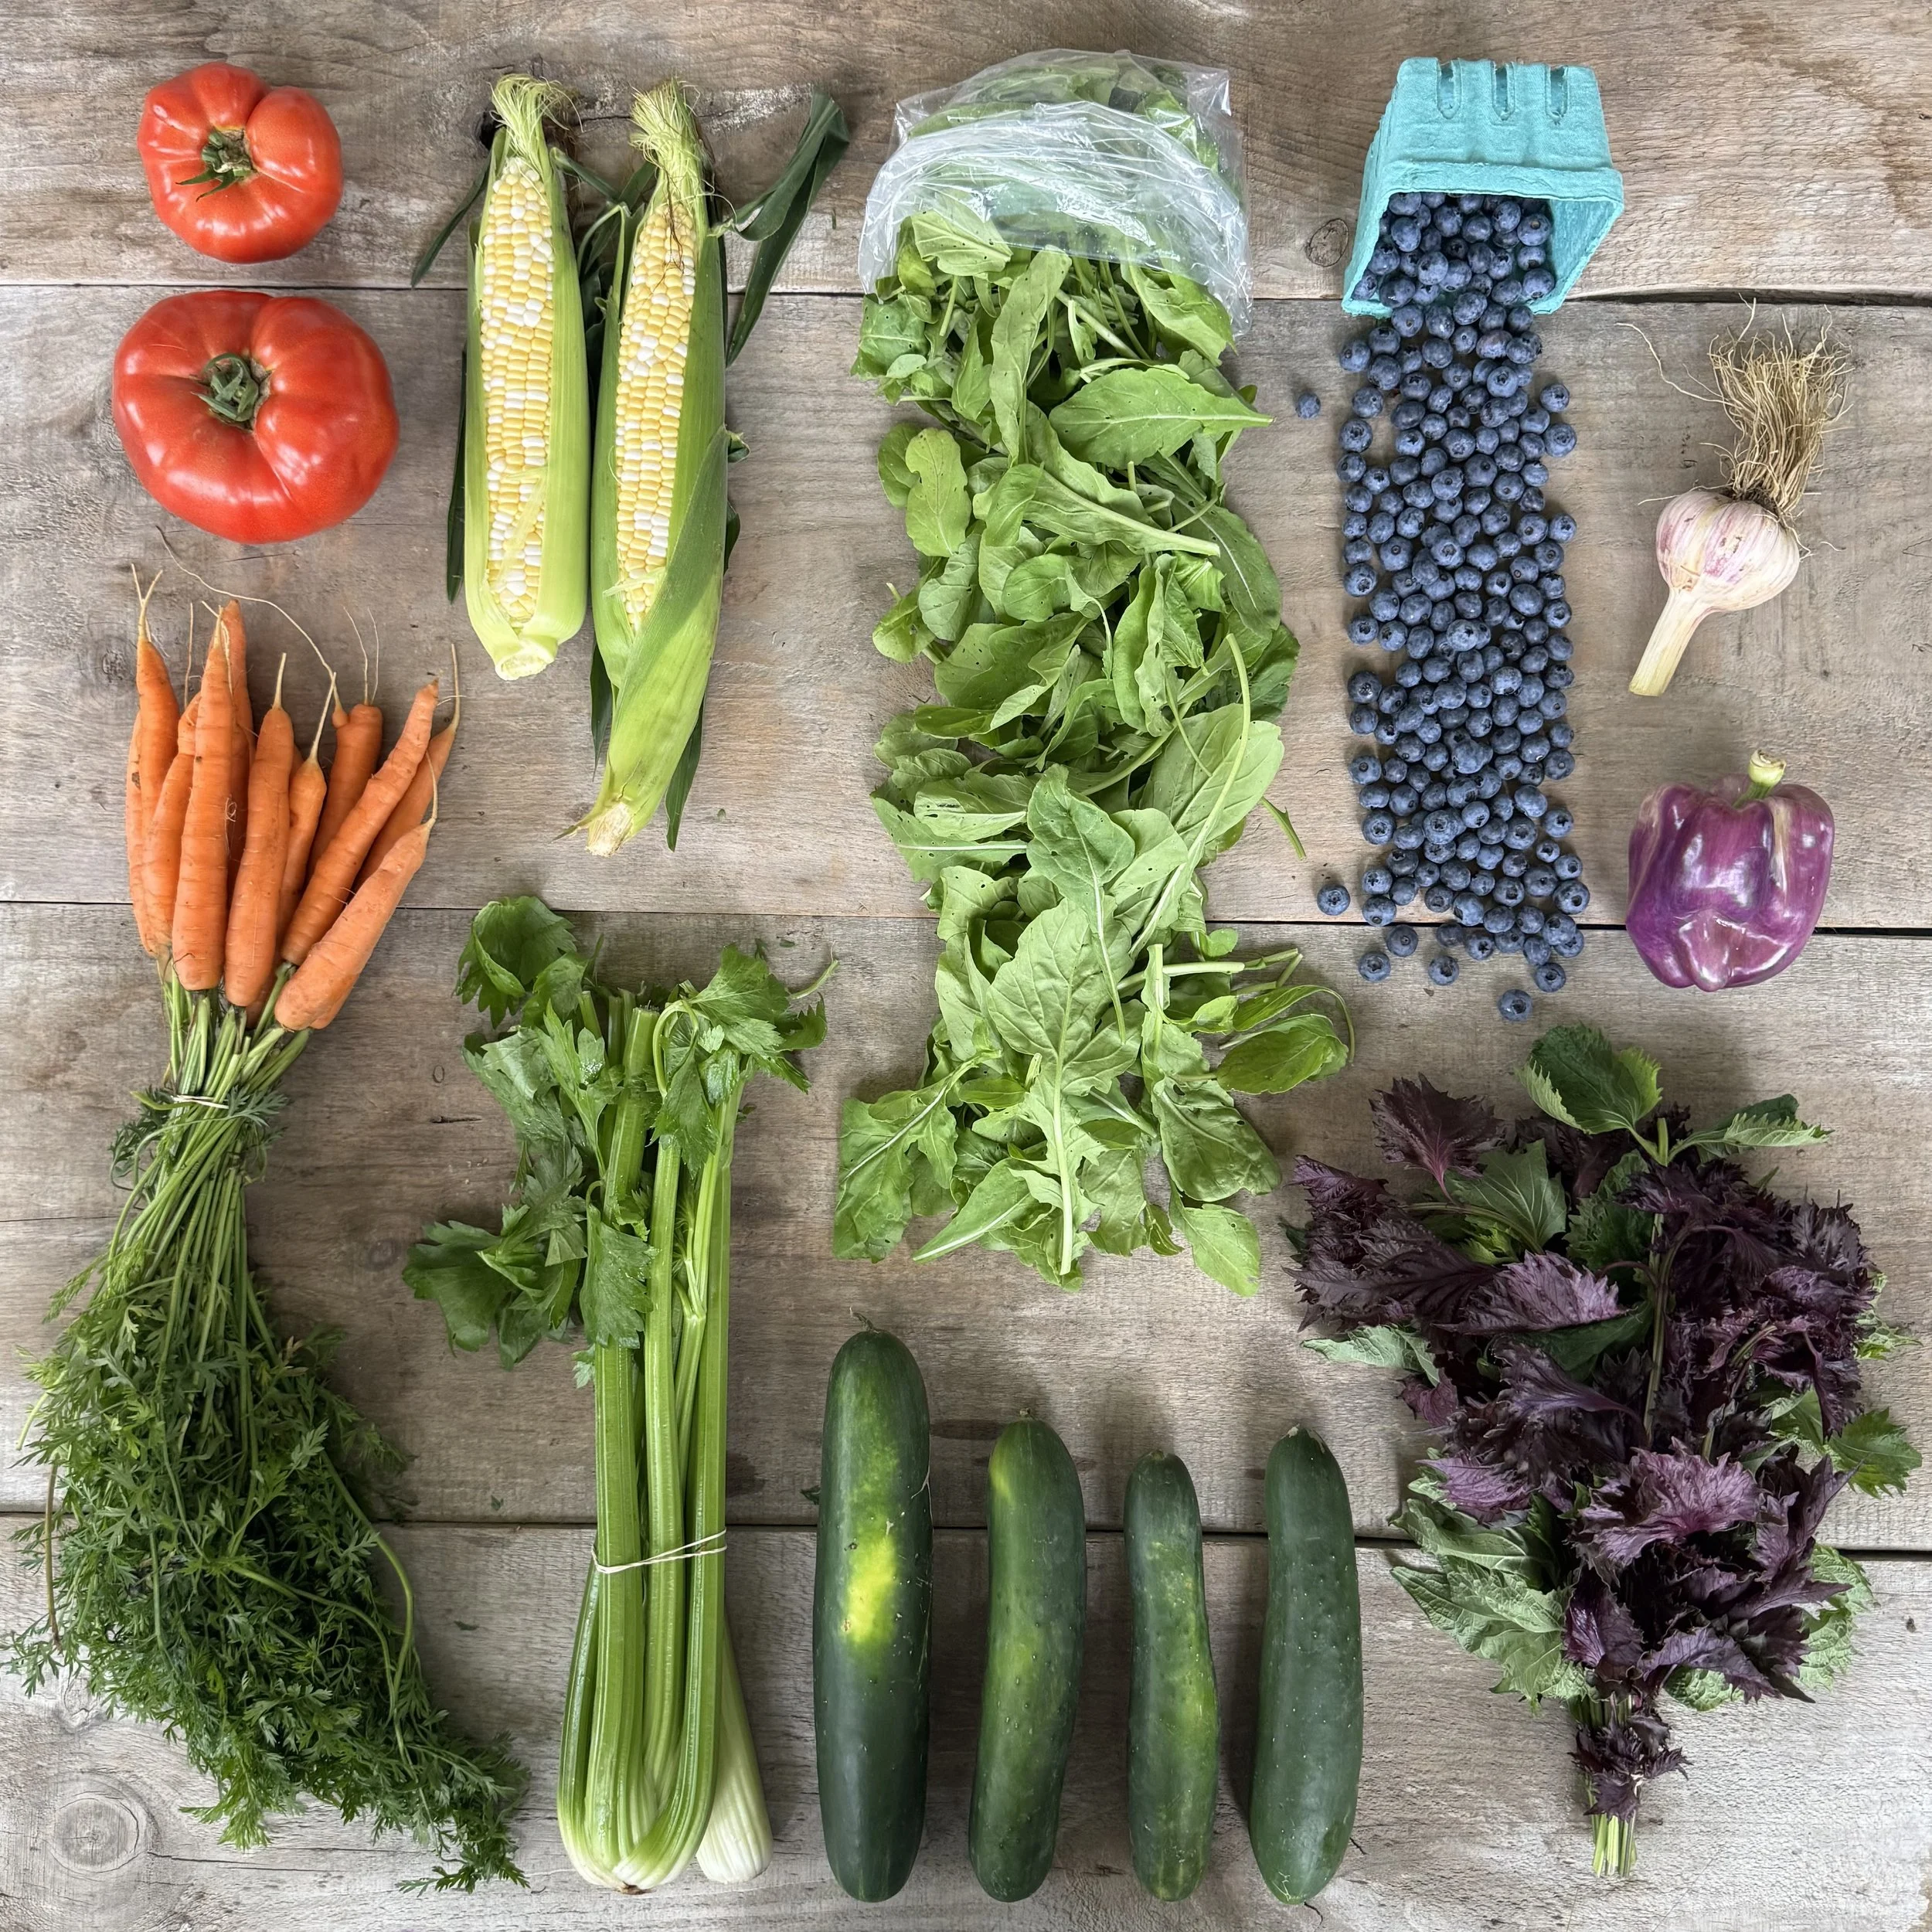
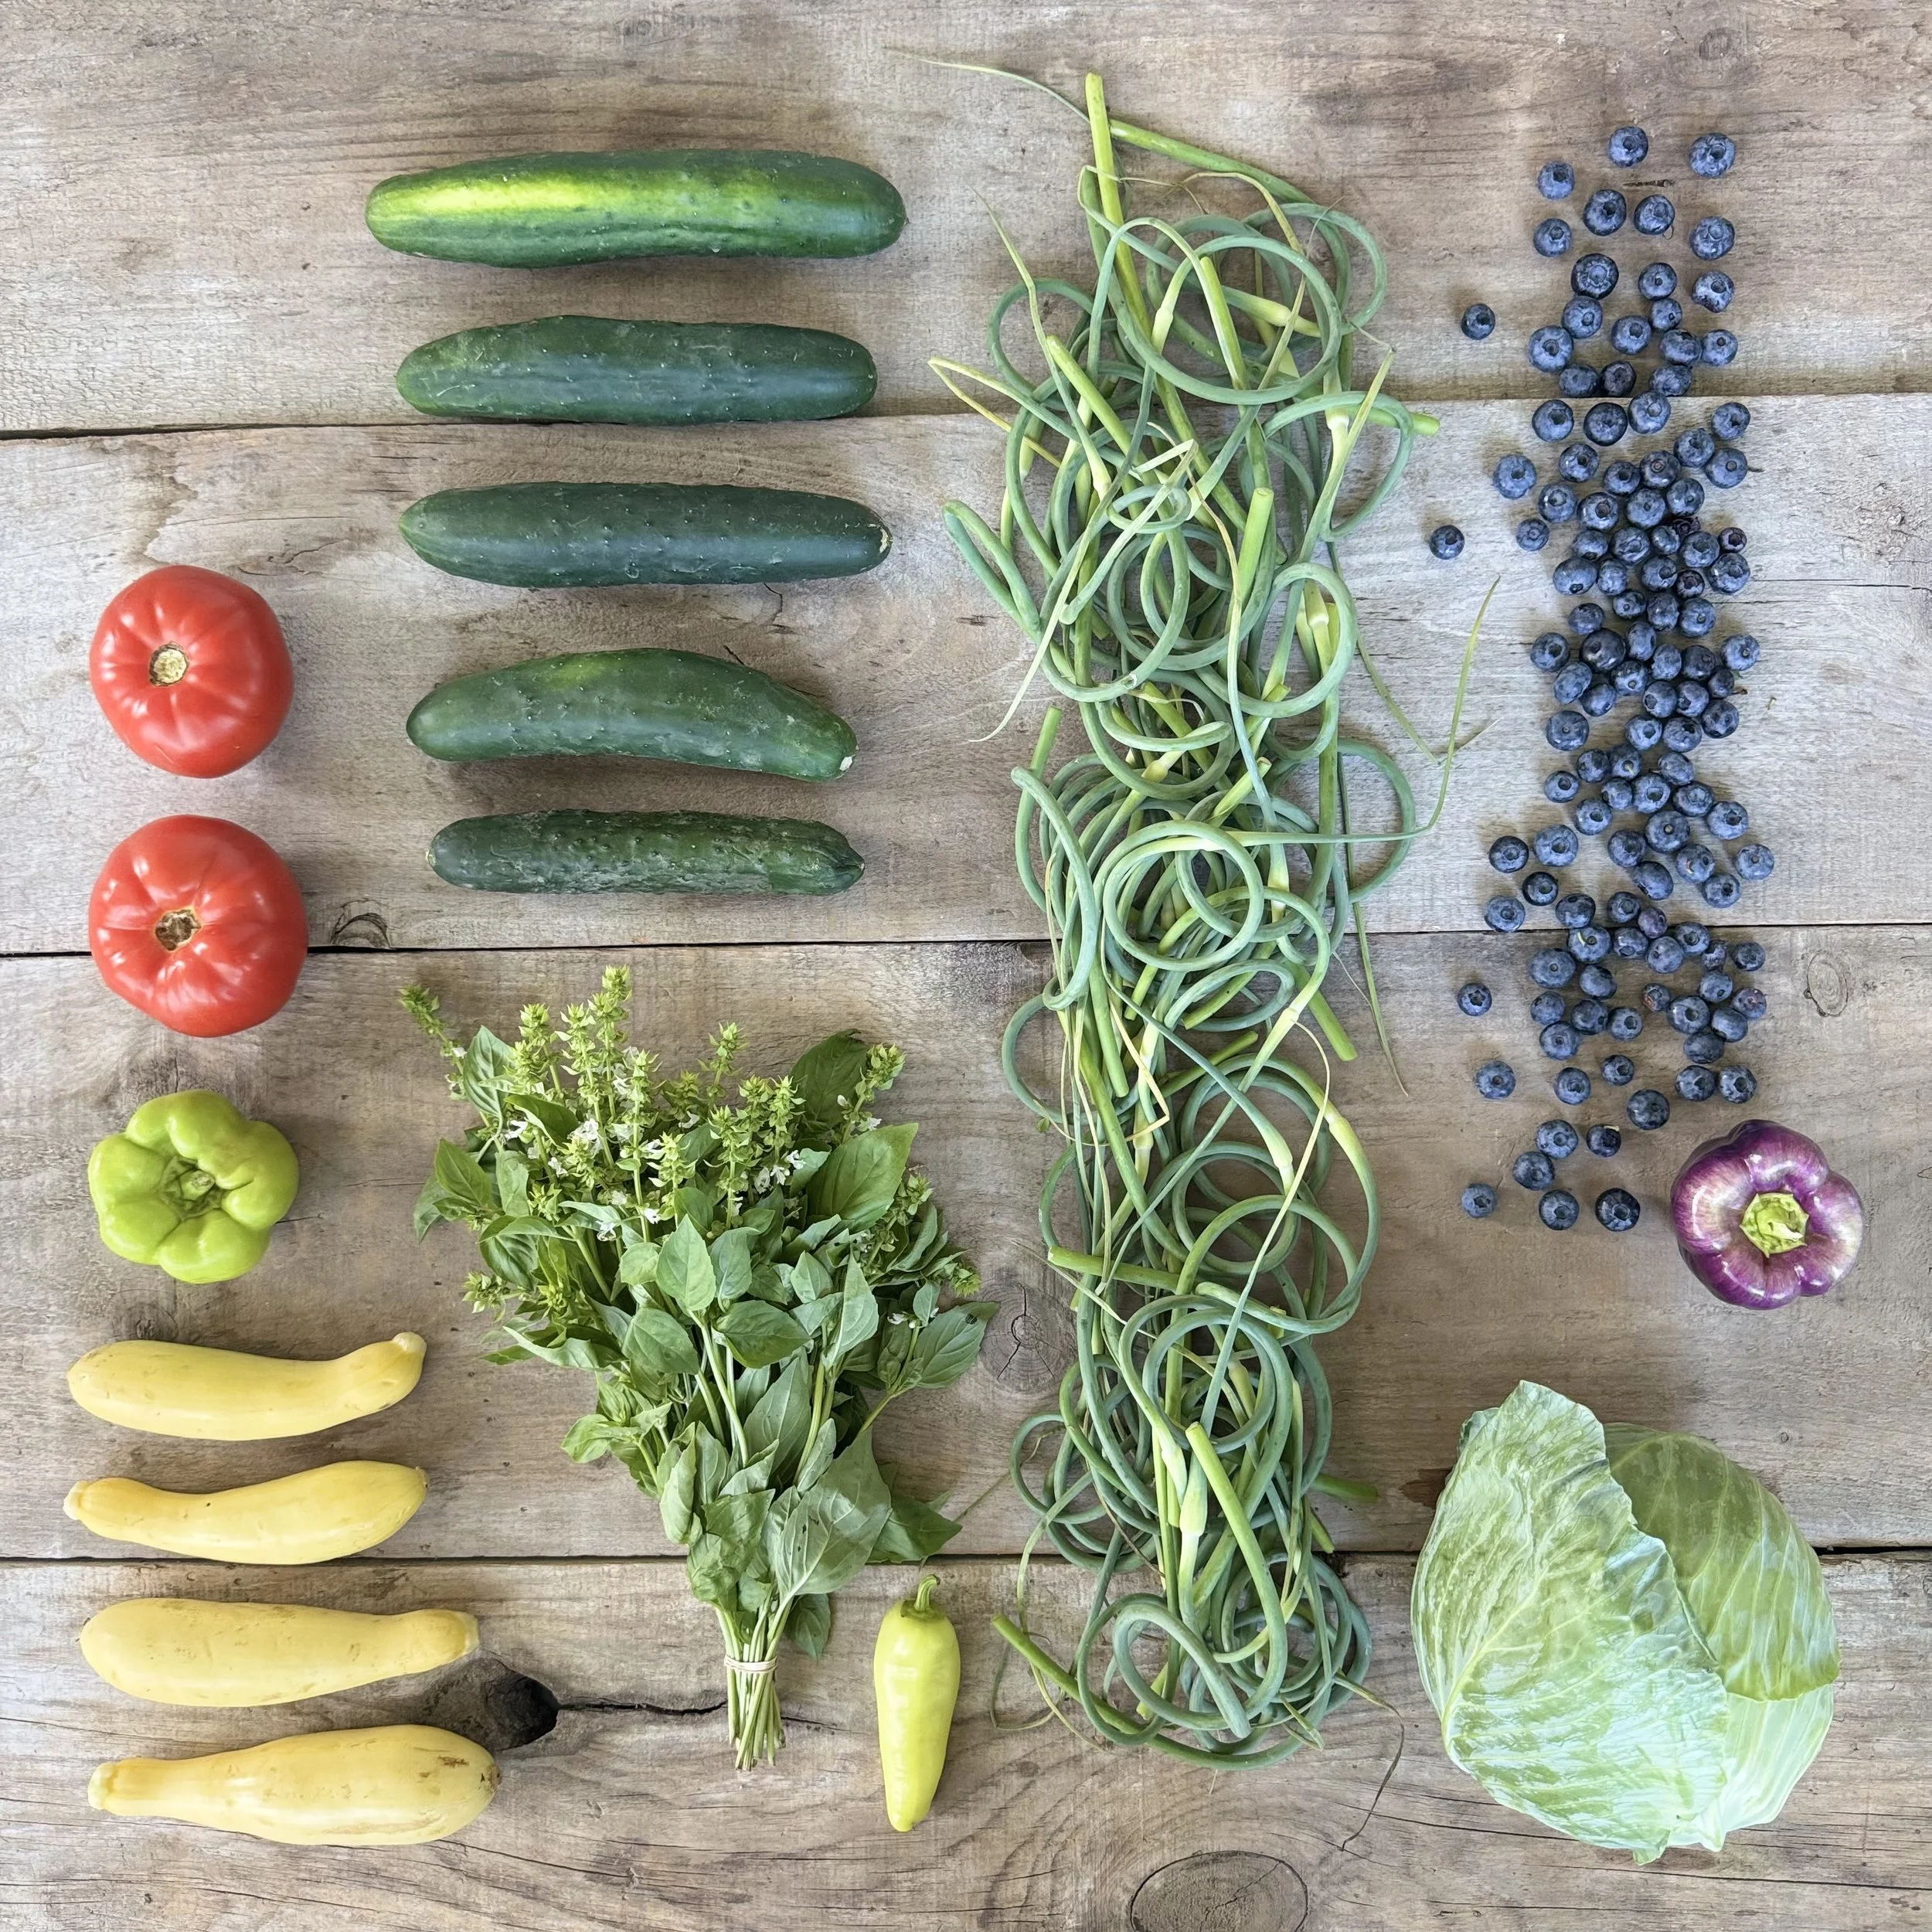
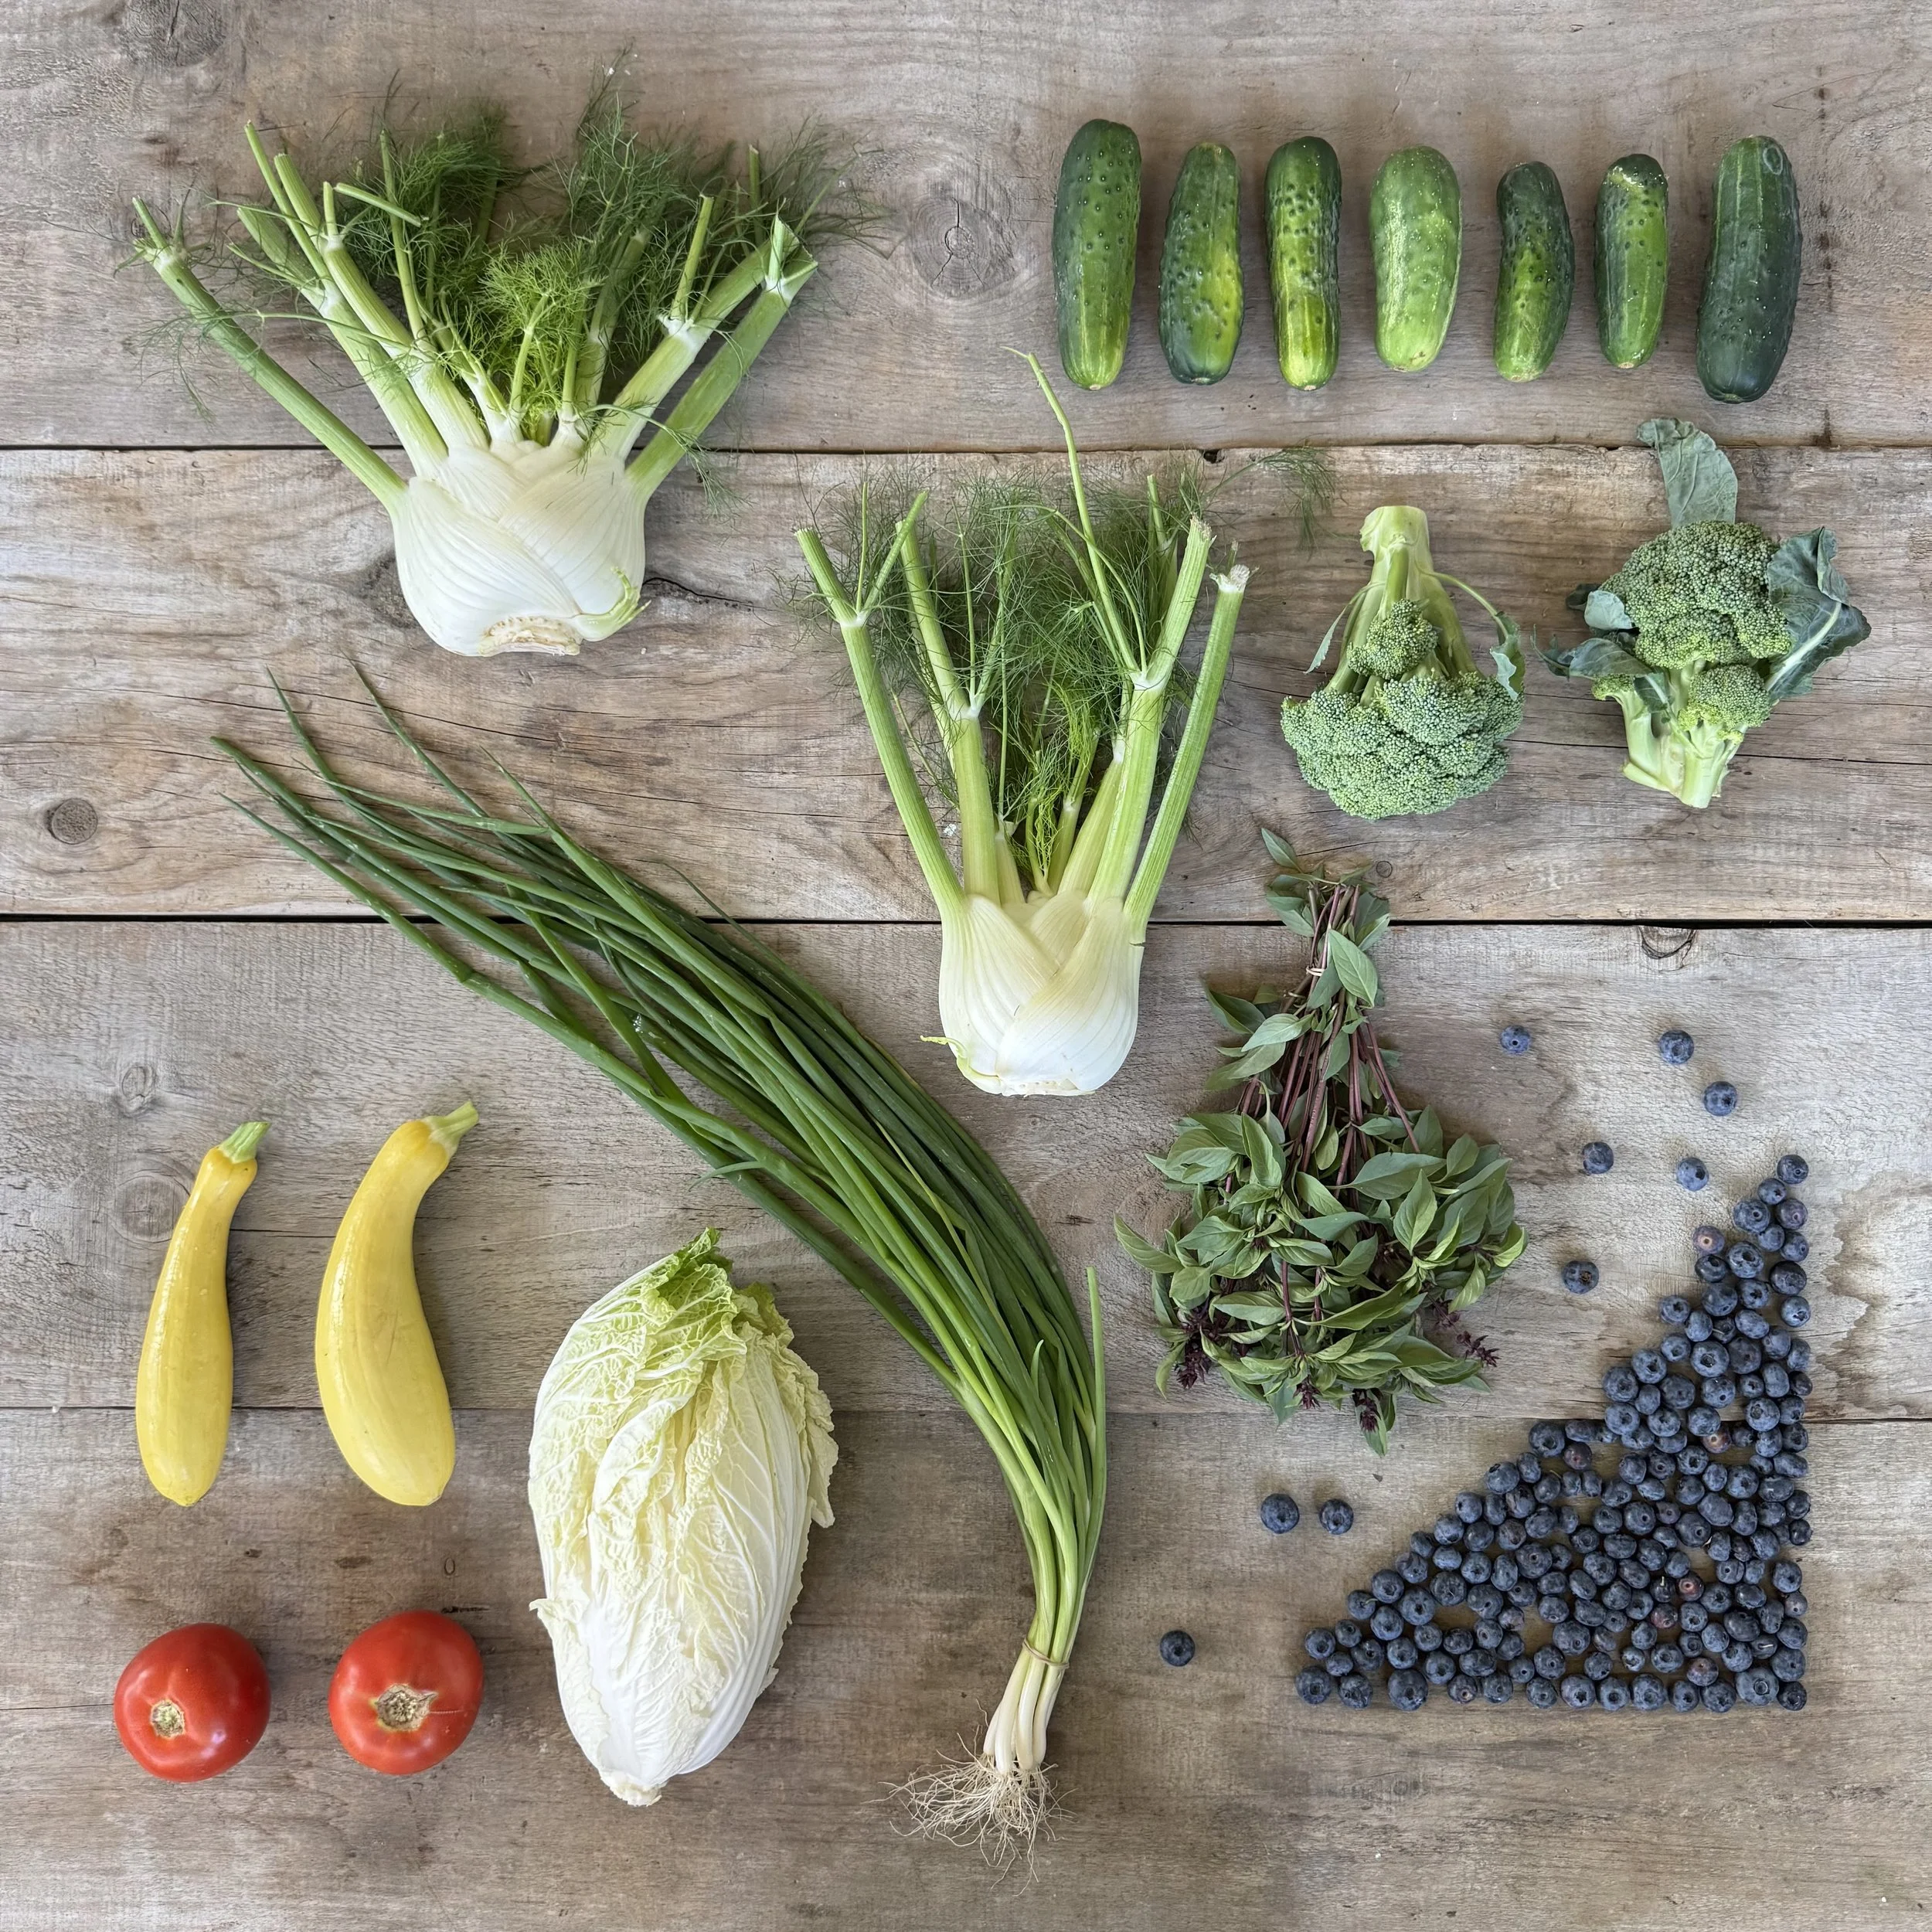
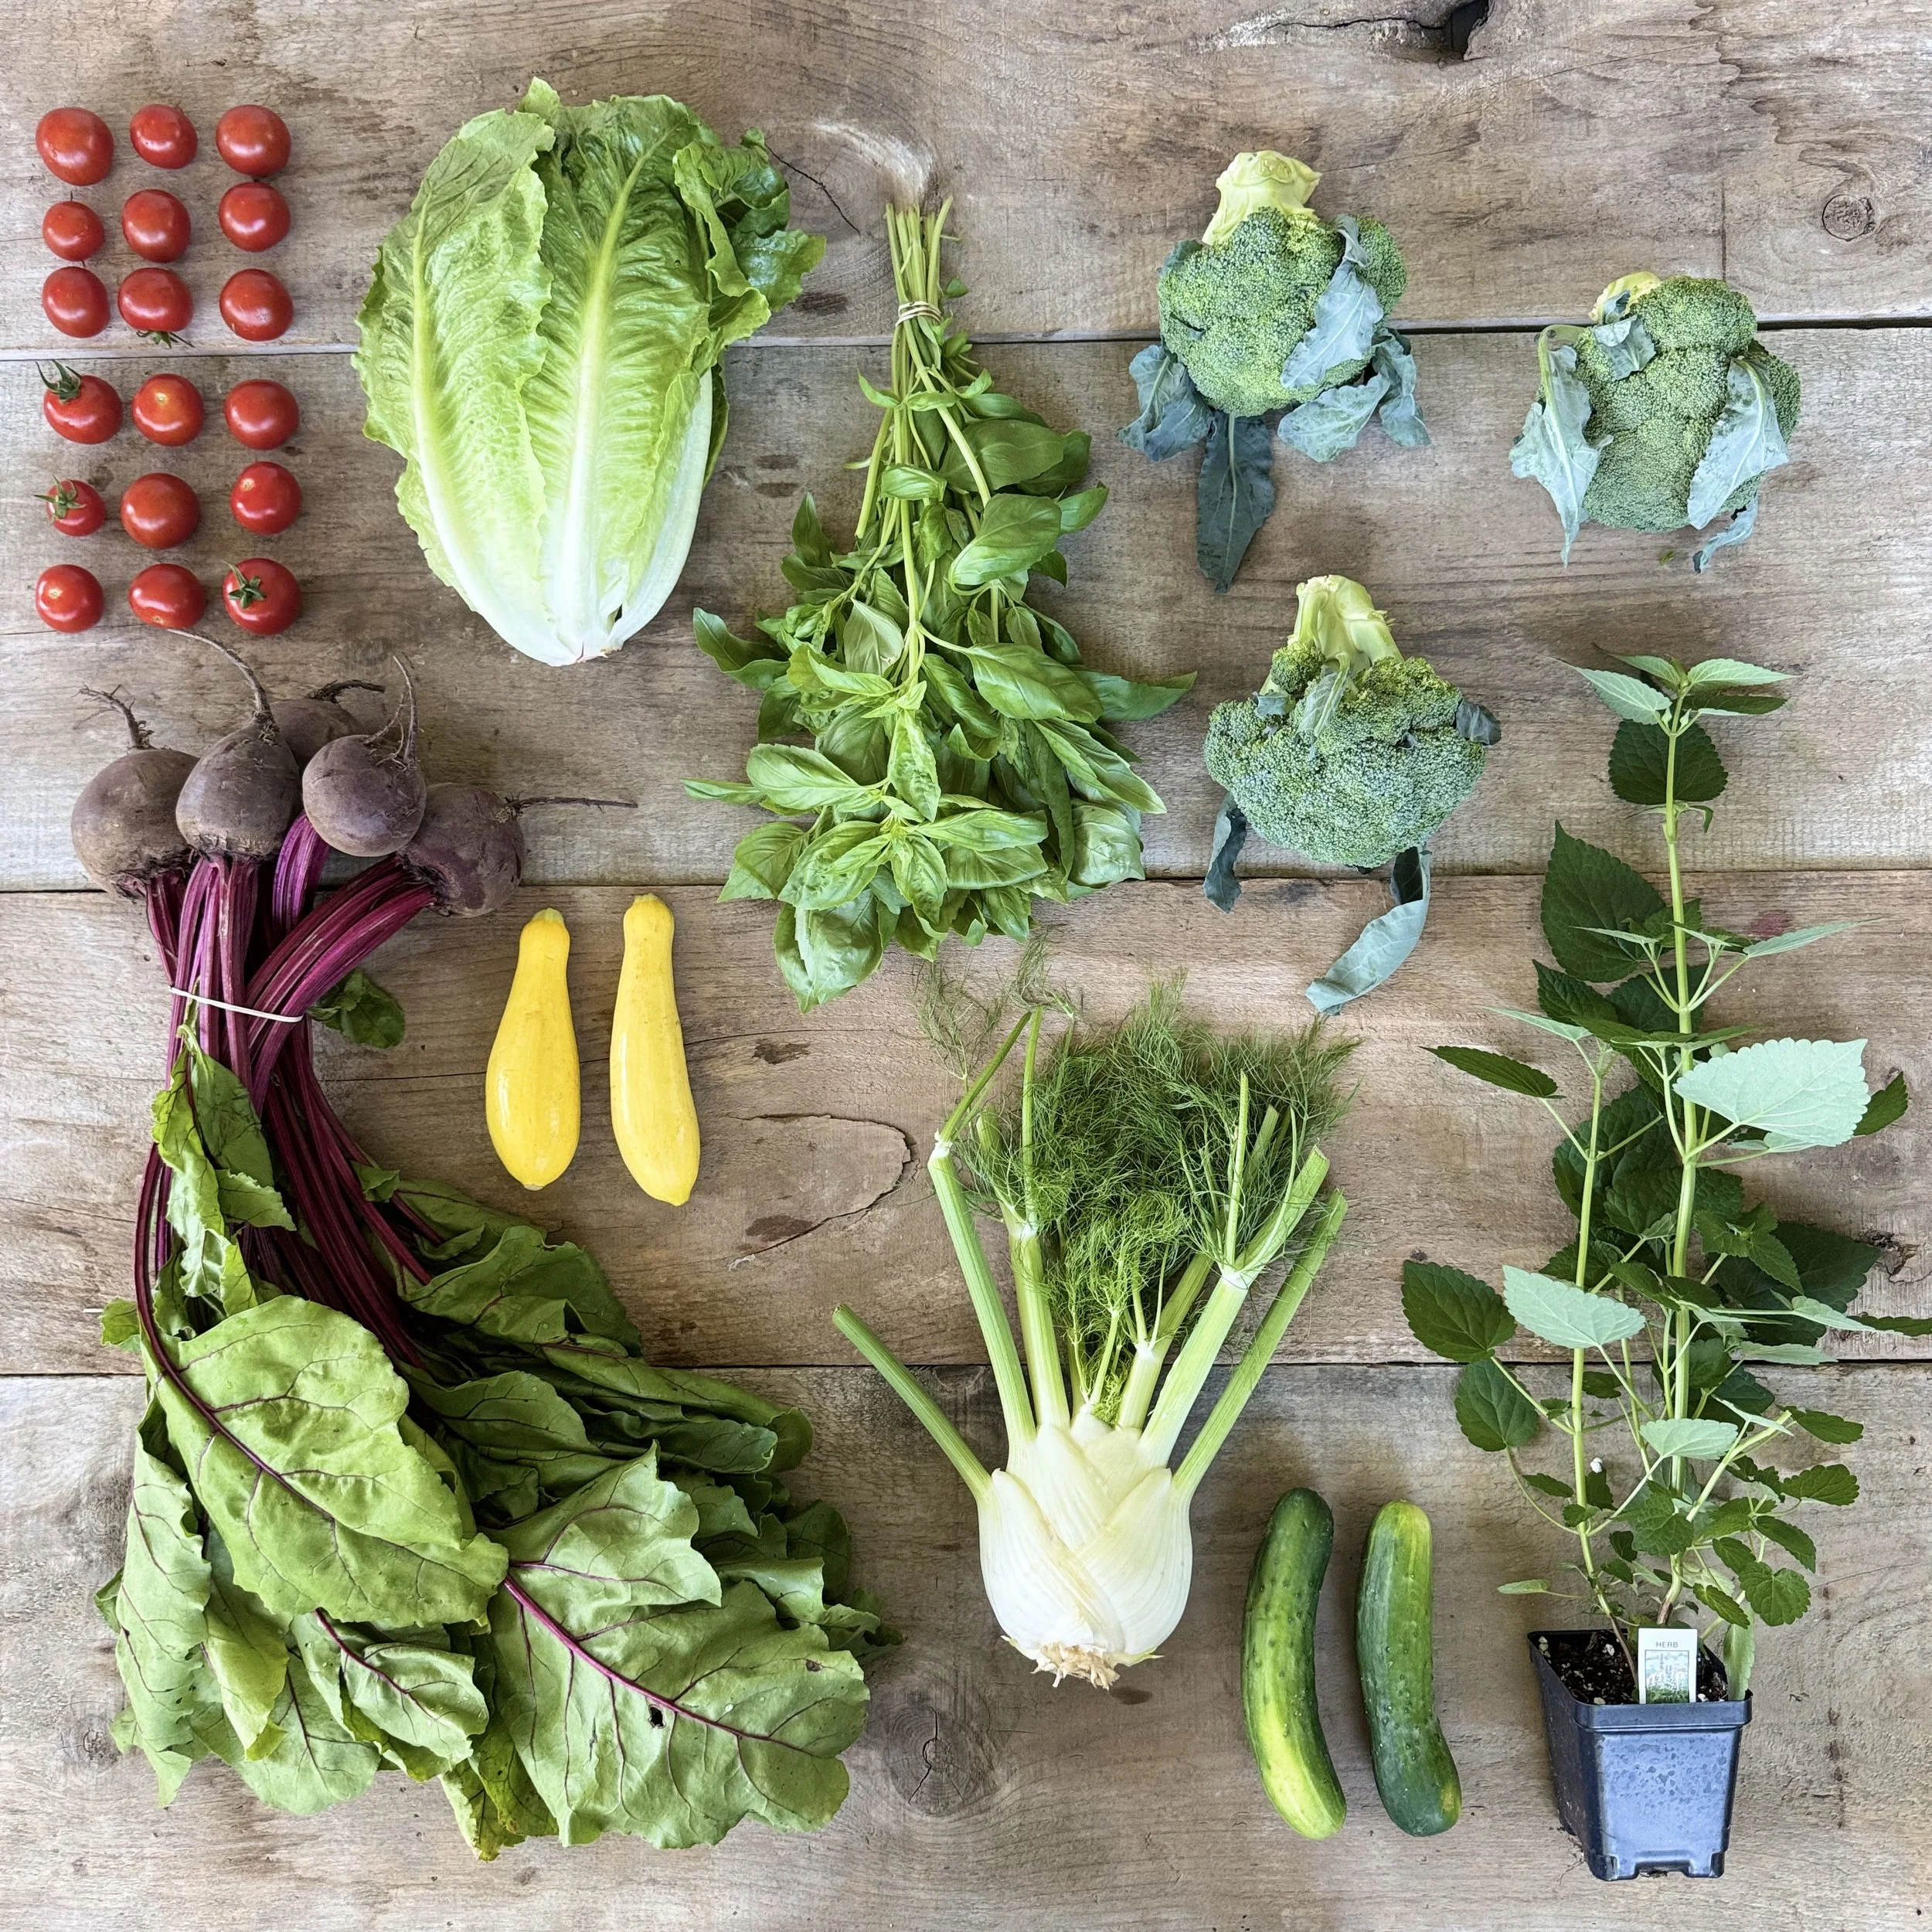
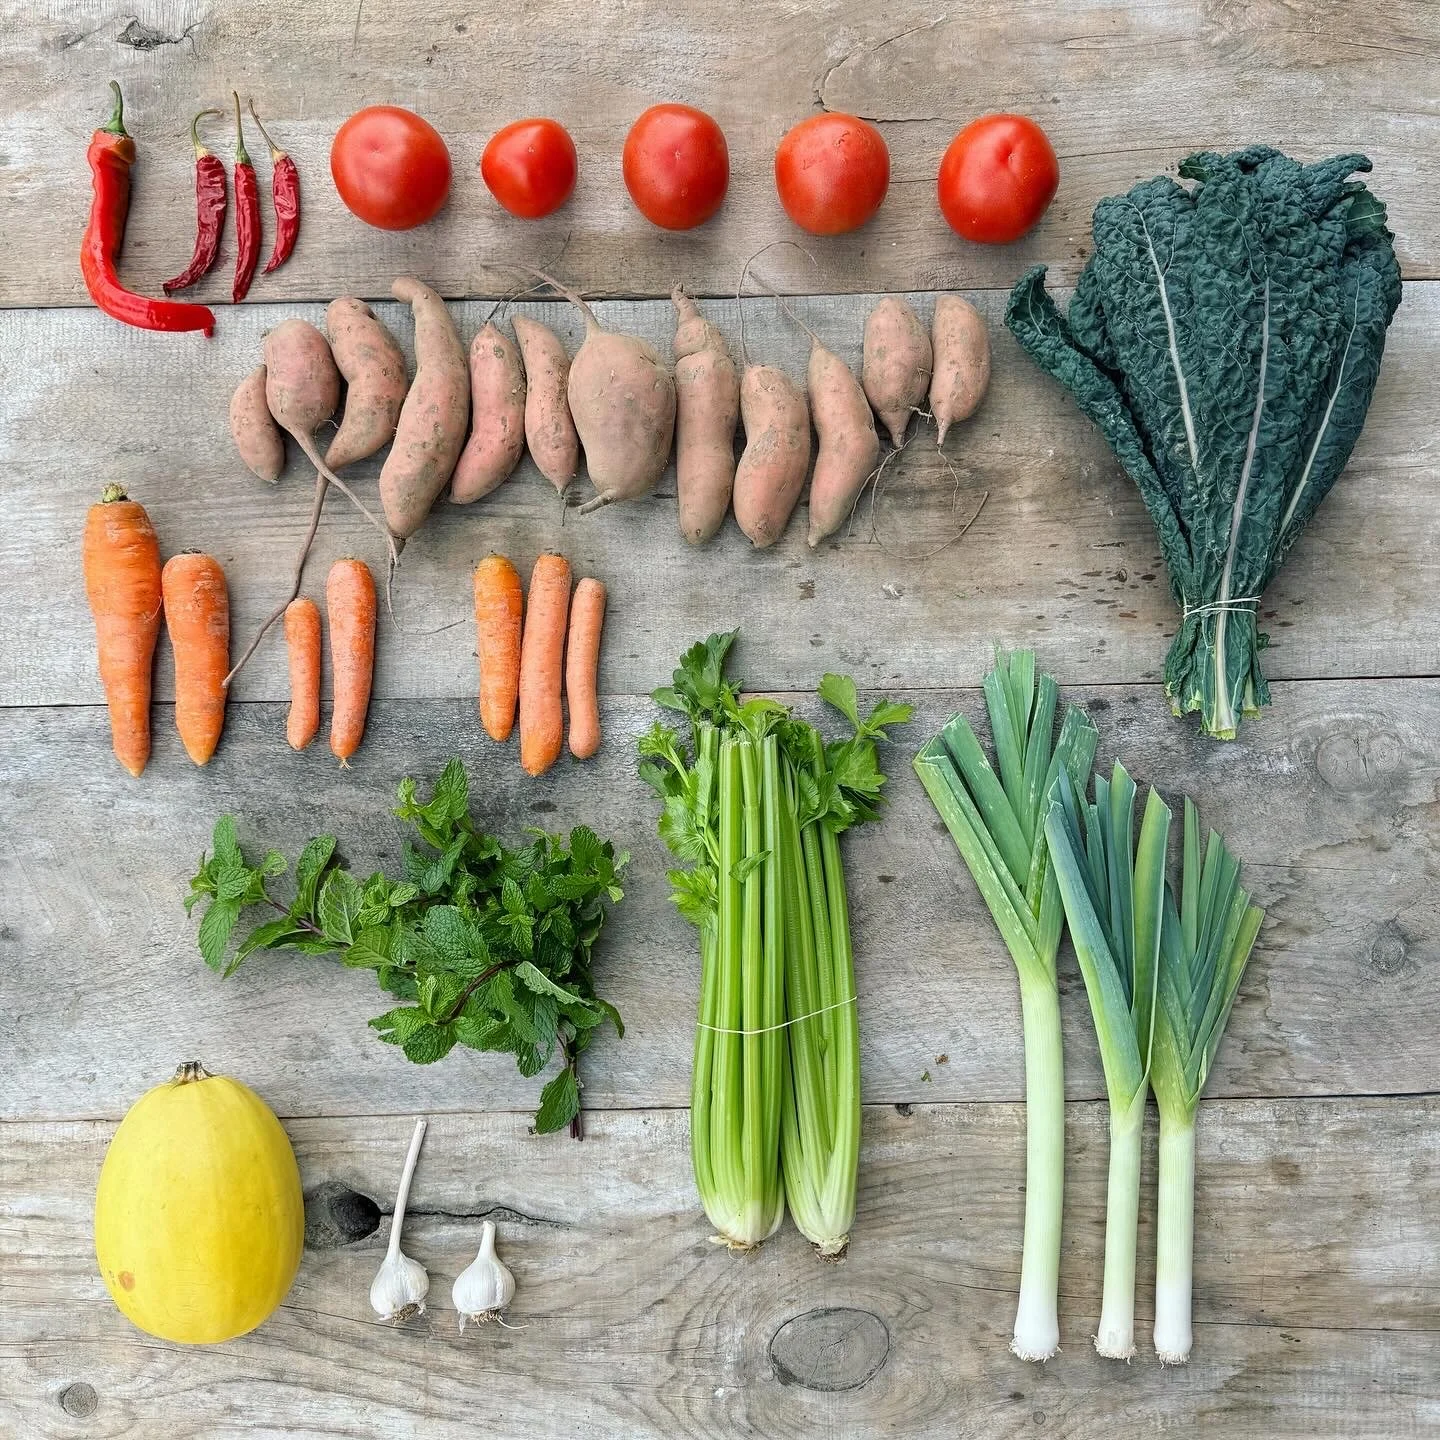
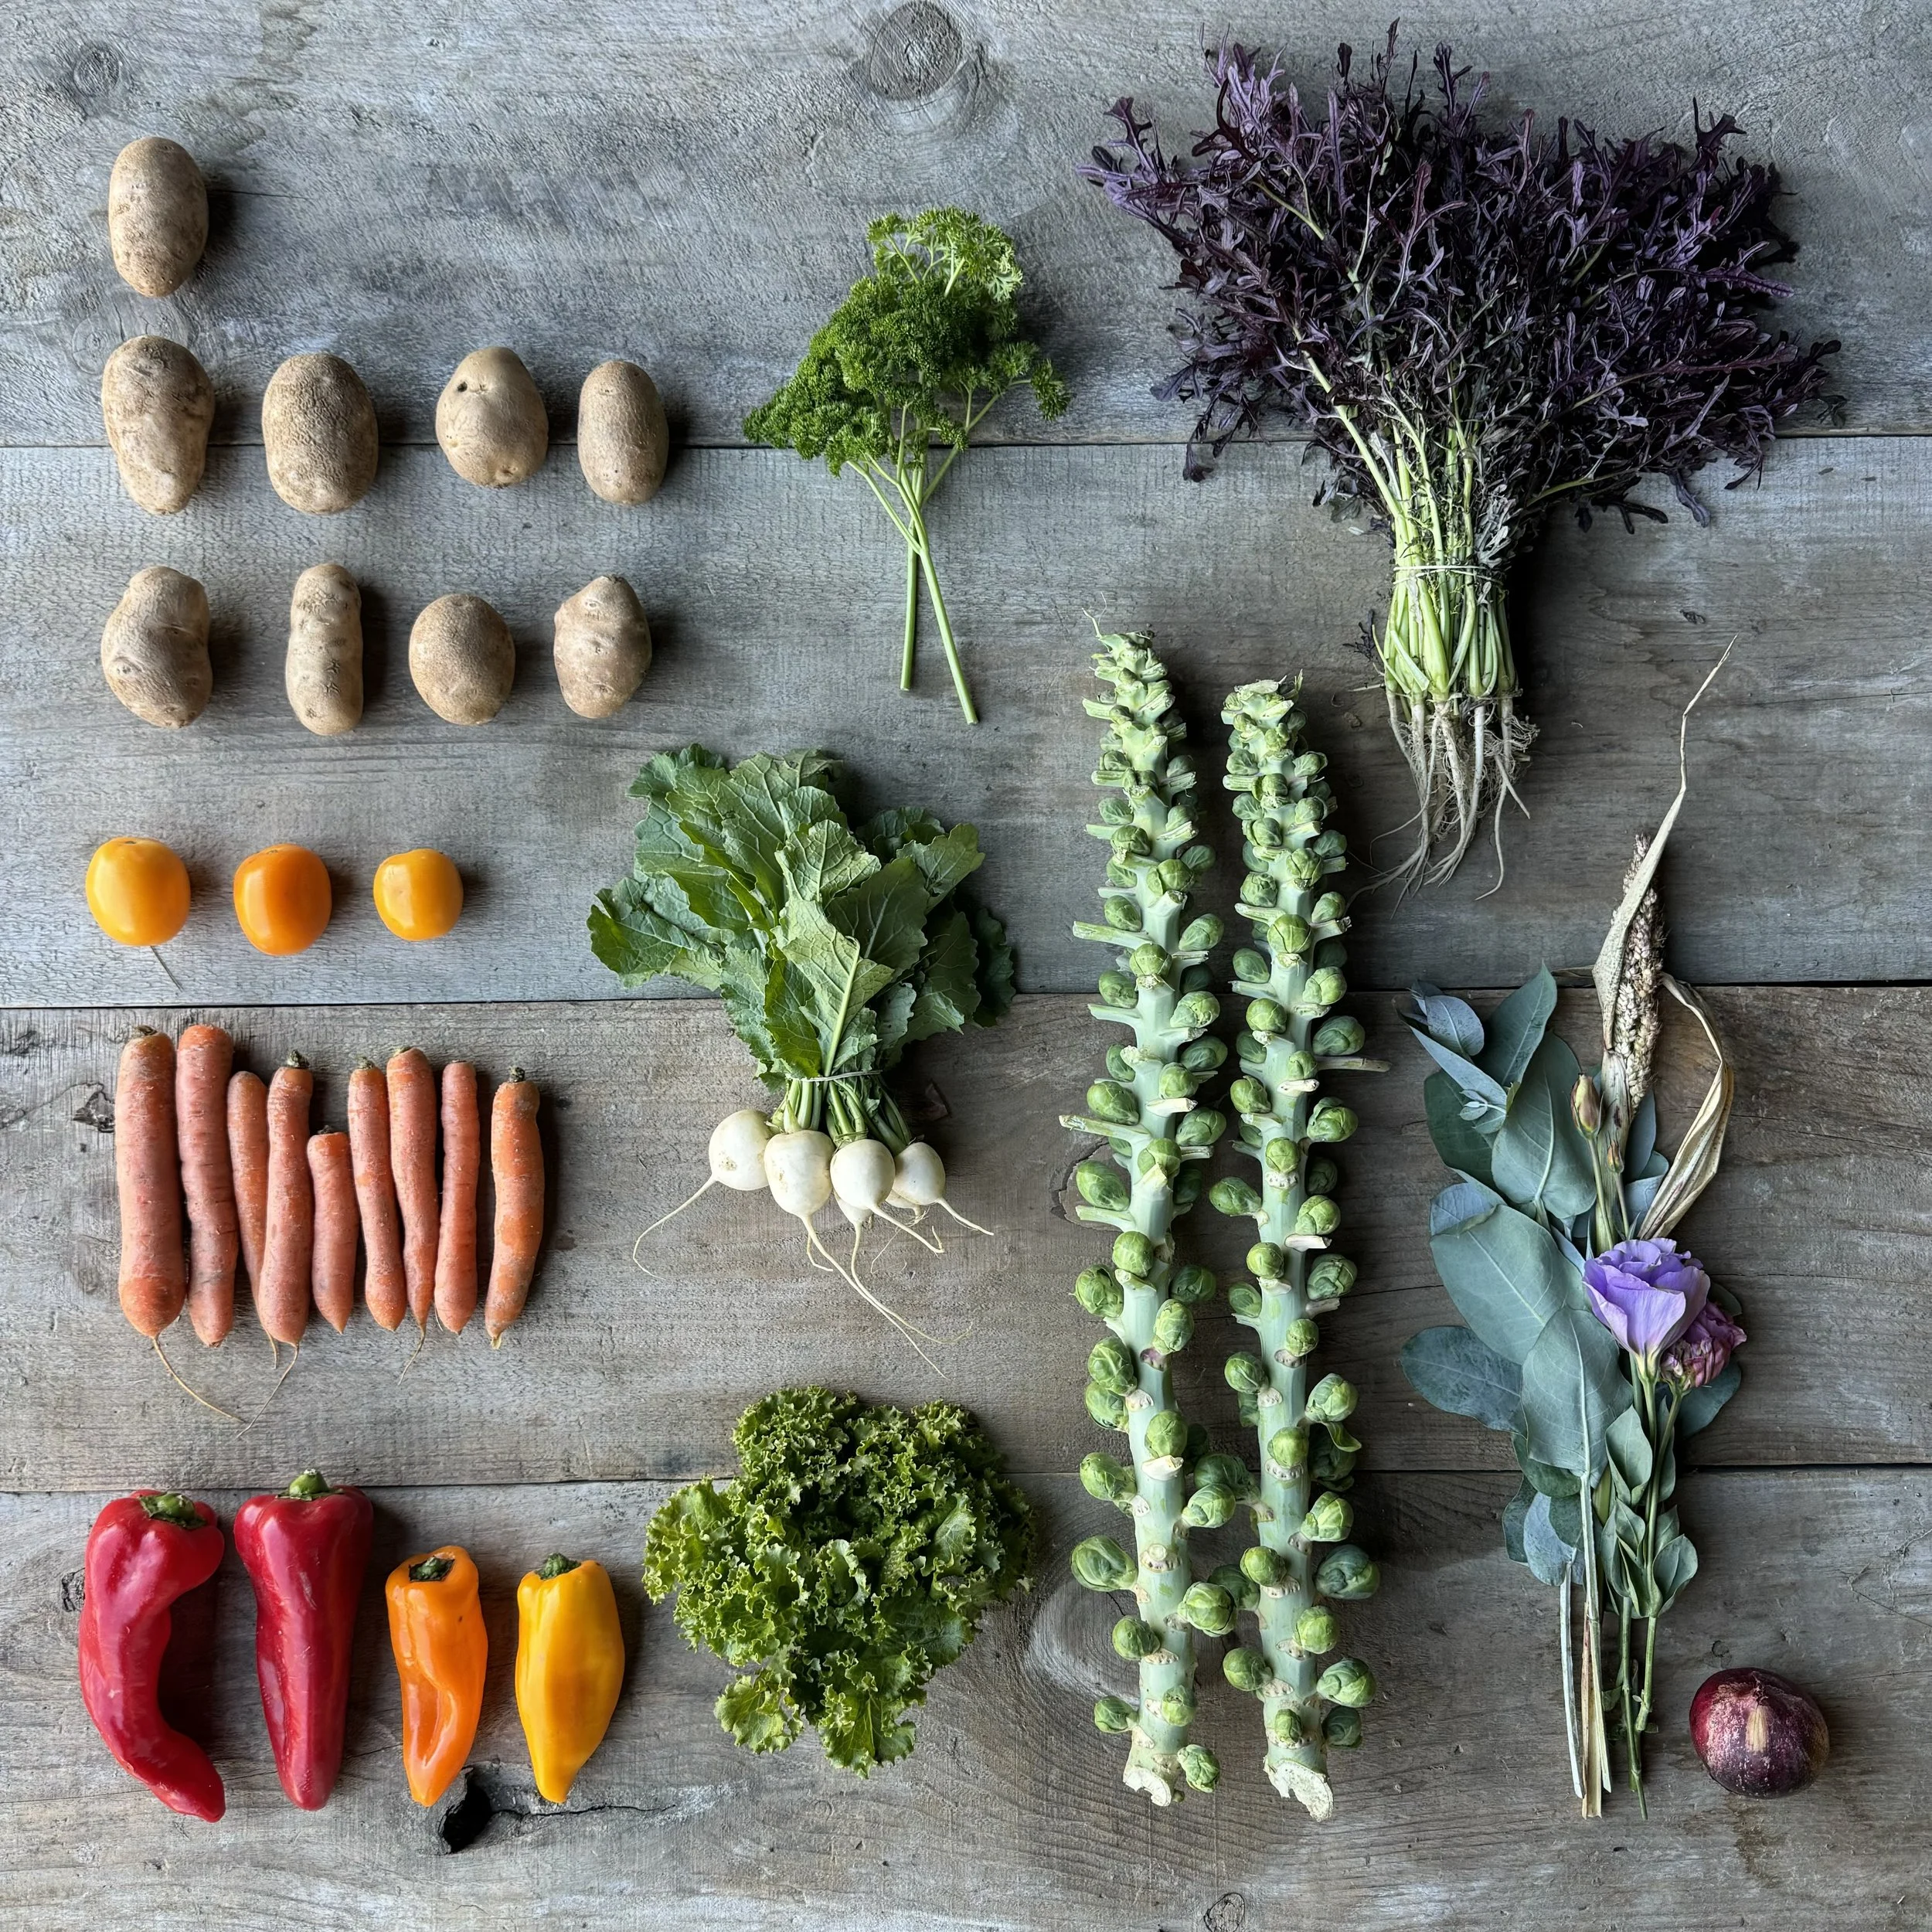
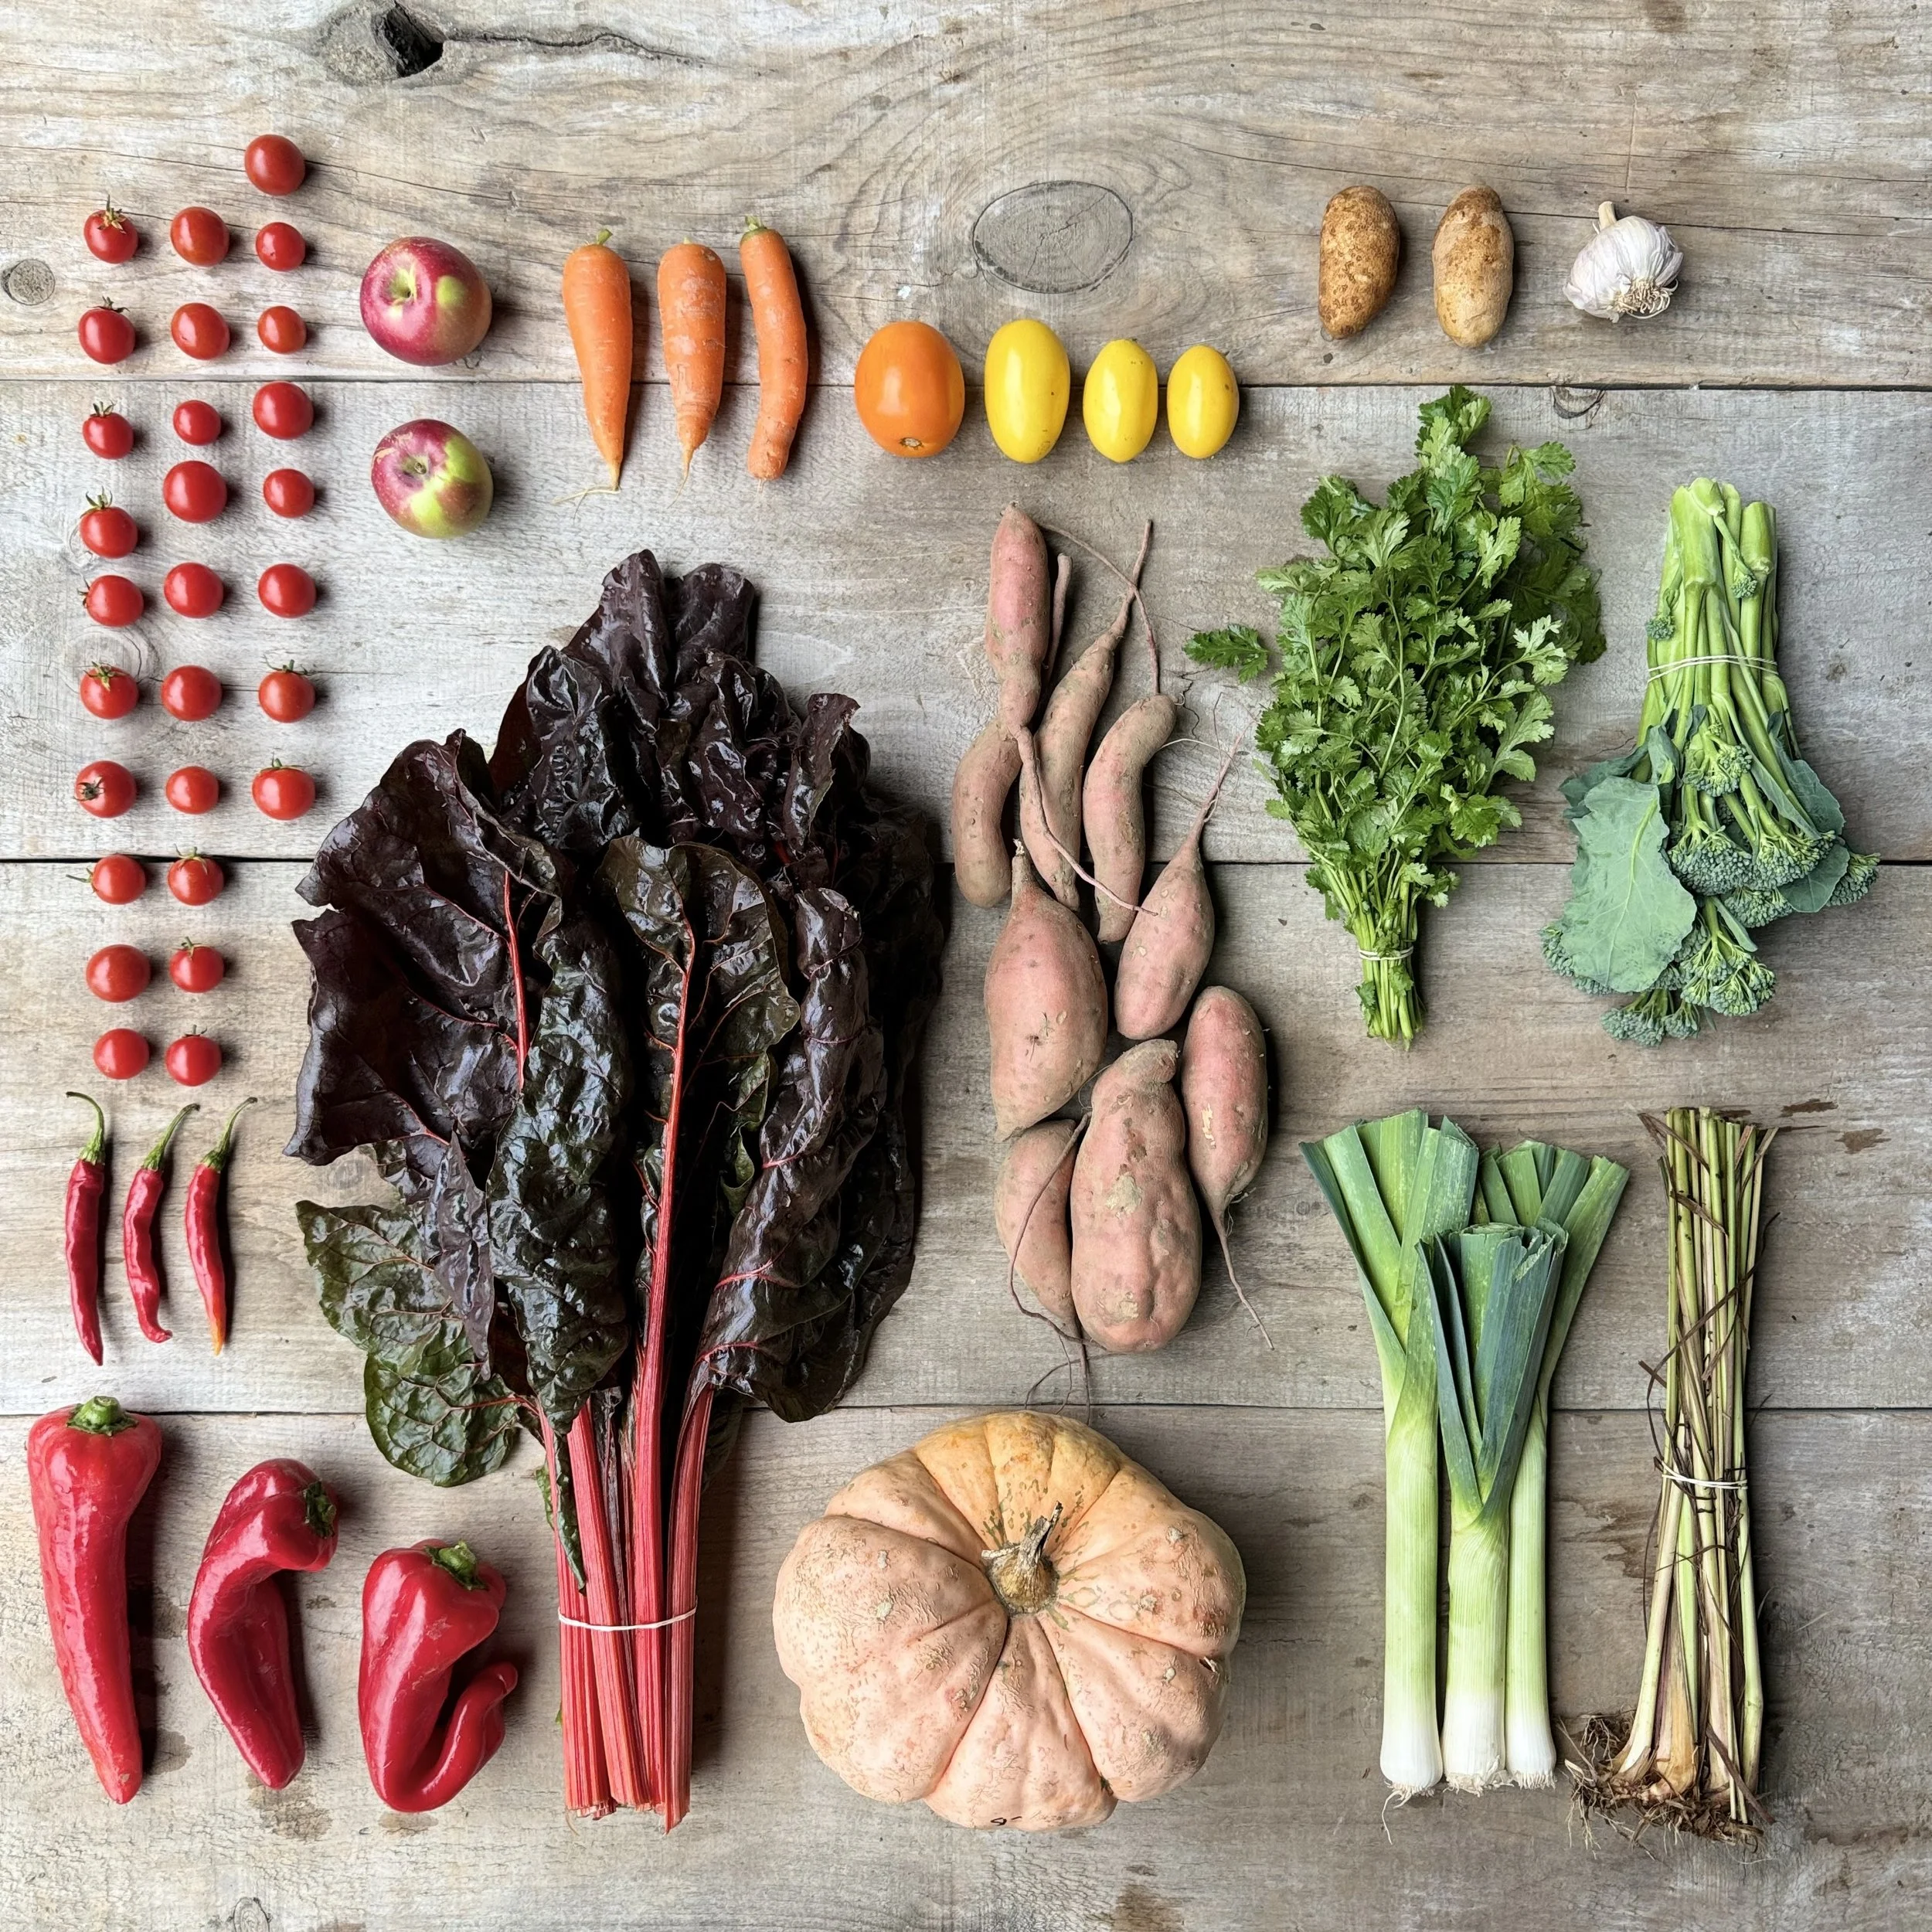
 CHERRY TOMATOES - CARMEN PEPPERS -  SHISHITO PEPPERS - SWEET HABANADA PEPPERS - ROMA TOMATOES - CORN - NAPA CABBAGE - ONION - FLAT PARSLEY - EGGPLANT - CARROTS
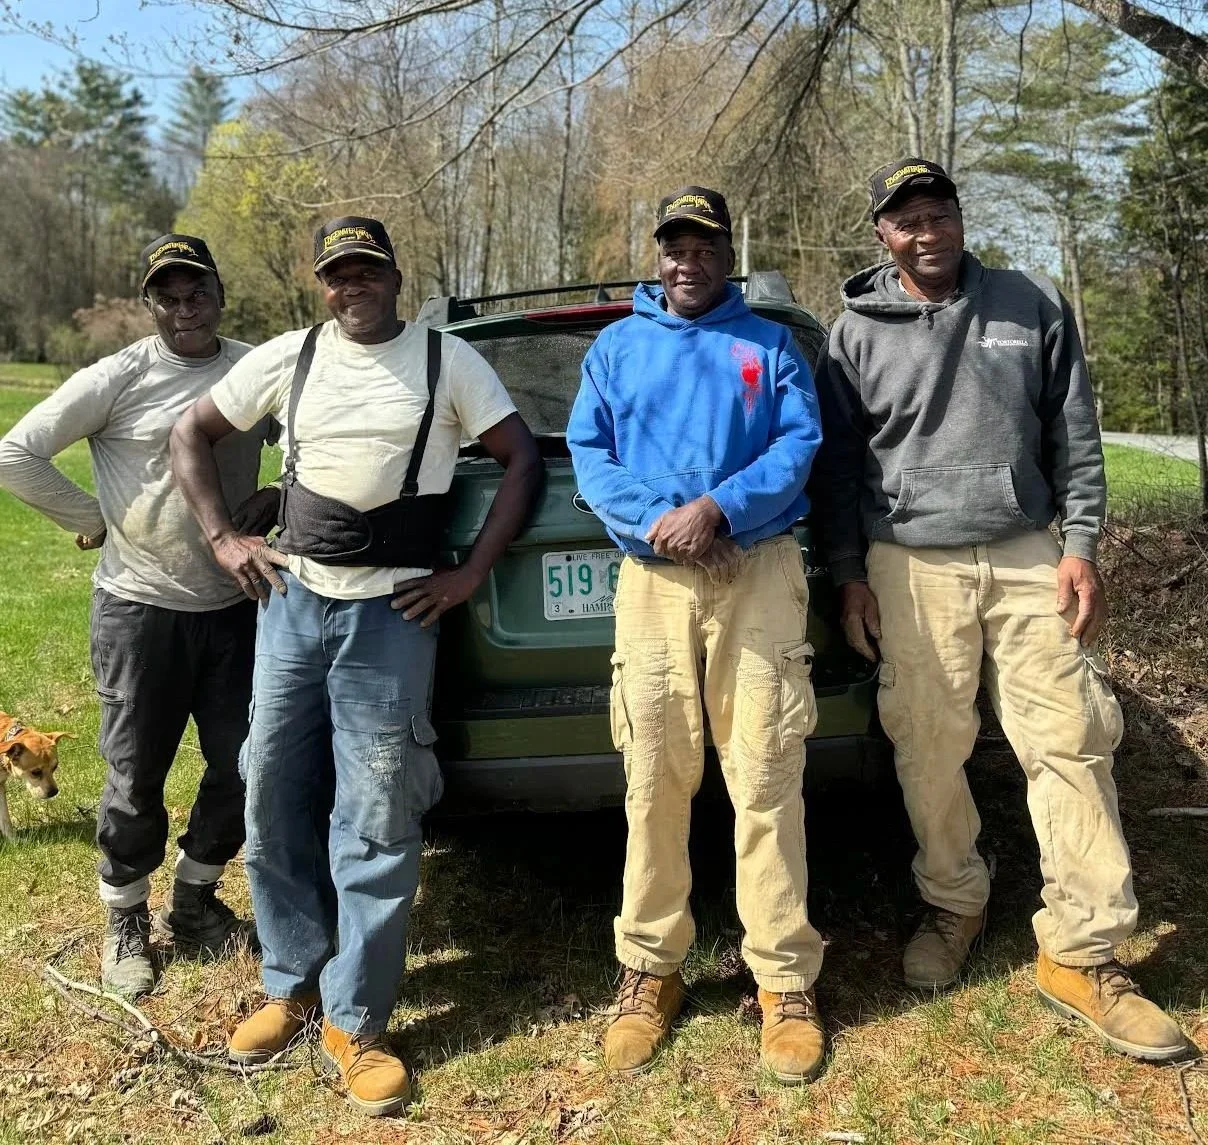
EDGEWATER update:

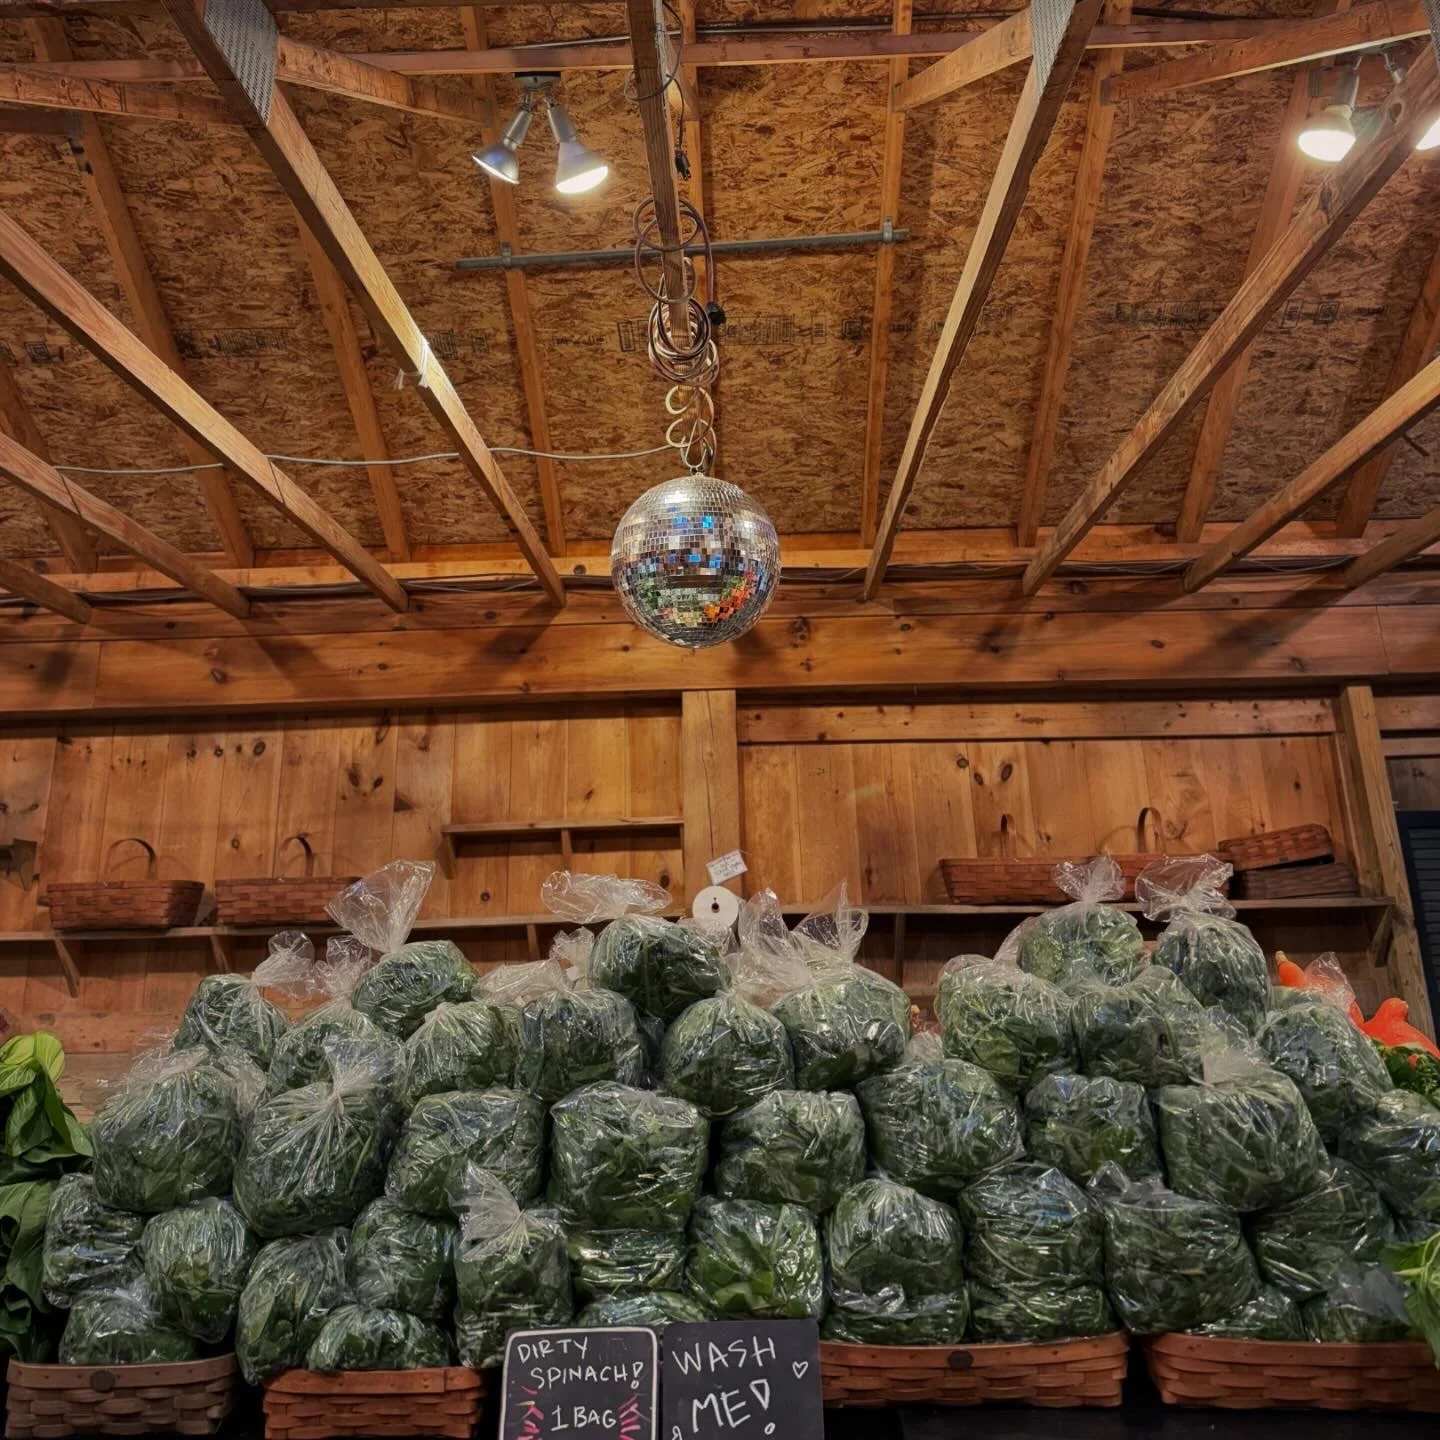
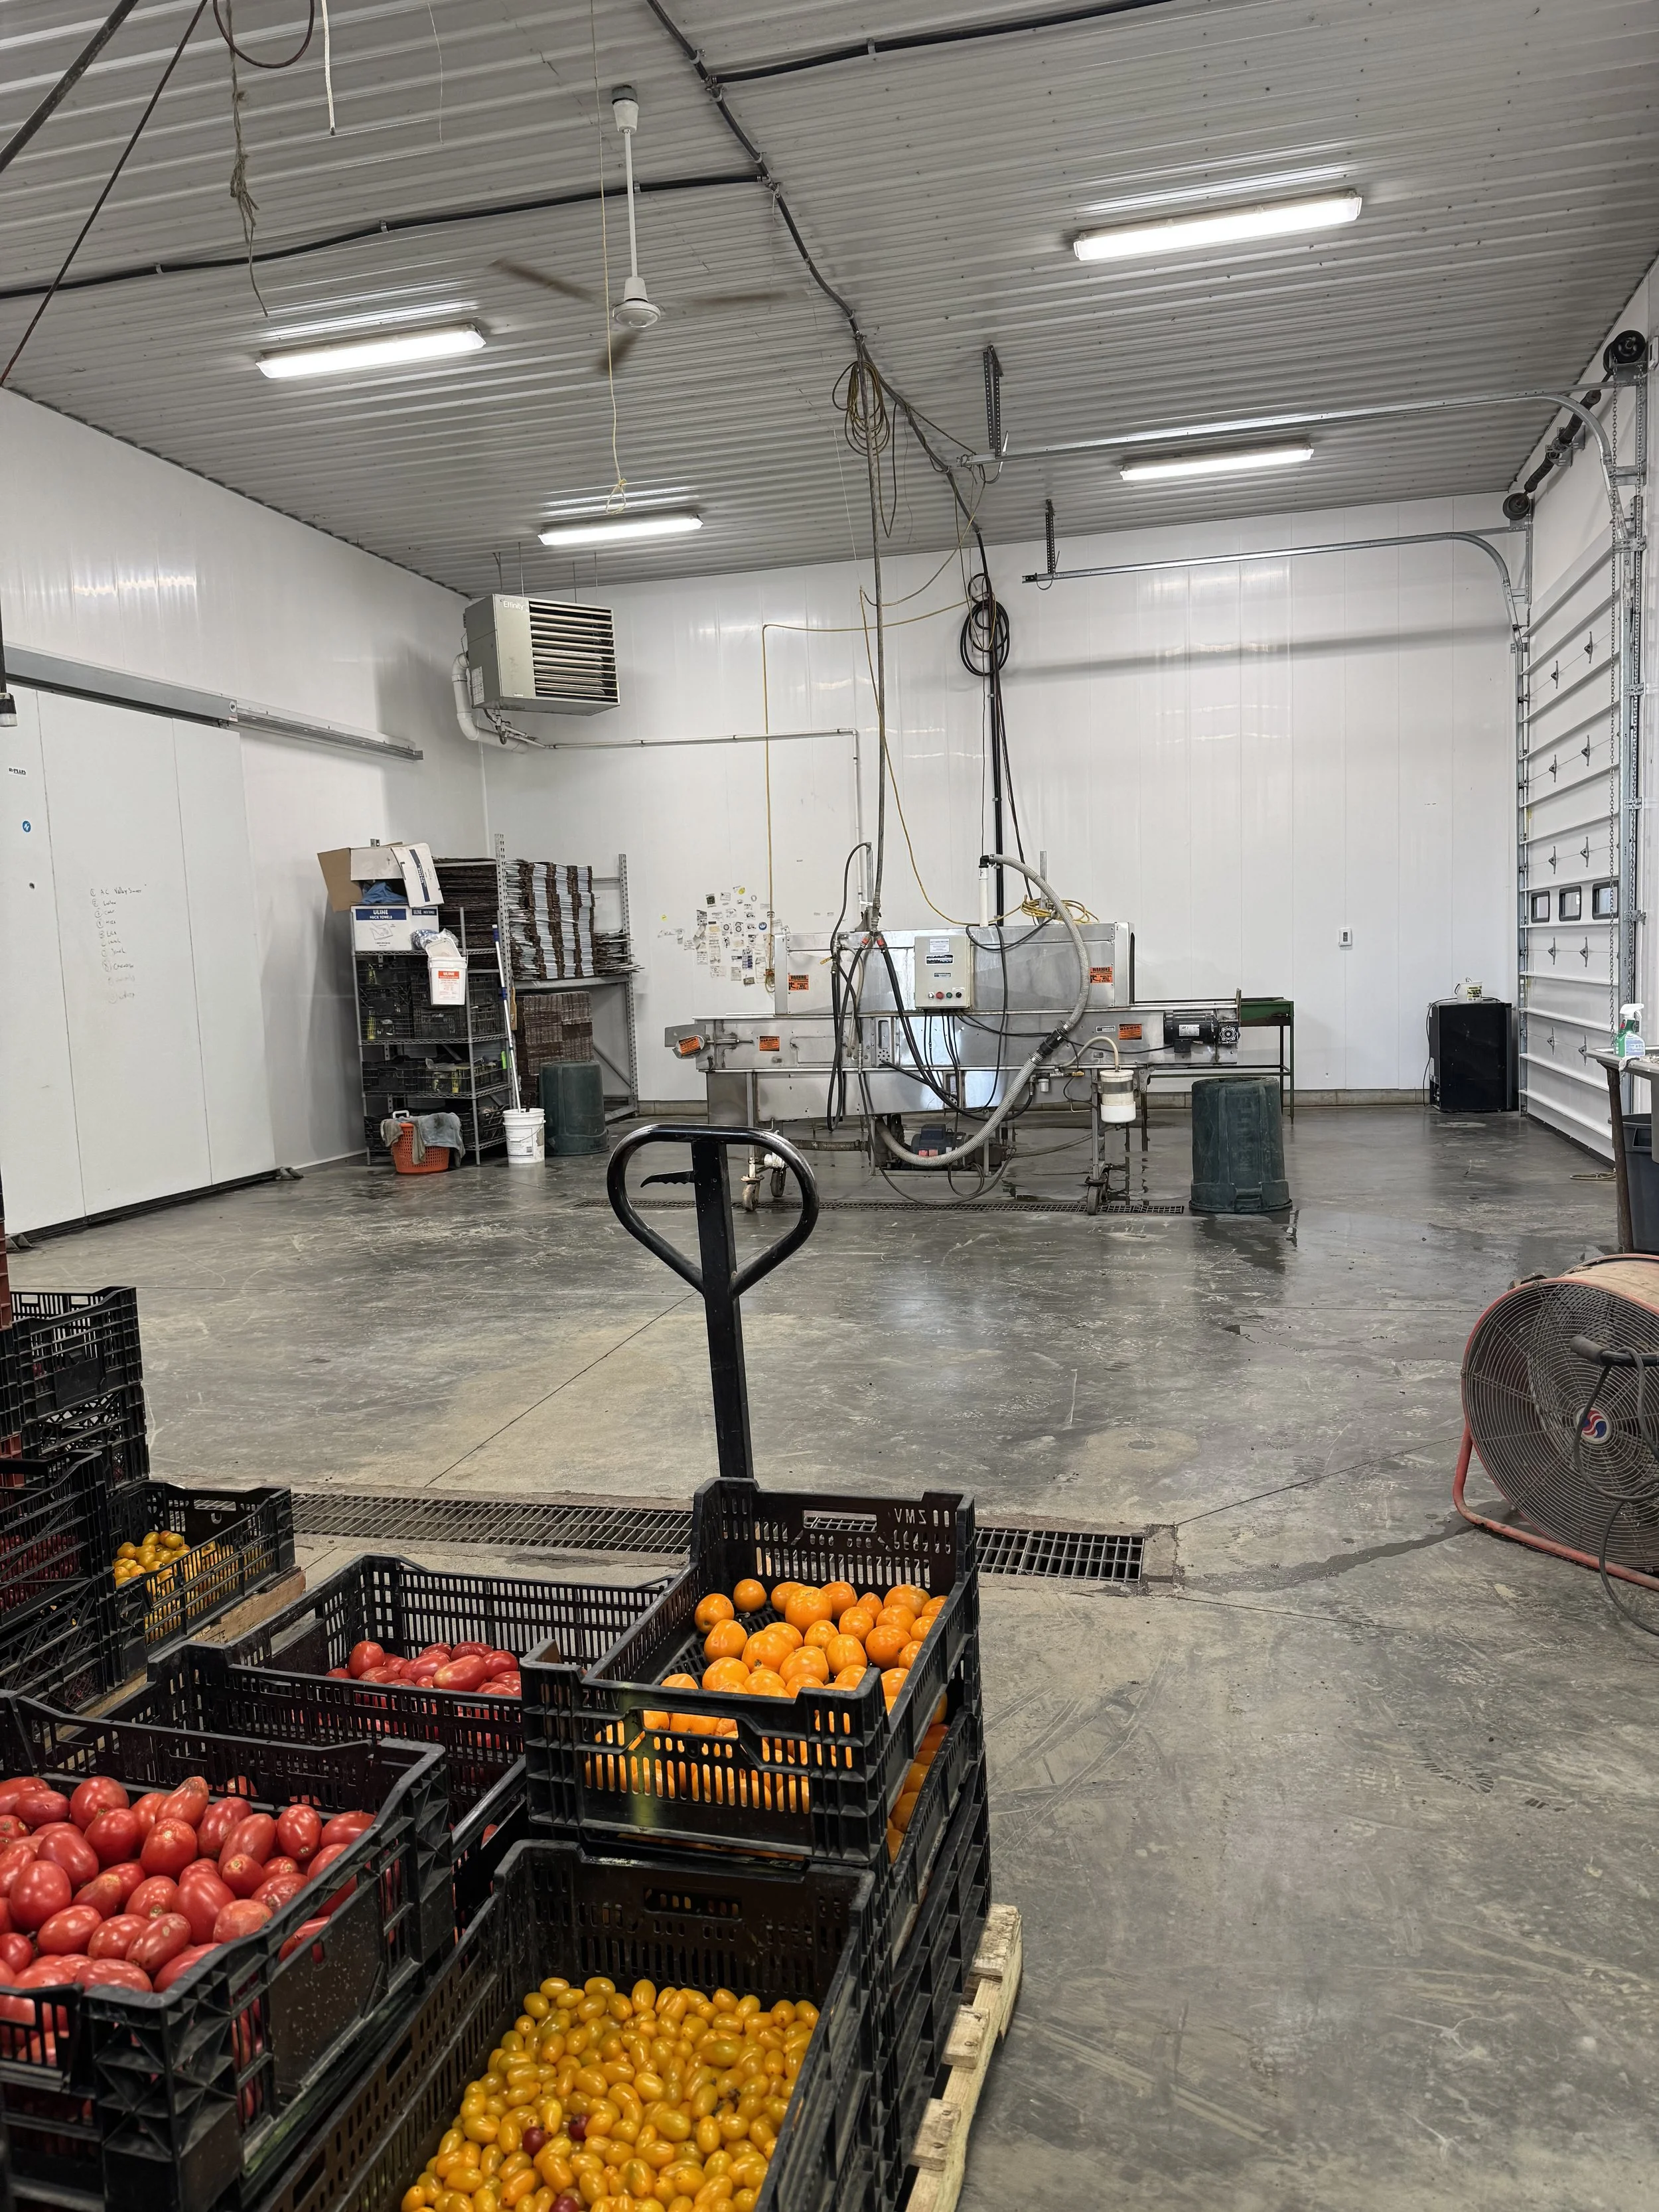
This update is but a tiny paragraph to make room for the most important thing you do this week with your maters,  your parsley, and your eggplant: enter EGGPLANT PARM, thanks Mitchell!  But before we get into the recipes, all i gotta say is that our field crew RALLIED SO HARD the past couple of days getting the packshed in order for our Triennial FSMA (NH Food safety) inspection.  I am so proud of this team- everyone came together and made that packshed sparkle.  And now the concrete floor of said pack shed is as smooth as glass and we should all take a break from farming to live out our actual fantasies of roller disco royalty… the farm already owns its own disco ball -every farm needs one- now we just have to locate some roller skates.

SEE PICS BELOW FOR PROOF OF ROLLER SKATE READY FLOORS
FARMY FOODIE PRO-TIPS:

The following recipe is crafted specifically for this week’s CSA by our friend and hyper local chef (he lives just up the road), Mitchell Davis.  if you are curious about alllll the recipes he has to offer, check out his substack:

Eggplant Parm

Serves 4 to 6

Although making eggplant parm can be a bit of a production, it’s worth the effort. And you can use whatever convenience foods (jarred sauce, shredded cheese, etc.) you’ve got to make it simpler. But since this week you’ve been given both eggplant and Roma tomatoes, I’m going to give you recipes for the whole shebang, sauce and all.

There are many different ways to assemble eggplant parm, thin slices layered with cheese and sauce in a casserole like lasagne, or thick slabs treated more like steak baked on a sheet pan. I like ‘em both, but tend to go the slab route at home because it requires less frying. Use leftovers to make eggplant parm sandwiches.

1 large Italian eggplant

Kosher salt

3 tablespoons extra-virgin olive oil

1/2 small white onion, finely chopped

1 clove garlic, minced

1 small hot pepper, seeded and minced, or pinch hot pepper flakes

2 pounds Roma tomatoes, diced

1/2 cup dry white wine or water, plus additional water as needed

1 tablespoon tomato paste

1 bay leaf

1 tablespoon chopped fresh oregano or 1 teaspoon dried

Freshly ground black pepper

All-purpose flour

2 large eggs

Japanese panko or regular bread crumbs (at least 2 cups)

Vegetable oil for frying

Handfuls of chopped fresh flat-leaf Italian parsley and/or fresh basil

6 to 8 ounces fresh mozzarella thinly sliced or shredded

1 ounce freshly grated Parmigiano Reggiano

With a vegetable peeler, remove strips of the eggplant peel lengthwise so that it ends up looking striped. Leaving some of the peel on adds flavor and texture; too much can become bitter. Remove the top (stem end) of the eggplant and slice the eggplant lengthwise into long, thick steaks, about 1/2-in thick. Salt each side of these slices and let sit on a plate for 20 minutes or so while you make the sauce.

In a medium frying pan, heat the olive oil. Add the onion and a pinch of salt and sauté for 3 or 4 minutes until softened. Add the garlic and hot pepper and continue cooking another minute or so. Add the chopped tomatoes and continue sautéing until they soften and give off some liquid, 5 to 7 minutes. Add the wine, tomato paste, bay leaf, and oregano. Turn down the heat and continue cooking for 10 minutes or so until the sauce comes together. As it simmers and the liquid evaporates, add 1/4 cup of water at a time to keep the consistency consistent. You want

it chunky but loose. Season with black pepper, taste, and adjust.

Meanwhile, get ready to bread and fry the eggplant. Place a pile of flour on a dinner plate. In a wide, shallow bowl, beat the two eggs with a couple of tablespoons of water and a pinch of salt until frothy. On a second dinner plate, pile some of the bread crumbs. Line these up on the counter in this order: flour, egg, breadcrumbs. In a large frying pan, heat about 1/4-inch vegetable oil over medium-high heat. Line a large platter or tray with paper towel. With

additional paper towel, wipe off any liquid that the salt has drawn to the surface of the eggplant slices. Dredge the first slice with flour and tap to remove excess. Dip in the egg wash and allow any excess to drain off. Lay the slice on the bread crumps, flip, and press the crumbs onto the eggplant, being sure to coat the entire surface evenly. Tap off any excess and lay the breaded slice in the hot oil. Repeat to fill the pan without crowding.

Fry until the first side is golden brown. You don’t want the pan too hot or the breading will burn before the center is soft. Flip and fry the second side until browned. When done, remove the eggplant to the paper-towel-lined platter. Repeat—noting the oil will get hotter as you continue frying, so you may want to remove the pan from the heat from time to time, and you may need to be replenish the oil for subsequent batches—until all of the eggplant is fried.

Preheat the oven to 350°F. Spread a spoonful or two of the tomato sauce on the bottom of a baking sheet (with sides). Arrange the fried eggplant in an even layer on the sauce in the pan.

Don’t worry if the pan isn’t completely covered. There can be some space between each slice. Spoon some tomato sauce over each slice. Scatter the chopped herbs over everything. Divide the mozzarella among the slices and then scatter the Parmigiano over that. Bake for 20 to 25 minutes, until bubbly and the cheese has melted and browned. A minute or two under the broiler will finish the trick.

Grilled Corn and Napa Cabbage Slaw with Tahini Dressing Serves 4 to 6

2 ears corn, shucked

2 tablespoons tahini

1 small clove garlic, minced

1/3 cup warm water

Juice of 2 lemons, finely grated zest of 1 lemon

2 tablespoons extra-virgin olive oil

Kosher salt

1/2 medium Napa cabbage, thinly sliced crosswise into shreds

2 medium to large carrots, peeled and shredded

1 carmen pepper, seeded and thinly sliced

Large handful flat-leaf parsley, coarsely chopped

Freshly ground black pepper

Directly over a gas flame, on a hot grill, or in a hot, dry cast-iron pan, roast the ears of corn, turning frequently, until the kernels are nicely charred. Let cool. With a sharp knife, slice the kernels off the cobs into a large mixing bowl. Set aside. In a pint jar with a tight-fitting lid, combine the tahini, garlic, water, lemon juice and zest, and a pinch of salt. Cover the jar and shake vigorously until blended. (Alternatively, you can use an immersion blender.) Adjust the consistency with additional water, if necessary, to get a smooth, creamy dressing.

Into the bowl with the corn, add the shredded Napa cabbage, shredded carrot, sliced pepper, and parsley. Add the dressing and a generous grind of pepper and toss. Taste, adjust the seasoning and toss again. Serve at room temperature or chilled.
CSA WEEK 13 (OH SO BELATED)

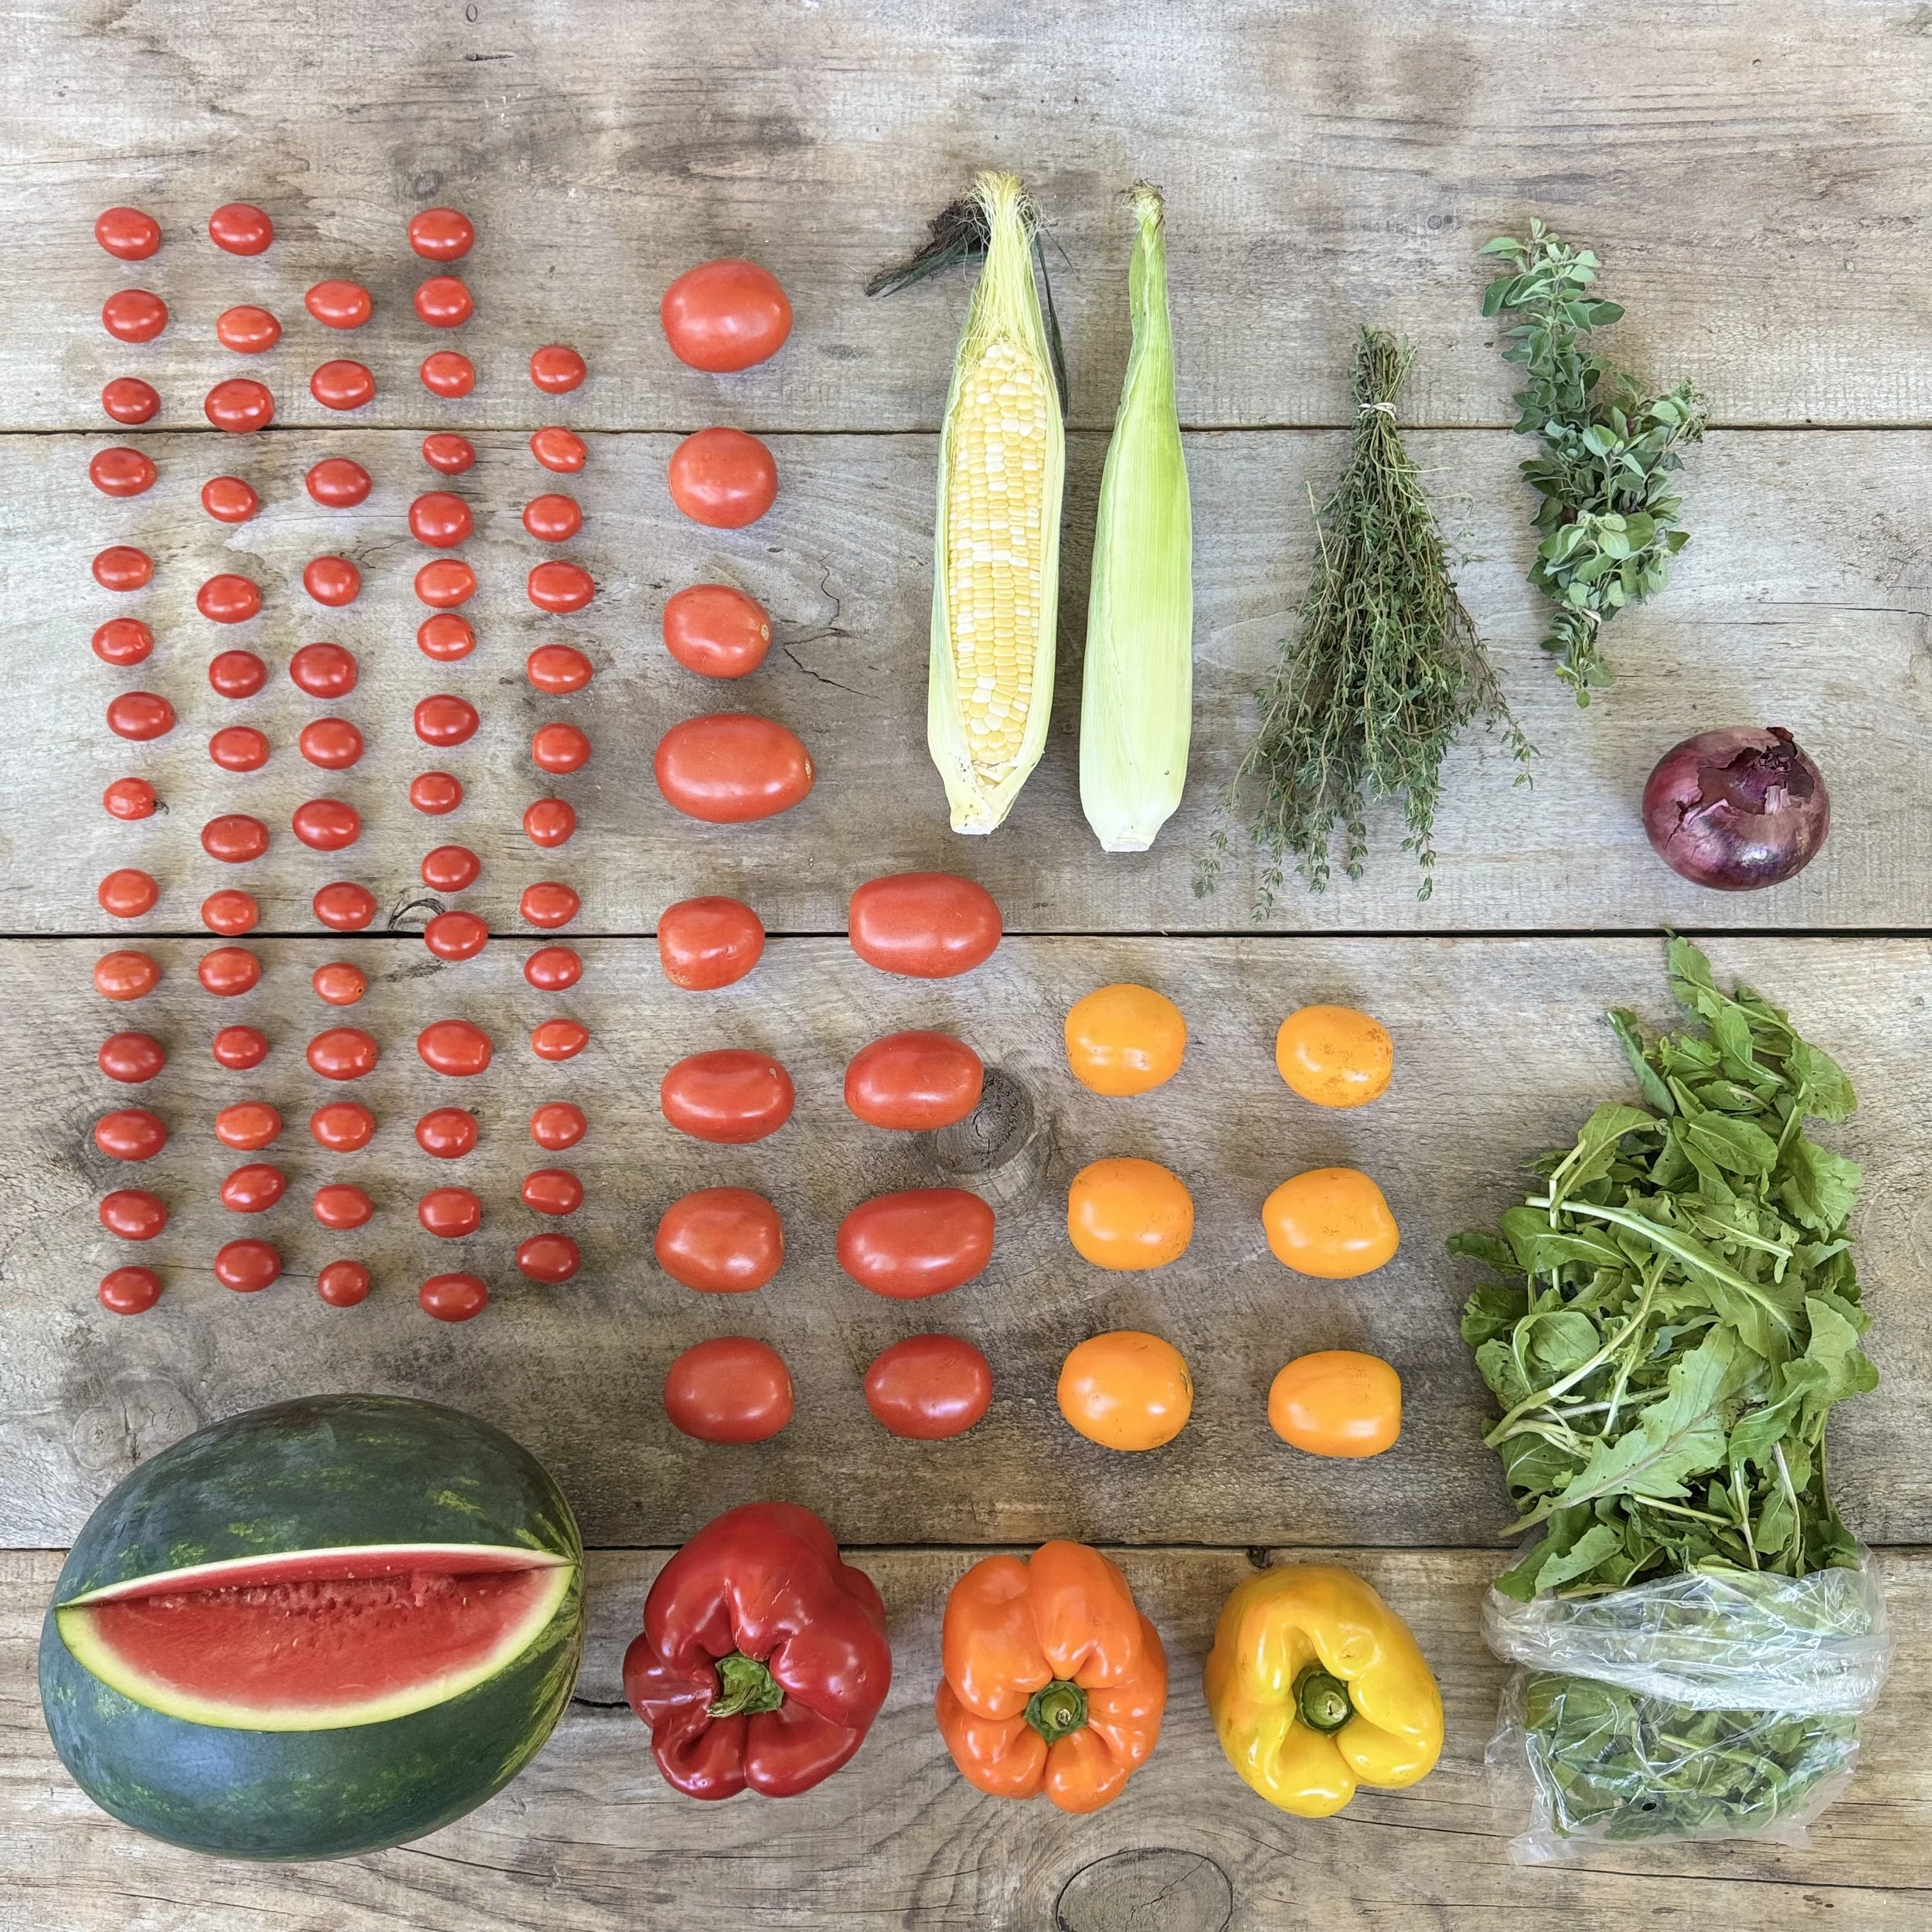
MELON - CHERRY TOMATOES - BELL PEPPERS - ROMA TOMATOES - CORN - 

ARUGULA - RED ONION - GARLIC - OREGANO - THYME

EDGEWATER update:

OK yall, I wouldn't say we are drowning in tomatoes, but it is pretty damn close to it.  These next two weeks are your moment for sauce prep and execution.  Hence the addition of oregano and thyme to your CSA.  Our field tomatoes- the Romas and Cherries- are dripping from the plants and our crew is picking them daily trying like hell to keep up with the crop.  There are literal towers of tomatoes crated and stacked in our wash pack barn, affectionately known as “the pack shed.”  During these times of tetris tomato mayhem it is crucial to remind ourselves that this is such a fleeting reality as tomato season is brief.  If you are feeling overwhelmed by the tomatoes jump right into the recipes below, and just do what Mitchell does.  Make sauce, make ferments, preserve away, and enjoy when YOU are ready. 

Also so noteworthy and so sweet is the watermelon!  

Whoop whoop! I’ve been waiting all season for watermelon week.  Enjoy!

FARMY FOODIE PRO-TIPS: The following recipe is crafted specifically for this week’s CSA by our friend and hyper local chef (he lives just up the road), Mitchell Davis.  if you are curious about alllll the recipes he has to offer, check out his substack:


Fresh Tomato Sauce Makes

about 1 quart

This is a simple sauce I use for pasta or pizza or in any dish that calls for tomato purée or passata. (I use leftover tomato sauce in Indian curries, for example.) You can use any tomato—cherry, grape, heirloom, or best, Roma or plum tomatoes, which are the meatiest. I like to keep the same color tomatoes together, so reds with reds, yellows with yellows and oranges. If you need to add liquid for consistency, you can use anything from water to dry white wine to vegetable or chicken stock. The optional tomato paste or soy sauce (!) adds umami, while the optional sugar adds sweetness when you aren’t making this sauce in the peak tomato season. A vegetable mill, blender, or food processor help achieve the best texture, but you can also just cook things down and keep them a little lumpy for a sauce that works particularly well for short pasta shapes

2 to 3 tablespoons extra-virgin olive oil

1 medium white or red onion, finely chopped

Kosher salt

1 small clove garlic, minced

Pinch hot pepper flakes

1 tablespoon tomato paste or 1 teaspoon soy sauce (optional)

1 teaspoon sugar (optional)

2 pounds or more ripe tomatoes, diced

1/3 to 1 cup water, dry white wine, vegetable or chicken stock, or a combination

1 bay leaf

1 tablespoon chopped fresh thyme, oregano, rosemary, or a combination

Freshly ground black pepper

In a medium stockpot, heat the olive oil over medium-high heat. Add the onion and a pinch of salt and sauté for 5 minutes or so until soft. Add the garlic and sauté another minute until fragrant. Stir in the pinch of hot pepper flakes and the tomato paste and sugar, if using, and cook another 30 seconds. Add the diced tomato and cook, stirring,

until the flesh begins to break down and the tomatoes give off their liquid. Add enough of the additional liquid to allow the tomatoes to simmer—you’ll need more or less depending on how juicy your tomatoes are. Add the bay leaf and fresh herbs, cover the pot, turn down the heat to low, and simmer for 5 to 7 minutes until everything softens and comes together. Uncover, remove the bay leaf, and, if desired, purée the sauce in a food mill, food processor, or blender (standard or immersion) until smooth, adding more liquid if necessary to achieve the right consistency. Taste and adjust the seasoning with salt and fresh ground black pepper.

Bell Pepper Sauce

I use exactly the same recipe and technique as the tomato sauce (above) to make a delicious and unexpected sweet pepper sauce for pasta. Just substitute 2 large red, yellow, or orange bell peppers and a small hot pepper, seeded and chopped, for the tomatoes and pepper flakes in the recipe above. Because peppers are less juicy, you

will need all of the liquid called for and maybe more. If you have any Turkish pepper paste, substitute it for the tomato paste, but tomato paste works fine, too. Finish the sauce by adding the pasta in the pan and tossing with a pat of butter and plenty of freshly grated Parmigiano-Reggiano.

Fermented Tomato Sauce

By lacto-fermenting tomatoes, you develop and concentrate their flavor. You can either separate out the liquid and pulp to use separately as condiments, or purée them together to make a sauce that I use to add a jolt of flavor to things like the Fresh Tomato Sauce, above. Juicier tomatoes are preferable, but any will do, and a combination is best.

Fresh tomatoes, diced

Kosher salt

1 small clove garlic, sliced

Weigh the tomatoes you have—grams make the math easier—and place in a mixing bowl. Add 2% of the weight of tomatoes in salt—so if you have 500g of tomatoes, you’ll add 10 grams of salt—and the garlic and toss to evenly distribute. Pack the tomatoes tightly into mason jars, pressing the pulp down to help release rliquid. Before you put

them aside to ferment, you will need enough liquid to cover the tomatoes. I let them sit uncovered in the jars on the counter for an hour or so to allow the salt to do its work. Press the tomatoes again. If they aren’t submerged, you can add a 2% saltwater solution to help, but do so sparingly so as not to dilute the flavor.

To keep the pulp submerged and prevent mold development, weigh the tomatoes down with a fermenting weight or a small resealable bag filled with water. Cover the jars and set in cool, dark place for about a week, until they have fully developed. If you don’t have fermenting lids, which release gas as it develops, you will have to burp the jars
once a day by simply opening and resealing them. When satisfied with the fermented flavor—taste the liquid to be sure—you can strain out the liquid and purée the pulp separately or you can purée everything together


CSA WEEK 12

P i c k l i s t

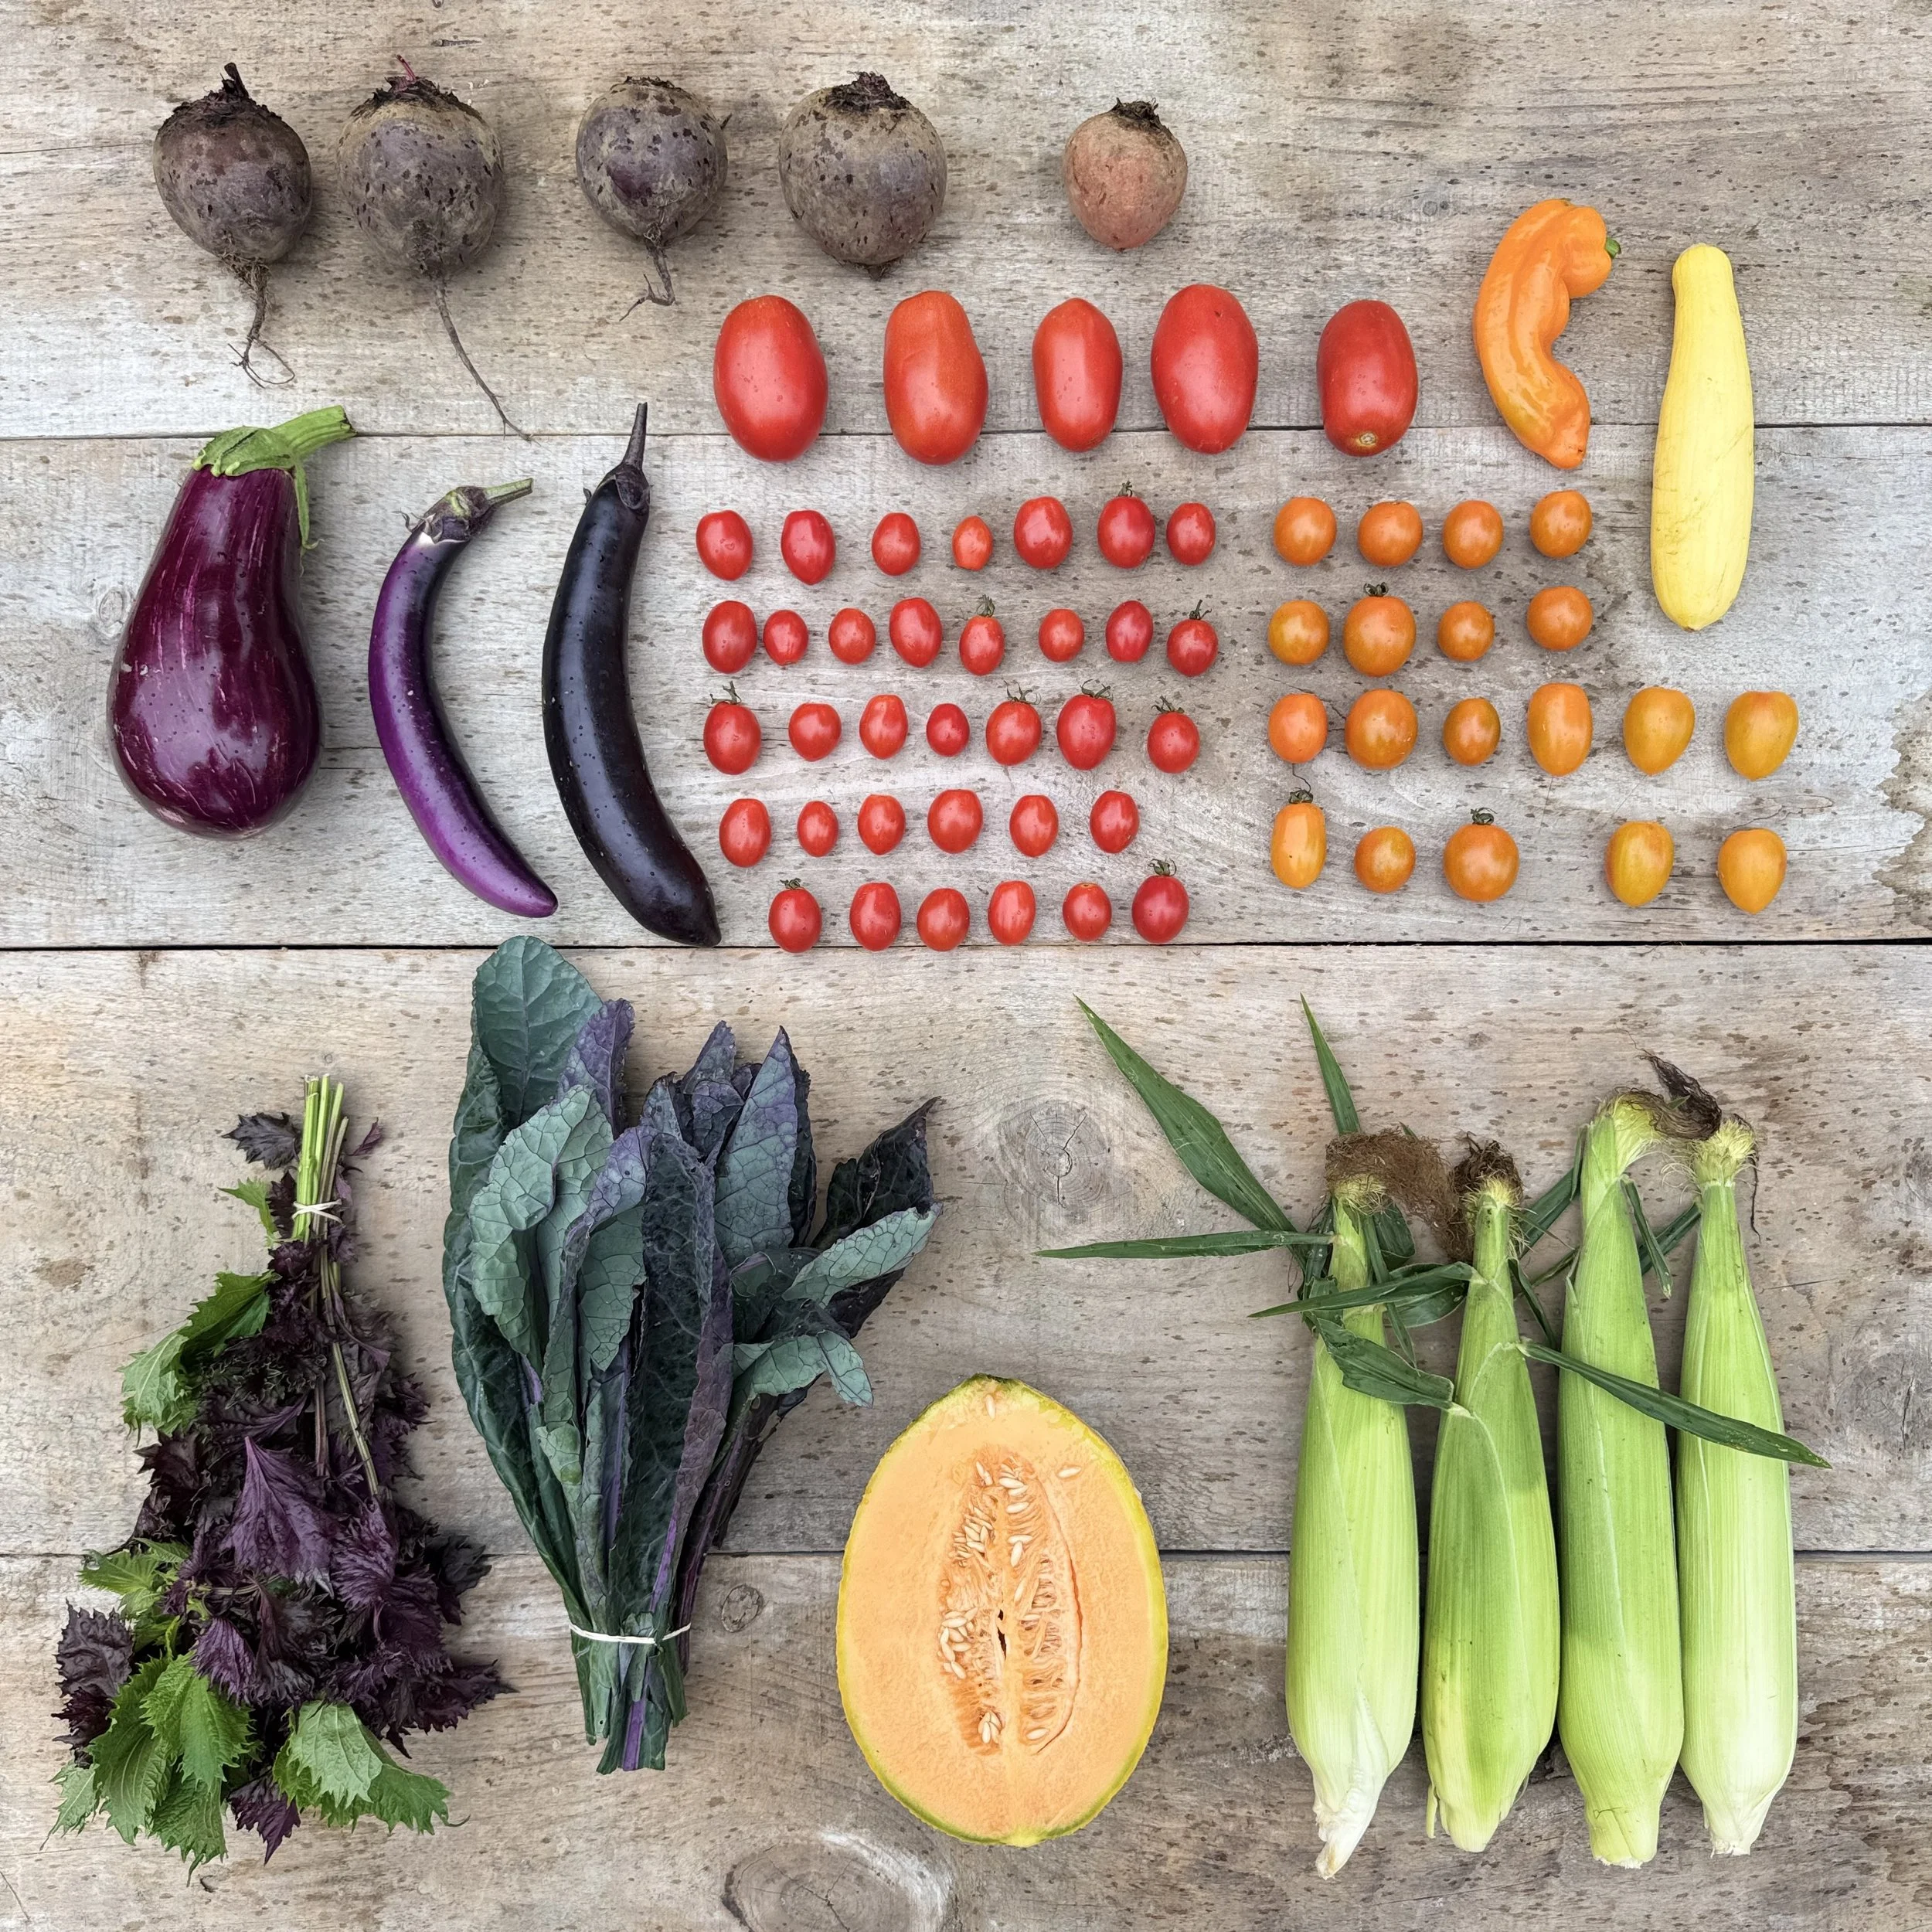
MELON - CHERRY TOMATOES - CARMEN PEPPERS - SHISO -

ROMA TOMATOES - CARMEN PEPPER - BEETS - SUMMER SQUASH -

DAZZLING BLUE KALE - EGGPLANT - CORN

EDGEWATER update:

After being totally immersed in a world of Dolly Parton this week, I can finally ease back into listening to any other music by any other name.  That said, her songs are never too far from the dial as there is nothing better than picking crops with Ms. Parton as our soundtrack.  But there are in fact other musicians out there, and it is Beyonce's Birthday on friday, SO, Virgos Groove it is.  What does music have to do with farming? Everything.  Listening to the natural sounds of birds and crickets and wind be damned! JK, I love the birds and crickets and wind, but come September we do need a little bit more then nature sounds to keep us MOVING. Because wow our bodies are feeling that all season hustle!  Gotta keep the vibes high during this final stretch of late summer.  Let's pump that volume, fill bushel upon bushel, wash up some greens, and shake whatever you got that your mother gave you...

In the fields the ABUNDANCE JUST PEAKED.  Tomatoes, peppers and melons are ripening daily, the greens continue to pump out new leaves and I swear the winter squash just doubled in size.  September & October are the months to really hone in on those winter eating goals.  Have you dipped your toes in tomato sauce yet? Whether this is a metaphor for preserving your food or a barefoot contessa way of life, the action remains the same, you need to pick up a box or two of Romas from the farmstand and think winter.  Honestly with my own overwhelm of everyday hustle, I am taking a real hiatus from canning and have decided to just freeze the maters.  A simple ziplock bag of frozen Roma tomatoes now means soup in January.  Remember people, winter is long and a warm belly is best.

Speaking of bellies and the turn of the season, we got to take a moment and pep talk my favorite Fall sport, our FALL CSA.  The Fall CSA is a way to keep our fave community eating all the good crops even after the farmstand shuts down mid-October. From October through November, there is still so much to harvest, so much to make, and so much to enjoy.  Also, it’s a fun scene where people gather and high five and talk recipes and stare at towers of brussel sprouts under the glow of the CSA disco ball. I just love it. To sign right on up head here:

And now the deets:

  •  6 weeks of real hearty Fall abundance.  Think: root veggies, winter squash, greens, herbs, the last of the peppers and tomatoes,  etc..).  Newsletter + recipes also included. COST: $240

  • Pick up location is on farm in Plainfield NH 

  • PICK UP TIME: 4:30-6pm

  • PICK UP DAY: WEDNESDAYS! With one special pre thanksgiving pick up, on Tuesday November 24th

  • BEGINS WEDNESDAY OCTOBER 21/ ENDS TUESDAY NOVEMBER 24th (you must sign up for the 6 consecutive weeks)

  • Sign up at the FARMSTAND (cash or check) or ONLINE at www.edgewaterfarm.com

FARMY FOODIE PRO-TIPS:

The following recipe is crafted specifically for this week’s CSA by our friend and hyper local chef (he lives just up the road), Mitchell Davis.  if you are curious about alllll the recipes he has to offer, check out his substack:
Indian Eggplant in Peanut Sauce

Serves 6

A recipe developed by my friend Madhur Jaffrey to echo a classic Hyderabadi vegetarian dish without the fuss, I’ve been making my own version of this tasty eggplant dish for years. It works with both Asian and Italian varieties of eggplant. Don’t let the longish list of ingredients intimidate you; they are mostly spices, whole and ground, which you likely have. Fresh curry leaves are available in Asian markets. I can almost always find them in the Upper Valley at Stern’s Produce in White River Junction, VT, or at the Asian Super Store and Bangkok Asian Market, both in Lebanon, NY, where you’ll also be able to find the spices. If you can’t find them, use a handful of Thai basil.

2 pounds Asian or Italian eggplant

1/2 cup olive, peanut, or vegetable oil

Salt

1 tablespoon peanut butter

1 tablespoon tahini or Chinese sesame paste

1 tablespoon tomato paste

2 tablespoons dark brown sugar

1 1/2 teaspoons tamarind paste, pomegranate molasses, or balsamic vinegar

1/2 teaspoon brown mustard seeds

1/2 teaspoon cumin seeds

8 to 10 fresh curry leaves or a handful of Thai basil

1 large onion, finely chopped

1 small knob fresh ginger, grated

1 large clove garlic, minced

1/4 teaspoon ground turmeric

1 teaspoon ground coriander

1 teaspoon ground cumin

1/2 teaspoon Kashmiri or other chili powder

Preheat the oven to 400°F. Line a baking sheet with parchment. Bring a kettle of water to a boil. Cut the eggplant into 1 1/2-inch pieces. Place in a bowl, toss with 5 tablespoons of the oil and a teaspoon of salt until coated. Transfer to the baking sheet and roast about 20 to 25 minutes, until soft and lightly browned.

In a small bowl, combine the peanut butter and tahini. Whisk in 1 cup boiling water to form a smooth paste. Add the tomato paste, brown sugar, tamarind, and another 1 cup of boiling water, stirring to combine. Set aside.

Set a large frying pan over medium-high heat. Add the remaining 3 tablespoons oil. When hot, add the mustard seeds. In a few seconds, when they begin to pop, add the cumin seeds. Add the curry leaves (if using Thai basil, you’ll add that later) and the onions and sauté for about 4 or 5 minute to soften and lightly brown. Lower the heat and keep cooking another 3 or 4 minutes. Add the ginger and garlic and cook another minute or two. Add the turmeric, coriander, cumin, and chili powder, and cook another minute. Add 1 more cup of boiling water and scrape of anything stuck to the bottom of the pan. Simmer for 5 or 6 minutes.

Now add the peanut mixture and simmer for 5 minutes. Add the roasted eggplant, Thai basil, if using, and a generous pinch of salt and continue simmering for another 10 minutes or so until the sauce thickens and the eggplant softens to a silken texture.


Refrigerator Pickled Beets

Makes 1 quart

2 pounds beets, trimmed

1 red onion, thinly sliced

1 cup white vinegar, red or white wine vinegar, rice vinegar, tarragon vinegar or a combination

1/2 cup sugar or 3/4 cup maple syrup

1 teaspoon kosher salt

1 cinnamon stick

6 whole cloves

Preheat the oven to 400°F. Wrap the beets in aluminum foil and roast for 45 to 60 minutes, depending on size and age, until soft; the tip of a knife should slide easily into the flesh. Remove from the oven and cool for 15 minutes or so. When you can handle them, peel and slice 1/4- inch thick. In a clean quart jar, layer the sliced beets with the sliced red onion.

In small saucepan, combine the vinegar, sugar, salt, cinnamon stick, and cloves with 1/2 cup water (use only 1/4 cup water if using maple syrup). Bring to a boil and while hot, pour over the beets to fill the jar. Allow to cool, cover tightly and refrigerate 3 or 4 days before consuming.


CSA WEEK 11

P i c k l i s t

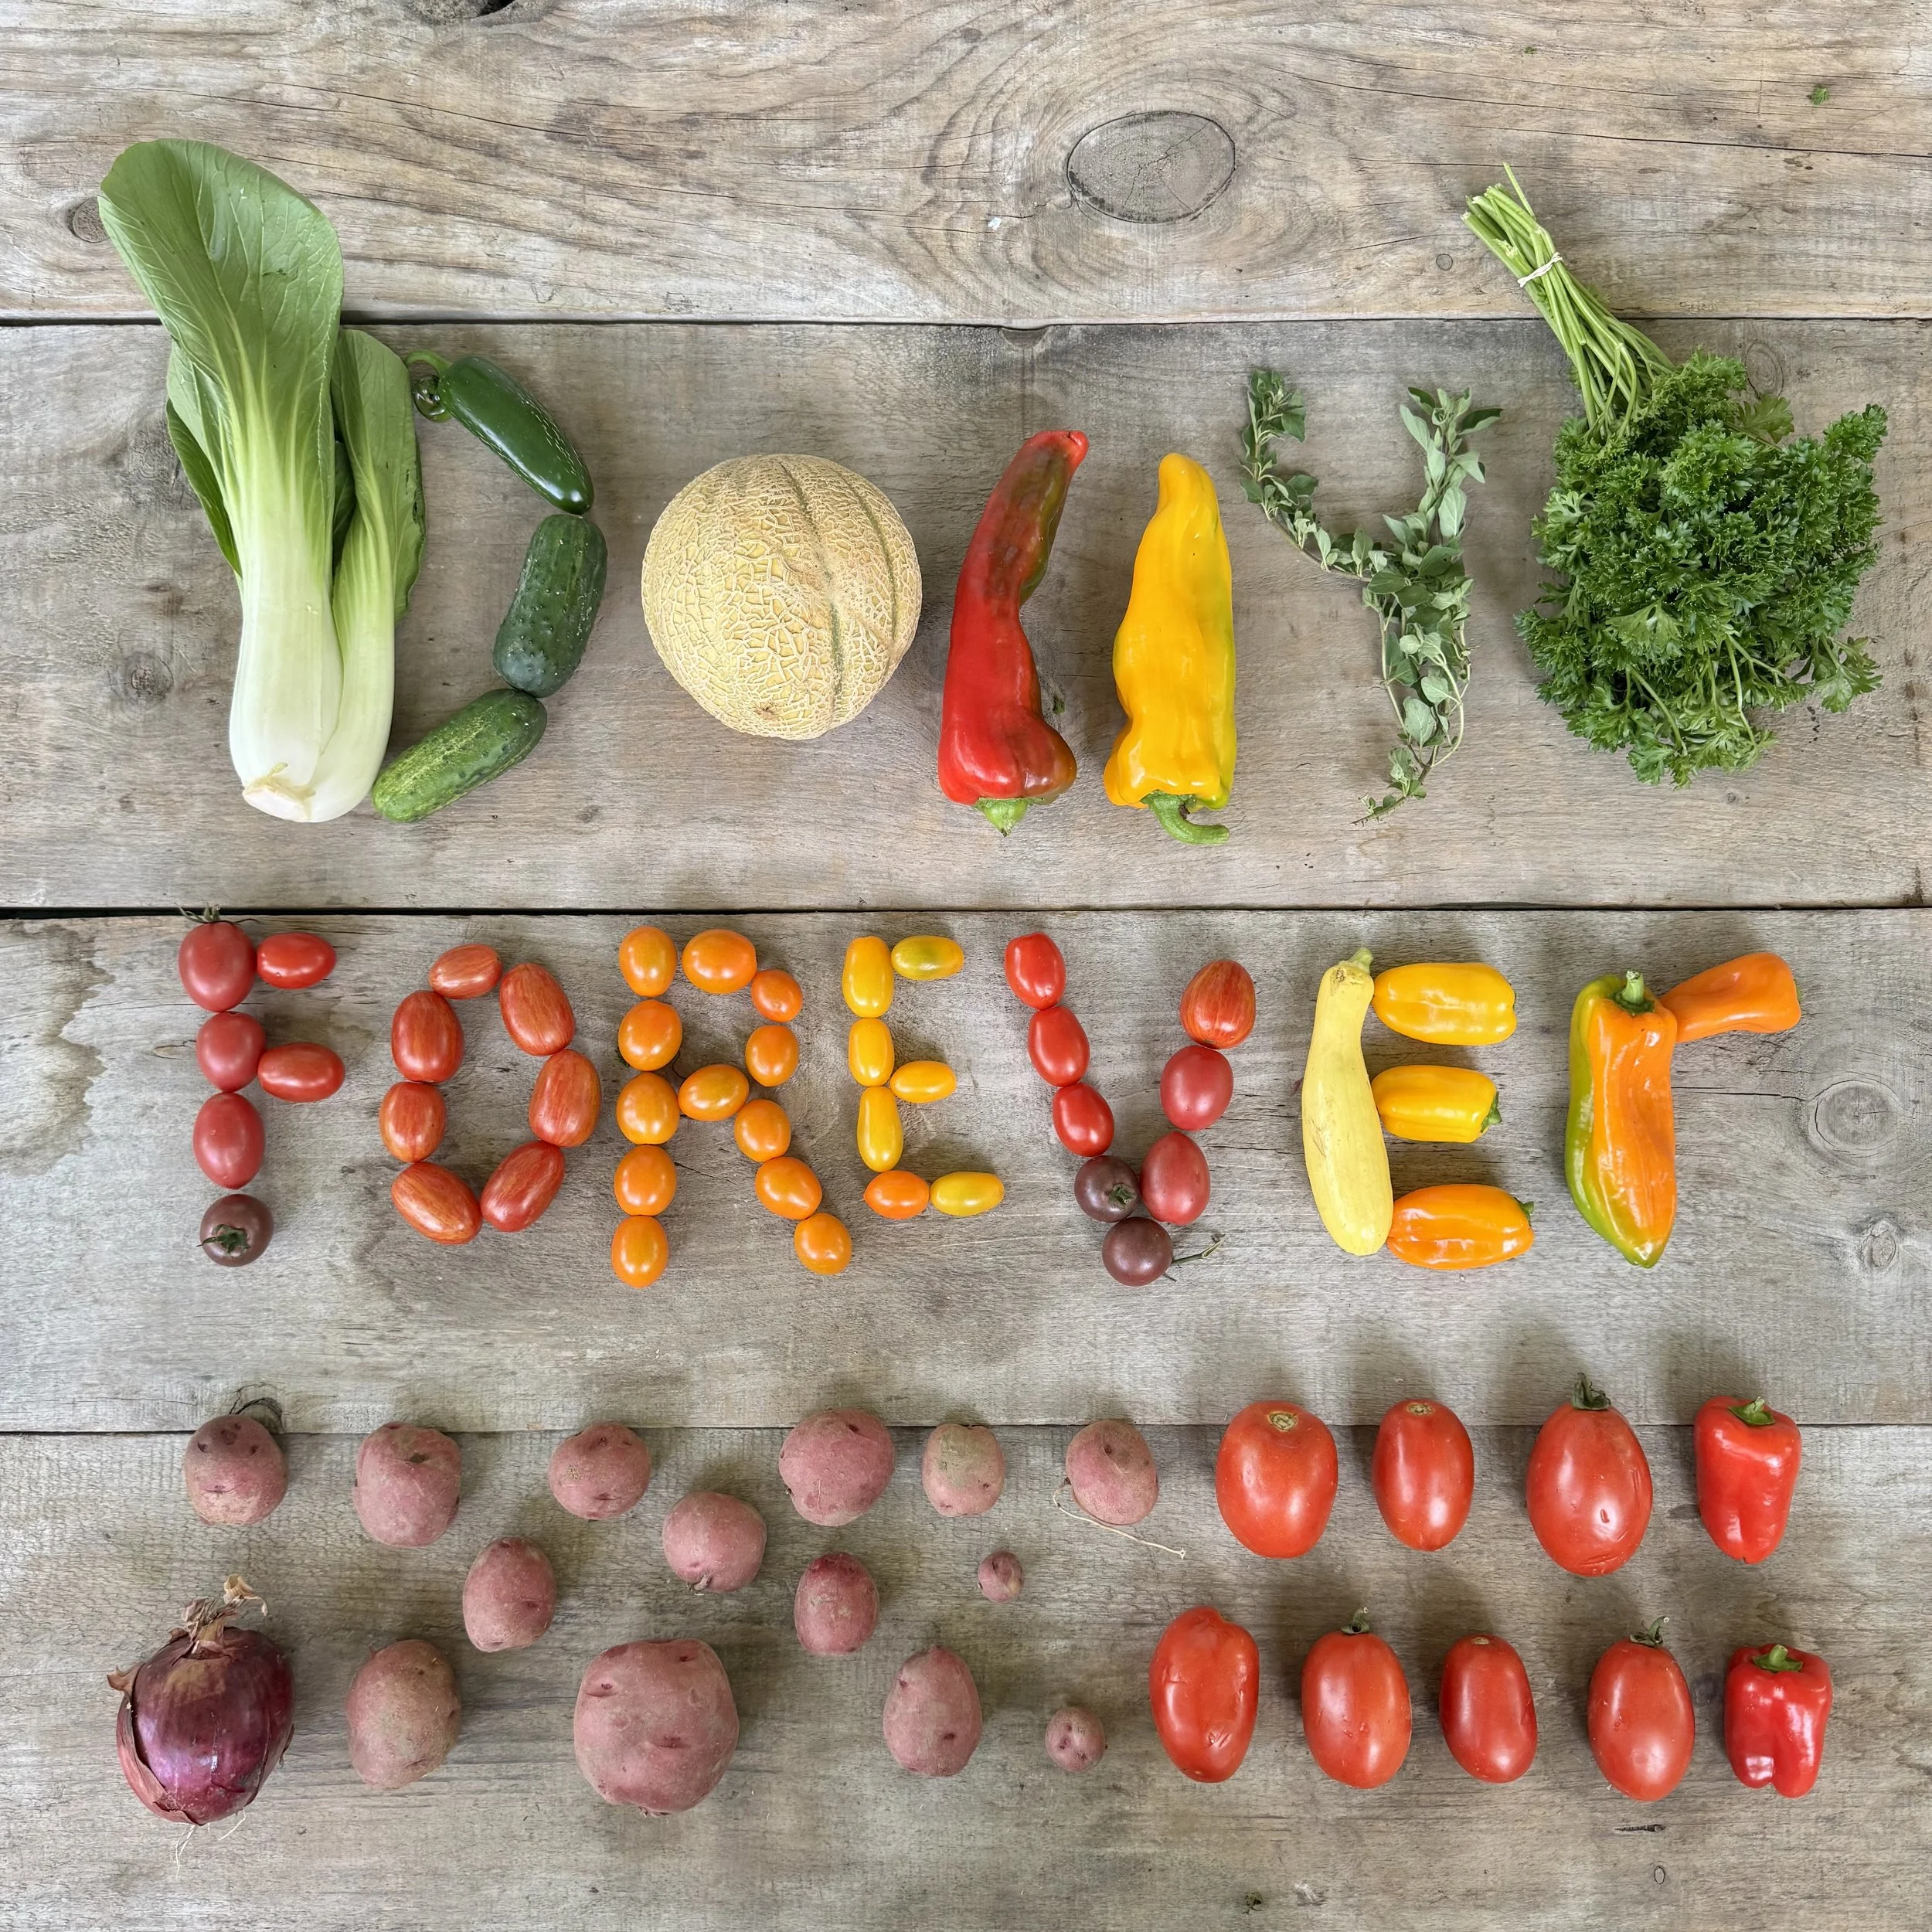
MELON - CHERRY TOMATOES - CARMEN PEPPERS - ONION - PARSLEY - OREGANO - PLUM TOMATOES - JALAPENO PEPPER - POTATOES - SUMMER SQUASH - PICKLING CUCUMBERS - BOK CHOY - LUNCH BOX PEPPERS!

EDGEWATER update:

Well, I really had the newsletter all dialed in-  The goal was to focus on all the feral farm kids that gave it their all this season.  An homage to the back to schoolers- from elementary to college, but then the texts began just before 3pm, heartbreak emojis galore and while in the midst of a bok choy harvest i checked my phone, dolly parton has died.   

The thing about Dolly is that she is the tie that binds.  She is the music we all hum while weeding strawberries or brassicas and love to belt out time & time again.

 Personally, Dolly Parton's music is the soundtrack to my 18 years at Edgewater.  18 years ago, I spent my first summer on this farm.  Sleeping in a lean-to at night, cooking over a fire, showering in a pond… But then Fall came, and my crew of fellow campers were still just as happy as ever sleeping with frigid dew drops on their faces.  But this Georgia peach got cold at night.  Too damn cold.  Come October, I was knocking on the cabin door where this middle aged Jamaican fellow was bunked, checking to see if there was room in that heated cabin for two.  Yes, of course.  And I moved right in.

At that time I was in my early 20’s.  We laughed a lot at the same jokes, were extremely polite over bathroom use, but when it came to music, I was dead wrong.  Roy Mitchell did not lean into reggae music as my naivete assumed, oh contrare, He was all about Dolly.

We listened to Dolly Parton on repeat, and learned all the lines to island in the stream.  Ray or I played Kenny Rogers, and Roy, of course, Dolly Parton… We’d bring this act upstreet after farming all day to what is now a toyota dealership but what was then, Shenanigans bar (which was also home to a multi-use space that housed laser tag/ arcade/ bowling alley/ and strip club, in my opinion, the Upper Valley’s Golden era, and for sure another story for another time, but I digress).

Anyhow, every Thursday after spending hours upon hours harvesting onions or picking raspberries we traveled off river road to WRJ for bowling followed by karaoke.  And Islands in the stream was a karaoke fan favorite… i mean, please do not fact check that last sentence, but yeah, for sure fan favorite.  

Beyond the duet of duets, was also the sound of Dolly Parton in the background of many a greenhouse seeding day, or garlic bulb prep day.  It’s those long monotonous tasks that I can close my eyes and hear her songs taking us through hour after hour.  And while it’s not an Edgewater Farm employee requirement, I can't think of one person who worked here that didn't love Dolly.  Cheers to the greatest 9 to fiver that ever lived, A fellow wildflower that did not care where she grew.  Let's just all go ahead and eat all our veg and sing her songs all week long. 

And lastly a beyond huge cheers to all the kids and teachers getting back at it.  Faves on the farmstand crew head back to high school and *gasp/sob* college.  And our own littles start school today.  Time to literally dust off- and when i say dust i mean heavy launder- all the things so they enter school looking crisp and not like they just stepped out of a heaping compost pile of rotten tomatoes… lolol

FARMY FOODIE PRO-TIPS: 

THE LUNCH BOX: Yall, so much of this week’s food is a welcome back to lunch box season.  However,  if I am perfectly honest with you- I despise assembling and am really leaning into the hot lunch experience for the kiddos BUT for those of you who continue to find joy in lunch box prep, THIS CSA IS FOR YOU. Case in point, an assortment of small raw veg to put in said box.  See: cherry tomatoes and literal lunch box peppers.  And if you are going to go ahead and cut up anything, make sure it's the cukes and the melon.  Your children MAY thank you OR they just won’t touch it and you will be religiously dumping out warm raw produce at the end of every day… your compost pile will be so happy :)

Bok Choy!: I know it really makes no sense here to combine with all these other veg, BUT the crop was perfect, abundant, demanded harvesting and now makes me think of Dolly Parton. So, please sautee and eat as your greens for the week, they are delish.  

And now the moment you've all been waiting for… A RECIPE!

The following recipe is crafted specifically for this week’s CSA by our friend and hyper local chef (he lives just up the road), Mitchell Davis.  if you are curious about alllll the recipes he has to offer, check out his substack: 

Roasted Tomato Soup

Makes 4 servings

The sweetness of meaty plum tomatoes is enhanced by roasting. Once roasted, you can freeze roasted tomatoes to use in recipes like this soup in the dead of winter. A blender of food mill is necessary to get the right consistency.

About 3 pounds fresh plum tomatoes, sliced lengthwise in half

1 onion, roughly chopped

1 head garlic, smashed and peeled

3 tablespoons olive oil

1 teaspoon kosher salt

1/2 teaspoon black pepper

2 to 3 cups chicken or vegetable stock

Large handful fresh basil leaves

Preheat the oven to 425°F. Arrange the tomatoes on a baking sheet, cut side up. Scatter the onion and garlic around the tomatoes. Drizzle with the olive oil and season with salt and pepper. Roast for 45 minutes to an hour, until the tomatoes have burst and shriveled and show signs of light char.

Transfer everything in the sheet pan to a blender. If anything has stuck on the bottom scrape it off. You can use some of the stock or water and simmer the pan on the stove to help dislodge any flavorful bits and add them to the blender, as well. Add 2 cups of stock and the basil and purée until smooth. Alternately you can combine everything with the stock and use an immersion blender to purée or pass it through a food mill. Transfer the soup in a clean saucepan and bring to a simmer for 5 to 10 minutes. Adjust the consistency, if necessary, with additional stock and the seasoning with salt and pepper before serving.


CSA WEEK 9, SO BELATED! POSTED A WEEK LATE :0

P i c k l i s t

CORN! - SHISHITO PEPPERS - RED ONION - MELON - KALE - 

CURLY PARSLEY - SUMMER SQUASH - POTATOES - CARROTS 


EDGEWATER update:

Holy cow people! Somehow we are 9 weeks deep into CSA and I am stunned.  The picklist is beginning to bulk up with crops like taters and melon.  I, for one, am most elated by the quarts of shishitos.  All year I wait for this moment.  To me it indicates peak grill season.  Summer squash, peppers, corn, carrots, etc, everything goes on the grill.  To practice said art of peak grill season, start with your shishitos and just add olive oil and salt.  Grill these peps until blistered… eat immediately.  Perhaps this is more of a farmie foodie “pro-tip” situation, but I am too eager to get y'all on board.  As for farm updates, the blueberry crop really slowed down this week, but the bluebs are hardly missed with the arrival of the melon crop.  

The netting on the corn worked like a gem and this next flush of ears were able to take shape sans bird bites.  The onion crop is looking particularly mighty and we are holding off on tomatoes and cukes this week for CSA, as the temperature and light levels have shifted just enough to slow down ripening.  It's a far cry from winter, but it is a reminder of what is to come.  

Speaking of crystal ball future things, the announcement of Fall CSA is just around the corner, look for an email from me at some point in the next week.

Also, now is a perfect time to think about processing food for winter.  Canning, jamming, freezing, etc… Holler at the farmstand: 603-298-5764 to place an order of any fruit or veg you like in bulk.  This includes cucumbers, tomatoes, greenbeans, beets, eggplant, corn, jalapenos, etc… 

And as for me, it is abundantly clear that I should wrap this newsletter up, as one kid is doing what appears to be figure 8’s in the dooryard on his dirt bike like a madman and the other has been making dresses for eggplants that she culled from the pitch pile.  I mean we are in a good flow here, but it’s dinner time and the grill is calling.  

FARMY FOODIE PRO-TIPS: The following recipes were crafted specifically for this week’s CSA by our friend and hyper local chef (he lives just up the road), Mitchell Davis.  if you are curious about alllll the recipes he has to offer, check out his substack:

Kachumber

Makes 4 servings

This common Indian side salad has a welcome cooling effect to counteract hot (i.e., spicy) food and hot weather. You can use almost any combination of vegetables. Just dice them small and all the same size. The seasoning can be as simple as lemon or lime juice and salt. But I like to add some herbs and toasted spices, too.

1 small cucumber, diced

2 small carrots, diced

1/2 small red onion, diced

1 ripe tomato, diced

1 small summer squash, zucchini, turnip, or other vegetable diced

Handful fresh parsley, cilantro, mint, or a combination, coarsely chopped

Juice of 1 lime or 1/2 lemon

Salt and freshly ground pepper


For optional garnish:

3 tablespoons neutral vegetable oil

1/2 teaspoon mustard seeds

1/2 teaspoon cumin seeds

1/2 teaspoon nigella seeds


In a medium mixing bowl, combine the diced cucumber, carrot, red onion, tomato, and other vegetables along with the chopped herbs and toss. Add the lime or lemon juice, a generous pinch of salt and some freshly ground black pepper. If using the garnish, heat the vegetable oil in a small sauté pan with the mustard, cumin, and nigella seeds over medium high heat. When the mustard seeds begin to pop, pour this mixture over the vegetables and toss. Serve immediately.


Summer Fritters

Makes 12 to 16 fritters, depending on size

Proving, yet again, that everything fried is better, these fritters are a great way to use your summer produce

1 medium potato, peeled or not, as you prefer

1 small summer squash

Salt

Kernels from 1 ear of corn

3 or 4 shishito peppers, thinly sliced

1 egg

1/4 cup all-purpose flour, cornmeal, or chickpea flour

Pinch turmeric or paprika

Pinch cayenne pepper

Freshly ground black pepper

Oil for frying


Grate the potato and summer squash into a bowl. Season with salt and let sit for 5 to 10 minutes until some liquid has been drawn out. Roll this up in a clean kitchen towel and wring over the sink to remove any excess water. Return to a clean bowl. Add the corn kernels and shisito pepper slices. Add the egg, flour, turmeric, cayenne, freshly ground black pepper, and another pinch of salt. Mix to combine.

In a large nonstick or cast-iron pan, heat a thin layer of oil. Drop the fritter batter by spoonfuls into the hot oil and cook until set and nicely browned, about 5 minutes. Flip and cook the second side until brown. Remove to paper towel to drain before serving.


CSA WEEK 8

P i c k l i s t

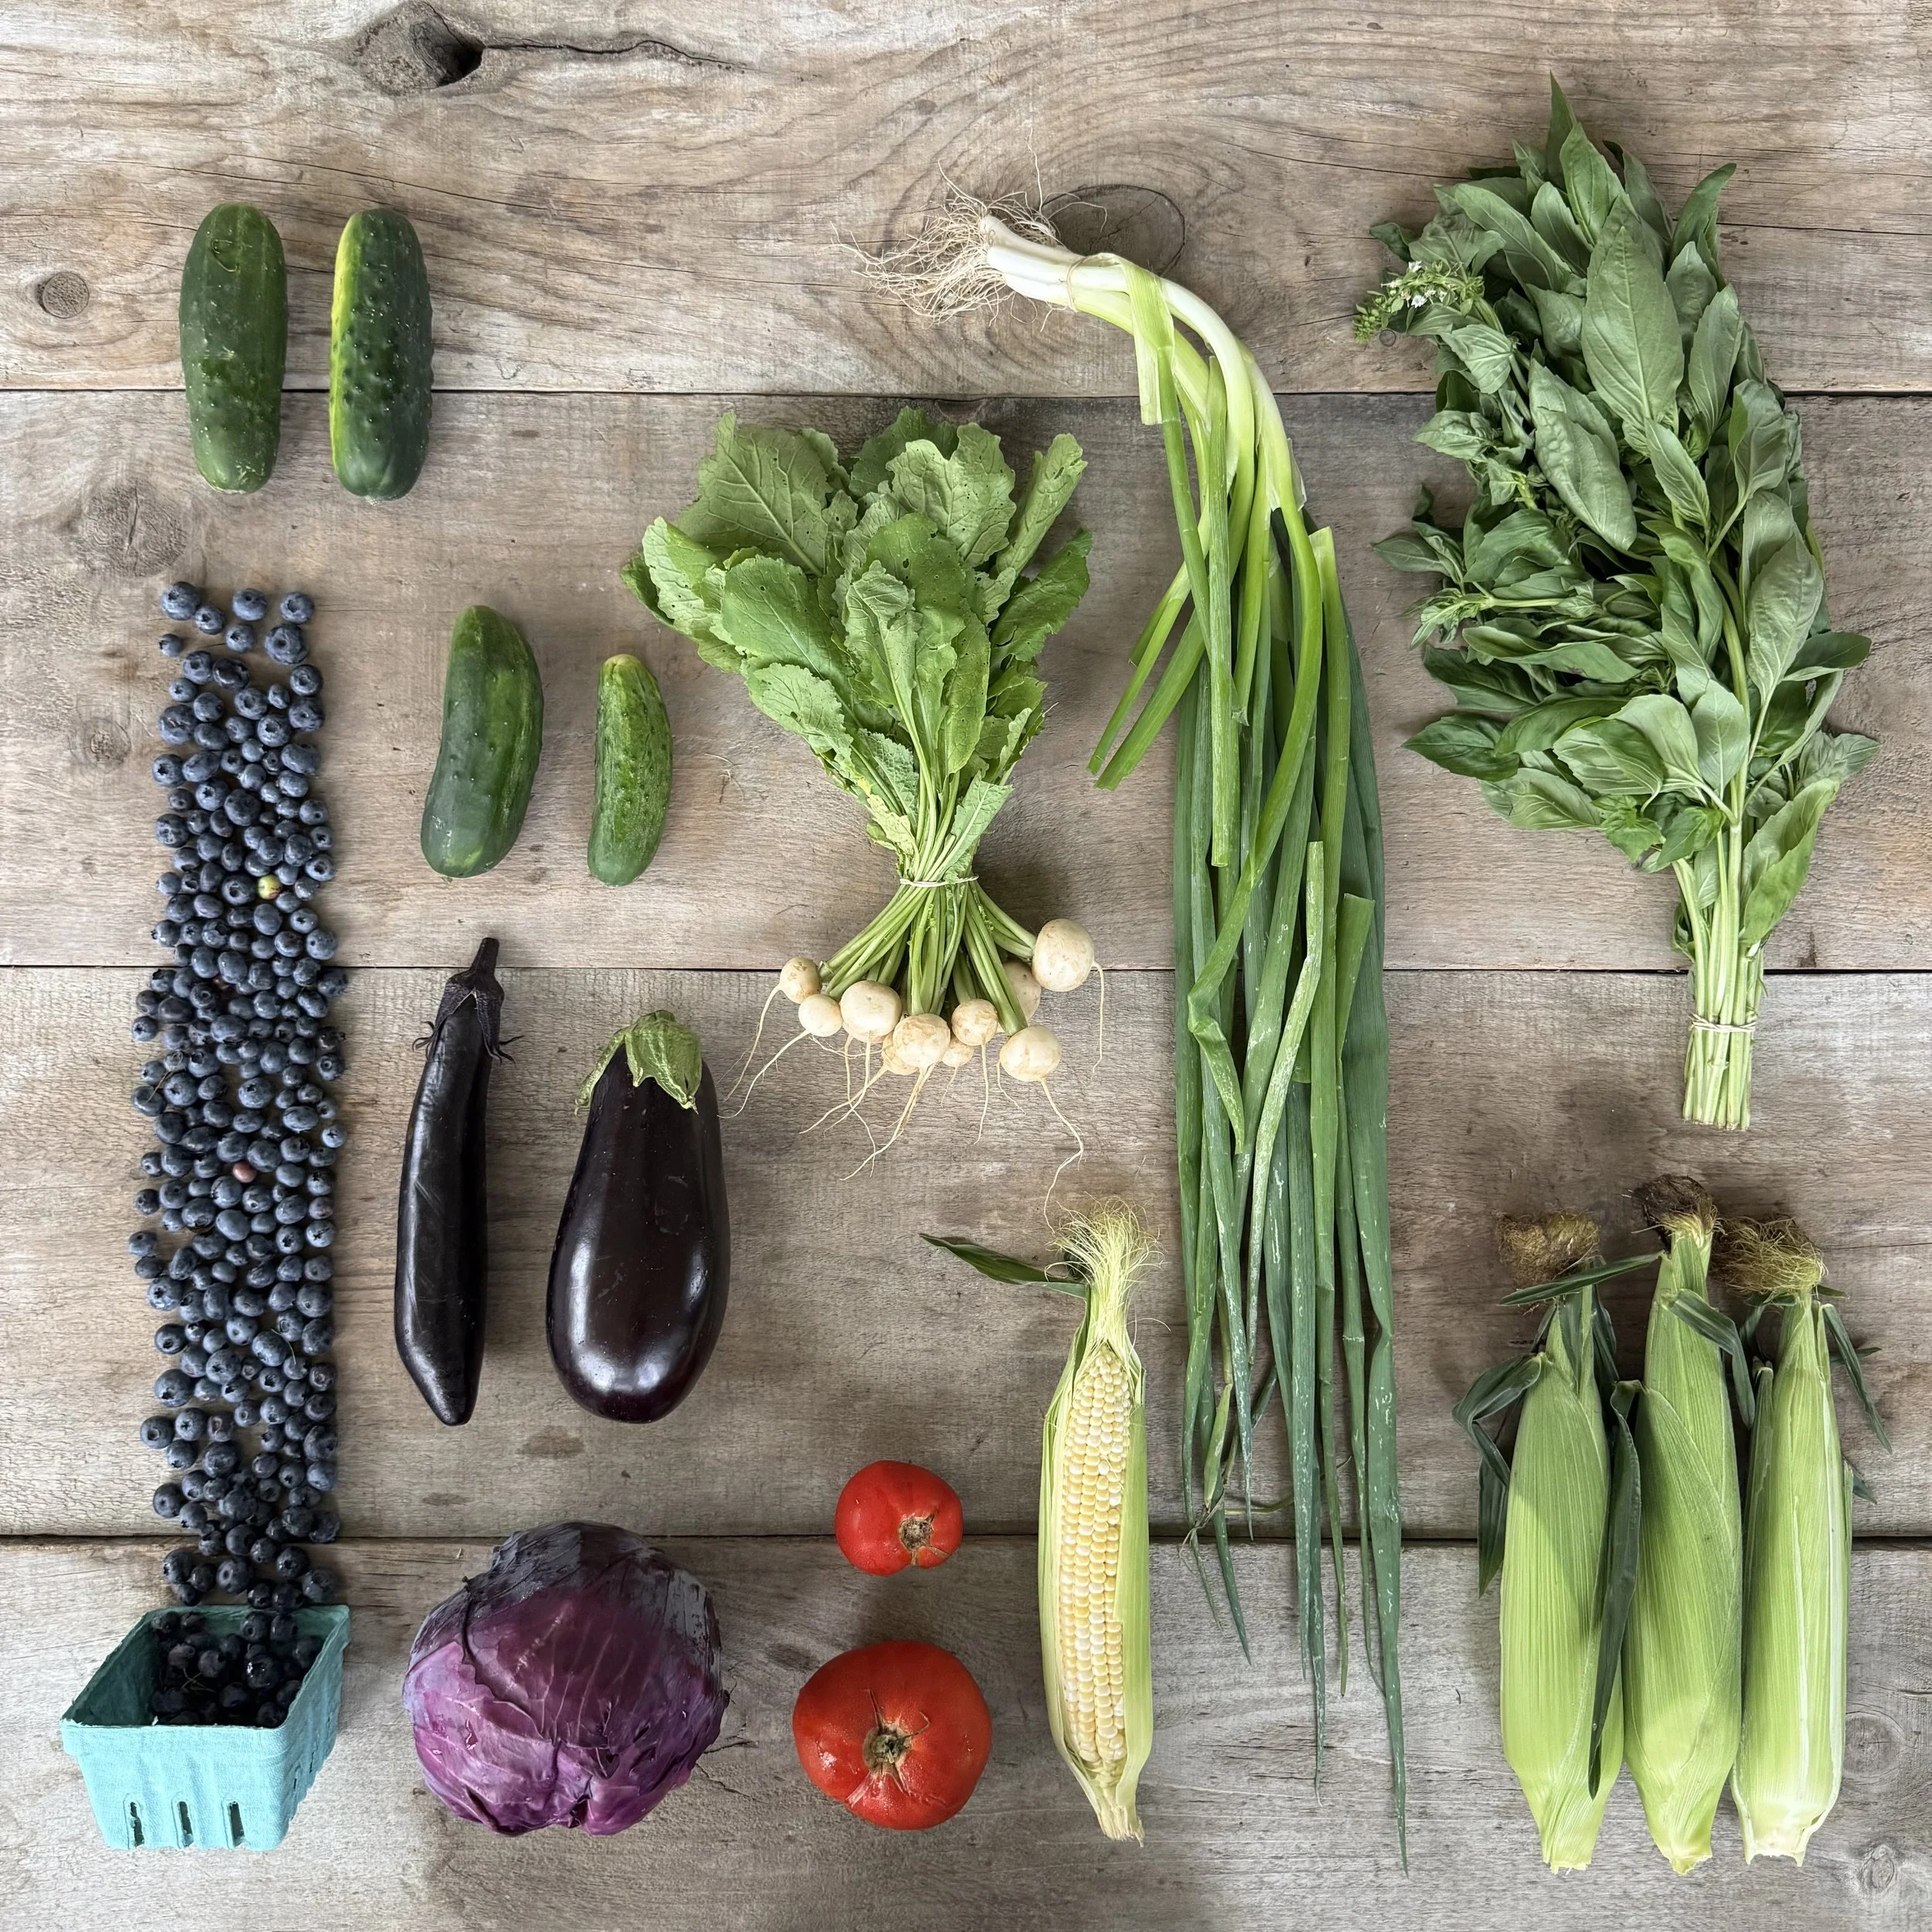
2nd TOMATOES - CUCUMBERS - BLUEBERRIES - CORN - BASIL - RED CABBAGE - 

HAKURAI TURNIPS - EGGPLANT - SCALLIONS - 

EDGEWATER update:  Last week’s blissed out arugula harvest led us to this week’s hakurai turnip pick.  Which came with its own element of fun.  Monday, if you recall, was a real soak.  I came to work in one outfit and left in  another, chilled to the bone and ready for a hot shower by dusk.  But in between that, there was the hakurais.  We all held our breath hoping we were not going to get caught in yet another downpour while picking those cutey-patooty-sweet-horseradishy-baby globes.  Don’t get me wrong, picking in rain is nothing new- but being ill prepared picking in rain with not a rain coat in sight is a whole nother ball game.  Somehow though, by the grace of August 3rd, we made it in and out of that field without one drop of rain atop our heads.  Hallelu!

On another note, there came the corn pick.  Ray has been out there daily, hand picking ear after ear.  But a real mess stopped us all in our tracks Tuesday.  Total bird mayhem.  It feels like thousands of birds have descended on the corn patch- and the worm sitch isn't ideal either.  If you happen to get a worm in your corn, just cut off the top, toss it to the side and pretend, like you didn't see anything… “nothing to see here” is my new corn mantra.  THAT SAID, the ear remain delicious, and birds and worms can't stop me from my daily snack of raw sweet corn straight from the field, or my nightly desert of boiled corn and butter.  

And for those that are unsure about the cracks in your tomatoes, it was either no tomatoes or tomato seconds, and I just couldn't fathom a full week in august without a tomato to go with your basil.

AND WHILE WE ARE ON THE SUBJECT OF BASIL, HELLLLLLO MASSIVE GREEN BUNCH! This basil was picked with great intention to unveil the ginger growing in its shade.  I believe I've mentioned this once and I’ll say it again- this interplanting of ginger and basil is the coolest thing we do here.  And you dear CSA fam, get to reap the benefits time after time.  For those not taking this basil home and making pesto right away, treat it as a flower bouquet, and keep it in an inch or two of water with stems down. Bonus points for beautifying your kitchen counter with this fragrant green bunch. 

FARMY FOODIE PRO-TIPS: The following recipes were crafted specifically for this week’s CSA by our friend and hyper local chef (he lives just up the road), Mitchell Davis.  if you are curious about alllll the recipes he has to offer, check out his substack:


Skillet Corn and Vegetable Pudding

I first shared this recipe back in 2024. But when corn is in season it is such a good use of vegetables—garlic scapes, fennel, cabbage, zucchini, summer squash, bell peppers, turnips, kohlrabi, kale, you name it—that I thought it was time to share it again. We’ve been eating it all week. Pan-fry leftovers in butter or olive oil until crisp and serve with poached eggs for breakfast the next morning.

Makes one 10-inch pudding, enough for 6 to 8 people. 

(But the recipe can be easily cut in half and baked in an 8-inch skillet, for 4)

2 tablespoons unsalted butter or extra-virgin olive oil

1 large onion, white or red, diced (about 1 ¼ cups)

1 small red or green pepper, sweet or spicy, diced (about 3/4 cup)

2 to 3 cups seasonal vegetables, such as kale, zucchini, yellow squash, Swiss chard leaves and/or stems, kolrhabi, green tomatoes, garlic scapes, turnips, celeriac, mushrooms, or butternut squash, cleaned, peeled, if appropriate, and cut into small dice

1 tablespoon kosher salt

1 tablespoon sugar

Handful of chopped fresh herbs, such as basil, shiso, thyme, parsley, marjoram, and/or sage

1 teaspoon sweet or smoked paprika

1/8 teaspoon cayenne pepper

Kernels from 2 or 3 large fresh ears corn (about 3 cups)

1/2 cup fine cornmeal

3 large eggs

1 1/4 cups milk or buttermilk

1/2 cup heavy cream, yogurt, or additional milk

Pinch freshly grated nutmeg

1 cup finely shredded hard, sharp cheese, such as cheddar, Gruyère, Comté,

Gouda, pecorino, or similar

Preheat the oven to 350°F. Melt the butter in a 9-inch cast-iron skillet over medium-high heat. Add the onion, pepper, and other vegetables, and salt, and sauté, stirring frequently, until the onions are soft and they are beginning to brown, about 10 minutes. Add the sugar, sage, salt, paprika, and cayenne, and cook another 3 or 4 minutes to bring out the flavor of the spices. Add the corn kernels.

Continue cooking, stirring frequently, until no water remains in the skillet, another 8 minutes or so, longer if using zucchini or mushrooms, which have a lot of water in them. Stir in the cornmeal and remove from heat. In a small bowl, whisk together the eggs, milk, cream or more milk, and nutmeg, then pour this into the corn mixture. Using a rubber spatula, stir well to combine.

Sprinkle with the grated cheese, and bake until set, about 30 minutes. Turn on the broiler and broil only until the melted cheese is lightly browned, a minute or two more. Serve warm.

Cardamom Jam Bars

These simple, delicious bars can be made with just about any jam you’ve got (you just need a cup). Or you can use any seasonal berry—blueberries, raspberries, black raspberries, or strawberries—to make a quick jam for a seasonal treat.

For the jam

1 1/4 cups fresh berries, such as blueberries, raspberries, black raspberries, or strawberries

1/2 cup sugar

Juice of 1/2 lemon


For the bars

1 cup (2 sticks) unsalted butter, at room temperature

1 cup sugar

1 teaspoon kosher salt

1 large egg yolk

1/2 teaspoon vanilla extract or paste

2 1/2 cups all-purpose flour

2 teaspoons ground cardamom

Zest of 1 lemon

2 to 3 tablespoons chopped nuts, such as almonds, pistachios, or walnuts

If making a quick jam, in a small saucepan, combine the berries, sugar, and lemon juice. Bring to a boil, stirring to dissolve the sugar. Once the fruit gives off its juice, lower the heat to a good simmer, and cook, stirring often, until the jam thickens, 7 or 8 minutes.

You don’t want it too thick, as it will continue to thicken as it cools. When the bubbles start to calm down and there’s evidence of thickening, but the jam is still liquid, take if off the heat and let cool. Otherwise, you’ll need 1 cup of jam.

Meanwhile, preheat the oven to 350°F. Grease a 9-inch square baking pan, line with parchment with a decent overhang on the sides, then grease the parchment.

In a large mixing bowl, cream together the butter, sugar, and salt using a wooden spoon or rubber spatula. (You can use the paddle attachment of a stand mixer if you prefer.)

Add the egg yolk and vanilla and mix to blend. Add all the flour at once and stir to combine. The mixture will remain somewhat dry and crumbly, but you don’t want to see any evidence of plain flour. And the cardamom and continue mixing until evenly distributed. Take off about a cup of this mixture and set aside.

Press the remaining dough into the pan. Spread it out so the bottom of the pan is evenly coated and then press with your fingertips to form an even, compacted layer. Be sure to get the dough into the corners. Flatten the edge along the sides of the pan with a spatula or other straight object so there’s not really any crust coming up the sides. Bake in the preheated oven for 30 minutes, until lightly browned and set. Remove and cool for 15 minutes.

Spread the jam in an even layer over the bottom crust. Top with an even sprinkling of lemon zest. (You can zest the lemon with a Microplane right onto the jam.) Scatter the chopped nuts on top and then crumble the reserved cup of dough evenly on the surface. Bake for another 35 minutes, rotating the pan once or twice during baking. Undiluted here is evidence of the jam bubbling and the crumble top has browned.

Remove from the oven and let cool completely on a wire rack, about 2 hours or even overnight. Run a knife along the edge and then let the whole thing out of the pan using the parchment overhang for leverage to get it out without breaking. Place on a cutting board, carefully peel back the parchment from the sides, and slice into squares or bars.

I usually get about 36 one-inch squares.

CSA WEEK 7

P I C K L I S T

tomatoes - corn - carrots - celery - arugula - blueberries - garlic - purple pepper - shiso - cucumber

EDGEWATER update: All the mid Summer specials this week! And with the convergence of tomatoes, corn, and blueberries- which is basically my holy trinity-  it's impossible to go hungry around here.  As these three crops enter the group chat, they are met with high fives, bathing suits and watering holes. As in, do as your farmers do- and always bring these three items with you everywhere you go- to every single swim spot, every single time.  All your buds will be so pumped to snack with you, just add potato chips. 

In other news, the garlic is all harvested! And you CSA fam, get first dibs. It is a pretty impressive harvest this year, we are thrilled with the size and quality of the bulbs.  For anyone looking to grow their own, this crop is prime for excellent planting (come fall)...  Obviously, I am getting a head of myself here- who needs to think about garlic planting in July, BUT when the time comes, reach out- we should have some for your home gardens. Until then, keep the vampires away and add to all your savories. 

It was near impossible to keep me out of the arugula patch this week. I got a text from ray that said, “cleanest arugula i’ve grown, somebody got to cut it.”  Which is pretty much the most romantic thing we can say to each other this time of year.  This is our version of summer sexting.  A love language of snapping pics of good looking veg or weed free fields and texting with a kissy face wink emoji.  A suggestive message of, “go get that harvest, it’s all yours.” That's romance baby!  

And as for your carrots this week, a perfect glimpse into all the weeds we battle can be found in your carrot tops.  Ray and Tim spent an entire afternoon digging through the brush bunching the CSA carrots.  It is worth eyeing the carrot tops with a fine tooth comb to see all the other ecosystems that got bunched in there as well.  This is a result of weeds getting ahead of us.  That said, these carrots are as sweet as you can get before a frost ups their sugar content.  So feel free to remove green tops immediately and store carrots in a plastic bag in your fridge to keep em crunchy.

Also this week, hello sweet corn my old friend!  And what the hell is shiso anyway?  

Shiso is an herb typically found and eaten in East Asia and Southeast Asia.  I love it.  I find the flavor so unique, earthy, and fresh.  Kind of like a mint/annise hyssop/ tulsi basil/ cilantro cross… I can't quite name the flavor, it's just shiso and it’s awesome.  its worth adding fresh to salads or stuffing and frying (as per Mitchell’s recipe inspo below).  My plan for din tonite, is to chop it real fine, mix it with a little mayo and a little sriracha and smear it on my ear of barely boiled sweet corn.  I am so excited about this meal plan, I’ve been daydreaming about it all day, I can’t wait to tell you how it goes.  

FARMY FOODIE PRO-TIPS: The following recipes were crafted specifically for this week’s CSA by our friend and hyper local chef (he lives just up the road), Mitchell Davis.  if you are curious about alllll the recipes he has to offer, check out his substack:

Tomato Vinaigrette

1 large ripe, red tomato, cored and cut into chunks

1/2 cup red wine vinegar

1 clove garlic

Handful basil or shiso leaves

1 tablespoon maple syrup or honey

1 tablespoon Dijon mustard

1 1/2 cups extra-virgin olive oil

Salt and freshly ground black pepper

Place the tomato, vinegar, garlic, basil, maple syrup, Dijon mustard and olive oil in a blender. Add a generous pinch of salt and couple of healthy grinds of black pepper. Pulse to get a good blend going and then purée until smooth.


Grilled Corn Salad with Sesame Miso Dressing

The secret to this salad is dicing all the vegetables quite small, about the same size as the kernels of corn.

2 ears corn, shucked

2 stalks celery, diced

1 cucumber, diced

1 bell pepper, seeded and diced

2 carrots, peeled and diced

1 tablespoon white miso

1/3 cup rice vinegar

2 tablespoons Chinese sesame paste or tahini

1/2 cup vegetable oil

1 teaspoon toasted sesame oil

Salt and freshly ground black pepper

1 bunch arugula

Char the shucked corn over an open flame on a gas burner or on a barbecue until some of the kernels are black and others are in various stages of brown. Cool. Using a sharp knife, cut the kernels off the cobs into a mixing bowl. Add the celery, cucumber, bell pepper, and carrots and toss to combine. In a small bowl, whisk together the miso, vinegar, and sesame paste or tahini until smooth and blended. Slowly beat in the vegetable oil to create a nice emulsified dressing.

Add the toasted sesame oil, a generous pinch of salt, and some black pepper. Toss the mixed vegetables with about 1/4 cup of this dressing. Arrange the arugula on the base of serving plate and spoon the chopped vegetables on top. Drizzle more of the dressing around the arugula and season again with salt and pepper.

Stuffed Shiso Leaves

This is a recipe from the fabulous Korean cookbook writing by my friends JP Park and JY Choi. It falls into the Korean category of jeon, often translated as “pancakes,” but containing so much more. These sound complicated, but they aren’t. And they always impress anyone I’ve served them to. I like to prepare them as an hors d’oeuvre.

2 ounces tofu

7 ounces ground beef

1/2 small shallot or 1/4 small onion, minced

Small handful minced garlic chives or 3 finely chopped garlic scapes

1 small carrot, finely chopped

1 medium clove garlic, minced

White part of 1 scallion, minced

1 tablespoon soy sauce

1 teaspoon sugar

1 teaspoon cornstarch

Freshly ground black pepper

12 large shiso leaves

2 tablespoons flour

1/4 teaspoon salt

1/8 teaspoon baking soda

1 large egg

1 large egg yolk

Cooking oil, for frying

To prepare the filling, in a small bowl, break up the tofu into crumbs. Add the beef, shallot, garlic chives or scapes, carrot, garlic, scallion, soy sauce, sugar, cornstarch and some freshly ground black pepper. Mix in one circular direction until the ingredients are well blended and have developed a smooth texture.

On a small plate, combine the flour, salt, and baking soda, and mix well. In a small bowl, beat together the egg and egg yolk until blended. Dip the back of a shiso leaf in the flour mixture and dust off any excess to very lightly coat. Lay the leaf floured side up on the work surface. Cover half of the shiso leaf vertically with a thin layer of the filling. Fold in half and press lightly to seal. Repeat with the remaining leaves until they are all stuffed. Using a fine sieve, very lightly dust both sides of the stuffed leaves with the remaining flour

Heat a thin layer of oil in a over low heat. Dip 3 or 4 of the stuffed shiso leaves in the egg, drain off any excess, and set in the frying pan, frying each side for 2 1/2 to 3 minutes, until nicely browned and set. Transfer to brown paper or paper towel to drain and repeat with the remaining leaves, adding more oil as necessary, until all are fried.


CSA WEEK 6

P I C K L I S T

TOMATOES - CUCUMBERS - PURPLE PEPPER - LIME GREEN PEPPER - HUNGARIAN HOT WAX PEPPER - SUMMER SQUASH - BASIL - CABBAGE - GARLIC SCAPES - BLUEBERRIES

EDGEWATER update: This will surely be the last of the garlic scapes until next season. Basque in their glory, it will be a full year until you meet again.  That said, fresh garlic bulbs are just around the corner.  We anticipate the yearly massive harvest of them this week- as long as we can enter the field without burying a tractor in wet ground. Remember, the size of your garlic bulb is determined by when the garlic scape is picked.  It is likely that the bigger the garlic bulb, the earlier the scape was harvested.  All things connected in these parts.  

Another new harvest for us this week are the peppers in your CSA.  These peppers were picked early from the plant for 2 reasons.  One, they are so fresh and crunchy so why not, and two, picking off peppers before they sweeten allows the plant to produce peppers of larger size.  Similar to the garlic scape harvest aiding in the size of the garlic bulb, the less peppers on a plant, the bigger the fruit. This can also be seen in your blueberry pint this week.  Any extra large blueberries in there? If so, I guarantee they are the result of an excellently pruned blueberry bush.  But enough about size, let's talk flavor.  The smallest pepper of your bounty is a hot one, eat with care.  The others are mild and are best enjoyed sliced into spears and utilized as a vehicle for all that garlic scape basil pesto you are about to make and dip into.  Also noteworthy, if we left the peppers on the plant to properly ripen, the purple would ripen to sweet red and the lime to sweet-as-can-be yellow.  

IN OTHER NEWS, for any of you on this quasi-harvest-while-I-listen-book-club journey with me, I just began listening to Maggie O’ Farrel’s I am, I am, I am: seventeen brushes with death. Email me, and let me know if you have also taken the journey into this memoir.  

FARMY FOODIE PRO-TIPS: The following recipes were crafted specifically for this week’s CSA by our friend and hyper local chef (he lives just up the road), Mitchell Davis.  if you are curious about alllll the recipes he has to offer, check out his substack:

Summer Squash Salad

Makes 4 servings

A favorite salad of mine, this recipe was given to me by my friend Tony Liu, chef of The Queensboro in NYC.

1/4 cup dried currants, raisins, or other dried fruit

1 teaspoon cayenne pepper

1/4 cup raw pine nuts

2 medium green zucchini (about 3/4 pound)

2 medium yellow squash (about 3/4 pound)

1 small, hot pepper, seeds removed, thinly sliced

1/4 cup extra-virgin olive oil

Juice of 1 lemon

1/2 bunch mint or basil leaves

1/4 cup pitted black olives, preferably oil cured, chopped

1/4 cup sliced ricotta salata or crumbled feta

Salt and freshly ground black pepper, to taste

Combine the currants or other dried fruit and cayenne with 1/2 cup of water in a small saucepan. Bring to a boil, turn off the heat, and let steep for 20 to 30 minutes to soften. Drain. Meanwhile toast the pine nuts on a baking sheet in a 300°F. oven until lightly golden and aromatic, 8 to 10 minutes. Using a mandoline or sharp carrot peeler, slice the zucchini and yellow squash lengthwise into long, very thin strips into a large bowl. Stop once you hit the seeds in the center of the vegetable, rotate, and shave some more. Repeat. At the end you should have a long, squared plug of seeds to discard.

Combine the slices of yellow squash and zucchini with the chili, olive oil, and lemon juice. Add the mint leaves, olives, ricotta salata or feta, toasted pine nuts, and drained currants. Gently toss together, season to taste with salt and pepper, and serve.


Kulei (Steamed and Stir-Fried Cabbage from Shangxi)

This regional specialty was new to me, but after making it I could see instantly why those who know it consider it a comfort food. Apparently in Shangxi it is sometimes eaten instead of and as you would rice. The same technique can be used with potatoes that have been finely julienned.

1/2 medium head green cabbage

1/2 to 3/4 cups all-purpose flour

1/2 teaspoon salt

1/2 teaspoon Chinese five-spice powder

4 or 5 scallions, chopped

2 to 3 tablespoon vegetable oil

1 teaspoon Sichuan peppercorns

3 cloves garlic, minced

Soy sauce

Thinly slice the cabbage into shreds as you would for coleslaw. Place in a large bowl. Sprinkle some of the flour into the bowl and toss the cabbage with your hands to coat. You don’t want it to clump; you want the cabbage shreds to remain distinct and be lightly coated with flour. Keep tossing and adding flour until evenly coated. Add the salt, five-spice powder, and half the chopped scallions, and toss again to distribute.

On a bamboo or other vegetable steamer lined with parchment, mound the cabbage like little haystacks. Steam over boiling water for 12 minutes to cook through. Transfer to a clean bowl. Depending on how big your steamer is, you may have to work in batches.

Once all the cabbage is steamed, heat a wok or large frying pan over medium- high heat. Add the vegetable oil and the Sichuan pepper corns to toast for 30 seconds. Add the garlic, stir, and then add the cabbage, tossing to fry. You want the cabbage to get some crispy edges but not to clump. Continue stir frying until nicely browned. If the cabbage sticks to the bottom of the wok or pan, scrape it off and mix it in. Add a dribble or two of soy sauce to season and transfer to a serving bowl. Garnish with the remaining chopped scallions and serve.


Lemon Blueberry Sour Cream Crunch Cake

1 3/4 cups granulated sugar

Zest of 2 lemons

3/4 cup unsalted butter, at room temperature

3 large eggs

3 tablespoons lemon juice

1 teaspoon salt

1 1/2 teaspoons baking powder

2 cups all-purpose flour

3/4 cups sour cream, heavy cream, or whole-fat Greek yogurt

3 cups fresh blueberries


In a large mixing bowl, combine the sugar and the lemon zest. Rub the zest into the sugar with your fingertips until fragrant and the texture of wet sand. Remove 1/4 cup of the sugar mixture and set aside. To the bowl with the remaining lemon sugar, add the butter and cream until smooth. Add the eggs, one at a time, beating well after each. Continue beating until light. Add the lemon juice, salt, and baking powder, and beat to blend. Stir in half the flour, then the sour cream, then the remaining flour, to form a stiff batter. Don’t overmix. Finally, fold in the blueberries.

Transfer to the prepared pan and spread evenly with an offset spatula. Sprinkle the reserved lemon sugar mixture evenly on top. Bake in the preheated oven for about 40 minutes, until risen, brown, and firm to the touch. An instant-read thermometer should hit over 200°F. when inserted in the center. Remove from the oven and cool completely on a wire rack before serving.


CSA WEEK 5

P i c k l i s t

TOMATOES - BROCCOLI - FENNEL - SCALLIONS - CUCUMBERS - 

SUMMER SQUASH - THAI BASIL - NAPA CABBAGE - BLUEBERRIES

EDGEWATER update: Bloobs kicked in hard this week.  Honestly, I'm so grateful that they did.  We were all deep in the post strawberry season feels.   For a couple of days after strawberry season, we all feel a little unmoored.  It’s a shift in routines, a shift in roles, a longing for our favorite fruit.  It’s also a moment to quite literally pick our heads up, look around the farm, and take in all that has occurred over the past 5 weeks while we were bent over, butts up to the wind, picking strawbs.  As it turns out, a ton happened.  The corn is now shoulder high, but then again, so too are the weeds.  Typical juxtaposition of being pleased with growth and at the same time being humbled by it.  

Many of us took out our hoes and attempted combat on the lambsquarter, crab grass, etc... Moving through fields was for sure a challenge, but we persevered for a bit until blueberries started ripening. At that point we shrugged our shoulders, waved our little white flags, and said here you go weeds… we got bigger bluer fish to fry. 

And now, for the foreseeable future all afternoons into evenings will be spent in the blueberry fields, where the crew will fill up pint after pint as the sun sets while hopefully guzzling down buckets of water.  It’s hot out there yall.  

FARMY FOODIE PRO-TIPS:

The following recipes were crafted specifically for this week’s CSA by our friend and hyper local chef (he lives just up the road), Mitchell Davis.  if you are curious about alllll the recipes he has to offer, check out his substack:

Charred Broccoli Salad with Cheddar, Almonds, and Dates

Serves 6 to 8

This is my version of a salad that Carla Lalli made famous at Bon Appétit. The charring of the broccoli gives it a more complex flavor and interesting texture. You can char the broccoli on a grill, in a hot pizza oven, or in a hot cast-iron pan.

2 broccoli crowns

Extra-virgin olive oil

Salt and freshly ground black pepper

3 tablespoons cider vinegar

1/4 cup toasted almonds, coarsely chopped

6 medjool dates, pitted and chopped

4 ounces sharp cheddar or other hard cheese, crumbled or diced

1 tablespoon maple syrup

2 scallions, chopped

With a vegetable peeler, peel the bottom of the stems of the broccoli to reveal the lighter green inner core. Using a paring knife, separate the heads into long florets and then divide the head into spears. Place in a large bowl. Drizzle with some olive oil and season with salt and pepper. Toss to coat.

On a hot grill, in a hot oven, or in a smoking hot cast-iron pan, arrange the broccoli spears with any flat sides facing down. You want to deeply char the flowers and the edges. Turn once or twice to promote even browning. It should take 4 or 5 minutes

Return the charred broccoli to the bowl. While still warm, toss with the cider vinegar and let cool to room temperature. Once cool, chop the broccoli into bite-sized pieces and return to the bowl. Add the almonds, dates, and cheddar, and toss. Add the maple syrup and 3 or 4 more tablespoons of olive oil and toss. Adjust the seasoning with salt and pepper. Serve garnished with chopped scallions.

Thai Basil Fish Cakes with Cucumber Relish

Serves 4 to 6

For the cucumber relish:

1/4 cup water

1/4 cup sugar

1/4 cup white vinegar

1 cup thinly sliced cucumber

1 or 2 shallots, thinly sliced

Some fresh hot chili, seeded and finely chopped

2 or 3 sprigs cilantro, coarsely chopped

For the fish cakes:

12 ounces skinless red snapper or other white fish fillets, cut into cubes

3 ice cubes

3 tablespoons Thai red curry paste

1 large egg

2 tablespoons fish sauce

2 teaspoon sugar

4 makrut (kaffir) lime leaves, finely chopped, or the finely grated zest of 1 lime

5 green beans, thinly sliced

1/2 cup Thai basil leaves

Vegetable oil, for frying

In a small pan, combine the water, sugar, and white vinegar. Bring to simmer to dissolve the sugar. Remove from the heat and transfer to a bowl. Cool to room temperature. Add the sliced cucumber, shallots, chili, and cilantro.

Chill the metal blade of a food processor and the fish in the freezer for 20 to 30 minutes before making the fish cakes. Place the ice cubes in the processor and pulse to grind. Add the fish, curry paste, egg, fish sauce, and sugar, and process for about 2 minutes to form a smooth paste, scraping down the sides of the bowl from once or twice. Transfer to a bowl and stir in the lime leaves, green beans, and Thai basil. Mix well.

Heat a thin film of oil in a cast-iron or nonstick frying pan over medium-high heat. Fry two tablespoonfuls of the mixture shaped into patties, about 4 minutes per side. Serve with the cucumber relish.

Thai Cucumber Salad

Serves 4

1 Thai chili, seeded and chopped

3 small cloves garlic, crushed

1/4 lime, very thinly sliced

1 tablespoon palm or light brown sugar

1 tablespoon tiny, dried shrimp, rinsed (optional)

2 ounces long or green beans (or garlic scapes), cut into 2-inch pieces

1 or 2 cucumbers, cut into 1-inch bite-size pieces

2 tablespoons Thai fish sauce

Juice of 1 lime

6 cherry tomatoes, cut in half

2 tablespoons roasted peanuts, chopped

With a mortar and pestle or a mini chopper, make a paste from the chili, garlic, sliced lime, and sugar. Add the dried shrimp, if using, and work it into the paste. In a large bowl, combine the beans, cucumbers, fish sauce, lime juice, and the paste. Using a potato masher or the back of a large spoon, lightly bruise the vegetables while tossing with the dressing. Add the tomatoes and bruise them, as well. Let sit 10 minutes or more at room temperature. Toss in the peanuts and serve.

CSA WEEK 4

P I C K L I S T

CHERRY TOMATOES - LETTUCE - BASIL - BEETS - SUMMER SQUASH - BROCCOLI - FENNEL - CUCUMBERS - PERENNIAL PLANT OF CHOICE (pictured here, annise hyssop)

EDGEWATER update: Waking up on Tuesday morning made the past few days feel like a dream.  Was there even a heat wave last week? Did we in fact harvest three plantings of broccoli in fear of it bolting and turning soft and mushy due to high temps? How about the fourth of July?  Did we parade prep like crazy, go so hard on the streets of Plainfield, and then recoup by the river?  Who knows, I'm suddenly blinded by a layer of fleece on my upper half and wool socks at my feet.  Oh New England… everything they say about you is true.  You don’t like the weather? Wait a minute.

As I work up the courage to go outside, get rained on, and harvest all the Tuesday things for Wednesday's CSA day, I am reminded that I am in fact a fairweather farmer.  ooops. 

Strawberry season came to a close this week.  All in all, it was a pretty weak harvest compared to past seasons.  Many things could be said about the why of it all.  But we are already looking into the future, and weeding next year’s crop that is planted on new ground in hopes of a better run.  All that said, the flavor was great and our field crew busted their buns daily picking the sweetest berries in a field lacking heavy set fruit.

Moving right along though, we are suddenly rich in raspberries, black caps, and blueberries are on the horizon.

FARMY FOODIE PRO-TIPS:

The following recipes were crafted specifically for this week’s CSA by our friend and hyper local chef (he lives just up the road), Mitchell Davis.  if you are curious about alllll the recipes he has to offer, check out his substack:

Chilled Green Garden Soup

Makes 6 to 8 servings

Use whatever herbs you like to flavor this refreshing chilled green soup. Garnish with diced fresh tomato, plain yogurt, and chopped herbs.

2 zucchini or summer squash

2 large cucumbers

1 bunch scallions, garlic chives, or a small handful of garlic scapes

3/4 cup plain yogurt or unflavored, unsweetened almond milk

Handful of fresh basil leaves

4 or 5 ice cubes

Juice of 1 lemon or lime

Dash Tabasco

Salt and freshly ground black pepper, to taste

Into a powerful blender, cut the zucchini or summer squash into chunks. If the cucumbers have thick skin, half peel them. If the seeds are large, scrape them out. Then cut into chunks and add to the blender along with the scallions, yogurt, basil, ice cubes, lemon or lime juice, and Tabasco. Add a generous pinch of salt and some freshly ground black pepper. Pulse to get a good blend going, then let the machine run on high until you have a smooth, bright green soup. You can adjust the consistency with water or vegetable stock and adjust the taste to your liking with additional salt, pepper, Tabasco, or more citrus juice. Serve in chilled bowls garnished with plain yogurt, diced tomato, and chopped herbs.

Chopped Broccoli Salad

Makes 6 to 8 servings

Though I’m really not a fan of raw broccoli, I crave this salad.

1 large head broccoli or a couple of broccoli crowns

½ medium red onion, finely chopped

3 scallions, chopped

1 bunch parsley or cilantro, minced

½ cup pumpkin or sunflower seeds, toasted, or cashews or walnuts, toasted and chopped

½ cup dried cranberries, blueberries, or cherries, chopped, or fresh pomegranate seeds

¼ cup extra-virgin olive oil

Juice of 1 lemon

½ cup plain Greek yogurt, full fat preferred, or mayonnaise

1 tablespoon maple syrup

1 teaspoon toasted, ground cumin

½ teaspoon kosher salt

½ teaspoon ground black pepper

With a sharp vegetable peeler, peel the tough outer layer of the broccoli stems. Cut off the peeled stems, dice finely, and place in a large mixing bowl. Cut off any florets on long stems and chop the stems and the florets. Repeat until all of the broccoli is chopped finely and in the bowl.

Add the red onion, scallions, parsley, seeds or nuts, dried cranberries or other fruit, olive oil, lemon juice, yogurt, honey or maple syrup, cumin, salt, and black pepper. The salad will keep at least a week in the fridge, getting better after a couple of days.


CSA WEEK 3 (a week late!)

p i c k l i s t

STRAWBERRIES - GARLIC SCAPES - CUCUMBER - LETTUCE - BASIL  - CHERRY TOMATOES - ZUCCHINI - SUMMER SQUASH - HERB PLANT OF CHOICE (ROSEMARY/SAGE/STEVIA)

EDGEWATER update: Field crew has now spent 19 days straight picking strawberries.  They greet each morning with butts in the air and hands towards the ground, moving through the plants, searching for the sweetest red.  The sounds from the field are a symphony of leaves rustling, fruit plucking, chitter chatter, jokes galore, etc…  If you make it down to the berry patch for PYO this week, you will most certainly be picking near these angels.  They are the real heroes of strawberry season, tell em I say hi.

My morning starts differently.  Mike and I receive the picklist from the farmstand/ the coops/ and the CSA.  And we divvy up who is picking what, and where daily.  When I first came to Edgewater, I was granted the esteemed privilege of riding around in Mike’s truck and harvesting the daily pick with him.  Everything I know about harvesting, I learned from him.  He also taught me about the best field snacks, for example eating corn raw straight from the stalk. The sounds from the truck were of sports talk radio and potentially too many bad jokes.  He still has sports talk radio constantly on dial as he moves from harvest to harvest- picking beet greens, lettuce, kale, fennel etc… 

As for my ears and the sounds of the field, you might assume that I'm just out here taking in the natural sounds and being one with all my senses and my environment- but you would be so wrong- I am deep in Yesteryear by Caro Claire Burke, hbu?  I get all my summer reading (aka listening to audio books) done while crawling under the canopies of tomato greenhouses, picking cherries and slicing tomatoes on repeat.  Totally getting lost in the Yesteryear world while filling trays of T’s for your future BL’s.  All in all, I’d say It’s been a pretty fun week of audio and a tasty week of field snacks (hello cherry tomatoes).

Next train of thought- should the CSA also become a book club of sorts? LMK, send me your recs.  

FARMY FOODIE PRO-TIPS:

The following recipes were crafted specifically for this week’s CSA by our friend and hyper local chef (he lives just up the road), Mitchell Davis.  if you are curious about alllll the recipes he has to offer, check out his substack:

Strawberry “Long Cake” Makes 8 to 10 servings

A variation of shortcake, this seasonal dessert is baked in one large pan and divided to serve. 

Best topped with plenty of whipped cream and/or service with vanilla ice cream on the side.

For the topping:

1/4 cup sugar

Finely grated zest of 1 lemon

2 tablespoons all-purpose flour

3 tablespoons whole wheat, rye, or additional all-purpose flour

Pinch fine sea salt

1/4 cup unsalted butter, softened to room temperature

For the berries:

5 or 6 cups ripe strawberries

1/3 cup sugar

Juice of 1 lemon

For the long cake:

1/2 cup (1/4 pound, 1 stick) unsalted butter, chilled

1 large egg

2/3 cup full-fat buttermilk, half and half, or heavy cream

1 teaspoon vanilla extract or paste

2 cups all-purpose flour

4 teaspoons baking powder

6 tablespoons sugar

3/4 teaspoon fine sea salt

In a small bowl, combine the 1/4 cup sugar and lemon zest. Rub the zest into the sugar until it has the texture of wet sand. Add the flours and a pinch of salt and stir with a fork to combine. Add the softened butter and stir with the fork to moisten the dry ingredients until they form a coarse crumble. Set aside.

To prepare the fruit, hull and slice the berries into a large bowl. Add the sugar and lemon juice and stir to distribute being careful not to bruise the berries. Let macerate at room temperature for 20 to 30 minutes, until the berries wilt and give off some of their juice. Grease a 9” x 13” baking dish. Line with parchment and grease the paper. Preheat the oven to 375°F.  For the cake, cut the butter into small cubes and return to the fridge. In a small bowl, beat together the egg, buttermilk or cream, and vanilla to blend. In a large mixing bowl combine the flour, baking powder, sugar, and salt, and whisk to blend. Add the cubed butter and using your fingertips or a pastry cutter, break up the butter into small pieces, rubbing it into the flour as you would for biscuits or pie crust. When done, it should resemble coarse sand. Alternately, you can use a food processor fitted with a metal chopping blade to cut in the butter into the flour mixture. Add the egg mixture to the dry ingredients and using the back of a fork, push the mixture to and fro until just about all of the dry ingredients have been moistened. Don’t overwork. Some dry patches are okay. Transfer this mixture to the prepared pan. Moisten your fingertips with cold water and press the cake into an even layer in the pan. You can cover and refrigerate the cake at this point until ready to bake and serve.

With a slotted spoon, scatter the berries over the surface of the cake layer. Some liquid is okay, but you don’t want it all. Finally, scatter the crumb mixture over the berries, breaking up and large lumps with your fingertips. Bake for 30 to 35 minutes until the cake has risen, lightly browned, and pulled away from the edges. Serve warm or room temperature with whipped cream or vanilla ice cream. If you don’t eat the entire cake in one day, store leftovers in the fridge.

Fermented Garlic Scape Pickles

These flavorful lacto-fermented pickles keep forever in the fridge. I chop them into potato, egg, or tuna salads, or add them anywhere you might add capers. They are also a nice alternative to an olive garnish for a Martini, Gibson, or other dry cocktail. Using the same ratio of salt solution (2 to 3 % of the total weight of produce, spices, and water), you can ferment just about anything.

Note the weight of a small glass jar. (Grams will make the math easier.) Trim the buds off the garlic scapes and cut the curlicues into 2-inch lengths. Pack the scapes into the jar. Add a ½ teaspoon of peppercorns, 1/2 teaspoon of yellow mustard seeds, and 1/2 teaspoon of fennel seeds, or any other spices you like. Fill the jar with water so the scapes are submerged. Weigh the jar again and subtract the weight of the jar to determine the total weight of the scapes, spices, and water. Add 2.5% of that total weight in salt—so if the jar weighs 500 g, you’ll add 12.5 grams , about 1/2 ounce. (500 x 0.025=12.5).

Swirl the jar to start to dissolve the salt. Cover with a piece of cheesecloth or paper towel and a rubber band, or use a fermentation lid, and let sit in a dark place at room temperature to ferment for 4 or 5 days or so. The liquid should start to turn cloudy and you’ll smell a distinct garlic aroma. Taste a scape, and if it is done to your liking, tightly cover the jar with a lid and

Refrigerate until ready to use. I’ve kept fermented garlic scapes refrigerated for more than a year at a time, adding new ones to the same brine as the next harvest comes in.


CSA WEEK 2

P i c k l i s t

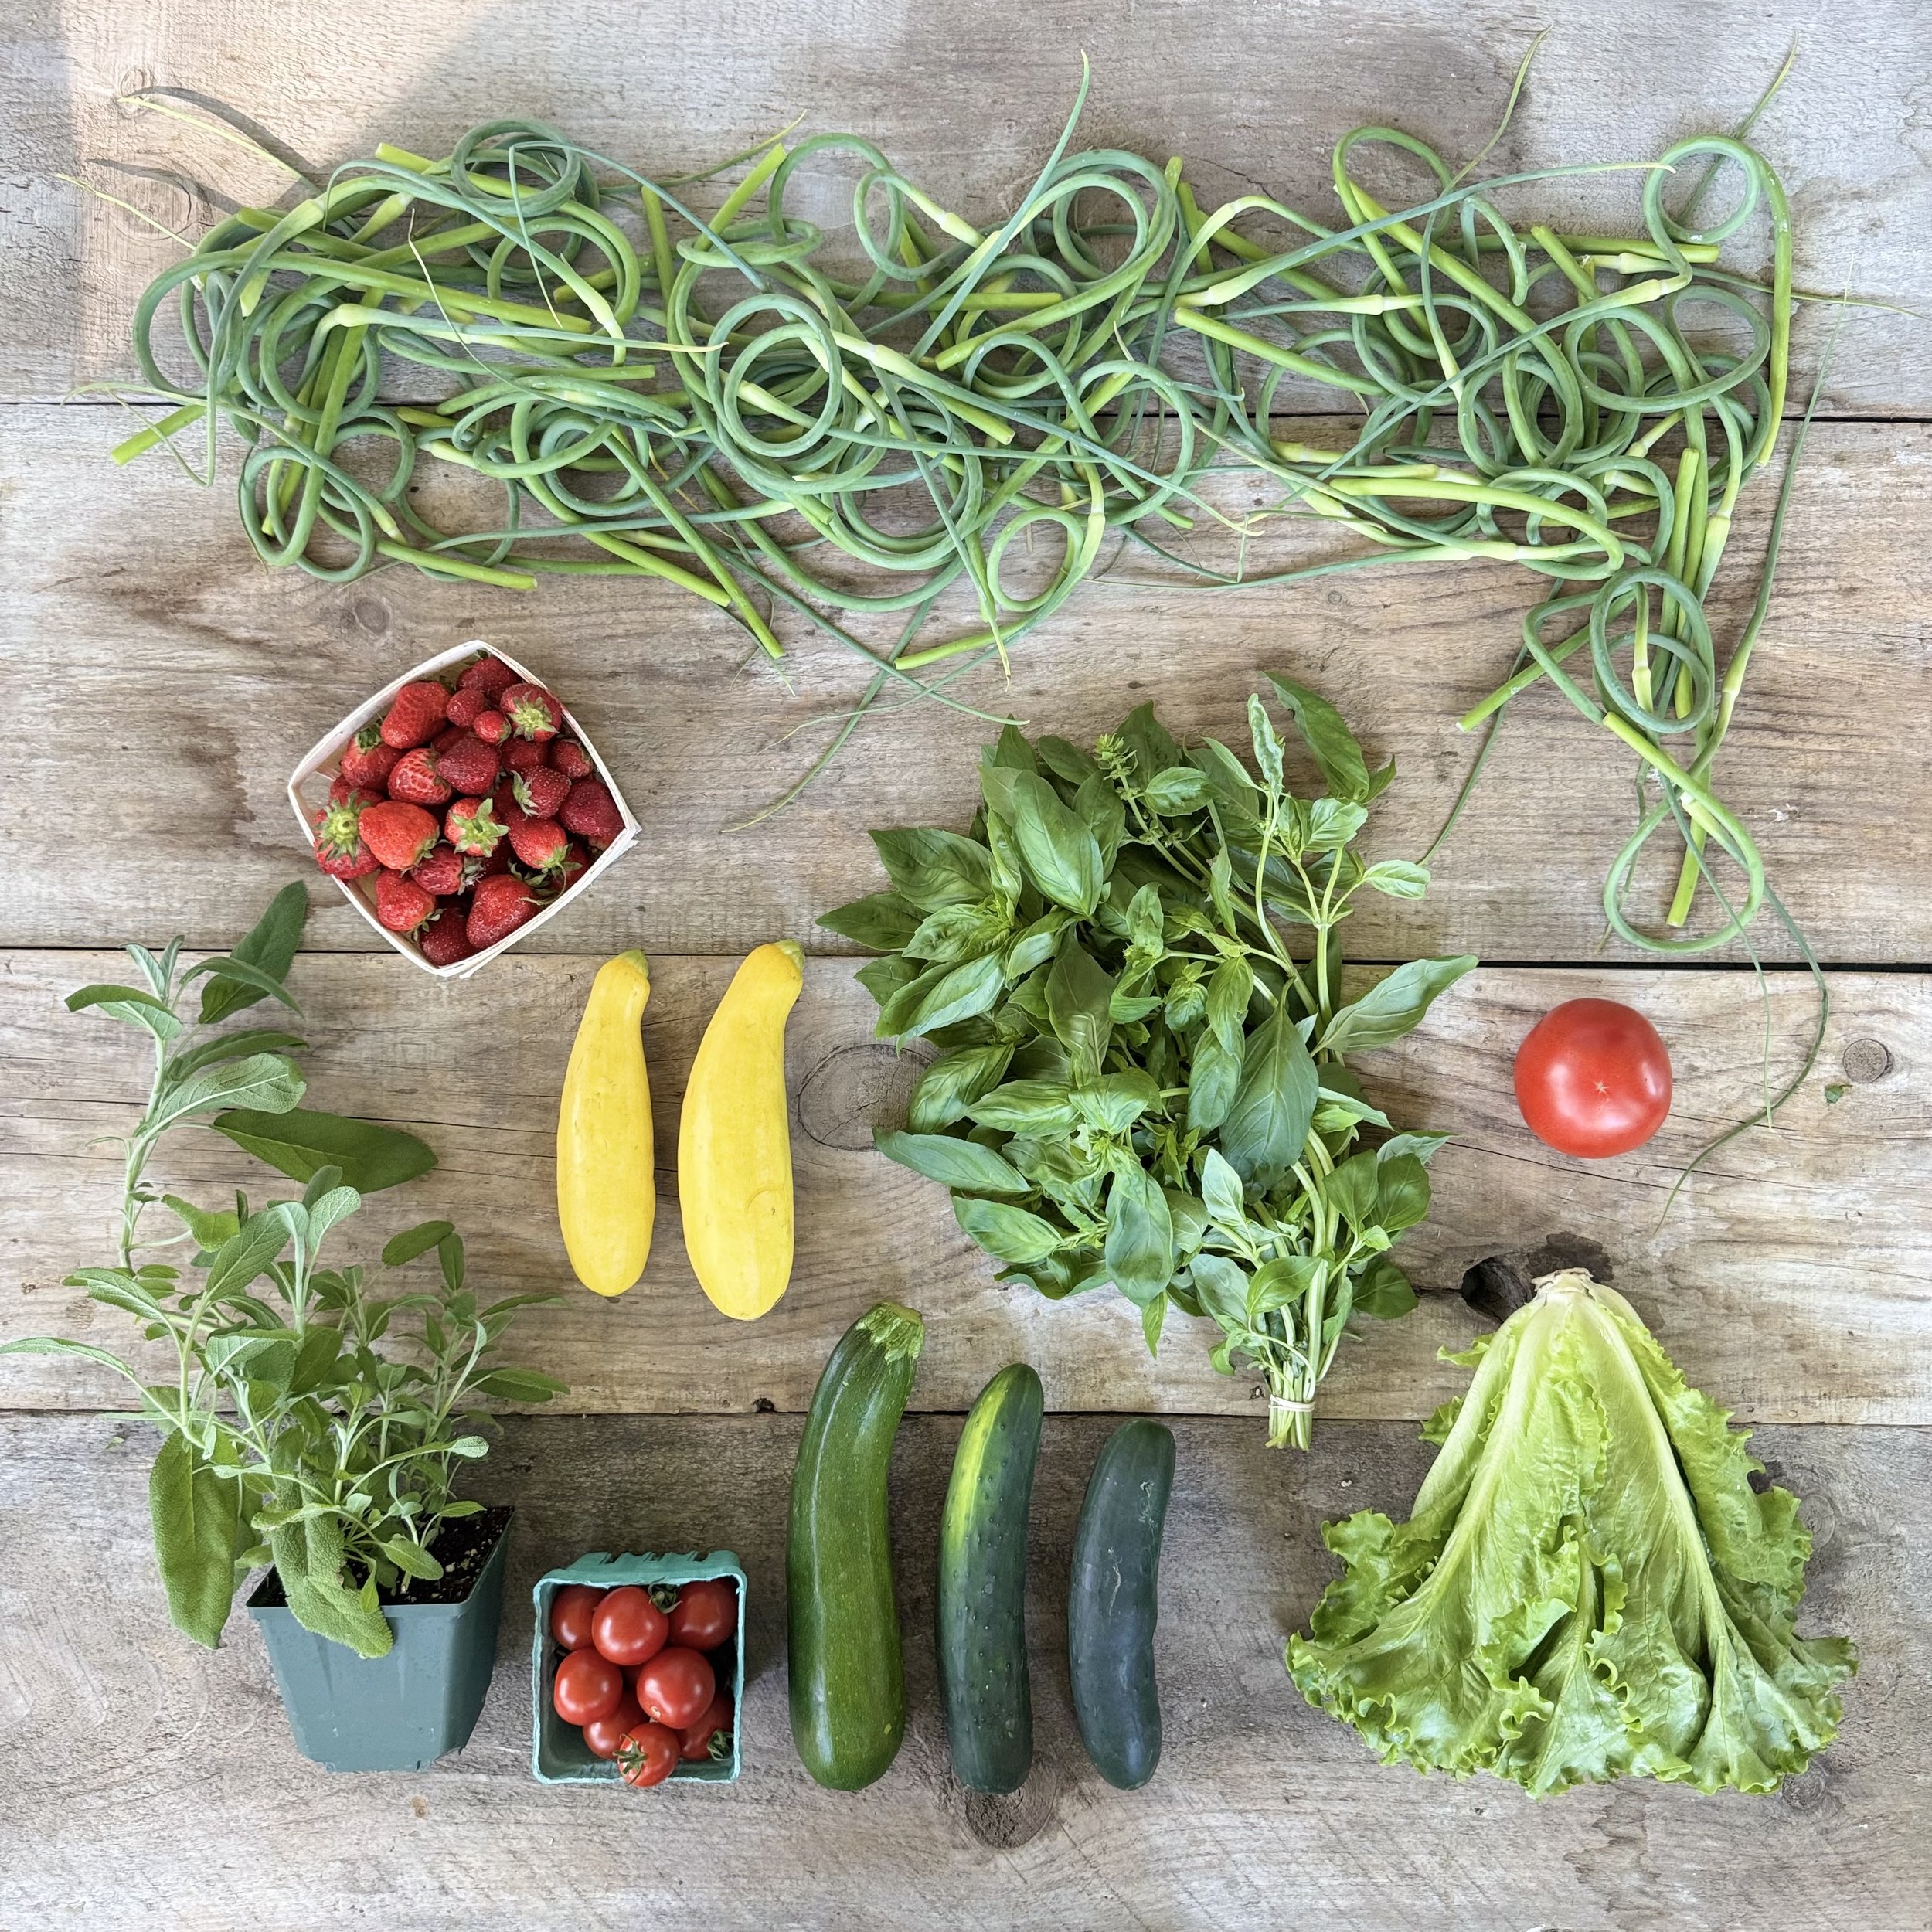
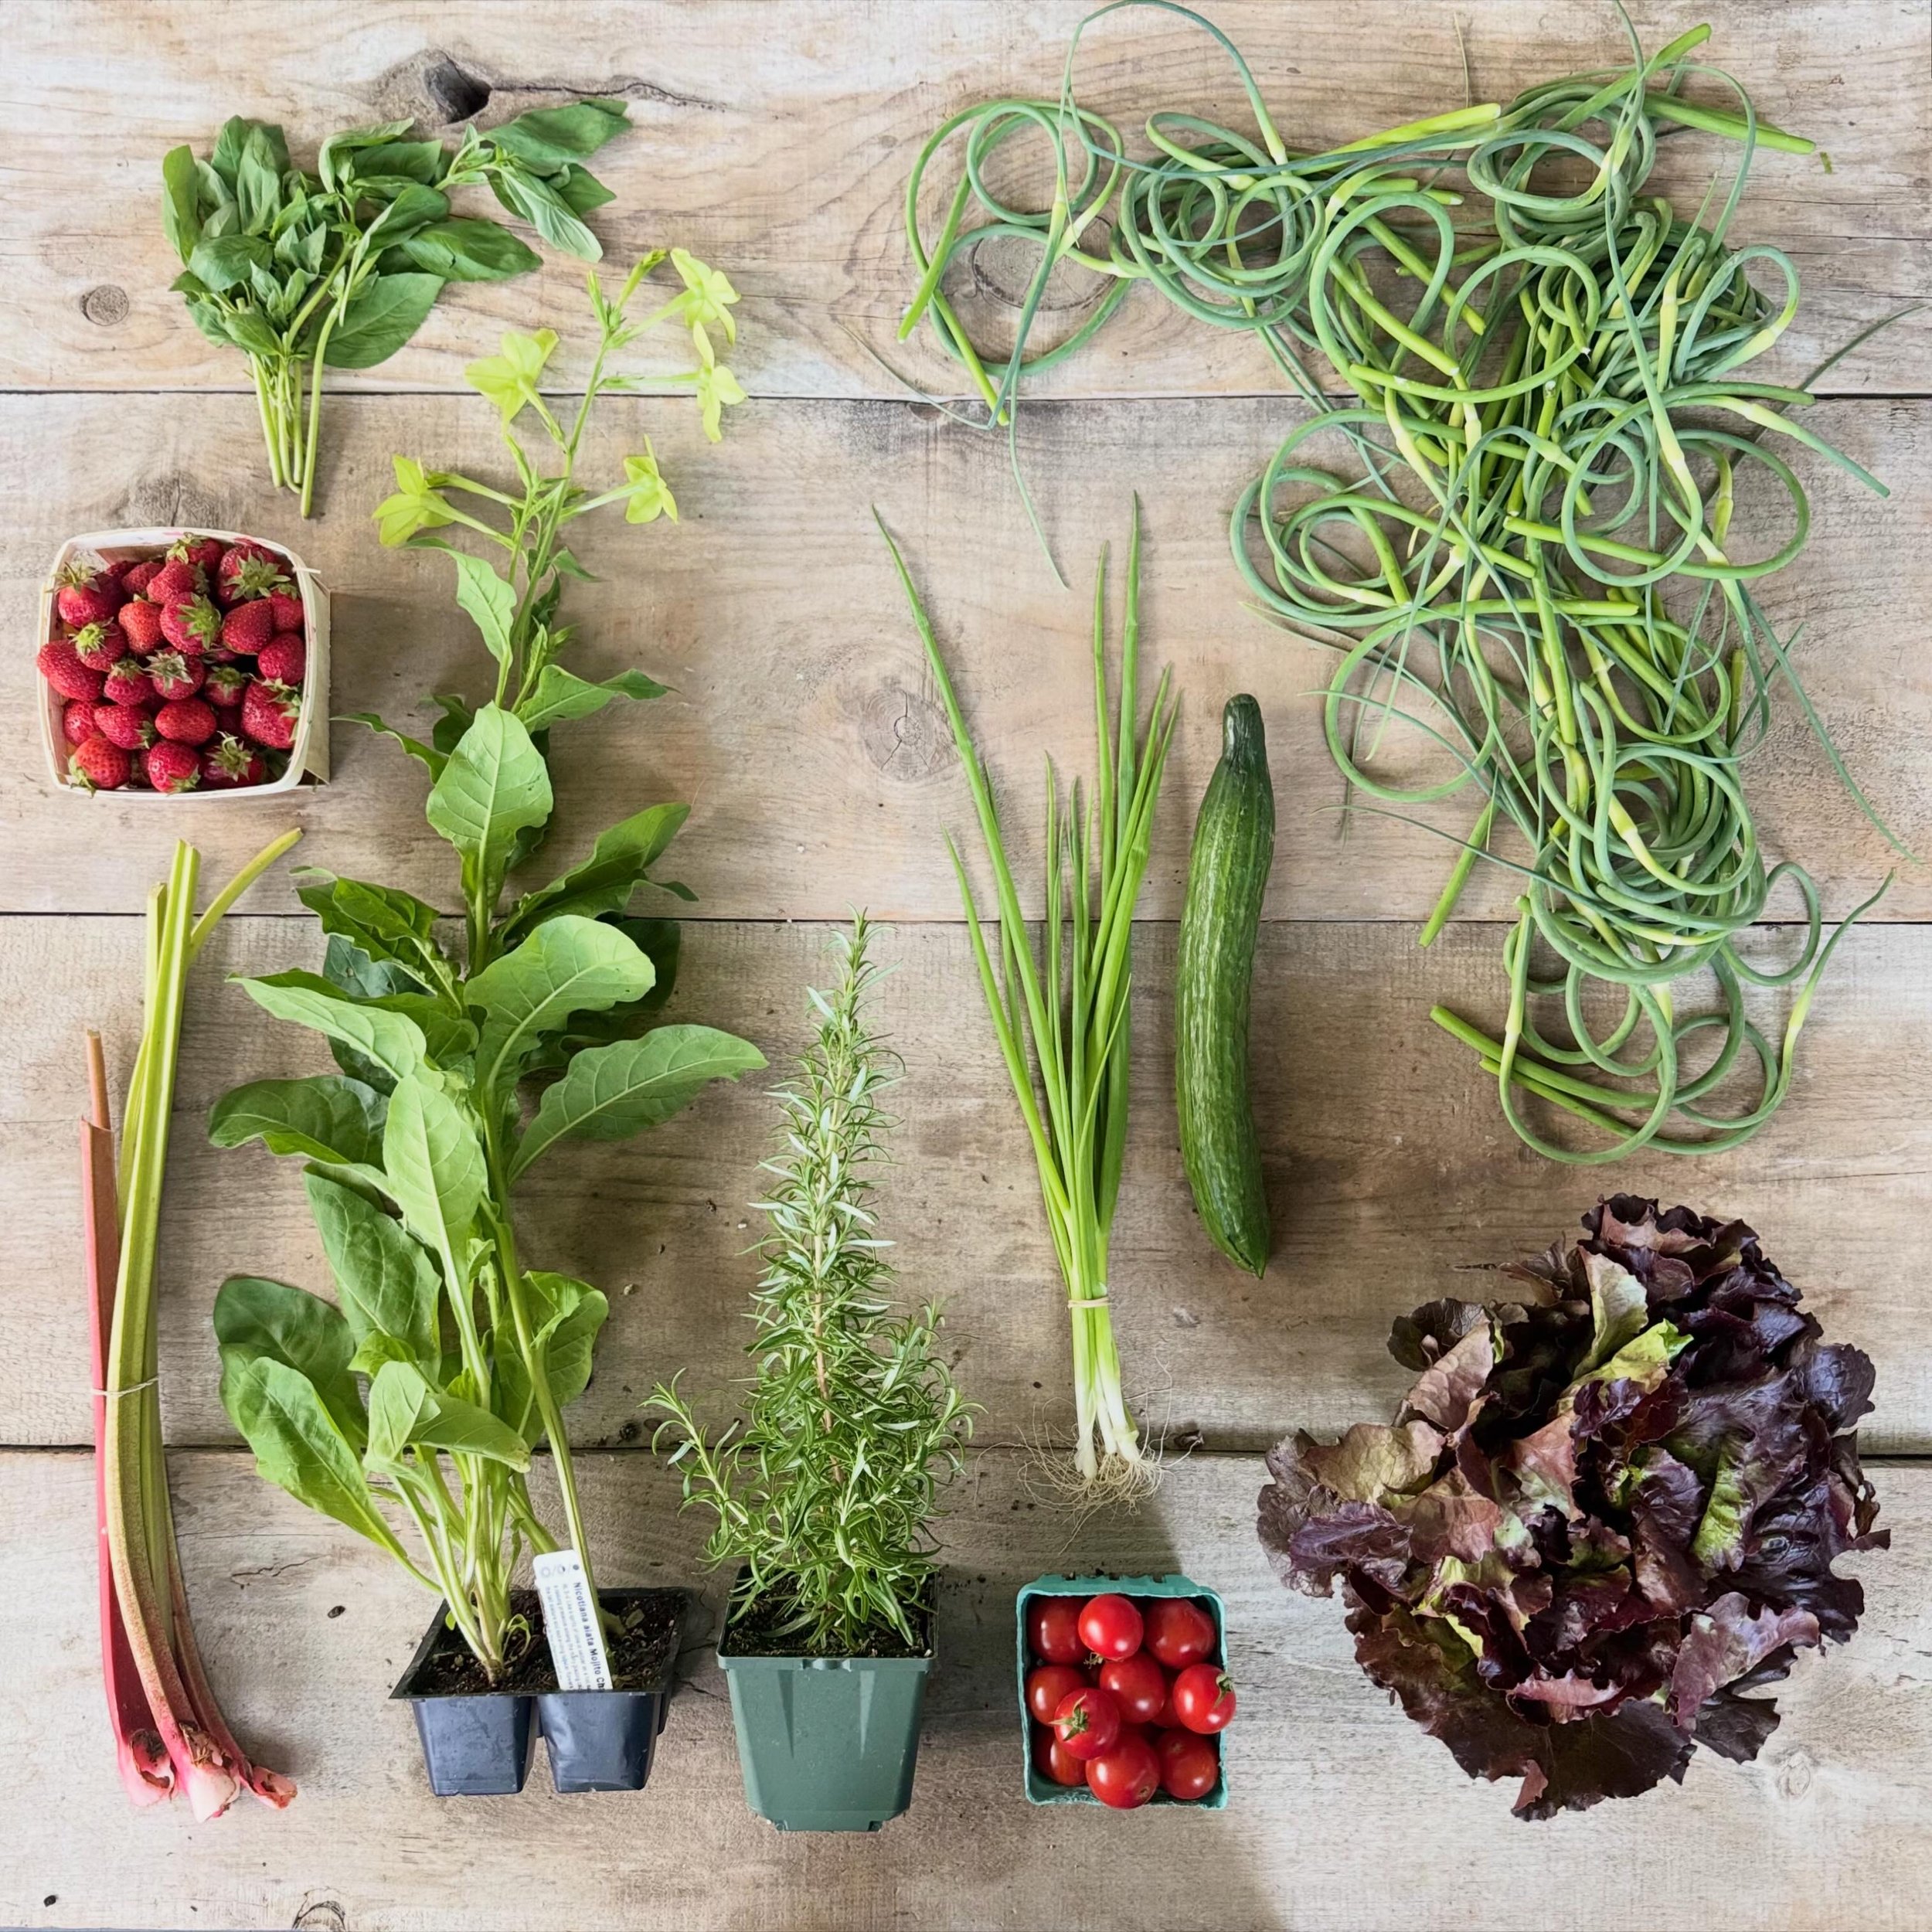
STRAWBERRIES - RHUBARB - GARLIC SCAPES - CUCUMBER - LETTUCE - BASIL - 

ROSEMARY - CHERRY TOMATOES - SCALLIONS - ANNUAL PACKS 

EDGEWATER update:  

Strawbs still strawbing and all the garlic scapes have been picked.  This moment is so fleeting- it's the best time of year when the sun hardly sets, the field smells like jam and we are just swimming in garlic scapes.  It’s a time to celebrate.  One way to honor the season happens to coincide with my fave way to store scapes. Treat them like flowers!  Bunch your garlic scapes lovingly in a bouquet and place in a vase, flat sides down sitting in about an inch of water.  Bud sides up, twisting and turning toward the sun.  It’s just the prettiest thing and it really captures this moment.

In other Edgewater news, the basil greenhouse is cranking.  And we are just beginning to see signs of life from the ginger crop we planted under the basil plugs.  This interplanting of basil and ginger might just be the coolest thing we’ve figured out at Edgewater and I’m all about it.  

Oh, this just in: PICK YOUR OWN STRAWBERRIES OPENS TODAY!

Well, hot damn, I just received the call from Ray, and the berries are ready for the people.  

~Here is what you need to know~

DIRECTIONS: head to 99 River Road/ Plainfield, NH and follow the signs to the field

HOURS: mornings only (for now) 8am-noon

FIXED PRICES: CASH AND CHECK ONLY

The picking is weather & crop permitting So, check facebook & instagram or our website before you come thru :)

and I’ll end on this note: It is not Summer without fresh picking/ stained red fingers/ a belly full of berries/ late night strawberry jamming/ etc. 

So, get in on everything strawberry this season, and we’ll see ya in the field!

FARMY FOODIE PRO-TIPS:

The following recipes were crafted specifically for this week’s CSA by our friend and hyper local chef (he lives just up the road), Mitchell Davis.  if you are curious about alllll the recipes he has to offer, check out his substack:

Braised Garlic Scapes

Serves 4

I first had a version of this dish in one of my favorite trattorias in Rome, Trecca. 

The same preparation works perfectly with green beans, too.

2 or 3 large handfuls of garlic scapes

3 tablespoons extra-virgin olive oil

1/2 small onion, finely chopped

1 small (2-inch) sprig fresh rosemary

1 clove garlic, minced

Pinch hot chili flakes

1 anchovy (optional)

1 cup tomato passata, tomato purée, crushed tomatoes, canned tomatoes, or other

tomato product

1 heaping tablespoon tomato paste

1/2 to 1 cup water, depending on which tomato product you use

1 bay leaf

Pinch sugar (optional)

Salt and freshly ground pepper to taste

Cut the remove the bulbs of the garlic scapes and cut the curlicue stems into 2-inch- long pieces. You want about 1 1/2 to 2 cups. Rinse, drain, and set aside. In a medium saucepan heat the olive oil over medium-high heat. Add the onion and rosemary and sauté for a couple of minutes until the onion is soft. Add the garlic, chili flakes, and anchovy, if using, mashing the anchovy with the back of spoon or spatula and sautéing until the garlic is fragrant. Don’t let it burn. If you are sensitive to the resinous flavor of rosemary, remove it now; if you love it, leave it in. Add the tomato passata, tomato paste, 1/2 to 3/4 cup of water, bay leaf, pinch of sugar, if using, and the prepared garlic scapes. They should be almost covered by liquid. Bring to a boil, reduce the heat to a simmer, cover loosely, and let braise for about 20 minutes, until the scapes are soft. Taste and adjust the seasoning with salt and pepper. Serve hot, warm, or at room temperature.


Garlic Scape Pesto

Makes 3/4 cup

As a more subtle substitute for garlic, garlic scapes work well in pesto. I like to blanch both the basil and the garlic scape to preserve their green color—placed in a small jar and topped with olive oil it will last a week without turning brown. Use the pesto on pasta, ricotta, fresh tomatoes, or anything you like.

6-10 large garlic scapes

1 large bunch basil

Salt

1/4 cup pine nuts

Freshly ground black pepper

1/2 cup extra-virgin olive oil

1/3 cup grated Pecorino Romano

Remove the bud from the garlic scapes and cut the curlicue stems into 2-inch pieces. Remove the leaves from the basil stems. Set both aside in separate containers. Place a medium bowl of ice water near the stove. Bring a medium pot of generously salted water to a boil. Add the garlic scapes and after a minute add the basil leaves. As soon as the water comes back to a boil, use a wire strainer or spider to lift everything out of the pot, drain well, and place into the ice water. Drain the scapes and basil very well and place in the bowl of a food processor fitted with a metal blade. Add the pine nuts, a pinch of salt, and some freshly ground black pepper. Pulse to finely chop the mixture, scraping down the sides to get an even paste. Once the paste is achieved, keep the machine running and slowly pour the oil through the feed tube to form an emulsion. Scrape down the sides from time to time. Add the cheese, pulse to blend, taste, and adjust the seasoning. Use a hunk of fresh bread to wipe out the bowl so nothing is wasted.


 CSA WEEK 1

P i c k l i s t

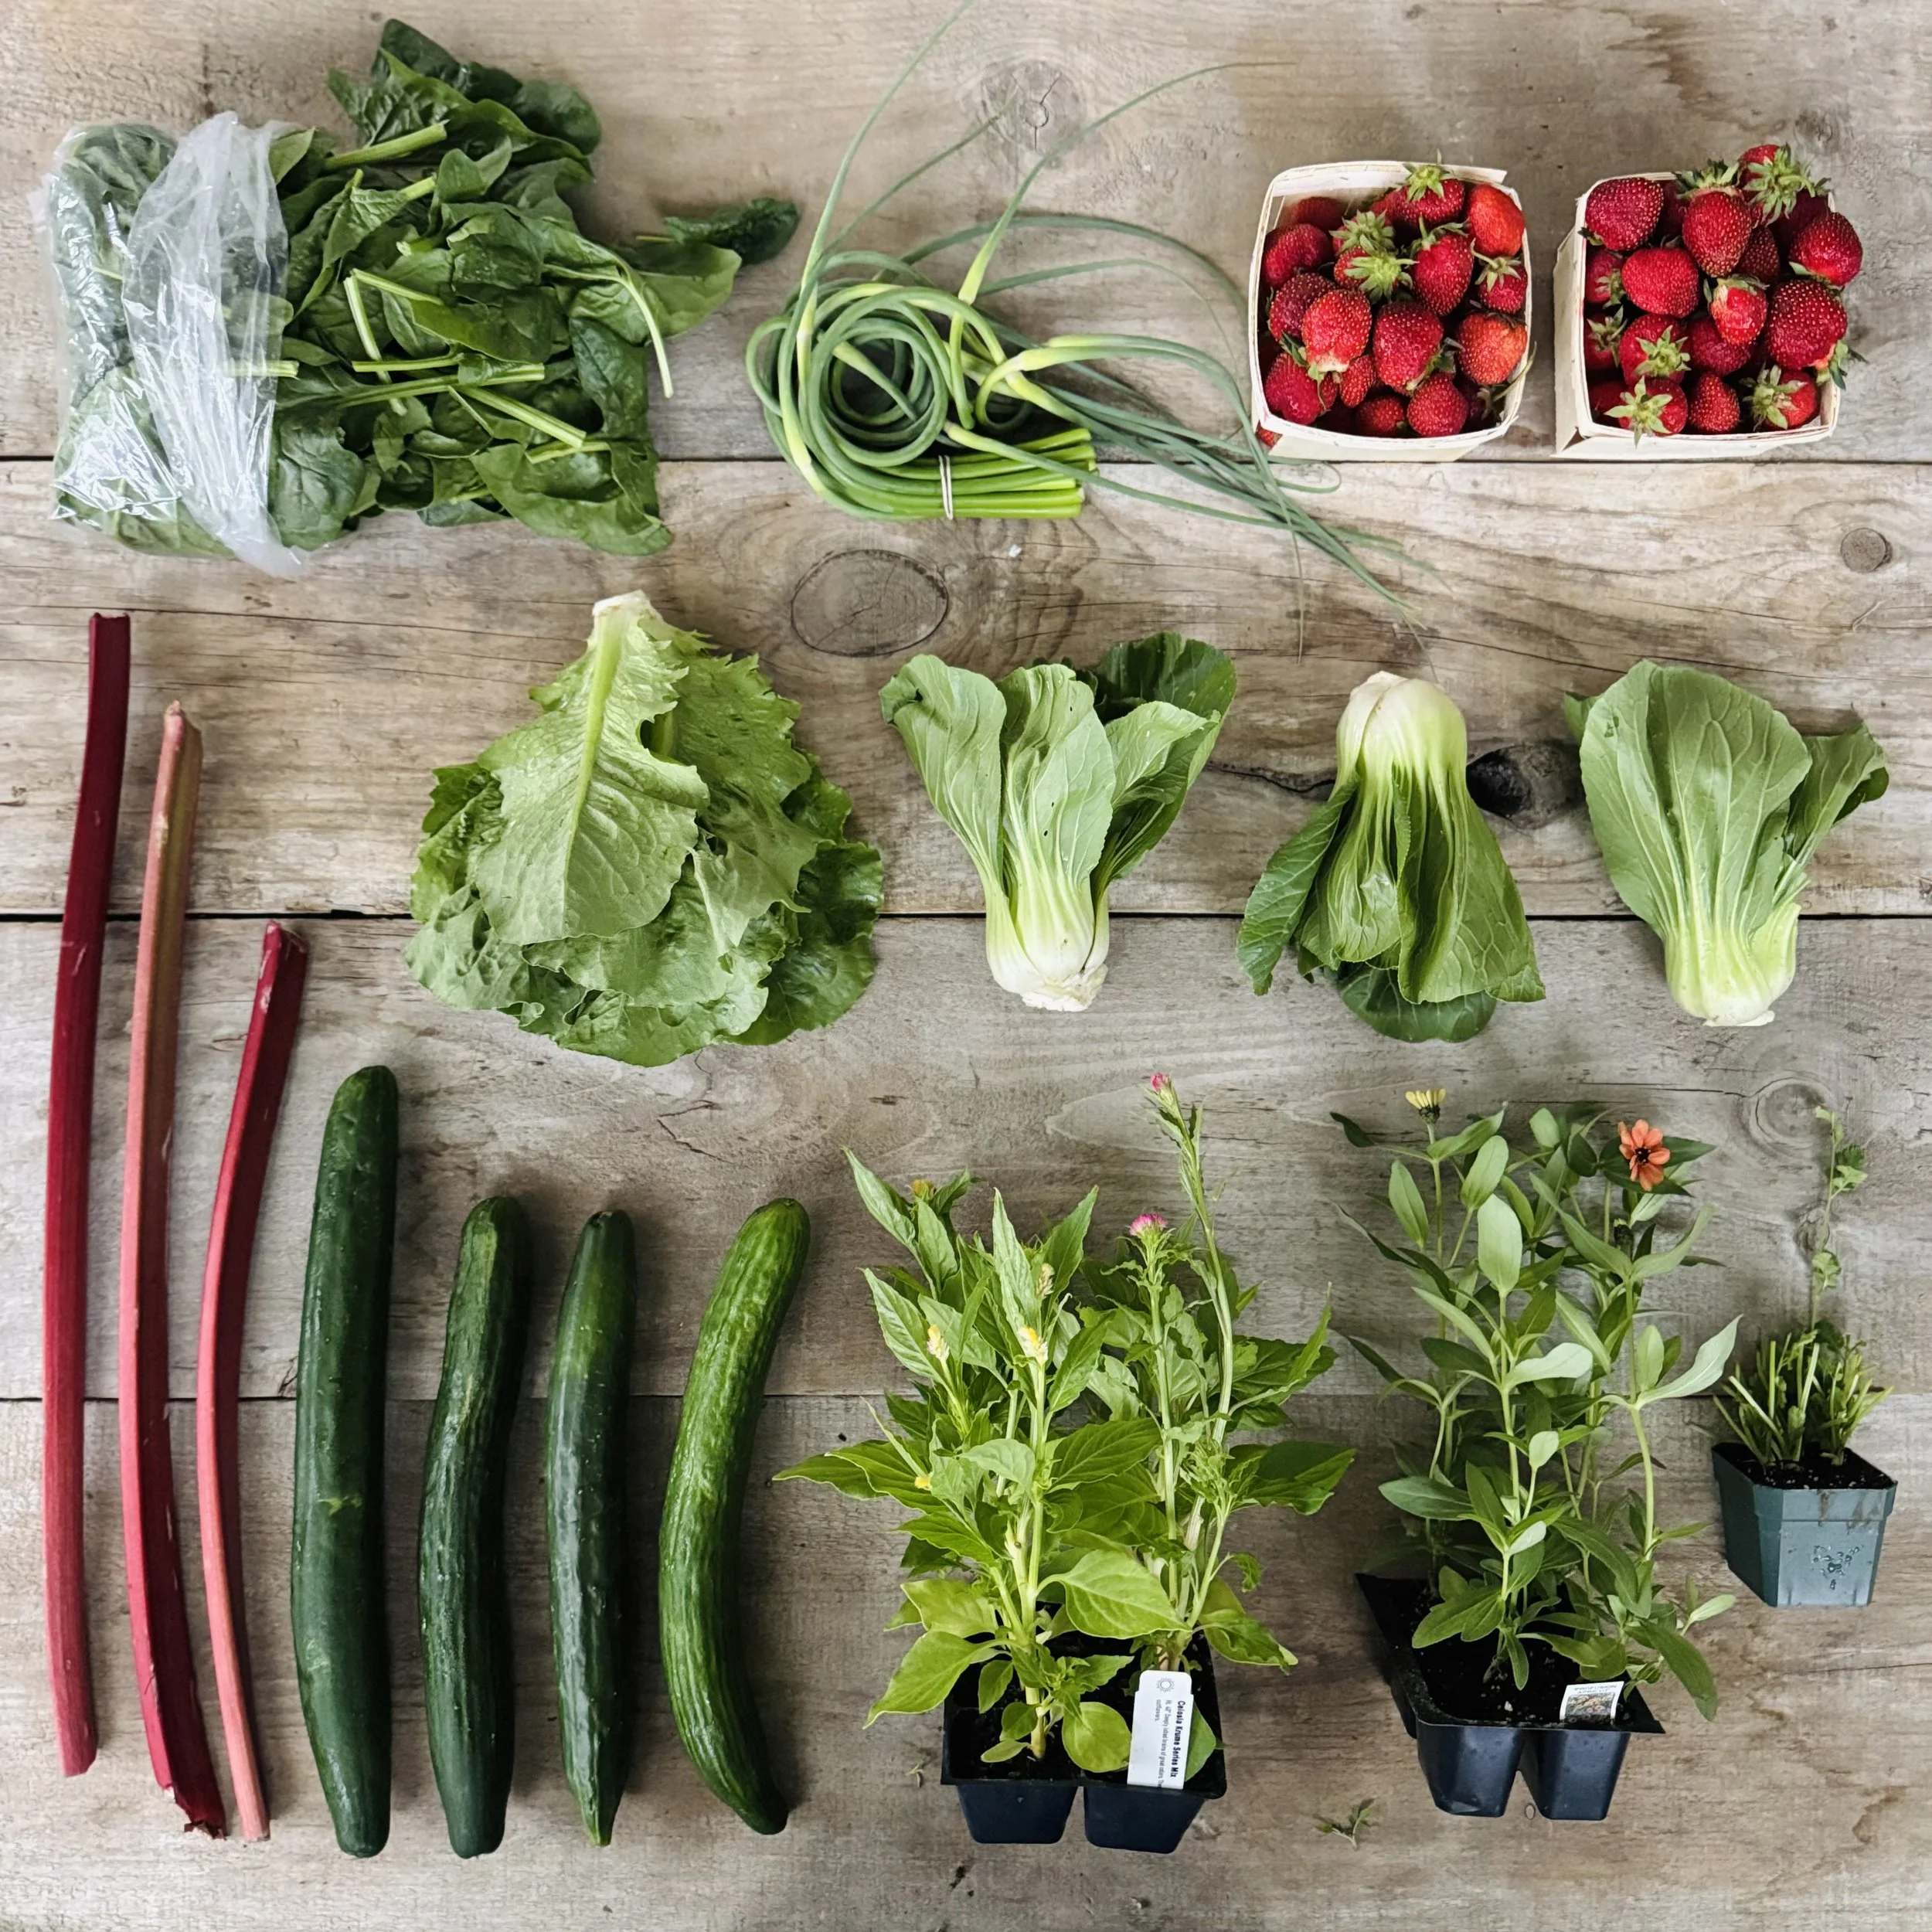
STRAWBERRIES - RHUBARB - SPINACH - BOK CHOY - GARLIC SCAPES - 

CUCUMBERS - ROMAINE LETTUCE - CILANTRO - ANNUAL PACKS 

HERE WE GO HARVEST SEASON.  Good grief yall, it’s been a real minute since we met over fresh veg. It feels so good and grounding to be back to the harvest of it all.  This winter was a beast and I am grateful it’s finally Summer.  So let’s all take in a collective deep breath in and out and name what brings us all here today:

STRAAAAWWBERRRIES.  

The thing about strawberries is their ability to meet us where we are.  You take that first bite of the season and you are immediately right where you need to be.  Nothing else is as important as tasting that first fruit.  All the hustle of whatever happened prior strips away. We’re all just out here eating strawberries and enjoying the sunshine, hallelu.

The kick off to CSA is met with community, fresh foods and first tastes.  The farmstand becomes the town's watering hole to meet up, give high fives, share fave swim spots, recipes, hot goss, eat a cookie, and pick up your week’s fruit and veg.  It is an act of delight to just be here.  I hope you feel the same.  

The lead up to this week’s harvest was honestly a dream.  The planting conditions in May were ideal-  rain fell an appropriate amount to keep the ground ready for planting at all times.  The sun shone in between the rains to bring out the best in all of us- people and plants.  Our field crew has been planting on repeat and this week they began the summer long haul task of keeping weeds at bay.  There is still plenty to plant as we rely on succession seedings to get us through November.

Lastly, before we get into recipes and pro-tips, here is a link to join this CSA club. If someone you know wants in, there is room for everyone here.

There is so much more of farm biz to address here, but we’ll just go ahead and save it for next time…until then, enjoy and eat up :)

FARMY FOODIE PRO-TIPS: The following recipes were crafted specifically for this week’s CSA by our friend and hyper local chef (he lives just up the road), Mitchell Davis.  if you are curious about alllll the recipes he has to offer, check out his substack:

Stir-Fried Bok Choy with Fermented Black Beans

Makes 4 to 6 servings

1 tablespoon Chinese fermented black beans

4 or 5 small bok choy

1/4 cup water

1 tablespoon cornstarch

2 tablespoons peanut or vegetable oil

1 large clove garlic, minced

1-inch piece ginger, minced

1 tablespoon Shaoxing wine

2 teaspoons soy sauce

2 teaspoons oyster sauce

Salt and freshly ground white pepper

Rinse the fermented black beans under cold running water and set aside to drain in a small strainer. Trim any dried ends off the bok choy and cut the stalks and leaves into 1 1/2-inch to 2- inch pieces. Rinse in cold water to remove any dirt or sand and drain. In a small bowl, combine the water and cornstarch and stir to dissolve. Set aside.

Heat a large, 12- to 14-inch pan or wok over high heat. Add the peanut oil, then the garlic and ginger. Let them sizzle (without burning) for 20 seconds, then add the rinsed black beans and continue cooking another 15 seconds or so until they are fragrant. Add the bok choy and sauté, tossing with the hot oil and aromatics, until it begins to soften, 2 or 3 minutes. Add the Shaoxing wine, soy sauce, and oyster sauce, and continue tossing the bok choy. It will wilt and give off its liquid. Add a pinch of salt and some freshly ground white pepper. Stir the cornstarch mixture again, and drizzle into the pan to thicken the liquid enough to glaze the bok choy. Serve immediately.


Strawberry Rhubarb Sour Cream Pie

Makes one 9-inch pie, 8 to 10 servings

For the Graham cracker crust:

8 ounces (about 14) Graham crackers, broken into pieces

1/3 cup light brown sugar

1/3 cup pecan halves

2 tablespoons whole-wheat or all-purpose flour

1/4 teaspoon cinnamon

1/4 teaspoon salt

6 tablespoons unsalted butter, melted and cooled

For the strawberry rhubarb filling:

3/4 cup granulated sugar

3 1/2 tablespoons cornstarch

1/3 cup water

2 1/2 cups thinly sliced rhubarb

2 1/2 cups halved or quartered fresh strawberries

Zest of 1/2 lemon

For the sour cream topping:

1 1/4 cups sour cream or full-fat Greek yogurt

1/2 cup granulated sugar

1/4 cup half and half, heavy cream, or milk

2 tablespoons all-purpose flour

2 large eggs

1 teaspoon vanilla

Preheat the oven to 350°F.

To prepare the crust, in the bowl of a food processor fitted with the metal chopping blade, combine the Graham crackers, brown sugar, pecans, flour, cinnamon, and salt. Pulse to grind to fine crumbs. Transfer this mixture of a mixing bowl. Drizzle in the melted butter while stirring with a fork to combine. The mixture should resemble wet sand. Transfer to a deep-dish, 9-inch pie plate and press along the bottom and up the sides to form a crust. Be sure to thin out the edge around the bottom, where the sides begin to rise, using your finger tips to press the crust into the crevice. Carefully and gently place in the preheated oven—a jolt or bang will cause the crust to collapse—and bake for 15 minutes, until lightly browned. Remove to a wire rack to cool completely. Keep the oven on 350°F.

To prepare the filling, in a heavy-bottom saucepan, combine the sugar and cornstarch. With a rubber spatula, stir in the water to form a smooth paste. Add the rhubarb, strawberries, and lemon zest, and stir to coat with the sugar and starch. Set the pan over medium heat and bring to a simmer, stirring frequently. The fruit will give off liquid. As it begins to heat up, the cornstarch will thicken. You want to heat it slowly enough for the fruit to soften by the time the mixture has thickened. Let simmer for a minute or two. Remove from the heat, transfer to a wide bowl or tray to cool. Spoon the cooled filling into the cooled crust and, using an offset spatula, spread it into an even layer.

To prepare the topping, in a small bowl, beat together the sour cream, sugar, half and half, flour, eggs, and vanilla, until combined. Pour this mixture over the filling, being careful to keep it on top of the strawberry rhubarb mixture. Using a clean offset spatula, spread the topping to the edges of the crust, covering the filling completely. Place in the hot oven and bake for 35 minutes until the topping is set and lightly browned. Remove from the oven and cool on a wire rack to room temperature. Refrigerate for at least 4 hours and preferably overnight before serving.

FALL CSA WEEK 6/ END OF SEASON

P i c k l i s t

BLACK FUTSU WINTER SQUASH - BUTTERNUT WINTER SQUASH - ONIONS - PURPLE TOP TURNIPS - GOLD POTATOES - BRUSSELS SPROUTS - SWEET POTATOES - CARROTS - KALE - LEEKS - ROSEMARY - TOMATOES!

EDGEWATER update:  Last picklist of season, marker of time, CSA comes to a close for 2025. Week 6 of fall CSA marks the finale to our 23 weeks of outdoor harvest. What began in June with strawberries and radishes ends in November with leeks and sweet potatoes. Something about this year’s end is finding me deep in my feelings.  Maybe because this year feels bigger than food. This growing season was one to toss your hands in the air and say, ok drought just leave me standing.  Focus on the gains instead of the losses, always stay ready for climate hiccups (ok, catastrophes), and hold your people close.  Sure, nourish the body with food.  But nourish the heart with people.  

We had so many cool folks enter our farm/lives this season.  Ali Schubert came in fresh with very little edgewater time and stepped into farmstand world like a pro.  Alex, our kitchen’s lead with Megan at her side, also came in fresh with little direction from us “here is a kitchen, here is a cucumber, go!” and totally crushed it, turning us back onto grab and go salads, sauces and syrups we never knew we needed (ahem lemon verbena simple syrup! Rhubarb BBQ sauce!) and cookies galore.  It’s been rad to see the farmstand thrive as we move through the years. The farmstand is the heartbeat of the farm and the crew that works there are angels on earth that keep it all together and keep it feeling like a hub to be shared.  

On field crew we had newcomers Cheque and Jose.  They came to work with us through the H2-A visa program.  Quite frankly I’ve been hesitant to mention them this season and give them the light they deserve.  But now that the season is closing and they are heading back to Mexico, i just want to share how amazing these guys are.  Just more earth angels that have some how made their way to edgewater.  They are both so kind and cool and work so hard and I am full of gratitude they spent the growing season with us in Plainfield NH.  Also Jalina who was on field crew this year- a total bad ass who entered with 0 farming experience.  She is a neurologist that got let go from her federal work research job back in the Spring.  She spent the summer picking strawberries, summer squash, cucumbers, cherry tomatoes, blueberries, etc. until she found a job back in her field of literal brain science.  She had a very short stint here, but she seamlessly went with the flow of it all and made a very lasting impression.  Again, I can not stress enough all the amazing people that entered our lives in 2025.  I am already looking back on this years shitty growing season, and forgetting all about the lack of water and taking note of the good people instead.

car full of all the best/ a proper send off to Cheque and Jose

As always, BIG UPS to the CSA fam.  I am forever so taken back when you choose our farm to be your farm.  It means more than you know.  

In the words of my dear friend Rita of Stitchdown farm, “Time to trade in these work pants for the cozy fireside seed ordering farm planning varietal (sweats) worn in winter.” 

Happy winter everyone, hope to see you back in 2026… I’ll be here (lol)

And if you are jonesing to sign up for our 2026 CSA, check the website come Jan. 1 :)

 FARMY FOODIE PRO-TIPS:

The following recipes was crafted specifically for this week’s CSA by our friend and hyper local chef (he lives just up the road), Mitchell Davis.  if you are curious about alllll the recipes he has to offer, check out his substack:

Lebanese Pickled Turnips

These Lebanese pickles are known as lifit in Arabic. They are ubiquitous in the Middle East, where they garnish falafel and other pita sandwiches and are an integral part of every relish plate. They develop a deep crimson color from the addition of a small beet in the brine. They’ll keep about a month in the fridge.

1 cup water

2 tablespoons kosher salt

1 tablespoon sugar

2 teaspoons black peppercorns

1 bay leaf

1/2 cup distilled white vinegar

4 turnips (about a pound), peeled and cut into wedges or batons the shape of french fries

1 very small beet, peeled and thinly sliced

2 or 3 cloves garlic, thinly sliced

Bring about 1/2 cup of the water to a boil with the salt, sugar, peppercorns, and bay leaf. Stir to dissolve the salt and sugar. Remove from the heat and let cool to room temperature. Add the the remaining 1/2 cup of water and vinegar and set aside. Layer the turnips, beet, and garlic into a clean quart jar and pack tightly. Pour in the warm brine. (The vegetable should be totally submerged.) Cover and let sit in a cool, dark place for 5 to 7 days to cure. The liquid will turn dark red and turnips will wilt. Refrigerate for at least a day before enjoying.

Squash or Pumpkin Chiffon Pie Makes one 10-inch pie, 8 to 10 servings

So few people seem to really like traditional pumpkin pie, to everyone’s relief at Thanksgiving I started making this pumpkin chiffon pie using roasted kuri or kabocha squash purée. The recipe was given to me by my friend Adam’s mom, Maxine. It has a light texture and delicate spiced flavor, not nearly as heavy or overpowering as the original.

For the crust

1 1/2 cups Graham cracker crumbs (from about 14 whole Graham crackers)

1 tablespoons sugar

3 tablespoons melted unsalted butter

For the filling:

3/4 cup milk

3 large eggs, separated

1 cup sugar

1 envelope unflavored gelatin (1 tablespoon)

1 teaspoon cinnamon

1/4 teaspoon freshly ground nutmeg

1/2 teaspoon kosher salt

1 1/4 cups roasted squash purée* (see below) or canned pumpkin (not pie filling)

Preheat the oven to 350°F. Place the Graham cracker crumbs in a 10-inch glass, ceramic, or metal pie plate. Mix in the sugar and the melted butter. The crumbs should take on the consistency of wet sand. Remove 2 tablespoons of this mixture and reserve. With your fingertips, press the remaining crumbs to the edge of the pie plate, to make an even and smooth crust. Bake in the preheated oven for 10 minutes, until lightly browned. Cool. In a medium bowl, whisk together the milk and the egg yolks Whisk in 2/3 cup of the sugar, the gelatin, cinnamon, nutmeg, and salt. Transfer to a small saucepan and set over medium-low heat. Cook, stirring constantly, until the gelatin and sugar have dissolved (rub a drop between your fingertips to check) and the mixture begins to thicken, 3 or 4 minutes. Stir in the pumpkin and remove from the heat. Transfer to a large bowl and chill.

Using an electric mixer, beat the egg whites until they form soft peaks. Slowly add the remaining 1/3 cup sugar and continue beating 3 or 4 minutes, until the whites are stiff and glossy. Using a rubber spatula, fold about 1/4 of the egg whites into the pumpkin mixture to lighten it, and then fold in the remaining whites. Pour this mixture into the Graham cracker crust and smooth out the top. Sprinkle with the reserved crumb mixture and chill several hours or overnight before serving.

*If you need to roast the squash to make the purée, turn the oven up to 400F. Split the squash in half and remove the seeds. Set the halves cut side down on a parchment-lined baking tray and set in the preheated oven to roast until soft, about 45 minutes. Cool, scoop out the flesh from the skin, and purée in a food processor until smooth.


FALL CSA WEEK 5

P i c k l i s t

BLACK FUTSU WINTER SQUASH - RED KURI WINTER SQUASH - ONIONS - WATERMELON RADISH - GOLD POTATOES - BOK CHOY - SPINACH - BASIL - BROCCOLINI

EDGEWATER update:  Whoosh, the picking is hand numbing right now.  My neoprene gloves are getting worked. They are in a constant rotation of either being worn or drying out by the woodstove, and it is the only thing that is making these outdoor harvests possible.  

Yesterday morning we bid farewell to the backbone of Edgewater Farm.  Roy, Jasper, and Georgie, hopped a flight from Hartford Connecticut to Kingston, Jamaica finishing out the season with a myriad of emotions. Y'all are well aware that their lives are looking pretty different from when they left home back in May.  I just need to shout y'all out. Together we raised $6000.  This money came from you, and our greater edgewater family and friends.  This cash was split 5 ways, making $1200 cash in pocket for each to begin the re-build.  The US dollar goes far in Jamaica, hence the reason for their want of time here.  And while I am floored by the cookie jar fund raising method (Grassroots work! People care for people!) These guys are beyond grateful for your donations.  On Roy’s last night here, we had one too many gin and tonics, recounted the past 17 years working together, and he said, “you gotta tell the CSA how much this means to me, tell them thankyou.”  For context, here is a bit about Roy, and the “thanks” that he sends to you all, as the CSA fam has meant so much to he (and I) throughout the seasons.  Roy in particular has given so much time to the CSA program during its 18 years of existence.  If you are familiar with the summer CSA box method, he has touched every single one of those boxes.  Putting them together, filling them up, breaking them down.  He is the second best buncher on this farm (I of course claim champion here, though Mike and Ray may challenge this title).  He has picked one bazillion-trillion strawberries, and I guarantee if you have been eating from our farm at all in the past 1-20 years, you have eaten from his quarts/pints/bushels/flats. 

Everyone that comes through edgewater to work means so much to us.  When you work here, you are choosing to spend your time busting ass alongside our food growing/plant loving/problem solving/insanity.  Hopefully those who work here are not taking on our stress, but they are certainly carrying loads.  We wholeheartedly appreciate everyone who comes through.  But Roy, he is family.  

Roy went from being that hilarious middle age guy that could throw down and drink beers with a bunch of young-20-dirty-farmer types and then show up the next morning at 5am and pick circles around us in the strawberry fields, to that 60 year old guy who would finish the 210 count of CSA bunches of radishes I started and had to walk away from because a baby was crying and needed hugs, or kiddo needed a bandaid, snack etc..

The farm has changed so much throughout his career here, but he and his humor and kindness and skill and dedication to CSA have remained constant.  So while Roy thanks yall, we are applauding all day and night for him.  

In the words of Anne Sprague, “Many Thanks” all around

FARMY FOODIE PRO-TIPS:

The following recipes was crafted specifically for this week’s CSA by our friend and hyper local chef (he lives just up the road), Mitchell Davis.  if you are curious about alllll the recipes he has to offer, check out his substack:

Late Autumn Stir Fry (serves 2)

You can add chicken, shrimp, or tofu if you wish. Fry them in some oil at the beginning. Remove and wipe the pan clean the proceed as directed adding the protein back to the pan before adding the cornstarch slurry.

2 tablespoons peanut or vegetable oil

2 shallots, peeled and cut into thin slices lengthwise

1 clove garlic, minced

1-inch knob ginger, minced

2 to 3 ounces watermelon radish, peeled, cut in half lengthwise, and thinly sliced into half moons

1 or 2 carrots, peeled and thinly sliced

4 ounces broccolini, chopped into 1-inch pieces

2 bok choy, sliced crosswise into 1/2-inch pieces

2 teaspoons soy sauce

1 tablespoon Xiaoxing cooking wine or dry sherry

Pinch salt

Pinch white pepper

2 teaspoons cornstarch dissolved in 2 tablespoons cold water

1 teaspoon toasted sesame oil

Heat a large pan over high heat. Add the oil and shallots and stir fry a minute to soften. Add the garlic and ginger and cook another 30 seconds until fragrant. Add the radish and carrot and stir fry 2 or 3 minutes until they begin to soften. Add the broccoli and cook another 2 or 3 minutes.  Add the bok choy and toss for a minute before adding the soy sauce, wine, salt and white pepper and cook tossing until the bok choy wilts and gives off its water. Stir the corn starch in the cold water to dissolve and add to the pan, cooking a minute or two to thicken. Remove from the heat. Stir in the sesame oil and serve with white rice.

JENNY’S NOTE: before you get started on this stir-fry, WASH YOUR SPINACH!

Pumpkin Sfouf

(Lebanese Turmeric Cake)

A light, flavorful, eggless cake, this sfouf can be made vegan by replacing the melted butter with more oil. Recipe below

JENNY’S NOTE: Mitchel brought a stack of fresh made sfouf to a potluck, and I am STILL daydreaming about this heaven sent baked good. HERE is a pic of all that was left by the end of the night.

1 1/2 cups flour

1 1/4 cups sugar

1/4 cup fine semolina

1 tablespoon ground turmeric

1 1/2 teaspoons baking powder

1/2 teaspoon ground anise seed

1 teaspoon pumpkin spice (or 1/2 teaspoon cinnamon 1/8 teaspoon each cloves, allspice and ginger)

1/2 teaspoon salt

1 cup milk

1/4 cup extra-virgin olive oil

1/4 cup unsalted butter, melted and cooled

1/2 cup roasted squash or pumpkin purée

Topping:

1/4 cup pumpkin seeds

1/4 cup chopped pecans

1 1/2 tablespoons sugar

1/2 teaspoon cinnamon

2 tablespoons unsalted butter, melted and cooled

Preheat the oven to 350F. Grease a 9” x 13” baking sheet or pan and line with parchment. In a large bowl, blend flour, sugar, semolina, turmeric, baking powder, anise, pumpkin spices, and salt. In a separate bowl, beat together milk, olive oil, melted butter, and squash purée. Pour the wet ingredients into the dry and mix with a whisk until smooth. Pour the batter into the prepared baking pan and spread with an offset spatula to cover evenly. In a small bowl, combine the topping ingredients and sprinkle evenly on top of batter. Bake for 40-45 min or until top has turned golden brown, risen and is firm to the touch. Allow to cool 20 minutes before cutting.


FALL CSA WEEK 4

P i c k l i s t

RED CLASSIC SLICING TOMATOES! - SPAGHETTI SQUASH - MINT - KALE - LEEKS - SWEET POTATOES - CELERY - CARROTS - DRIED CAYENNE PEPS - GARLIC 

CSA PICKLIST, VIEW FROM THE DISCO BALL’S VIEW

kitchen share: roasted red pep hummus/ red pep jelly/ pesto

EDGEWATER update:  This week we embrace the deep fall crops. Most of the Summer faves have either frozen or run out.  We do however have a secret stash of tomatoes and basil, which are currently protected and sitting pretty in a greenhouse.  You, dear CSAer, are the recipient of said tomatoes this week- which this time of year, is worth their weight in gold.  Bust out that mayo, the crusty bread, the sprinkle salt and warm it all up for one last go at a perfect tomato sando  And once you digest these maters, make way for root crops, brassicas, and other hardy greens galore from now til February.  

The weather has certainly shifted and we are all looking to tidy up the rising stack of outdoor projects so we can get going on our fave indoor farm sport of drinking tea and going hubba hubba over seed catalogues.  But before we dive into the hygge of it all, it feels like we have miles of carrots to harvest, greenhouses to roll up, infrastructure odds and ends, etc… This time of year the neoprene gloves, the wooly hats, and the hot water bottles are never far out of reach making those outdoor projects a touch cozier… but only just a touch.

Our field crew heads home early next week.  Their return to Jamaica will certainly be met with unknowns.  With the hurricane, they are unclear what they are going back to.  However, they all are ready to be united with their loved ones and rebuild their towns.  They are also extremely ready to return to proper fixings of oxtail stew, curry goat, and rundown- meals that we just can not pull off in Plainfield NH.  So long to chicken bacon ranch pizza, hello rice and peas.

FARMY FOODIE PRO-TIPS: 

MINT: I can not get enough of fresh herb teas right now.  I'm either steeping lemon grass (from CSA 2 weeks ago) or Mint, or both.  Just fill up that tea pot, dash some leaves in, place on a woodstove and let the fire do the work.  If you are more of a coffee queen and have not entered into your tea era just yet, mint is also a wonderful garnish on most hearty meals.  Freshening up all your roasted veg.   

Updated Dec. 16, 2024 Yield: 4 servings 

(JENNY’S NOTE: This recipe is too easy, enjoy)

Once baked and scraped into noodle-like strands, spaghetti squash becomes a frequent pasta understudy, tossed with pesto, tomato sauce or roasted vegetables. But it’s a versatile ingredient, as its mild flavor and gentle crunch also make it a good base for stews or even curries. For a basic roasted spaghetti squash recipe, follow Step 1, scrape the insides into strands, and be on your way. For a complete side dish, proceed with the rest of the recipe and top with herby breadcrumbs and Parmesan. You can also add mozzarella, which will melt into delicious little pools among the squash strands.

INGREDIENTS 

1 large (3- to 4-pound) spaghetti squash, halved lengthwise and seeded 

3 tablespoons extra-virgin olive oil Kosher salt and black pepper

 1 cup freshly grated Parmesan ½ cup panko

 1 garlic clove, grated 

1 teaspoon fresh thyme leaves 

8 ounces mozzarella, cut into ½- inch cubes (optional)

 PREPARATION 

Step 1 Heat the oven to 450 degrees. Brush the cut side of each squash half with 1 tablespoon olive oil, then season with salt and pepper. Place squash, cut-sides down, on a parchment-lined baking sheet and roast until the squash is tender when poked with a fork, 35 to 40 minutes.
Step 2 Meanwhile, in a small bowl, stir together the Parmesan, panko, garlic, thyme and the remaining 1 tablespoon olive oil. Season with salt and pepper. 

Step 3 Flip the squash and use a fork to scrape the squash into spaghetti strands. Stir in half the mozzarella, if using, then sprinkle the squash with the remaining mozzarella and the panko mixture. Roast until the top is golden brown and mozzarella has melted, 20 to 25 minutes.


The following recipes was crafted specifically for this week’s CSA by our friend and hyper local chef (he lives just up the road), Mitchell Davis.  if you are curious about alllll the recipes he has to offer, check out his substack: 

Moroccan Carrot Salad Serves 4 to 6

There are about a million versions of this Moroccan salad, but the one I always use comes from chef Einat Admony of Balaboosta and Taim in NYC. The only secret is not to overcook the carrots.

2 pounds carrots, peeled

3 tablespoons extra-virgin olive oil, plus more for sautéing

1 1/2 teaspoons ground cumin

1 1/2 teaspoons Hungarian or smoked Spanish paprika

1 1/2 teaspoons kosher salt

1/2 teaspoon sugar

1/2 teaspoon freshly ground black pepper

3 cloves garlic, thinly sliced

Pinch of cayenne pepper

3 tablespoons white wine or apple cider vinegar

Juice of 1/2 lemon

Fill a large bowl with ice water. Place carrots in a large pan with cold water and a generous pinch of salt and bring to a boil. Cook until slightly tender but not overdone, 10 to 15 minutes depending on the size of the carrots. Drain and place the carrots in the ice water to stop the cooking. Drain again. Slice the carrots diagonally into 1/4-inch-thick rounds. In that same pan, heat enough olive oil to coat the bottom of the pan. Sauté the carrot slices until slightly brown, cooking them in small batches, if your pan becomes crowded. Place the sautéed carrots in a bowl, add the 3 tablespoons of olive oil, cumin, paprika, salt, sugar, black pepper, garlic, cayenne, vinegar, and lemon juice and mix well. For best results, refrigerate overnight and serve at room temperature.

FALL CSA WEEK 3

P i c k l i s t

GOLDEN ROMA TOMATOES - CARMEN PEPPERS - CARROTS - POTATOES - BRUSSEL SPROUTS - MIZUNA GREENS - HAKURAI TURNIPS - ONION - LETTUCE - PARSLEY

KITCHEN SHARE: CONFIT - BEET HUMMUS - EGGPLANT DIP W RED PEP JELLY

BREAD SHARE: POBLANO CORN BREAD

Edgewater update: 

This was a real hold your breath sort of week as we waited to hear stories from Hurricane Melissa.  If you’ve been reading emails and checking out the CSA blog, then you are as up-to-date on what's going on back in Jamaica with our extended crew family as I am.  One side note I keep on circling back to during this time is the magnitude of the event and how intense it was.  184 mph winds are totally unprecedented.  This wind force and why it was so dramatic had to do with the rising ocean temps etc… This is also not the first "unprecedented" climate event we’ve had this year.  We really are existing during a climate crisis.  Every year there are multiple events that are so dramatic and feel more dire than the next.  This is gonna keep on happening people.  

Go fund me’s and cash donations are really helpful.  They are truly used to rebuild homes and buy supplies, and make people comfortable as they put pieces of their lives back together.  Folks on the ground are so grateful and I am so moved by everyone’s generosity.  But it’s a bandaid for a greater problem.  The climate crisis will not be solved at a CSA pick up, but rather something to consider as we head into each new season and each new year.  These weather events are certainly something to brace for.  One thing I see here, in our town and in our region, is a community that really loves each other and will give an assist when times are tough and the storm hits.  Yall really know how to show up.  It is so powerful and it’s the beauty of the collective and I am so grateful to be a part of it, AND this moment bears nuance as there is greater work to do.

As mentioned in the morning email, Strong Henderson went home to Jamaica yesterday.  Roy, Jasper, and Georgie will leave in the next week.  The crew is filled in on the outpour of support yall are lending, and it means so much, Cheers.

In other farm news, the weather for the week looks totally dreadful and wintry and stick season appropriate.  Therefore we’ve been harvesting as much as we can outside in the fields this week before we start poking around greenhouses to see what’s growing inside.  The Brussels sprouts, the mizuna, the hakurais and the lettuce were all harvested yesterday in the on again/off again sunshine with the wind dominating all thoughts.  The potatoes, carrots, peppers, and onions are from our fancy storage collection, and will there be bonus herbs today? We shall see!

OH OH! Added last minute bonus, a lisianthus flower stem! If kept in clean water, this little bloom should keep that seasonal depression at bay for weeks… days?

MORE FARMY FOODIE PRO-TIPS: 

MIZUNA, what is it? Mizuna is a leafy mustard green that is very popular in parts of Asia.  It is particularly popular in Chinese and Japanese vegetable gardens and cuisine.  It is excellent both eaten fresh or braised.  It has that horseradishy mustard taste to it. Mizuna keeps beautifully for a week or so when refrigerated and stored in a ziploc bag.  Come November it becomes a staple in my house because of its flavor and versatility.  Braise it/ add it to eggs/ loves to be in a frittata/ stir fry/ excellent fresh chopped in a salad, etc…

The following recipes were crafted specifically for this week’s CSA by our friend and hyper local chef (he lives just up the road), Mitchell Davis.  if you are curious about alllll the recipes he has to offer, check out his substack: 

Shredded Brussels Sprouts with Bacon

This is a simple side dish that is always on our Thanksgiving table.

Serves 5 to 6

3 tablespoons extra-virgin olive oil, vegetable oil, butter, or bacon grease

2 ounces bacon, diced

1 medium onion, thinly sliced

Salt

2 pounds brussels sprouts, rinsed and drained.

1/2 cup dry white wine, stock, or water

Freshly ground black pepper

Chopped fresh parsley

In a large, heavy frying pan, heat the olive oil over medium-high heat. Add the diced bacon and cook until the fat renders into the pan. Add the sliced onion and a pinch of salt and sauté until the onion is wilted. While the onion is cooking, prepare the brussels sprouts. You want to slice them as thinly as possible, which you can do but cutting them in half lengthwise, placing them cut side down on a cutting board, and slicing them like an onion. Alternately you can use a mandolin or food processor fitted with a slicing blade. As the sprouts are sliced, add them to the pan, stirring to coat with the fat. Continue until all of the sprouts have been added. Add a generous pinch of salt. Pour in the wine or stock and cook until evaporated. Season with black pepper and serve with a sprinkling of parsley.

Indian Carrot (or Turnip) Salad

1 pound carrots, shredded, or hakurei turnips, julienned

2 tablespoons vegetable oil

1/2 teaspoon black mustard seeds

1/2 teaspoon cumin seeds

1/2 teaspoon salt

1/2 teaspoon sugar

Pinch turmeric

Juice of 1 lemon

Handful chopped cilantro

Place the carrots or turnips in a medium bowl. In a small frying pan, heat the oil. Add the mustard and cumin seeds. When the mustard seeds begin to pop, add the salt, sugar, and turmeric. Cool for five minutes. Add the lemon juice and toss with the carrots or turnips. Let sit for 30 minutes. Stir in the cilantro and serve.


FALL CSA WEEK 2

BEFORE WE GET INTO THE VEG OF IT ALL… a note about Hurricane Melissa and its impact

Hurricane Melissa just slammed through Jamaica.  As many of you know, our field crew is composed of long-time Jamaican farmers Roy, Strong, Jasper, Georgie.  They come up yearly on an H2A visa and spend May-November planting, picking, hanging out, sharing meals, etc with us and November-April back home with family.  This past week felt extremely tense watching the storm roll in on our phones and hearing stories from afar.  We are still hearing how it is all unfolding.  For the next few weeks, I will bring a big jar with a sign on it that says Jamaica hurricane relief to CSA pick up (WEDNESDAY AFTERNOONS, 4:30-6PM).  Any cash donations would be supremely helpful.  It will be the quickest easiest way to get money directly to these guys for them to bring back home.  It looks like a lot of rebuilding is in order.  

And if you feel inspired to put a jar out at your own workplace or something of the like, collect cash and then bring any earnings to CSA pick up, just know this cash going directly to people who have spent their whole lives sending money home and caring for others.  Last week at pick up we collected over $1000 from your cash donations. It gave me chills counting up the cash last week and realizing what a difference community and a jar can make. Thanks yall… and now the pick list etc…

P I C K L I S T

ROMA TOMATOES - PEPPERS (carmens and hotties!) - CILANTRO - LEEKS - 

SWISS CHARD - BROCCOLINI - SWEET POTATOES - LEMONGRASS - CARROTS 

BREAD SHARE: APPLE OATMEAL

KITCHEN SHARE: GARLIC SCAPE PESTO - RED PEPPER HUMMUS - PIZZA SAUCE

update TAKEOVER FROM EMILY OF EDGEWATER FARM KITCHEN & BUDDING NOURISHMENT, read on for all the nutrition based pro-tips…

Emily McNamara here. I can't believe I've been at Edgewater for 13 seasons.  This past summer, I took a leap of faith and decided to follow my heart into work with Functional Nutritional Therapy, which aims to help people optimize their digestion, blood sugar regulation, hydration, fatty acid handling & mineral balance by incorporating nutrient dense, whole foods into their lives.  I've always enjoyed a challenge, and it's been fun to turn my attention beyond the edgewater kitchen and what to do with 3 bushels of tomatoes and towards sharing simple, approachable, nutrient dense ideas with clients incorporating our local produce.  I've had so much fun working with people, that I'm opening up more private sessions to folks this fall!  If you're interested in working together or learning more, check out my offerings and click the following link. Also read on for what to do with this week’s veg and how to prep it for peak nutrition:

PART I: Vegetable Roasting, FIRST THINGS FIRST Preheat the oven to 325'-350' F.  

Sweet potatoes & carrots- chop up leaving the skins on & pop in the oven tossed with olive oil, salt & pepper... or leave whole to really maximize the nutrition.  This will, however, lengthen the cook time. 

[Carrots & sweet potatoes are loaded with vitamin A, as beta-carotene, which helps us see & fiber which promotes gut health.]

Golden plum tomatoes, yellow onion or leeks, carmen peppers (my favorite!) & broccolini can also be chopped up. Also Garlic.  I like to mince up at least 6 cloves per sheet pan and let them sit for 10 minutes to release their potent nutrients. Toss in as many of those hot peppers as you dare, those babies really bring the heat, and you may want to proceed with care, especially if you've married into an Irish family!  Pull the pan out & toss with the carrots & sweet potatoes & olive oil.  This is when I would also toss on my chicken legs, fish, sausage, meatballs, beans, chickpeas, or whatever other protein you might enjoy. 

[Golden tomatoes are also a nice source of vitamin A & C- but lycopene is actually richest in red tomatoes and, believe it or not, tomato paste- So feel free to toss a little tomato paste into your sheet pan of vegetables!  I cannot speak highly enough of the benefits of onions & leeks (AND GARLIC!) They are a wonderful source of quercetin, an antioxidant & anti-inflammatory, sulfur- with antiviral & antibacterial properties (can you say perfect for this time of year?!) and allium compounds which help reduce blood pressure & cholesterol.  Peppers are another great source of vitamin C- 1 raw bell pepper fulfills about 150% of your RDA of vitamin C- so save one out & let your immune system thank you! Broccolini is another heavy hitter for vitamin C and keep in mind that cruciferous vegetables are a wonderful source of sulforaphane which has anti-cancer properties.] 

Chop up the chard & mix in the last 15 minutes of cooking.  Roasting generally takes about an hour.  Cilantro can be added at the very end.  

[Chard is a well-known source of Vitamin K.  Cilantro is considered a heavy metal binder & delicious addition as long as you don't have a genetic variation that makes it taste like soap.  I often recommend people serve their fish with a side of cilantro pesto if they're concerned about heavy metal exposure.  If you're wondering if you should use the stems, our in-house Edgewater chef & fearless leader this year, Alex Mentus had me in awe of her stem usage which included her stellar cheese sauce, pickled and vegetable stocks.  Shout out to her at Rooted Anchor for tips & tricks or for your next catering event!]

PART II: Rice…  For tonight's dinner I plan to use that beautifully fragrant lemon grass (bruise/ chop into large pieces to release flavor) in the pot with the rice to infuse the coconut milk & bone broth.  For the adventurous, add other spices like coriander, curry, paprika, cumin, garlic or onion powder with some seaweed to up the nutritional content!

 MORE FARMY FOODIE PRO-TIPS: 

LEMONGRASS: A word from me, Jenny.  I LOVE THIS HERB.  Think of it like a bay leaf to add flavor to stock/rice/curries/etc… also makes a perfect tea.  You will find this herb used all over southeast Asia.  In Jamaica you will hear it called fever grass, meant to make you better when sick.  Helps bring the down fever.  I am obsessed with it in my chicken stock.  If you do not want to use it right away, put it in a ziplock and freeze.

The following recipes were crafted specifically for this week’s CSA by our friend and hyper local chef (he lives just up the road), Mitchell Davis.  if you are curious about alllll the recipes he has to offer, check out  his substack: 

Lebanese Chard Stem Salad

Makes about 6 servings

The leaves of Swiss chard are a delicate, flavorful alternative to spinach, Tuscan kale. or other leafy greens. But did you realize the chard stems are a delicious vegetable in their own right? Because they are tough, they need to be treated a little differently, that is, cooked for a bit. But don’t throw them away! Make this delicious Lebanese salad or spread, a great addition to a selection of meze appetizers.

Salt

Stems from one large bunch of Swiss chard (about 1 pound)

4 tablespoons tahini

2 tablespoons plain Greek yogurt

1 large garlic clove, grated on a Microplane

Juice of 1/2 lemon

Extra-virgin olive oil, for garnish

Sumac, za’atar, sesame seeds, or other garnish

Bring a large pot of salted water to a boil. Rinse the stems well to remove any dirt and cut into 1/2-inch pieces, removing any stringy fibers. Boil the cut stems until tender, about 25 minutes. Fill a large bowl with ice water. Drain the stems and place into the ice water to chill. Drain again, really well, pressing the stems against the strainer with the back of a spoon or ladle to remove any excess water. In a medium bowl, whisk together the tahini, Greek yogurt, garlic, and lemon juice. Add the drained chard stems and stir to coat. Serve on small plate drizzled with olive oil and sprinkled with the garnish of your choice.

Sweet Potato Gratin

Serves 6

Sweet potato gratin is a creamy, comforting dish that’s as appropriate for a weekday dinner as it is for a Thanksgiving feast. You can change up the flavor profile of the cream infusion depending on your mood—sage, rosemary and garlic for a classic herbal taste or cardamom, ginger, nutmeg, and lemon zest for something different. The only caveat is to be sure to cook the gratin fully. There’s nothing more disappointing than encountering a hard chunk of sweet potato in the soft, creamy mix.

Butter, at room temperature

2 cups heavy cream

Either 2 cloves garlic, smashed, 3-inch sprig rosemary, and 1 sprig sage, 

or ½ teaspoon cardamom, 1/2 teaspoon ginger, 1/4 teaspoon nutmeg, and strips of zest from 1 lemon

2 1/2 pounds sweet potatoes (about 4), peeled

Kosher salt and freshly ground black pepper

1 1/2 cups shredded Gruyére

1/2 cup grated Parmigiano

2 eggs

Preheat the oven to 400°F. Generously butter a large gratin dish and set aside. Place the 2 cups of cream in a small saucepan and add turkey the garlic, rosemary and sage or the Bahamian, ginger, nutmeg and lemon zest, as you prefer. Bring the cream to a boil—watching closely so it doesn’t overflow—then reduce the heat and let simmer for 10 minutes to infuse with the flavors. Allow to cool 10 to 15 minutes. 

Meanwhile, thinly slice the sweet potatoes with a mandoline or sharp knife. Arrange half the sweet potatoes in a layer on the bottom of the buttered dish. Season the sweet potatoes with salt and pepper and top with 1/3 of the Gruyére and half the Parmigiano. Arrange a second layer of potato slices on top, season with salt and pepper, and top with another 1/3 of the Gruyère and the remaining Parmigiano. Beat the two eggs in a small bowl. Strain the warm cream into the eggs while whisking until blended. Pour this mixture over the sweet potatoes. Cover with foil and bake in the preheated oven for 45 minutes, until the sweet potatoes are soft. Remove the foil and top with the remaining 1/3 of the Gruyère. Bake another 25 minutes or so until brown and bubbly.

FALL CSA WEEK 1!

P I C K L I S T

CHERRY TOMATOES - ROMA TOMATOES - PEPPERS (SHISHITOS, LUNCHBOX, etc) - EGGPLANT - PARSLEY - LETTUCE - CELERY - RADISHES - BROCCOLI - POTATOES - RED ONION - PUMPKIN - GREEN BEAN - MINI BOUQ!

This week’s CSA add-ons: Hazel Bread/ fennel corn chowder, tomato confit, beet hummus/ mac n cheese casserole/ and an obligatory pumpkin head

Edgewater update:  It is a common misconception that the farmstand closes and therefore we begin our winter hibernation/relaxation/reset.  Au contraire, all that good stuff will take place in about two months.  We have a glimpse of the end of season on the horizon but we are still very much in the thick of harvest.  In fact, with all the frost prep we did over the last two weeks, it is somehow still tomato season at Edgewater Farm.  Some of you may be burnt out on tomatoes and peppers by now, but I can promise you that when the end does come, you will suddenly experience a yearning for said veg.  If this is the case, and you just aren't feeling the tomatoes, pop’em in a ziploc and store them in the freezer for winter soup/sauce/summer reminders/etc.  As we move through the weeks, you will certainly experience your load of winter squash and root crops, but for today, enjoy this end of Summer haul with all the colorful standards.  Keep the grill out one last weekend and char that eggplant, fry those shishitos.

And while the season end is in sight there is still tons of - dare I say - fun to be had right here on the farm.  For example, next week we begin planting our garlic crop for the 2026 harvest season.  This is done with the same gusto as any planting, but with an added touch of magic. It consistently blows our mind that one little clove planted in the Fall grows to be a full garlic head come summer.  And yes I know it’s science, but you gotta be a fool to not consider it’s magic.

Other farmy things taking place this week include the reskinning of greenhouses, deep cleans- there is SO MUCH of that, and the continual harvest of carrots, greens, taters, etc…

Enjoy this first week of Fall CSA, I know it’s a ton of food.  Keep in mind that if this haul remains out of the sunlight/heat much of your veg will keep beautifully in a garage, mudroom, shed.

FARMY FOODIE PRO-TIPS:

The following recipes were crafted specifically for this week’s CSA by our friend and hyper local chef (he lives just up the road), Mitchell Davis.  if you are curious about alllll the recipes he has to offer, check out  his substack:  https://kitchensense.substack.com/

Chopped Broccoli Salad

I’m not generally a fan of raw broccoli, but I can’t stop eating this salad.

Makes 6 to 8 servings

2 or 3 broccoli crowns

1 sweet red pepper, seeded and chopped

½ medium red onion, finely chopped

3 green onions, chopped

1 bunch parsley, minced

½ cup pumpkin or sunflower seeds, toasted, or pistachios, cashews or

walnuts, toasted and chopped

½ cup dried cranberries, chopped, or fresh pomegranate seeds

¼ cup extra-virgin olive oil

Juice of 1 lemon

½ cup plain Greek yogurt, full fat preferred

1 tablespoon honey or maple syrup

1 teaspoon toasted, ground cumin

½ teaspoon kosher salt

½ teaspoon ground black pepper

⅓ cup fried onions or shallots

With a sharp vegetable peeler, peel the tough outer layer of the broccoli stems. Cut off the peeled stems, dice finely, and place in a large mixing bowl. Cut off any florets on long stems and chop the stems and the florets. Repeat until all of the broccoli is chopped finely and in the bowl.

Add the red pepper, red onion, green onions, parsley, seeds or nuts, dried cranberries or other fruit, olive oil, lemon juice, yogurt, honey or maple syrup, cumin, salt, and black pepper. If consuming right away, add the fried onions and mix thoroughly. If preparing in advance, stir the fried onions in just before serving. The salad will keep at least a week in the fridge, getting better after a couple of days.

Estela’s Celery Salad with Raisins, Pistachios,  & Bayley Hazen Blue Cheese

Celery was once grown in a rainbow of colors and so prized that special dishes were created for it to be displayed as a centerpiece on 17 th century tables. These days, the height of celery gastronomy may very well be this signature salad by Estela chef Ignacio Mattos.

Serves 2

2 tablespoons raisins

1 tablespoon white wine vinegar

5 or 6 stalks celery, including leaves

Kosher salt

1/2 cup mint leaves, torn into pieces

Zest of 2 lemons plus 2 teaspoons juice

1/4 cup brine from pickled chilis, such as jalapeños, cherry peppers, or Thai chilis, or other spicy

pickles

3 tablespoons extra-virgin olive oil

1/4 cup toasted pistachios, chopped

1/4 pound chunk Bayley Hazen or other blue cheese

In a small bowl, combine the raisins with the vinegar and set aside. Setting any pristine leaves aside, slice the celery stalks into 1/4-inch pieces. You should have about 2 cups. Submerge the sliced celery in ice water for 5 to 10 minutes to perk up. Drain well. 

In a large bowl, combine the sliced celery with 1/2 teaspoon of salt and toss well, rubbing the salt into the celery. Add the celery leaves, mint, lemon zest, and lemon juice. Strain the raisin soaking vinegar into the bowl and massage the dressing into the celery.

Onto a serving plate pour the pickled chili brine and drizzle the olive oil. Scatter the raisins and pistachios on top of the liquids and then scatter the dressed celery on top of that, distributing all of the dressing evenly around the plate. Shave or crumble the cheese on top to cover generously and serve.

CSA WEEK 17 (END OF SUMMER HARVEST)

P I C K L I S T

jimmy nardello peppers - sweet potatoes - gold potatoes - cherry tomatoes - lettuce - onion - carrots - garlic - green beans

pick list glamour shot with 6 year old art direction

First and foremost, I am shook that this was our very last SUMMER CSA pick up of the season as well as the conclusion to our yearly farmstand hustle. Our farmstand shut its doors yesterday, and will re-open again in June 2026. The farmstand is the dreamiest or dreams. It exists just down the road from walmart and homedepot and best buy and traffic lights. It is an open air market to breathe deep, wander, and fill one’s metaphorical cup with tangible veg. Food abounds, and so too do the sights and smells that go with it. But the people that run the stand are the real heart of the route 12A stronghold. This year, Allie Schubert stepped in to manage the farmstand. And she did so with much love and intention that you would think she’s been there for the past 51 years. Her attention to detail is seen in the way she uplifts the crew. Daily tomato sandos for staff, and Saturday night G&T’s. Heartfelt check ins and awareness over how to handle all the Spragues, especially as crops go south and emotions heighten (climate crises farming is stressful to say the least). She is learning farming’s imperfections and greeting the upper valley community with joy. We are all so happy Allie came into our lives.

Cheers to the 2025 farmstand season and all the people and the crops that made it happen. With all the abundance the tables displayed, you’d hardly realized we were experiencing deep drought.

As far as the past week in farming goes, I am a little out of touch as I had to step out of town for a family emergency.  Ray and Tim put on their best Jenny hat to organize and harvest for the week. Mitchell stepped up, like the angel he is, to craft recipes to complement the picklist.  

Looking ahead, as your pepper stock diminishes and your onion stash runs dry, know that we are still picking veg daily and though the stand is closed and Summer CSA is over, our FALL CSA begins next week, OCTOBER 22nd (come join the party HERE), and you can find our veg at the following locations:

All the coop food stores (leb, hanover, WRJ)

Brownsville Butcher and Pantry

Reading Greenhouse

Woodstock Farmers Market

Rumbrook Market

Kearsarge Food Hub

A bazillion thanks for joining us this Summer, having you along for the ride truly means so much.  This week, for those of you who are not continuing this journey into Fall CSA, hold your green beans close and that bag of lettuce closer.

FARMY FOODIE PRO-TIPS:

The following recipes were crafted specifically for this week’s CSA by our friend and hyper local chef (he lives just up the road), Mitchell Davis.  if you are curious about alllll the recipes he has to offer, check out  his substack: 

kitchen sense

Sichuan Scallops or Shrimp

This quick Chinese stir fry comes together in minutes once all of the ingredients are ready.

Brining the scallops or shrimp with sugar, salt, and baking soda, is Chinese technique that gives

them a plump, crisp texture.

Serves 3 or 4

1/2 pound bay scallops or peeled, raw shrimp

2 teaspoons sugar

1 teaspoon kosher salt

1/4 teaspoon baking soda

1 cup ice water

1 tablespoon oyster sauce

1 tablespoon light soy sauce

1 tablespoon black Chinese vinegar or other vinegar

1 to 3 teaspoons chili crisp, Chinese chili oil (with sludge), or other hot sauce, such as sriracha,

according to your spice tolerance

3 tablespoons vegetable or chicken stock, or water

1 teaspoon cornstarch

2 tablespoons peanut or vegetable oil

1/2 teaspoon Sichuan peppercorns (optional)

4 dried red chilis, split and seeded (optional)

1/2 small white onion, diced

2 cloves garlic, sliced

Handful fresh green beans, cut on the bias into 1-inch pieces

About 1/2 pound red bell or other sweet red peppers, seeded and chunked

About 1/2 pound yellow bell or other sweet yellow or orange peppers, seeded and chunked

5 fresh shiitake or cremini mushrooms, sliced

In a medium bowl, combine the scallops or shrimp with the sugar, salt, baking soda, and ice

water. Mix to dissolve and then set in the fridge for at least 20 minutes and up to an hour to

brine.

In a small bowl, prepare the sauce by combining the oyster sauce, soy sauce, black vinegar, chili

crisp or other chili sauce, stock or water, and corn starch. Mix well.

To finish the dish, drain the shrimp, rinse with cold water, and pat dry with paper towel. Heat

the peanut oil in a large pan over high heat. Add the Sichuan peppercorns and dried chilis, if

using, and cook just 30 seconds, until fragrant. Add the diced onion and garlic and sauté until

they begin to soften. Add the green beans and cook, tossing often until they begin to soften.

Add both peppers and cook about 3 minutes. Add the scallops or shrimp and sauté a minute or

two until they begin to turn opaque. Add the mushrooms and sauté another minute. Stir the

sauce to distribute the cornstarch and pour into the hot pan, stirring to coat all the vegetables.

Let cook until the sauce thickens to coat everything nicely. Serve immediately over steamed

rice.

Roasted Sweet Potato Wedges with Zaatar

These roasted sweet potato wedges are quick and easy and the Middle Easter za’atar—a blend of herbs, sesame, and salt—gives them a savory flavor. If you have a sweet tooth, you can add a

little maple syrup to the mix. I usually make these wedges in a cast-iron pan so the edges crisp,

but you can also use an air fryer. I never use a recipe, because it depends on how many sweet

potatoes I have. Simply adjust according to your needs.

Sweet potatoes

Extra-virgin olive oil

Fresh garlic, sliced

Salt and freshly ground black pepper

Maple syrup (optional)

Za’atar

Preheat the oven to 425°F. Wash and dry the sweet potatoes. Cut them in half lengthwise and

then cut each half lengthwise into wedges with the peel on the wide edge. If the sweet potatoes

are longer than 3 or 4 inches, cut them in half crosswise. You want the wedges to all be about the

same length and thickness so they cook evenly.

Place the wedges in a large mixing bowl. Drizzle with a few tablespoons of olive oil, scatter the

sliced garlic around, and season generously with salt and freshly ground black pepper. If using

maple syrup, drizzle a tablespoon or more in the bowl, too. Toss the potatoes to evenly coat with

everything and then transfer to a cast iron pan or the basket of an air fryer. Don’t crowd the

potatoes or the hot air won’t circulate and they won’t crisp. If using a cast-iron pan, lay as many

wedges cut side down as you can without them touching.

Place in the preheated oven or air fryer and roast for 20 minutes or so, until the wedges begin to

brown. Turn them over and/or move them around to expose the other sides to the hot air. Return

to the oven for about 10 minutes. The potatoes should be nicely browned and crisp. Toss with a

couple of tablespoons of za’atar and return to the oven for a couple of minutes, just to warm the

spice mix and bring out its flavor. Serve hot.