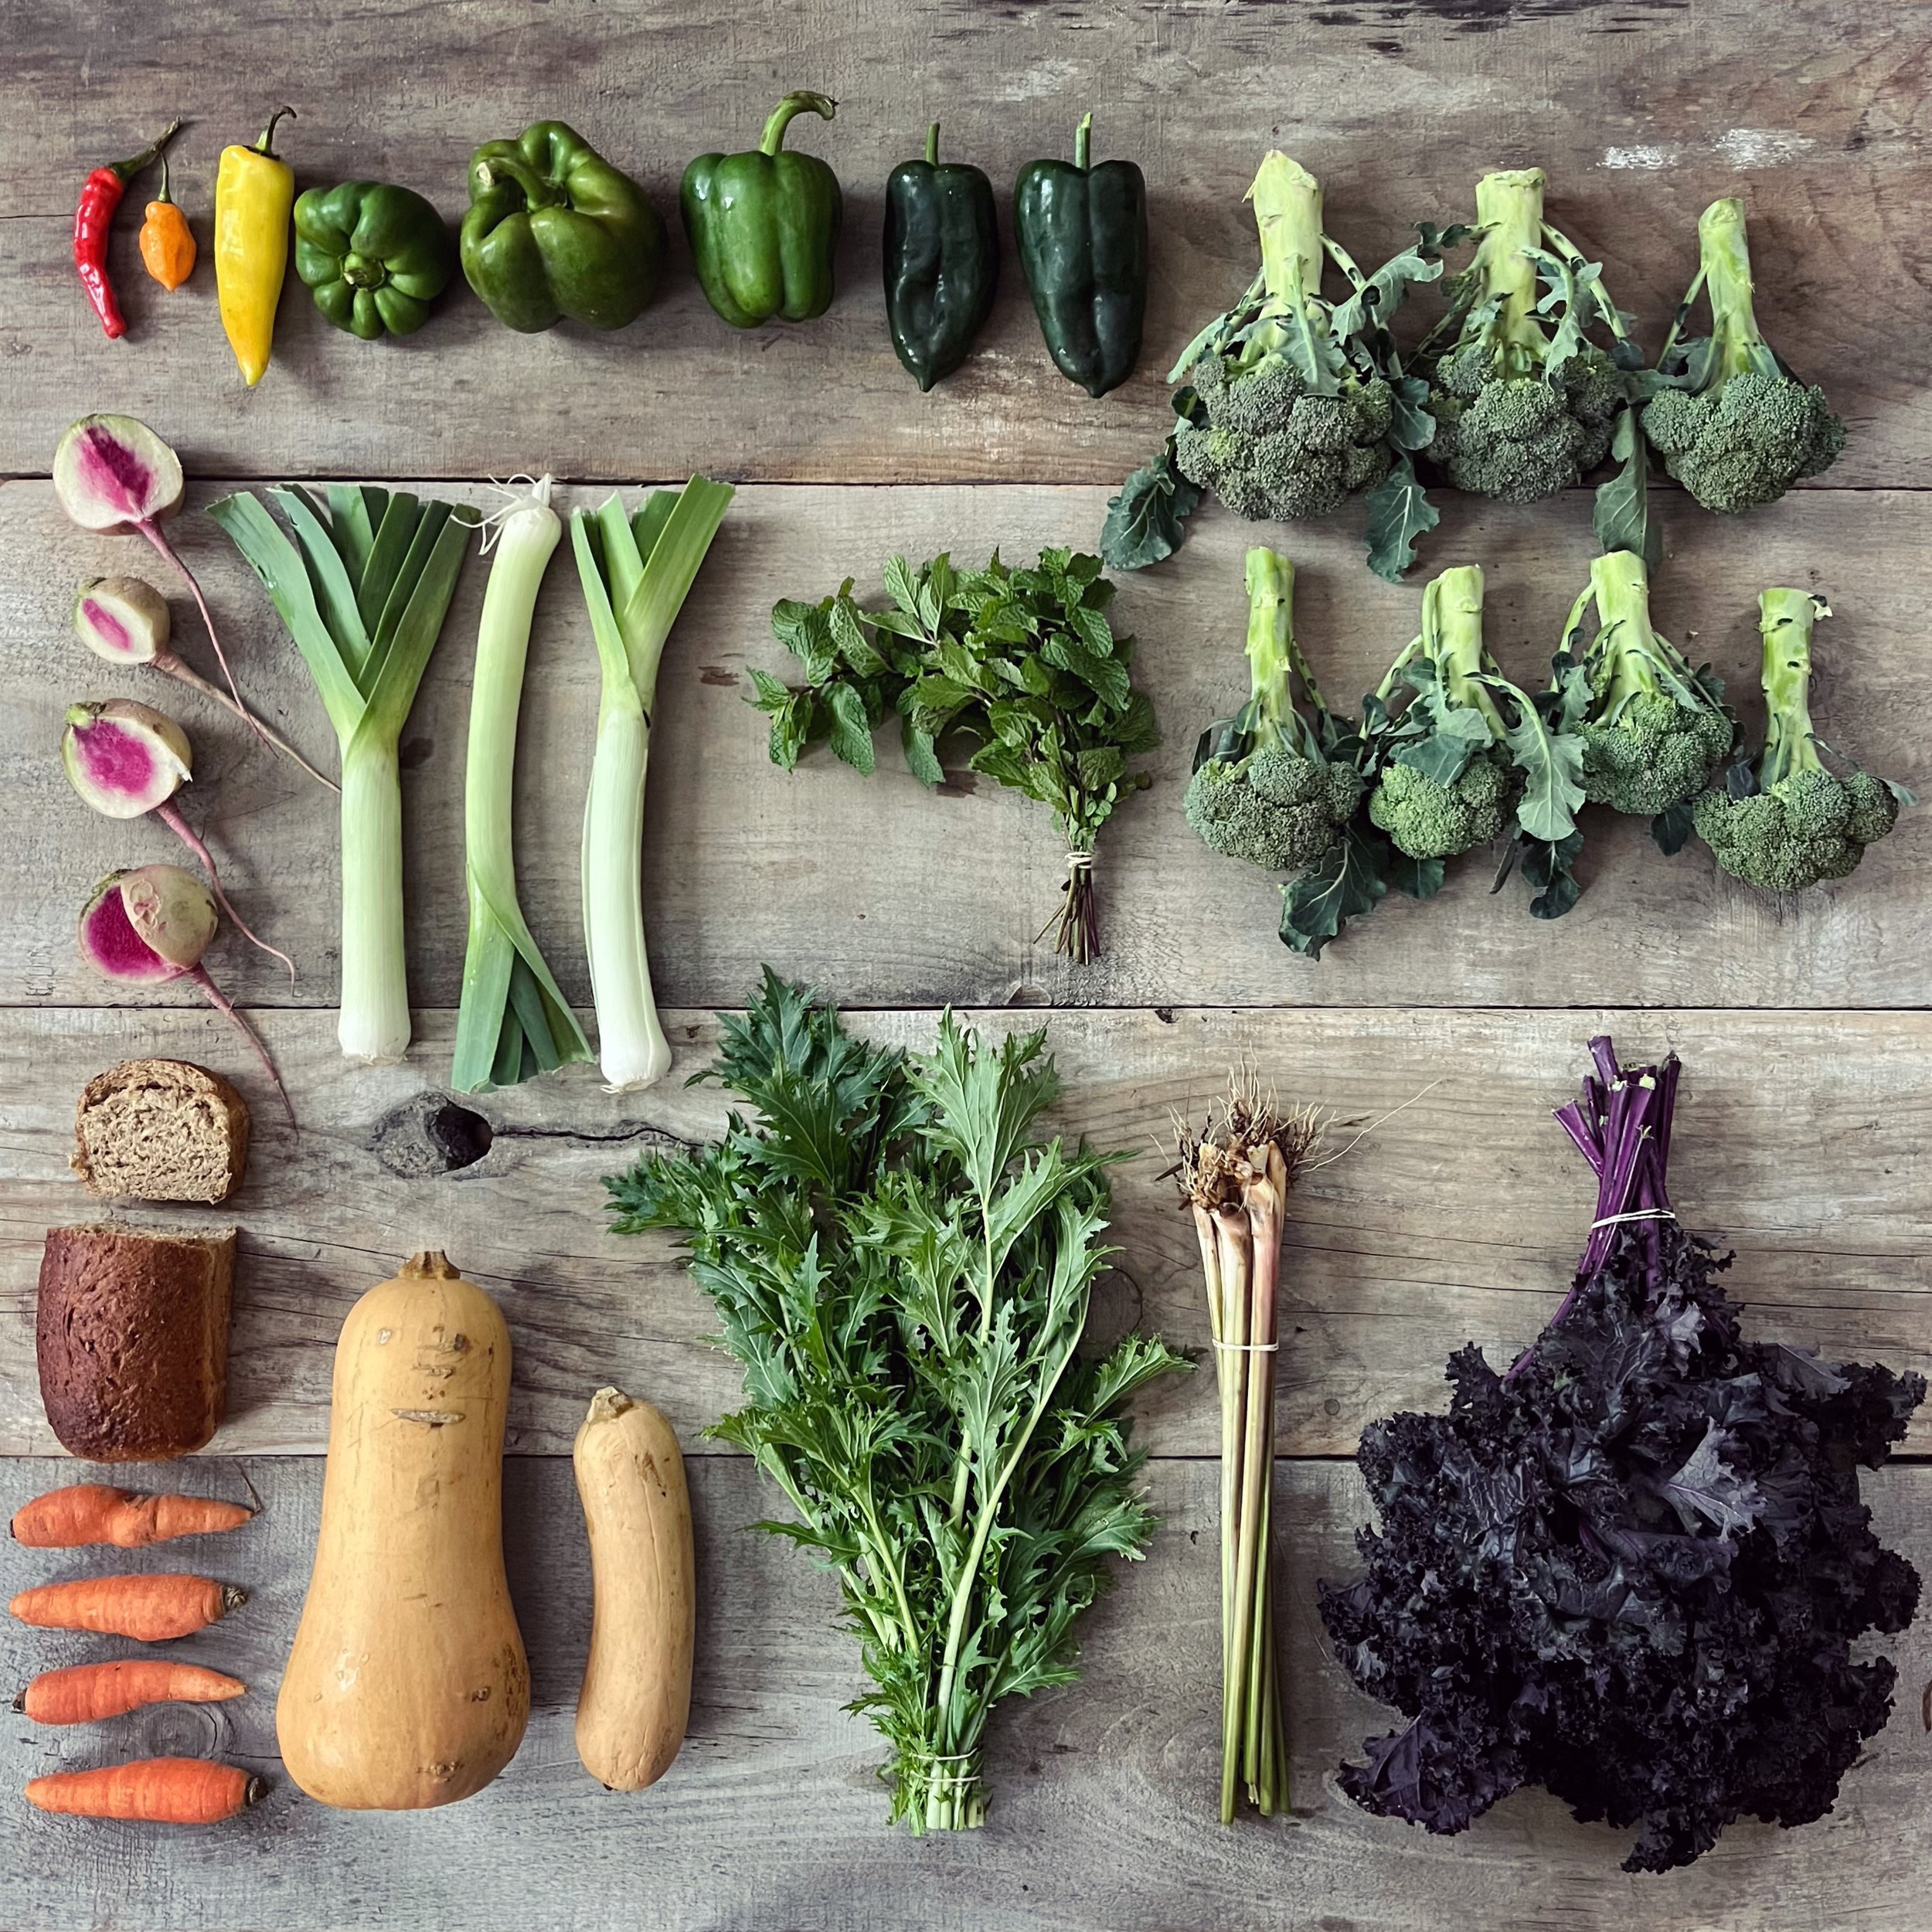
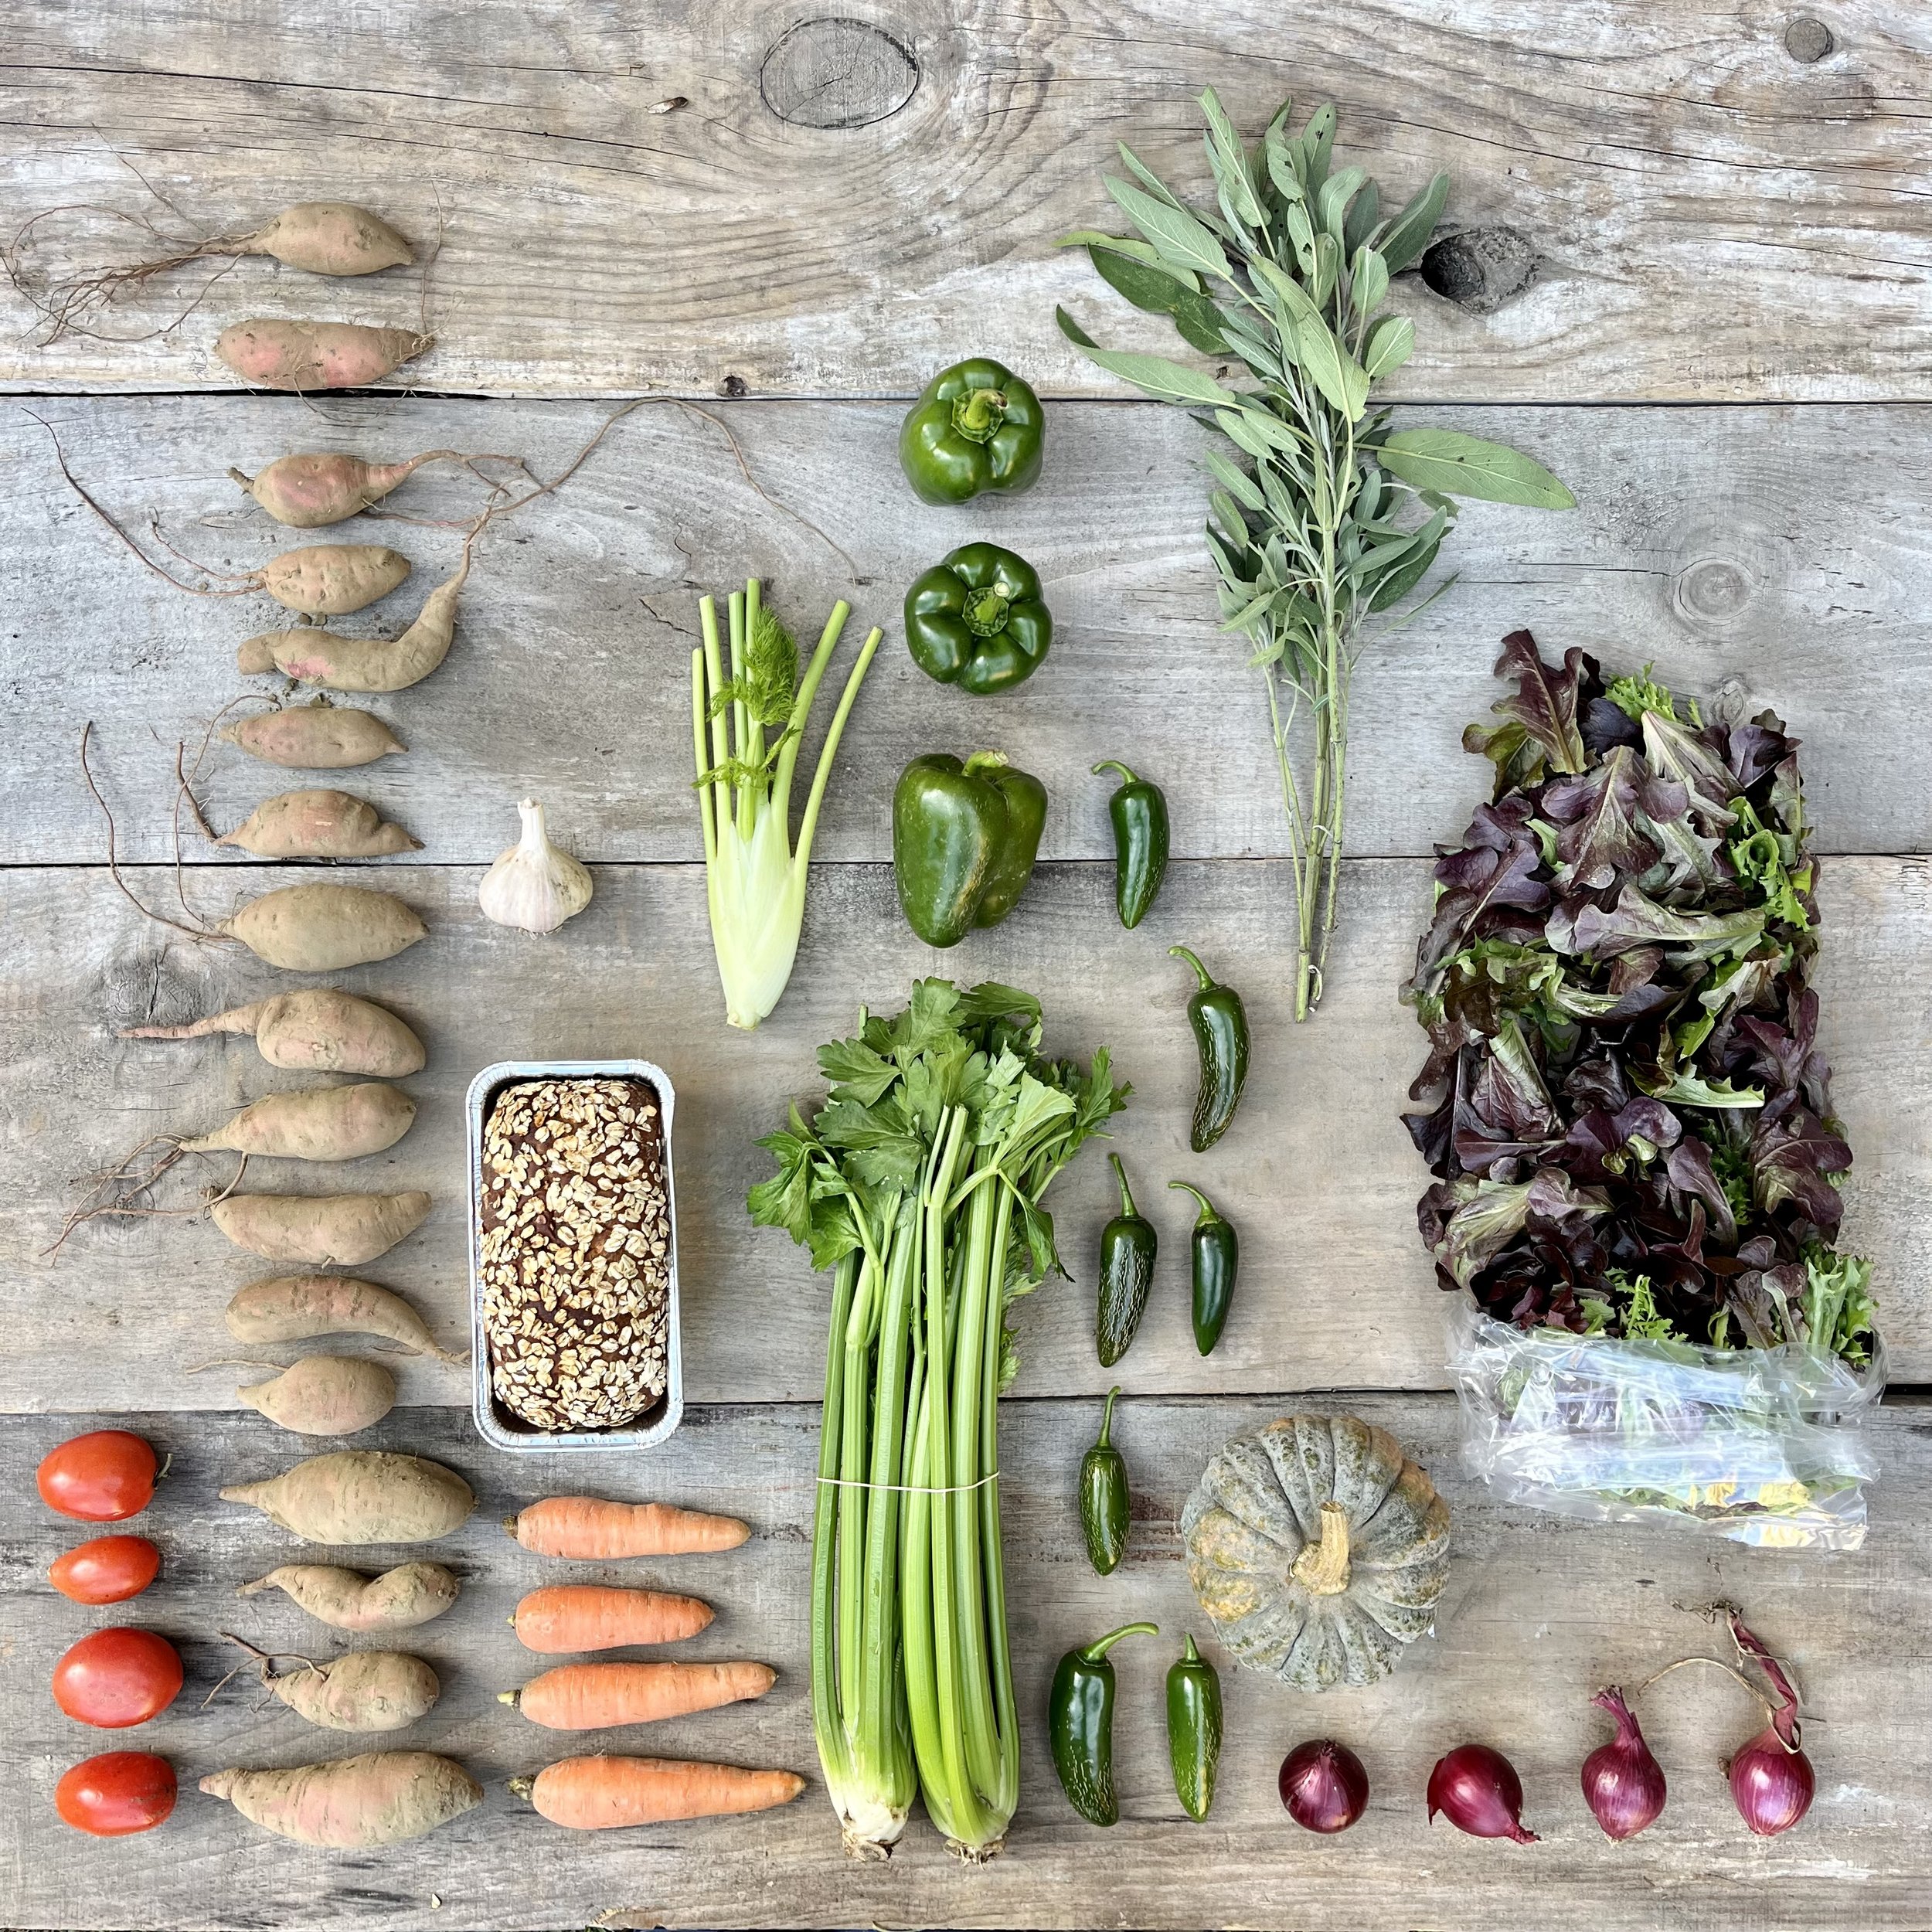
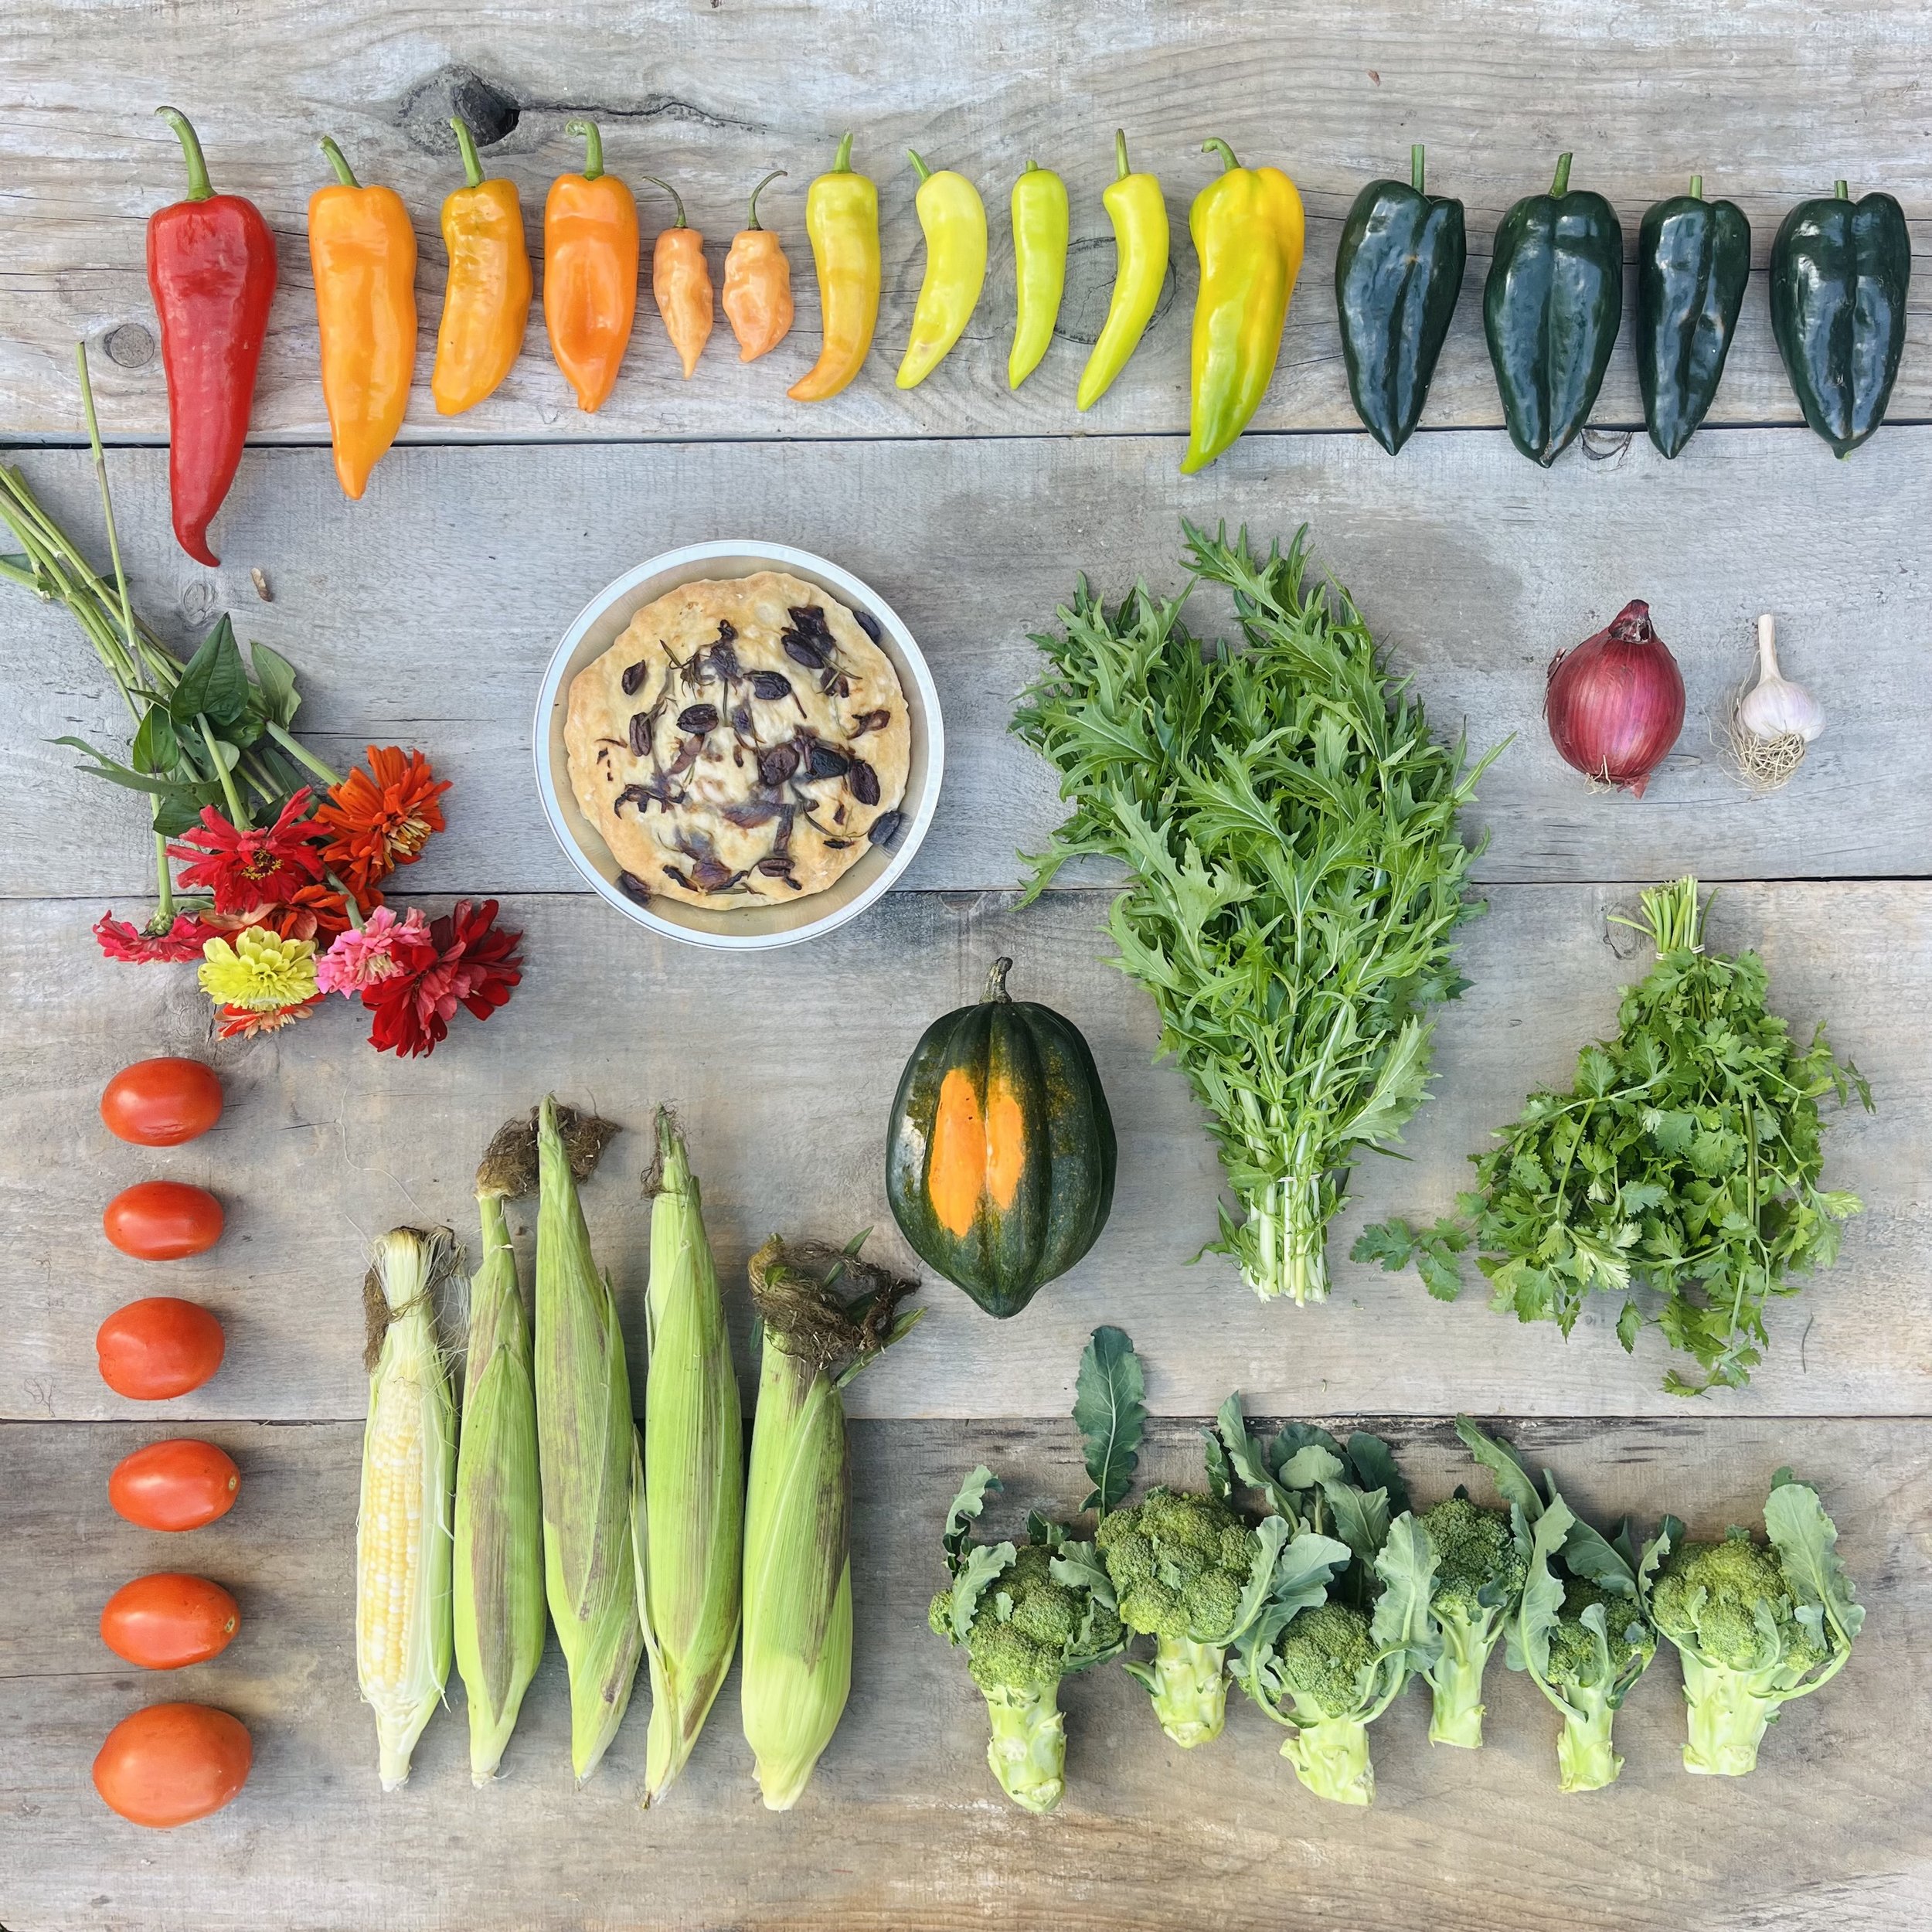
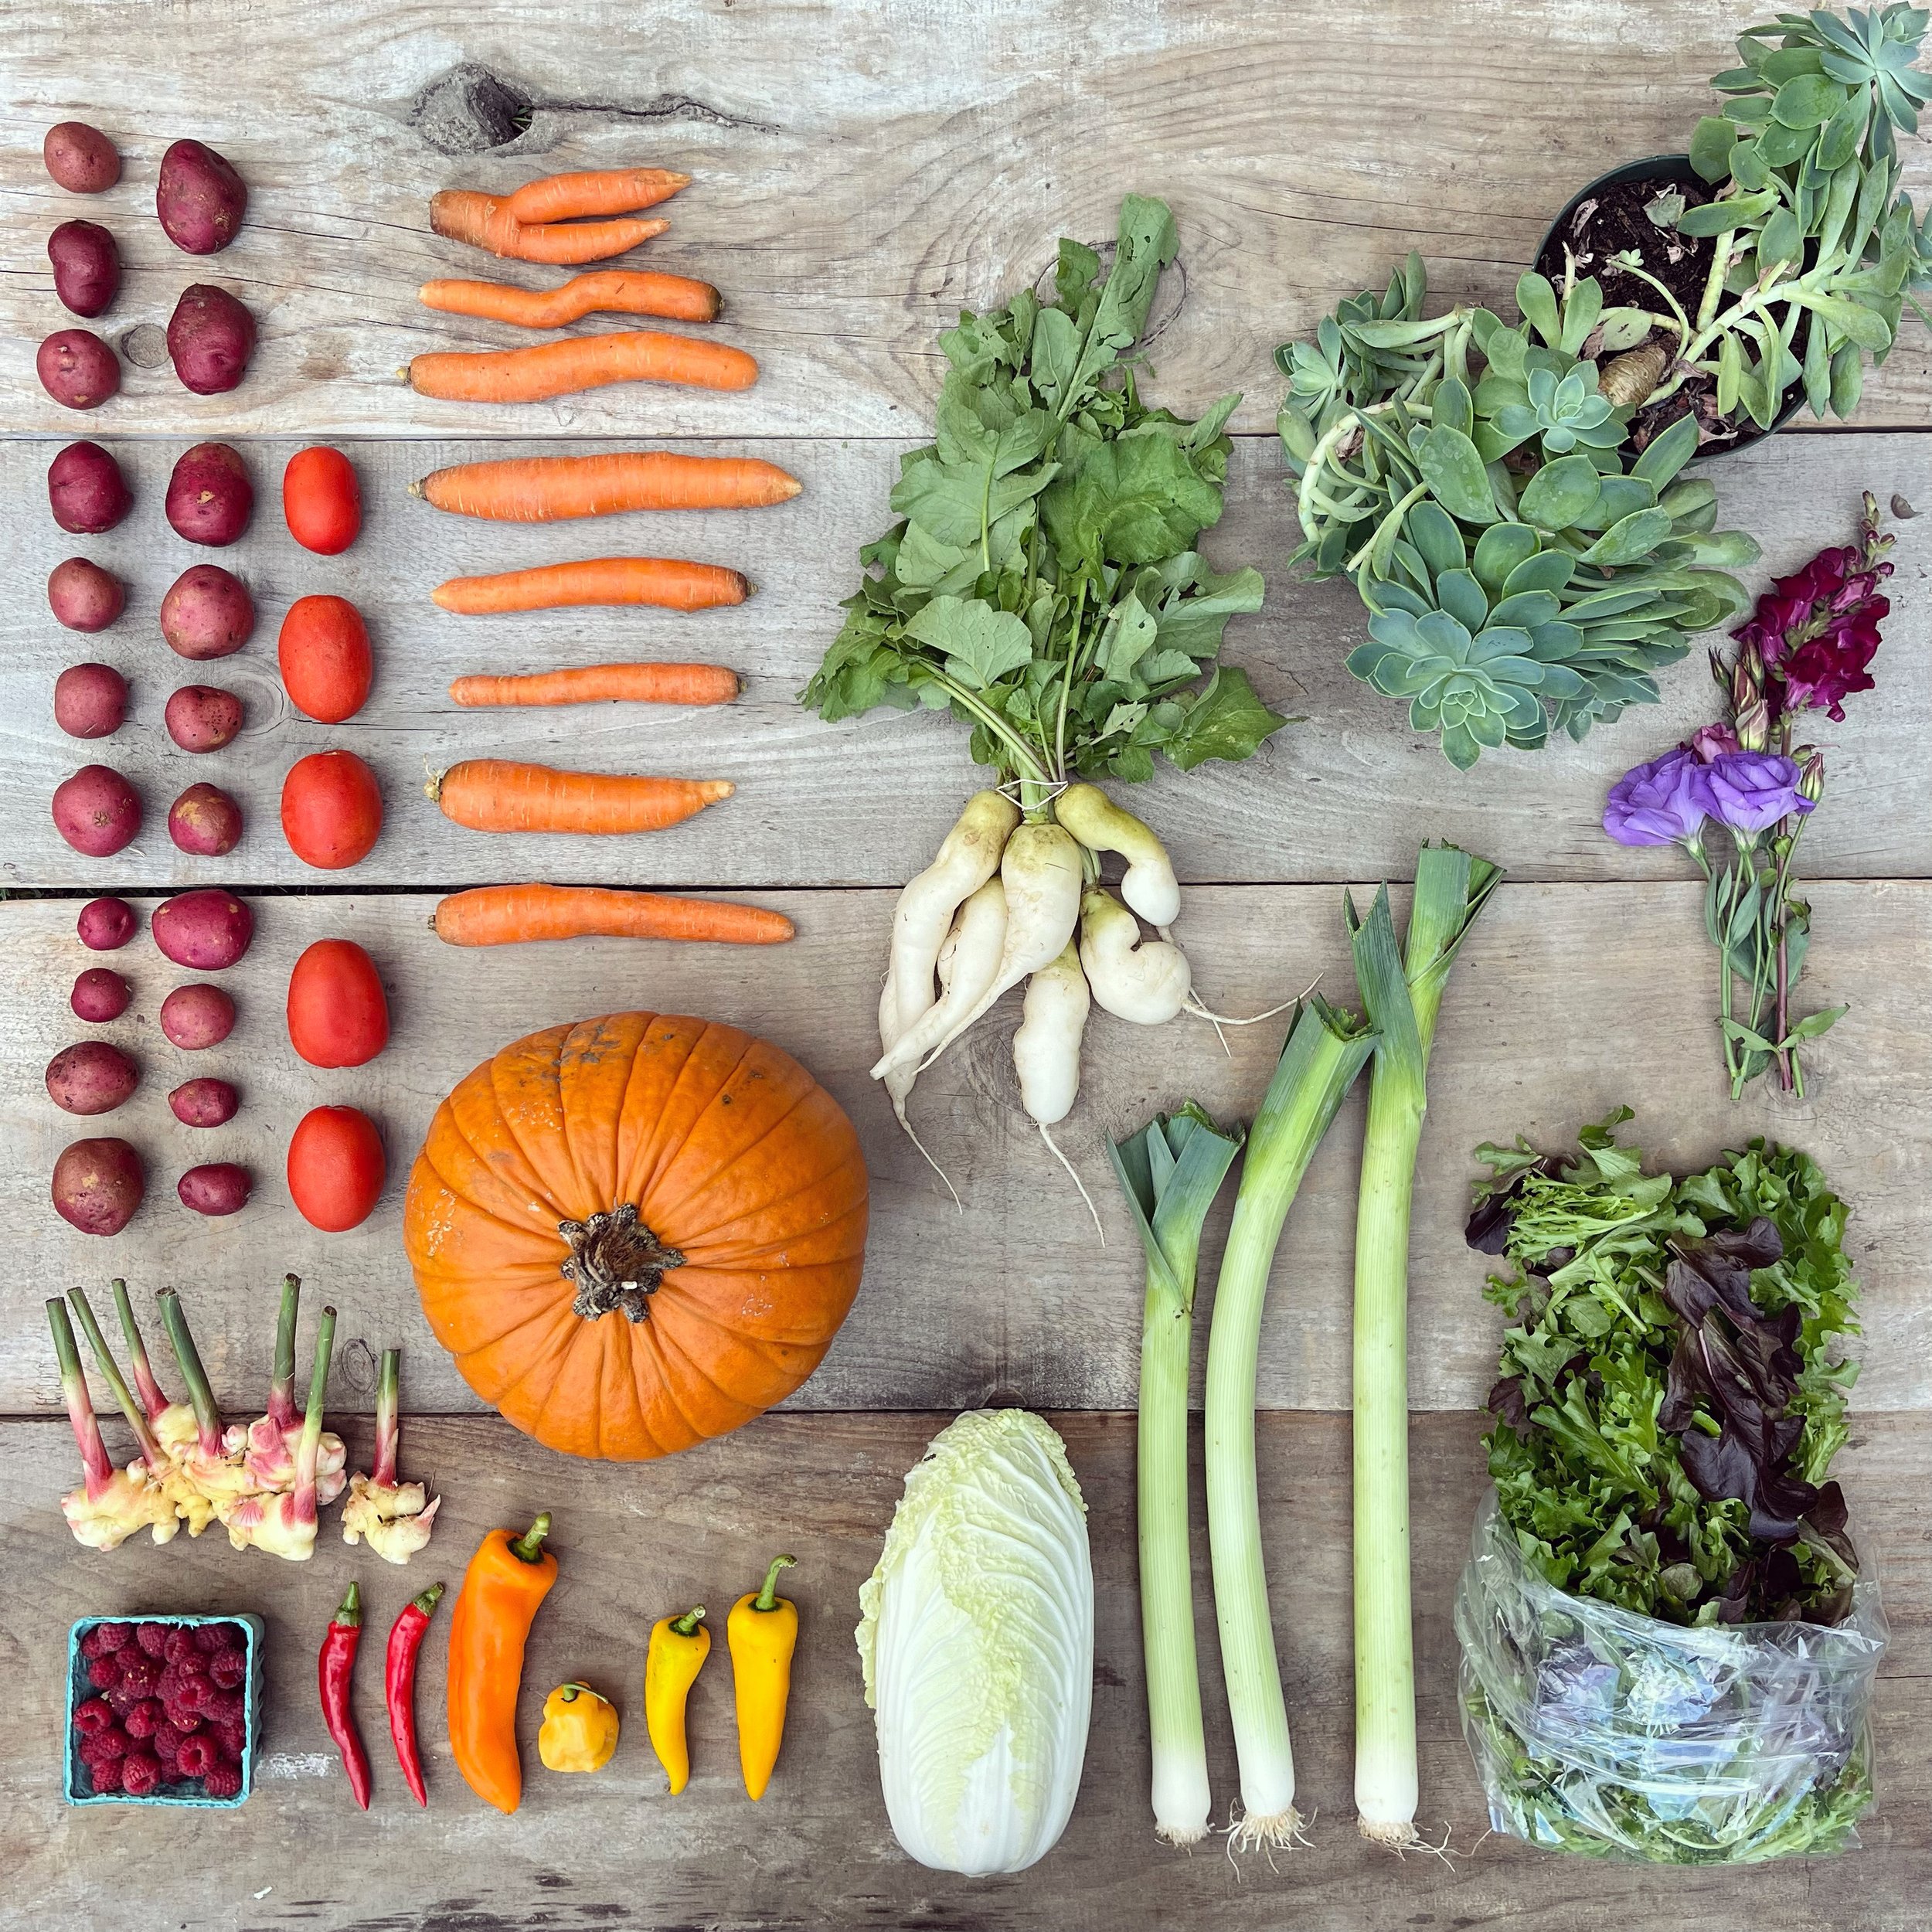
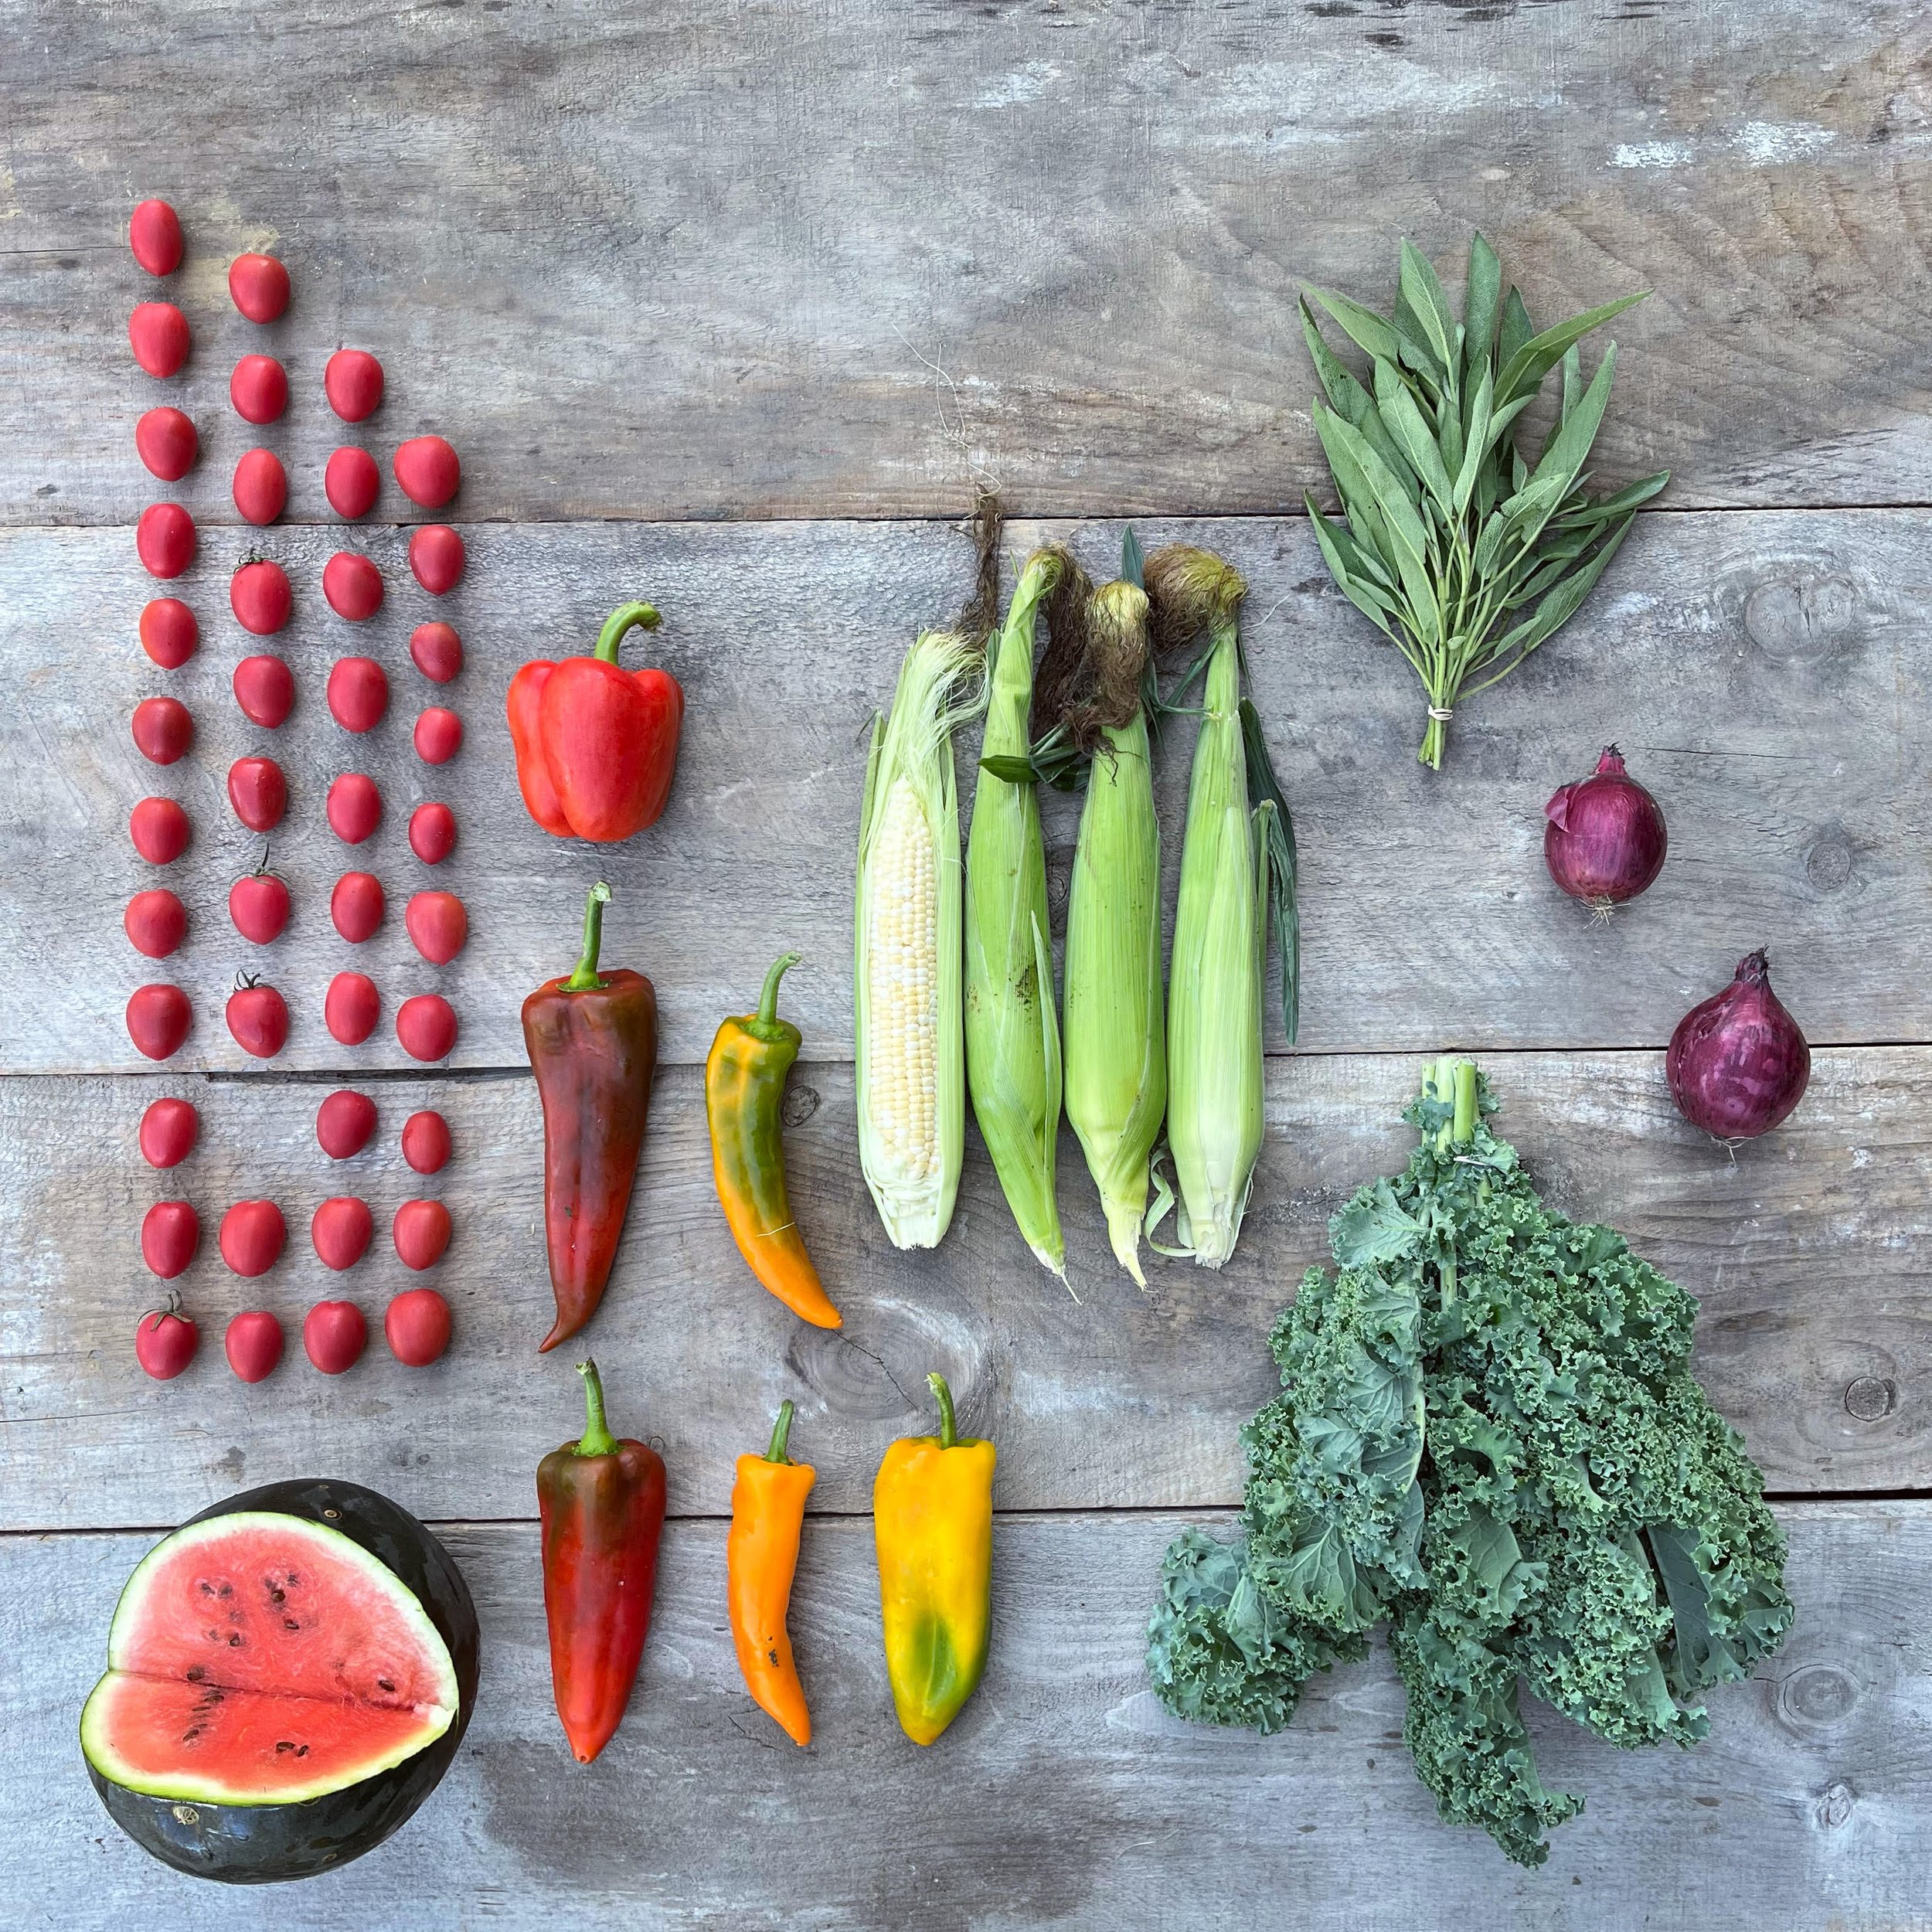
CSA WEEK 11

P i c k l i s t

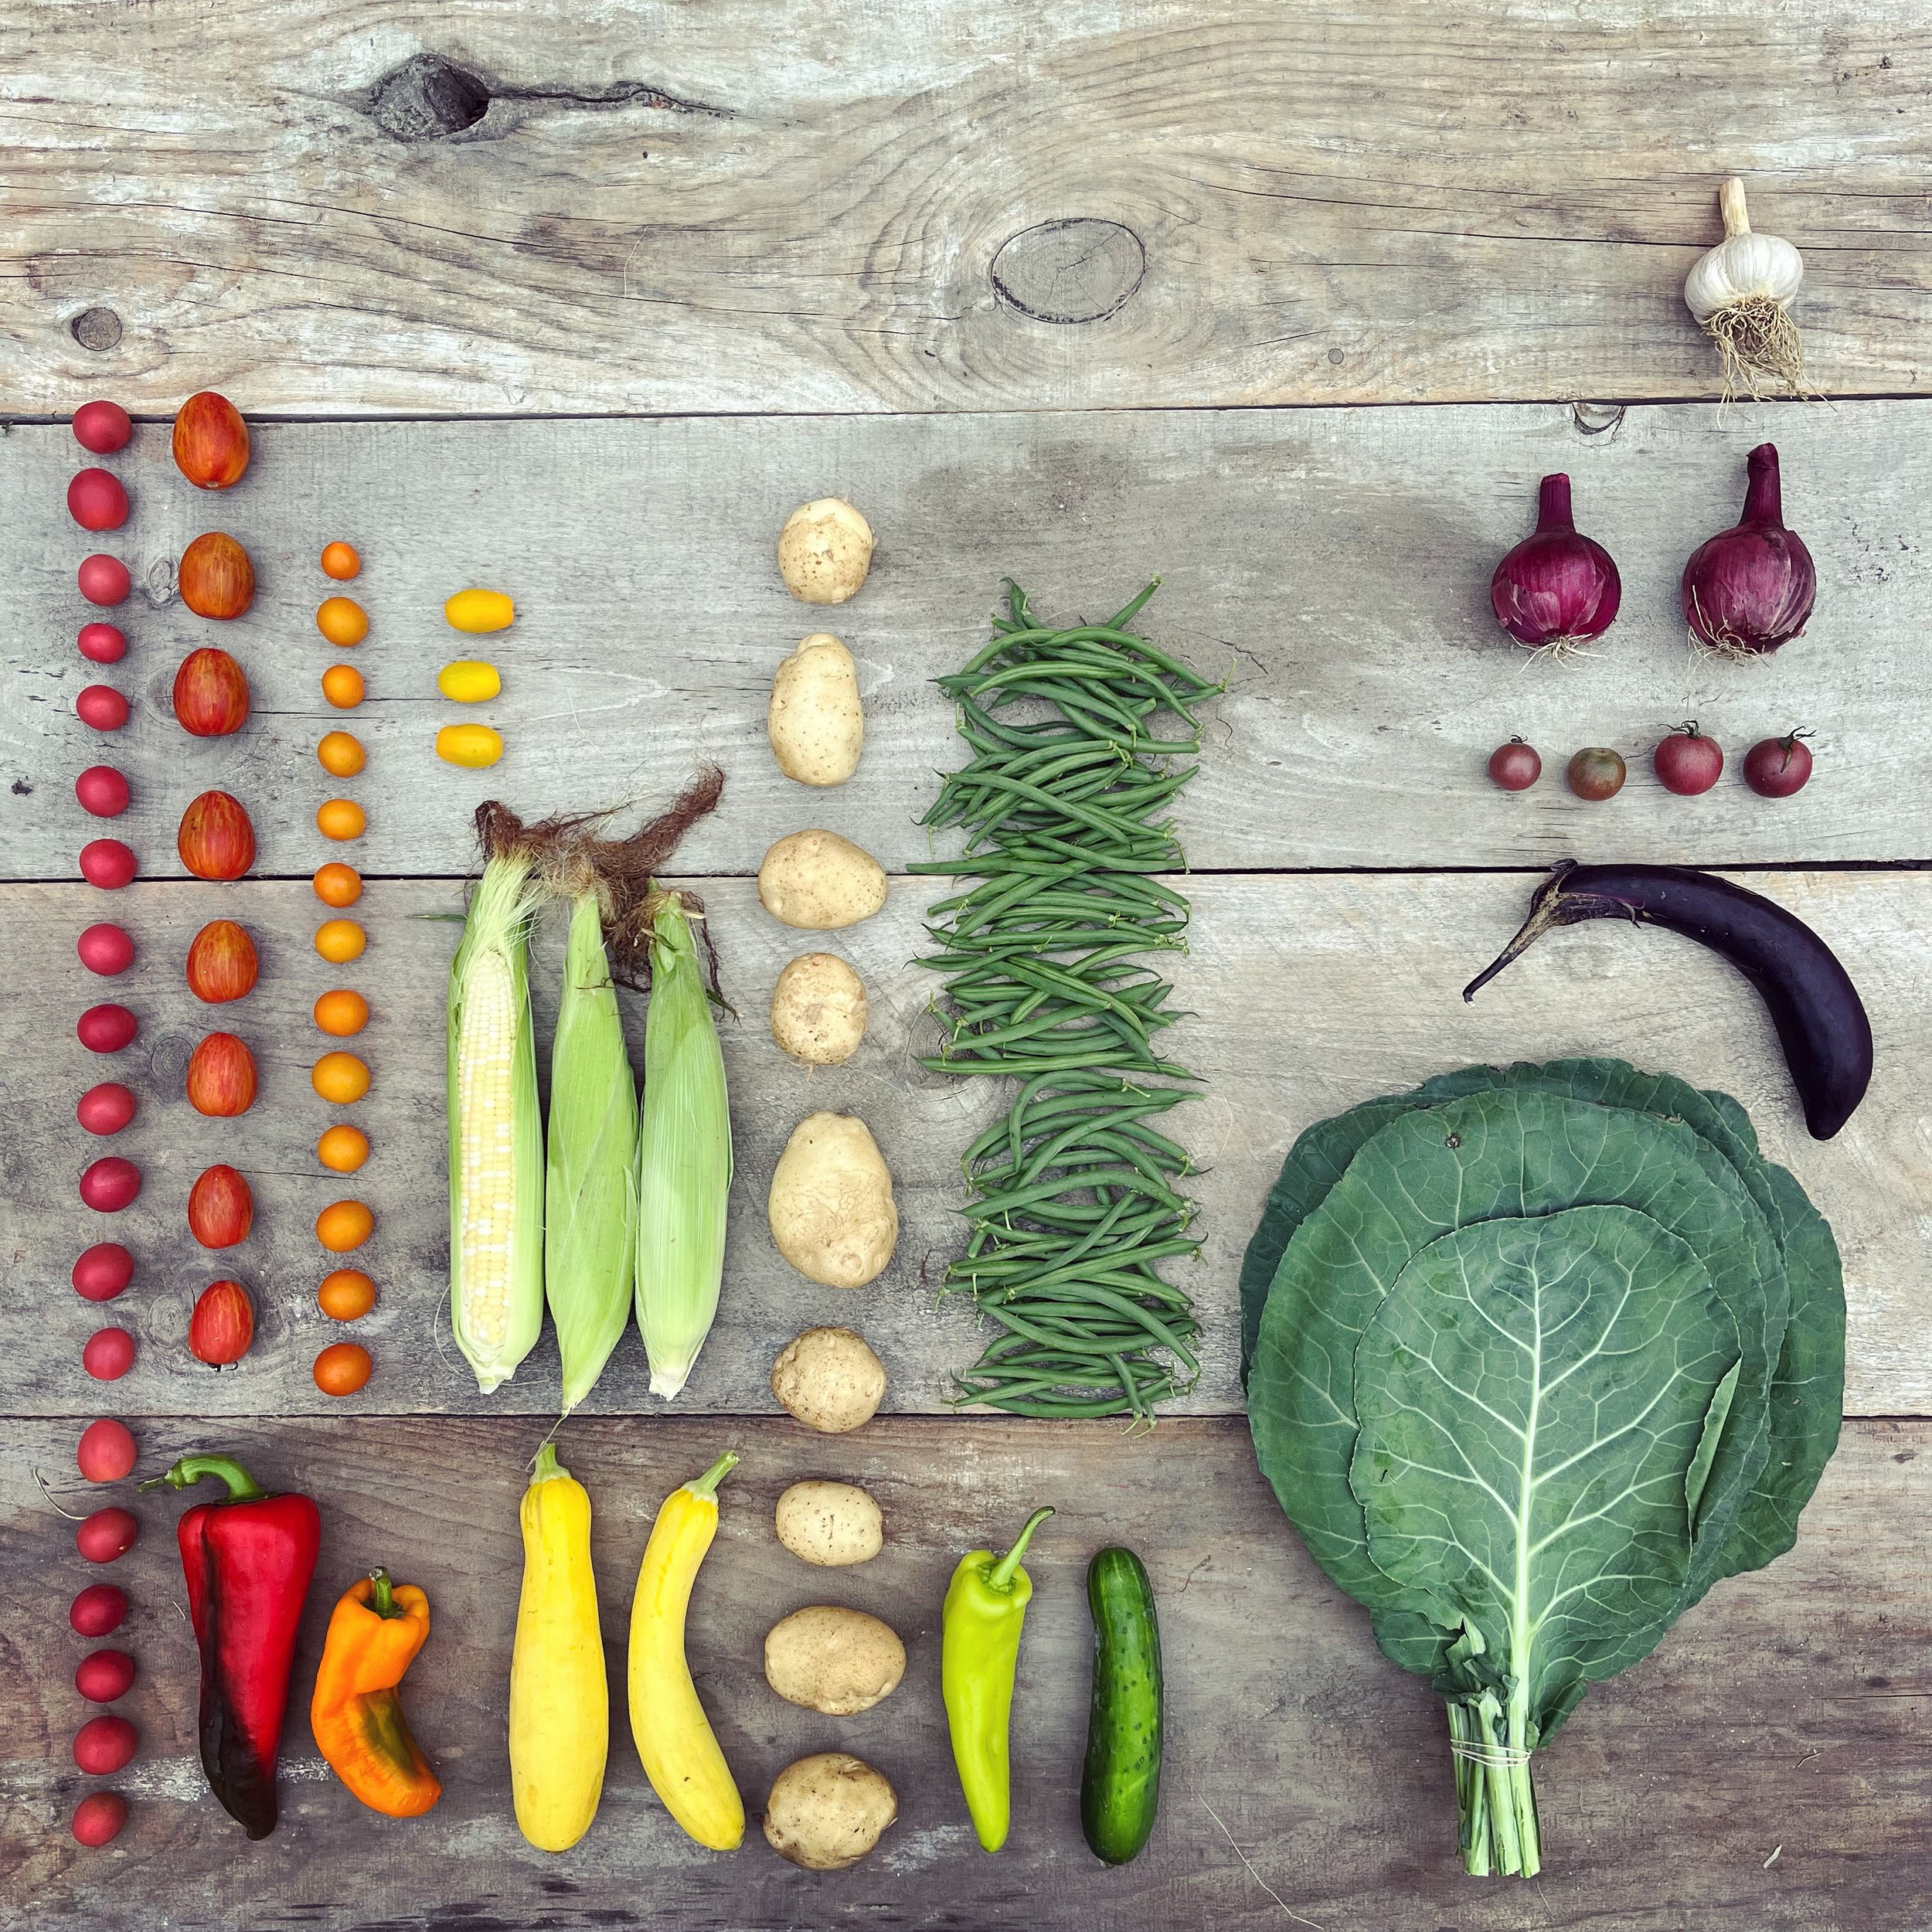
 roma tomatoes - cilantro - corn - purple pepper - watermelon -

kale - Basil - cherry tomatoes - onion

This week has been a real mix of kicking butt and having butts kicked.  With last week’s fleeting feeling that Summer was slipping away, and this week’s return to school, our family of four (two of which are full time farmers while the other two are full time farm adjacent) chose the more is more is more vibe, while ALSO working full time.  OOPS.  While we took in many sweet moments- paddling down the Connecticut, outdoor movie nights, lobster boils, etc, there was also the daily tasks that could not be delayed.  For example: morning harvest, followed by deliveries, and afternoon weeding.  We are officially running ourselves ragged over here, grown ups and kiddos alike.  It all felt a little much come Saturday night at 6pm when the kiddos sat in the parked minivan, along the field’s edge listening to the moth radio hour, while Ray and I were picking corn.  We promised them a dip in Kennedy pond post harvest only to then drive to Kennedy pond at 7:45 seeing that the sun had already dipped below the treeline.  Double oops. But the kiddos can’t complain too badly.  They had a pretty great Summer grazing their way through the days- berries from the fields, and cookies from the farmstand made for regular adventures AND they are currently on one last hurrah.  A Sprague family tradition, started by the wise old farm sage GranPooh Sprague in which he would call in a “sick” one day during the season, declare it a private holiday and take little Ray and little Sarah off farm to magical places far and wide (but also within the twin states).  Today, the next farming generation, now Big Ray and Big Sarah* have taken their littles on an adventure to get all the wilds out of them (storyland and lost river) before school starts.  Not a bad tradition, only second to the tradition of pizza and ice cream cake for every single edgewater field crew birthday, of which there are aplenty.

As for school starting, deep breaths all around and please note the cherry tomatoes and the 3 tiny peppers making for excellent school lunch fodder.  

And for those curious about how the week felt specifically in the fields, we are mostly harvesting and weeding now. We have weeded our strawberries for the 6th time, and hopefully the weeds will now slow. Daylight is reducing and we have made it successfully through millions of weeds so you gotta hope we have depleted a good portion of the seed bank. Our strawberry fields now look pretty good and continue to runner, so we can hope for a good crop next year. However we still will go through them once more with hoes before we cover them with straw and put them to bed.  

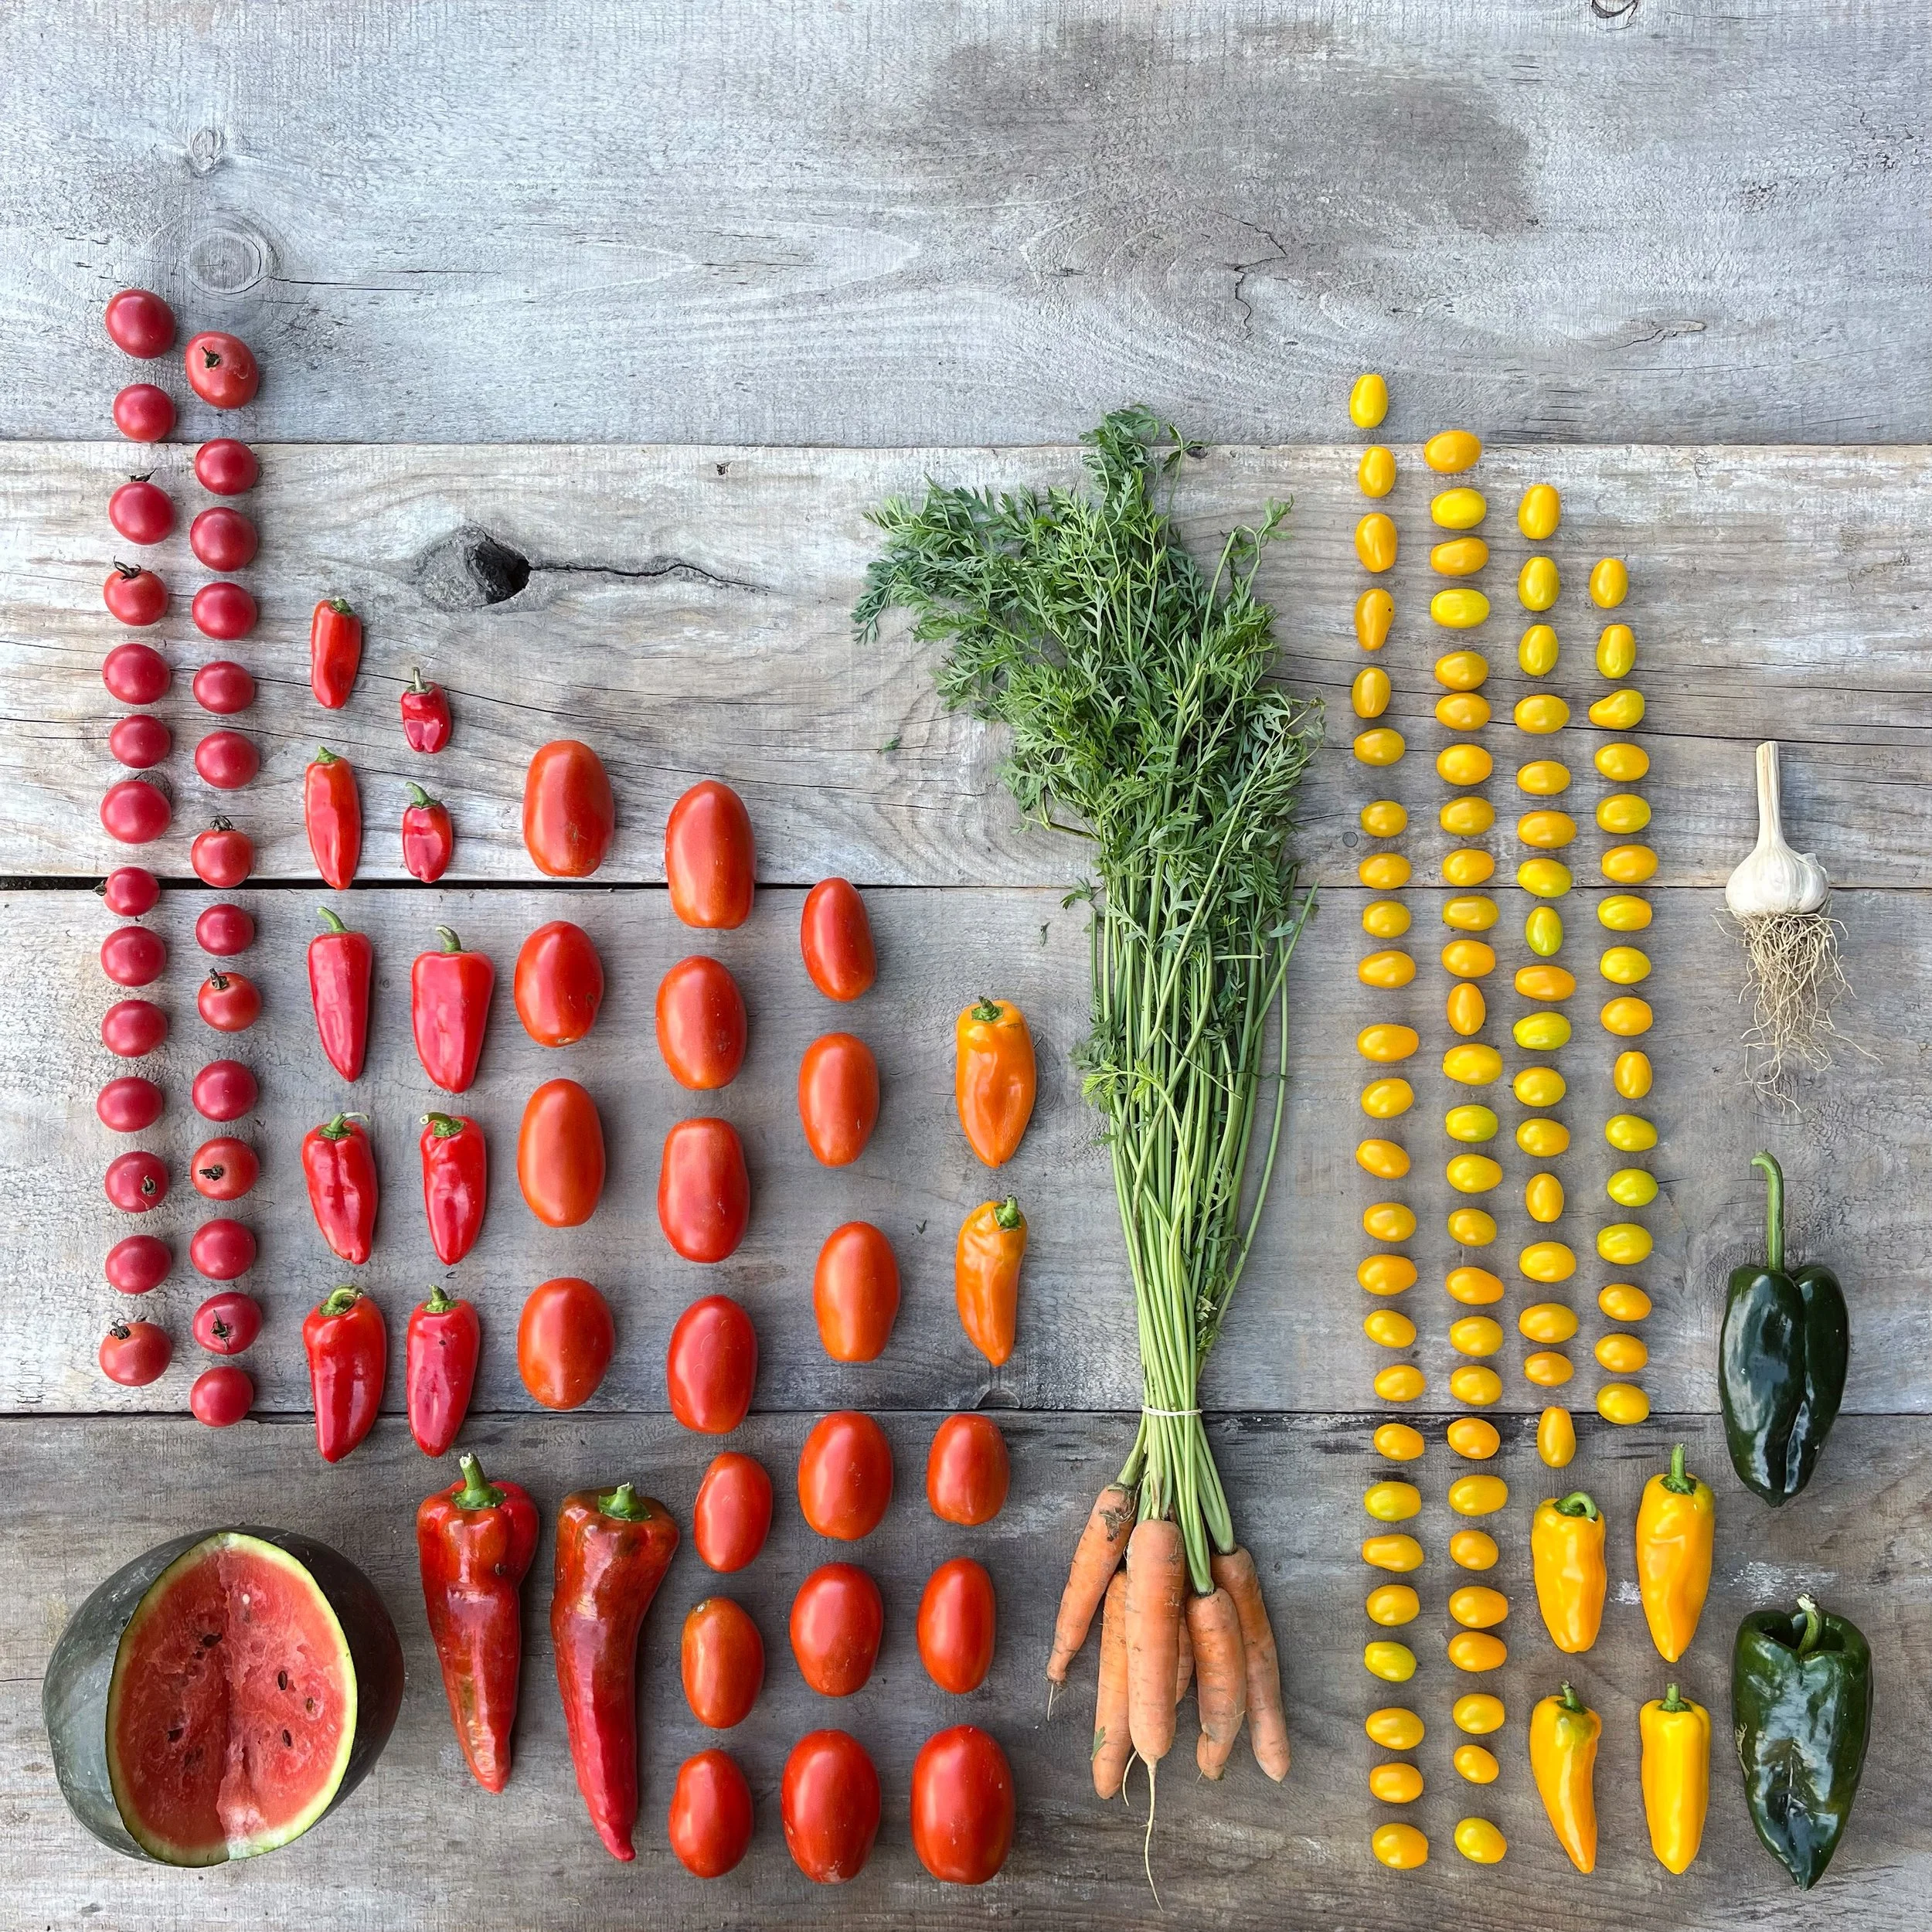
Our Fall winter squash is beginning to ripen up.  We spotted some spaghetti and acorn ready to go and a bit of butternut looks close behind it.  Tons of cherry tomatoes and plums continue to ripen.  Labor day is this weekend and that usually is peak abundance for melons and watermelons, and hot damn this fruit is delicious.  And great news for September, our next corn planting is looking pretty stellar.  

*For those CSA newbies of which there are a few of ya: Ray and Sarah are the kids of Anne and Pooh.  They grew up at edgewater  alongside their farming parents and are still at it.  Ray manages field crops, and Sarah manages greenhouses.  

FARMY FOODIE PRO-TIPS: 

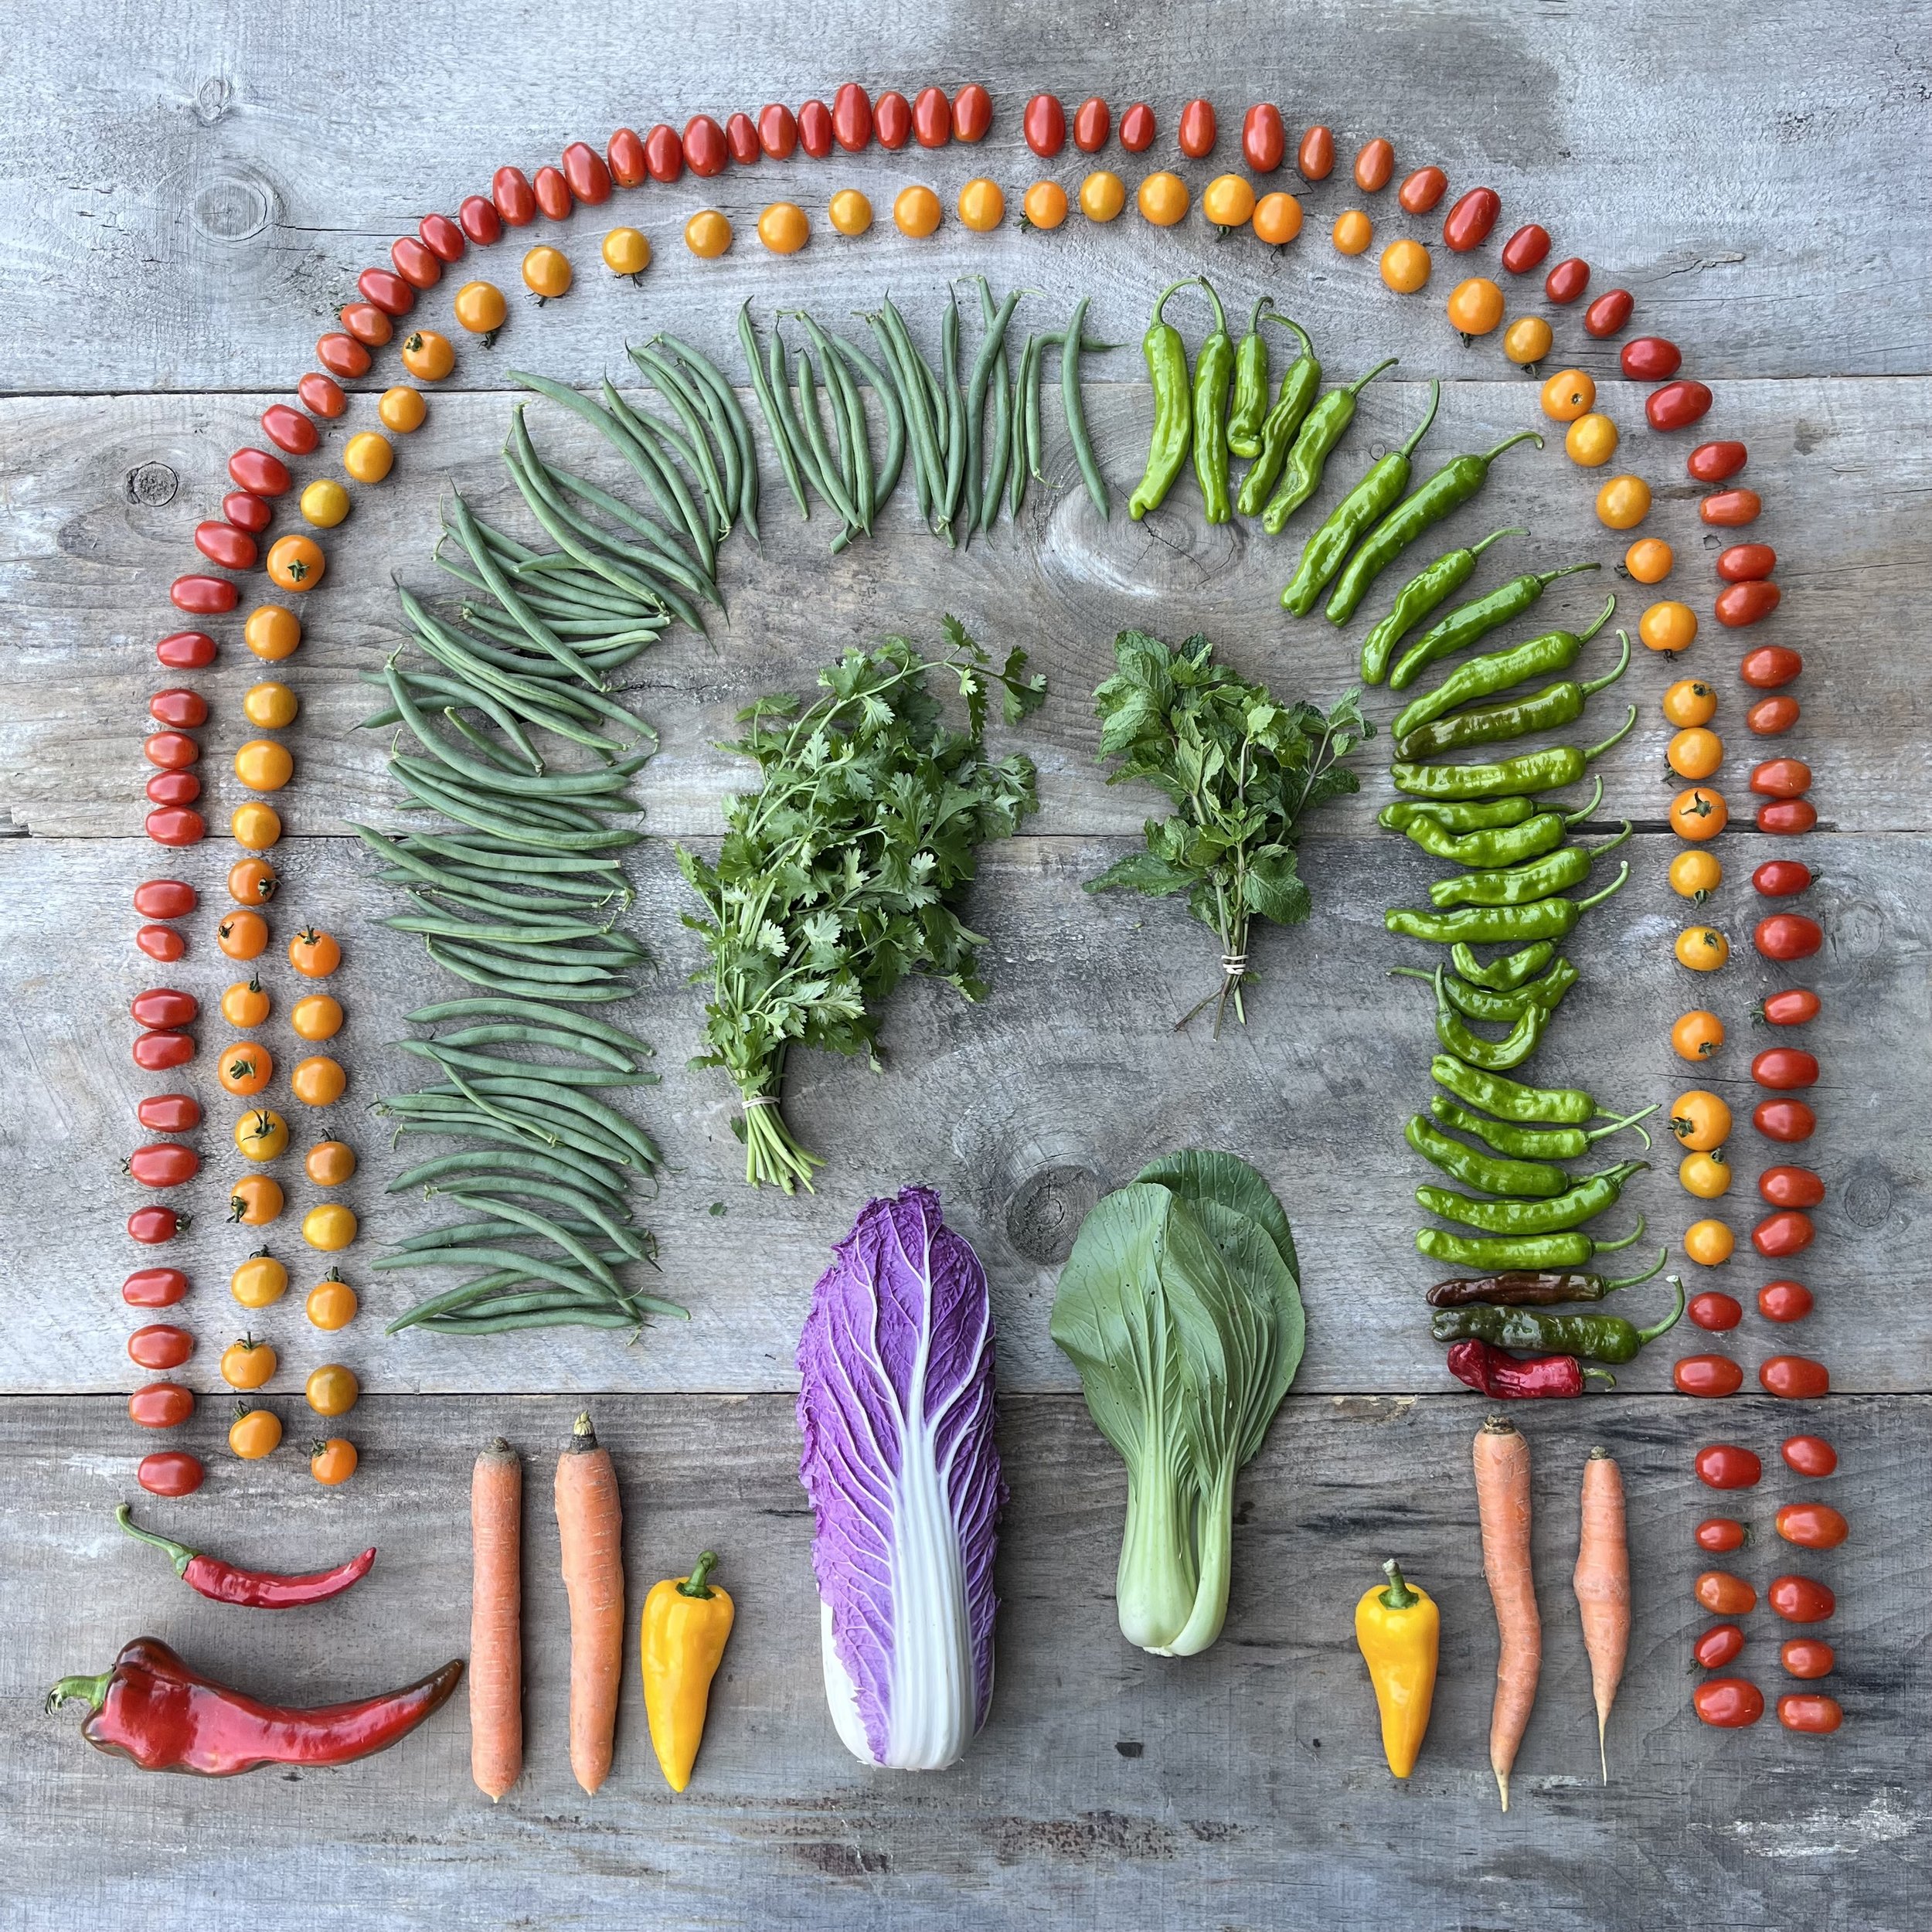
Ripe for the grill:   corn - roma tomato - onion - peppers 

MAYO-CILANTRO-SRIRACHA SMOTHERED CORN:  The following recipe is a real heavy hitter in my house as we indulge in corn every single night.  This stuff takes it to the next level.

  1. Finely chop cilantro leaves

  2.  stir into MAYO

  3. squirt in sriracha

  4. Mix any utensil in sight

  5. Pass on butter (gasp!) and spread this mayo upgrade on your cooked ear of corn and prepare to be delighted


Jenny’s Note: this recipe is particularly great eaten fresh

Ingredients Yield:About 2 cups

  • 3 large ripe Roma tomatoes, chopped

  • ¼ cup cilantro leaves and tender stems, finely chopped

  • ¼ white onion, chopped

  • 1 jalapeño, finely chopped

  • 1 serrano chile, finely chopped

  • 1 garlic clove, finely grated

  • 1 tablespoon fresh lime juice, plus more as needed

  • 1½ teaspoons kosher salt (such as Diamond Crystal)

Preparation:  Gently toss tomatoes, cilantro, onion, jalapeño, serrano, garlic and 1 tablespoon lime juice in a small bowl; season with salt and more lime juice if necessary. Let sit, uncovered, to let flavors meld, about 10 minutes.

Jenny’s Note: this recipe is particularly great for canning and eating come winter

INGREDIENTS:

8 plum tomatoes (about 2 pounds)

cored 4 cloves garlic, unpeeled 

2 serrano chiles, stemmed 

1/2 medium onion, halved 

1/4 cup packed cilantro leaves and tender stems

2 tablespoons fresh lime juice, plus more if needed  Kosher salt  

Directions: Heat a large cast-iron skillet over high heat. Add the tomatoes, garlic, chiles and onion and cook, turning occasionally, until charred on all sides, about 3 minutes for the garlic, 4 to 5 minutes for the chiles, 6 to 8 minutes for the onion and 8 to 10 minutes for the tomatoes. Transfer to a plate to cool.

When cool enough to handle, peel the garlic. Add the tomatoes, garlic, chiles, onion, cilantro, lime juice and 1 tablespoon salt to a blender and puree on low speed, stopping to scrape the sides and bottom to ensure an even texture, until the salsa is almost smooth but some small pieces remain. 

Season with salt and more lime juice if needed. When blending hot liquid, first let it cool for five minutes or so, then transfer it to a blender, filling only halfway. Put the lid on, leaving one corner open. Cover the lid with a kitchen towel to catch splatters, and pulse until smooth.

But what about basil?!?! If you are not feeling a salsa week, sauce it up yall!

CSA WEEK 10

P i c k l i s t

 roma tomatoes - curly parsley - corn - jalapeno peppers - melon - collard greens - 

green beans - garlic - onion

NOTES FROM POOH SPRAGUE: For this week’s newsletter, I’d like to introduce you to Pooh’s blog, he updated the other day- thoughts on 50 years of farming…


FARMY FOODIE PRO-TIPS: 

Ripe for the grill:   corn - jalapeno peppers! - roma tomato - onion - green beans

Braised Green Beans recipe by nearly resident chef, Mitchell Davis… Although we’ve come to believe that green beans should be fresh and snappy, these long- cooked, tomato-braised beans that are common around the Mediterranean are totally delicious nonetheless. Long cooking changes the flavor and texture of green beans, in a good way. This dish can be scaled up or down and served hot or at room temperature.

Serves 4 as a side dish
2 tablespoons extra-virgin olive oil

½ small onion, finely chopped

Salt

1 small clove garlic, minced

Pinch red pepper flakes

4 or 5 plum tomatoes or 1 quart cherry tomatoes, cored and chopped

Water

1 tablespoons tomato paste

1 quart green beans, tipped and cut on the diagonal into 1 ½-inch pieces

Chopped parsley

Set a medium saucepan over medium-high heat and add the olive oil. Add the onion and a pinch of salt and sauté for 3 or 4 minutes, until soft. Add the garlic and red pepper flakes and sauté another minute or two until fragrant. Add the chopped tomatoes and sauté for a few minutes until they begin to soften and give off their juice. Add the water and tomato paste and

stir to dissolve the paste. Add the green beans. Bring to a boil, reduce the heat to a simmer, cover, and let cook for 30 minutes or so, until the beans are tender but still hold their shape. Remove the lid, raise the heat, and let the juices reduce a little until the whole thing coheres. Stir in the parsley. Adjust the seasoning with salt and serve hot or room temperature.

Jenny’s note: I LOVE a pickled jalapeno! Add sparingly (or not) to soups, tacos, scrambled eggs, etc… I may have over picked these bad boys, so i have a pretty large canning project coming up this weekend, my winter tacos will be so pleased.  

First, slice your peppers into rounds. There’s no law against using whole jalapeños, but smaller pieces will soak up the brine faster. Bring 1 cup distilled white vinegar, 2 Tbsp. kosher salt, 2 tsp. sugar, up to 2 Tbsp. spices (e.g., peppercorns, ­coriander seeds, and/or ­mustard seeds), chopped fresh herbs (like cilantro), and 2 cups water to a boil in a saucepan. You’ll want enough liquid to cover the peppers, so feel free to scale this ratio up or down as needed.

Transfer sliced peppers to clean glass jars and pour over the brine, leaving ½ inch of headspace between the liquid line and the rim. Screw on the lids and let the jars cool before transferring to the fridge. Your pickled jalapeños will be best after 48 hours and last up to two months refrigerated. OR, take the extra step to can for winter months and enjoy all year long.  

The herbs are the star of this tabbouleh recipe—and require a bit of care. Make sure to use a very sharp knife so that you can slice through the parsley and mint just once. You don’t want to run your knife over them again and again or use a food processor; doing so will bruise the tender leaves and lead to a soggy salad. In classic recipes, like this one, there should only be enough bulgur and tomatoes to balance all those herbs, so keep the proportions in check. And, if you don’t eat gluten, you can swap bulgur for quinoa.

¼ cup fine-grind bulgur

3 medium ripe tomatoes (about 1 lb. total)

⅓ cup fresh lemon juice

Kosher salt

2 bunches of parsley, thick stems trimmed

1½ cups mint leaves

4 scallions, very thinly sliced crosswise

¾ tsp. ground allspice

5 Tbsp. extra-virgin olive oil

Freshly ground black pepper

Step 1
Place bulgur in a small bowl and cover with boiling water by 1". Let sit until bulgur is soft and tender, 20–30 minutes.
Step 2
Finely chop tomatoes and transfer to a large bowl (juices and all). Add lemon juice and bulgur to bowl; season with salt, then toss to combine.
Step 3
Rinse parsley under cold water and shake to get rid of excess water. Working in batches and starting at stem end, finely slice stems and leaves with your sharpest knife, making one even pass. This is so the parsley doesn’t get bruised or wilt and stays light in the salad (you should have about 4 cups).
Step 4
Gather mint leaves in a tight bunch and repeat same slicing motion as you did with the parsley.
Step 5
Add parsley, mint, scallions, and allspice to bowl with bulgur mixture; toss to coat in lemon juice. Drizzle with oil; season with salt and pepper. Toss once more and serve immediately.

CSA WEEK 9

p i c k l i s t

roma tomatoes - Thai Basil - corn - shishito peppers - 

edamame (young soy beans!) - melon - cabbage - new potatoes - garlic

The weather is certainly shifting. It can still shift back to hot summer days, but for now the cooler nights slow down the summer vining crops. Our cucumbers and squash have slowed production considerably and pretty soon we will start bringing in our fall crops. I am crossing my fingers this moment is just a Fall teaser and not the beginning of flannel on flannel. Ick, ick, ick, not ready.. We only just bit into our first watermelon over here!

On the topic of Fall, soon we will put info out there regarding our Fall CSA.  Stay tuned for that, and dream up winter squash recipes while chowing on sweet corn and tomatoes.  

This week at edgewater we continue to harvest everything all the time while simultaneously getting pumped for fair season. Though we never have our shit together to actually enter a veg for blue ribbon status, there are many times in the field when I come across (what I deem as) the largest eggplant on the planet, or the perfect tomato.  These are all tiny glory moments that are sprinkled throughout my everyday, often declaring blue ribbons all around! This weekend we make time to leave the fields and head to our home-town-Cornish-fairgrounds.  I am very pumped to wander, play some games, eat a corn dog and take in some prize winning animals, vegetables, quilts, and queens- love it all, see ya there!

Also at edgewater this week, we dipped into the bean field and got yall some edamame! These beans are such a treat and true labor of love.  We grow them because we love to eat them.  No other reason.  No big profits coming in from these baddies and we should never run the numbers on whether they make sense or not, because as a business- they take entirely too much time.  BUT it is glorious to grow, pick, boil, salt and eat your own.  We cut the plants low and bunch them, as the pods are a real pain in butt to pick.  Luckily for you, the CSAer, we left the pods on, so you too can experience the ummmm, errr “delight” of real time picking. Enjoy!

FARMY FOODIE PRO-TIPS: 

Ripe for the grill:   corn - shishito peppers! - roma tomato - onion - potatoes (if you have the patience) 

Shishito peppers EXCELLENT on grill OR fry pan. Shmear your shishitos with olive oil - toss them on grill/or in pan. Cook until blistered, remove from heat, sprinkle with salt, and devour immediately.  So good.  

Edamame: When eaten at this young stage soy beans are called Edamame (perhaps you are familiar? )

To eat:  1) Pick bean pods off plant

2) Boil in water for 7ish minutes, followed by icebath

3) Drain water, salt pods, devour immediately

Fried garlic chips 

from my one of my fave cook books: 

BURMA SUPERSTAR: ADDICTIVE RECIPES FROM THE CROSSROADS OF SOUTHEAST ASIA

by Desmond Tan and Kate Leahy

Makes about ⅓ cup fried garlic and about ½ cup garlic oil (perfect as a salad topper)

Ingredients:

½ cup thinly sliced fresh garlic

½ cup canola oil (though i used olive oil and it turned out great)

Line a heat proof bowl with a strainer.  Line a plate with paper towels.  In a wok or small saucepan, heat the oil over medium heat for a minute or two (the oil shouldnt be scorching hot).  Add the garlic and gently stir into the oil.  When bubbles start to form rapidly around the garlic, decrease the heat to low and cook, stirring often, until the garlic is an even golden color and nearly completely crisp, about 3 minutes.  If the garlic starts to darken too quickly, remove it from the heat and let it continue to fry in the oil.  If the garlic needs more time to fry, return the wok to low heat and continue to fry.  

Pour the contents of the wok into the strainer lined bowl.  Lift the strainer up and shake off of the excess oil.  Scatter the garlic onto the lined plate.  The garlic should crisp up as it cools.  The chips can be stored in an airtight container at room temperature for 1 month.  Store the oil in the fridge for up to 6 months.  

Yes, you can (and should) make salad in a mortar. When hardy vegetables, like cabbage, are lightly crushed in a tall Thai-style clay mortar with a long wooden pestle, they are tenderized just enough to yield a pleasing soft crunch. Bruised Thai basil, cilantro, and mint permeate this dish, with a dressing of fish sauce and lime, pounded chiles, garlic, and ginger. Serve it alongside grilled or roasted fish or chicken and steamed jasmine rice.

By Andrea Slonecker/  Updated on July 26, 2023 Tested by Food & Wine Test Kitchen

  • 3 thin slices (about the size of a quarter) peeled fresh ginger

  • 2 garlic cloves

  • 1 fresh Thai chile or 1/2 serrano chile, stemmed, seeded, and sliced

  • 1 tablespoon granulated sugar

  • 6 cups packed shredded cabbage (from 1 medium head)

  • 1 cup loosely packed soft fresh herbs (such as Thai basil, cilantro, and mint)

  • 2 tablespoons Vietnamese fish sauce

  • 2 tablespoons fresh lime juice

  • 3 tablespoons coarsely chopped dry-roasted peanuts

  • Fried garlic, for serving

Directions

  • Using a kruk, pound ginger, garlic, chile, and sugar to a fine paste, 1 to 2 minutes. Add cabbage and herbs; pound until cabbage is slightly softened and crushed and flavor of herbs is released, about 30 seconds. Add fish sauce and lime juice, and toss with pestle and a spoon until evenly combined. Let mixture stand at room temperature for 15 minutes. Serve salad topped with peanuts and fried garlic chips!.

Originally appeared: May 2020

Thai Stir-Fried Cabbage

recipes is from Mitchell Davis, our beloved up the road nearly resident chef…

I’m writing this week from Bangkok so I’ve got fish sauce on my mind. This quick Thai stir fry is an easy, fragrant way to cook just-harvested summer cabbage. Don’t cook it too long; you want to keep the leaves a little crisp and refreshing.

1 tablespoon peanut or vegetable oil

5 cloves garlic, roughly chopped

½ small head green cabbage, cored, leaves separated and cut into uneven 2-inch pieces

1 tablespoon Thai of Vietnamese fish sauce (nam plah)

Freshly ground white pepper

Salt to taste

Have a small dish of water at the ready. Heat a large cast-iron pan or carbon-steel wok over high heat until smoking hot. Remove from the heat and immediately add the oil and garlic, stirring to lightly brown the garlic without burning. Return the pan to the heat and add the cabbage, stirring and tossing to distribute the garlic, making sure it doesn’t burn, and to wilt the cabbage ever so slightly. Add droplets of water to the pan to steam-cook the cabbage, waiting each time for it to evaporate before adding more, until the cabbage is crisp but tender, about 2 minutes, depending on how hot your pan is. Add the fish sauce by spooning it around the edge of the pan, not directly onto the cabbage, so that it fries and evaporates as it blends in. The aroma will be strong but then dissipate into deep umami flavor. Keep tossing. Season with white pepper and salt to taste.

CSA WEEK 8

P i c k l i s t

 roma tomatoes - oregano - corn - onion - purple pepper -

lemon balm - lettuce - melon - cucumbers

Blueberry season came to an end this week and we are bumming.  The fruit is there but the quality is not.  While this typically occurs mid August, at the end of our blueberry picking season, this year the end- with its soft smushy berries- came entirely too soon.  Thank Goodness for that sweet sweet melon, of which we currently are rich in, to distract us from the hit we will take due to the sudden lack of blues.   

Yesterday, for the first time in my history of working at Edgewater, we celebrated Jamaican Independence Day away from the blueberry fields.  Typically we party amongst the blues, in the field, mid pick, but last night the crew came over after a full day of cutting pig weeds out of the eggplant and pepper planting.  As the majority of our crew is from Jamaica, it is only appropriate- and I say mandatory- to order a heap of food from Sunshine Cookshop in Claremont, and kick back.  We brought in a full spread of curry goat, jerk chicken, rice and beans, and red stripes.  It’s always a treat to literally sit down with the crew - a real mid season rarity- and put some Jamaican food in our bellies.  

Now that we are out of blueberry season, the next couple of weeks will be spent bringing in the harvest while simultaneously cleaning up the fields.  So many weeds have taken over- there is an actual jungle to bushwack every time the piclistk calls for fennel- and at this point we are crossing our fingers the crab grass in the potatoes decides to slow its roll… 

On the bright side of farm life, the temps have cooled, actually meeting the kitchen needs of the tomato harvest.  August is the month to focus efforts on putting up food for winter.  However doing so in August is often dreadful on account of sweltering heat mixed with stove top/oven use efforts.  While I do not love a cool summer day, I do appreciate the gift it brings when the tomatoes demand roasting/saucing/etc… So without any further ramblings, grab your ball jars, winter is coming, and farmy foodie pro-tips await…

FARMY FOODIE PRO-TIPS: 

Ripe for the grill:   corn - onion - roma tomato - pepper 

The following 2 recipes are from Mitchell Davis our beloved up the road nearly resident chef…

Both recipes can be frozen or canned for winter eating.  To can, see https://www.ballmasonjars.com/recipes?fdid=tomatoes&custompid=tomato-juice

And if freezing, make sure to add space in your bag/container/jar for inevitable expansion.

There are two ways to look at today’s CSA pick list: 1. Fresh tomato sauce 2. Roasted tomatoes. Both are excellent ways to save and savor these summer flavors. In fact, why not make a little of each?

Fresh Tomato Sauce

3 tablespoons extra-virgin olive oil

1 red, white, or yellow onion, chopped

1 small clove garlic, peeled and split in half, or 1 garlic scape, chopped

Salt

1/2 small hot pepper, seeded and minced, or a pinch of hot pepper flakes

10 to 15 plum tomatoes, roughly chopped

¼ cup white wine, vegetable stock, or water

1 bay leaf

Freshly ground black pepper

In a large saucepan, heat the olive oil over medium-high flame. Add the onion, the whole garlic clove or scape, and a pinch of salt, and sauté until the onion is translucent. Remove the garlic clove, if using, and discard. Add the hot pepper and sauté another minute or so. Add the chopped tomatoes, wine, stock, or water, and bay leaf. Reduce the heat, cover, and simmer about 5 minutes until the tomatoes begin to give off their liquid. Continue simmering for another 15 to 20 minutes, stirring often, until the tomatoes have fully melted into sauce. Remove the bay leaf.

At this point you have three options:

1. You can keep the sauce chunky and rustic as it is.

2. You can pass the cooked sauce through a vegetable mill to remove the tomato skins and create a nice texture, not too fine. Or,

3. You can use a regular or immersion blender to purée the sauce until smooth. (Passing it through a strainer once puréed is optional, and might be considered more French than Italian.)

All produce great results. If milling or blending, return the sauce to the pan, adding a little water or better, pasta cooking water, to adjust the consistency, if necessary, and bring it back to a gentle simmer. Add the chopped herbs and some black pepper. Simmer a couple of minutes more and then mix with pasta or use however you like.

Roasted Tomatoes

Any number of plum tomatoes, cut lengthwise in half

3 or 4 cloves garlic, thinly sliced

Extra-virgin olive oil

Salt and freshly ground black pepper

Sprigs of fresh oregano, basil, rosemary, or a combination,

Preheat the oven to 375°F. Line a baking sheet with parchment. Arrange the tomato halves cut side up on the prepared pan. Scatter the sliced garlic around the tomatoes. Drizzle generously with olive oil and season with salt and black pepper. Toss the tomatoes to coat with the oil and seasonings and then return them cut side up. Scatter the herbs around the tray. Set in the

oven and roast for about 1 hour or longer, until the tomatoes have shriveled a little, concentrated, and browned around the edges. Serve as is or with ricotta and toasted or grilled sourdough bread to soak up the juices and the oil.

—Cookbook author and food writer Mitchell Davis recently moved from New York City to the Upper Valley, just down the road from Edgewater Farm. For more recipes, subscribe for free to his weekly newsletter Kitchen Sense at www.kitchensense.substack.com

Lemon balm: I LOVE THIS HERB.  And as we enter high summer, it is the perfect aid to calm us down amidst the harvest hustle.  Read more about this herb, as you sip your lemon balm sun tea, or add to your salad mix…

Edit, copy, and pasted from mountain rose herbs

For centuries, lemon balm has been used for its beneficial properties and has been highly esteemed for its emotional and spiritual effects. Melissa (other name for lemon balm) has traditionally been used as a gentle nervine and in baths to support healthy skin. It is often used to promote a sense of calm and can be brewed into a citrusy lemon balm tea, incorporated into other herbal tea blends, and included in body care recipes.

Used since ancient times to calm the heart and the body, lemon balm with its delicate lemony flavor uplifts the spirit and any culinary dish it is added to. It has been used to sweeten jam, jellies, as an addition to salad, and as a flavoring for various fish and poultry dishes and liqueurs. Further, lemon balm is used for making perfumes, in cosmetics, and in furniture polish manufacturing. It is often found as a tea in combination with other relaxing herbs such as valerian, as an essential oil, and also in ointments for topical applications.

The use of lemon balm goes back thousands of years to the time of the ancient Romans and Greeks. One of its first recorded uses was as a wine infused liniment. Dioscorides (a Greek physician, pharmacologist, and botanist practicing in the 1st century in Rome, who authored the herbal De Materia Medica), mentions its use in this way, and it was also employed in this same manner in Ayurvedic medicine. St. Hildegard of Bingen, an herbalist and nun born in 1098 C.E. in present day Germany said, “Lemon balm contains within it the virtues of a dozen other plants.” According to Nicholas Culpepper (a botanist, avid astrologer, physician, herbalist, and author of the Complete Herbal, written in 1653), said dried lemon balm may be made into a fine 'electuary' with honey. He wrote that it was ruled by the planet Jupiter and associated with the zodiac sign of Cancer, therefore having an association with the water element and thus an effect on emotions.

Lemon balm was traditionally used to uplift the spirits. As Culpepper mentioned, some of its properties were spiritual in nature. This herb was used in spells to heal broken hearts and also to attract romantic love. 

MELON: Don’t rush these bad boys.  Just like your tomatoes, they can ripen off vine to reach peak flavor.  We pick them when they are sized up, but you eat them when their scent is sweet and calling to you.  You’ll know

CSA WEEK 7

P i c k l i s t

tomatoes - parsley - corn - green beans - carrots - kale - jalapeno - melon - garlic

Holy smokes it is basically August.  This week in farming flew right by.  At this point, I can not decipher one day from the next- thankfully I got CSA to remind me of Tuesdays and Wednesdays.  High season is here people!  I’ve been greeting each morning with the sweetest melon breakfast, and I bet you will get in on that this week.  The weather remains totally unpredictable, alot to scratch our heads over- just last night St. Johnsbury got hit with another flood. NorthEast Kingdom farmers are not psyched.  Such a mess.  And the heat, oh the heat!  On the plus side, this heat that every New Englander grumps over has provided the sweetest and earliest damn melon crop we’ve seen yet.  And for that, I am grateful and jazzed.  

Meanwhile, Our personal lives are a dirty mess and hopefully not a reflection of the farm.  Our kitchen floor has a real centimeter’s worth of field brought in from our boots, topped with smushed blueberries caked right on in.  Our kiddos probably don’t even know what shampoo is, it’s been so long… but we are well fed and eating the rainbow everyday, so there is that…

The garlic in your CSA this week was harvested on Friday.  It was an all hands on deck moment and it felt pretty great to work with the field crew.  I typically spend my days picking veg solo, so this was a real treat and flashback to my first 10 years at edgewater.  A Lot of jokes while harvesting garlic, extracting the allium from the weeds.  The crop is looking really nice, currently it sits drying on benches and extends the length of three greenhouses. I bet we will be eating from this harvest well into February, but right now, it is peak freshness. Enjoy!

 FARMY FOODIE PRO-TIPS: 

Green beans: hot tip hot tip! Wash before you eat- we tried to get the dirt off, but I’d give it a second rinse…

Ripe for the grill:   corn - green beans - garlic! - tomato

Skillet Corn and Vegetable Pudding

recipe from Mitchell, our beloved up the road nearly resident chef

Although the main ingredient in this delicious, one-pot, savory skillet pudding is corn, it’s a delicious way to use up any variety of the summer’s bounty. I’ve added kale, fennel, green beans, zucchini, kohlrabi, spinach, and other vegetables I’ve had around. What’s more, the next morning I like to fry the leftovers in olive oiluntil nicely browned and top with poached eggs for a hearty breakfast. —Mitchell Davis

(Makes one 10-inch pudding, enough for 6 to 8 people. But the recipe can be easily cut in half and baked in an 8-inch skillet, for 4)

2 tablespoons unsalted butter

1 large onion, white or red, diced (about 1 ¼ cups)

1 small red or green pepper, sweet or spicy, diced (about 3/4 cup)

1 to 2 cups seasonal vegetables, such as kale, zucchini, yellow squash, Swiss chard leaves and/or stems, kolrhabi, green tomatoes, additional peppers, green beans, carrots, jalapenos

1 tablespoon kosher salt

1 tablespoon sugar

Handful of chopped fresh herbs, such as basil, thyme, parsley, marjoram, or sage

1 teaspoon sweet or smoked paprika

1/8 teaspoon cayenne pepper

Kernels from 3 large fresh ears corn (about 3 cups)

1/2 cup fine cornmeal

3 large eggs

1 1/4 cups milk or buttermilk

1/2 cup heavy cream, yogurt, or additional milk

Pinch freshly grated nutmeg

1 cup finely shredded cheese, hard, sharp cheese, such as cheddar, Gruyère, Comté, Gouda, or similar

Preheat the oven to 350°F. Melt the butter in a 10-inch cast-iron skillet over medium-high heat. Add the onion, pepper, and other vegetables, and salt, and sauté, stirring frequently, until the onions are soft and they are beginning to brown,

about 10 minutes. Add the sugar, sage, salt, paprika, and cayenne, and cook another 3 or 4 minutes to bring out the flavor of the spices. Add the corn kernels. Continue cooking, stirring frequently, until no water remains in the skillet, another 8 minutes or so, longer if using zucchini or mushrooms, which have a lot of water in them. Stir in the cornmeal and remove from heat. In a small bowl, whisk together the eggs, milk, cream or more milk, and nutmeg,

then pour this into the corn mixture. Using a rubber spatula, stir well to combine.  Sprinkle with the grated cheese, and bake until set, about 20 minutes. Turn on the broiler and broil only until the melted cheese is lightly browned, a minute or two more. Serve warm.

Kale Salad with Lemon, Currants, Walnuts, and Parmesan (also from Mitchell, cheers!)

There are a million variations of kale salad out there, and this one is just a suggestion. It’s based on a salad made famous by Barbuto chef Jonathan Waxman. Use curly or laccinato kale, any type of nut, Parmesan, Pecorino Romano or any hard grating cheese, and you’ll have a delicious result. The salad is best served after it sits for 5 to 10 minutes, giving the salt and acid time to wilt the leaves. You’ll think you have too much, but once it wilts, you’ll be surprised how it shrinks.

Makes 4 to 6 servings

1/4 cup dried currants, raisins, cranberries, or other dried fruit

3 tablespoons red wine vinegar or apple cider vinegar

About 1/3 cup or more walnut halves, pecans, almonds, or other nuts

2 bunches of kale

About 1/3 cup or more extra-virgin olive oil

2 lemons

2 ounces Parmigiano Reggiano, Pecorino Romano, or other hard cheese, finely grated

Salt and freshly ground black pepper

Place the currants or other dried fruit in a small bowl. Add the vinegar and just enough hot water to cover. Let soak while you prepare the rest of the salad. Place the nuts in a small tray or baking pan and toast in a 300°F. oven for 10 to 15 minutes, tossing occasionally, until you can smell a nice toasted nut aroma. Set a timer or you are likely to burn them. Remove from the oven, transfer to a cutting board to cool. Once cool, using a sharp knife, finely chop. Set aside.

To clean the kale, I like to separate the leaves from the stems by laying the leaves out on a cutting board and, using a sharp knife, cutting along both sides of the stem. You can also invert the leaf, grasp the leafy part with one hand while you pull the stem off with the other. Whichever way you prefer, soak the de-stemmed leaves in a copious amount of cold water. Lift them from the water into the basket of a salad spinner or colander, discard the water, and repeat with fresh water until no sand remains. Spin the leaves to dry or pat with a clean towel. On a clean cutting board, lay out a pile of kale leaves, bunch together into a tight bundle and thinly slice them with a sharp knife. Place this shredded kale in a large mixing bowl and repeat with the remaining kale.


To finish the salad, drain the soaked fruit, reserving the soaking liquid, and add to the kale Add the chopped nuts, the olive oil, the zest of two lemons and juice of one lemon, the grated parmesan and a generous amount of salt and black pepper. Using tongs, toss well so that the ingredients are all evenly distributed. Taste and adjust the seasoning, using more lemon juice or the reserved soaking liquid from the dried fruit to up the tartness. Let sit for 5 to 10 minutes to allow the leaves to wilt somewhat before serving.

—Cookbook author and food writer Mitchell Davis recently moved from New York City to the Upper Valley, just down the road from Edgewater Farm. For more recipes, subscribe for free to his weekly newsletter Kitchen Sense at www.kitchensense.substack.com

CSA WEEK 6

      P i c k l i s t

tomatoes - broccoli - basil - parsley -

cabbage - blueberries - eggplant - corn - green beans

This week in farming proved way chiller than last- woop woop! We did not have to take shelter due to thunderstorms, we did not have to pull riverside equipment in fear of flood, and we did not have to grin and bear at 2 pm on those 95 degree days.  We got to enjoy the season, we got to enjoy farming.  It is all harvest all the time right now and it feels so good to swiftly fill a bushel with carrots, or a flat with raspberries.  Pints upon pints have been filled daily with the sweetest blueberries, and I can't help but eye the shishito pepper crop nightly as it is planted right outside my bedroom window.  I like to lazily dream gaze at this field, waiting for it to produce an abundance of my fave veg (the shishitos) to pick and fry.   

Bottomline here, we are in the middle of what seems to be a good all around summer bounty, with loads of cukes, pickles, squash, zucchini, and green beans coming in from the fields. Now adding cherries, grapes, and mixed colors little tomatoes to pint up along with their elders: gobs of red slicing tomatoes and heirlooms just waiting to be sliced. The corn is ready! The melons are sweet as can be- lets just hang out in July forever shall we?

What is proving to be a challenge right now? We are struggling to get our Fall crops seeded, and our fields weeded.  Even with this abundance of light levels, there are just not enough hours in a day.  Forgive me, if I’ve said that last part about light and not enough hours, 100000 times.  But it’s so true!


FARMY FOODIE PRO-TIPS: 

Basil: hot tip on storing basil, treat it as a cut flower and keep it in a vase on your counter (outside the fridge) in about 2 inches of water.  

Ripe for the grill:   broccoli - cabbage - eggplant - corn - green beans - tomato

Where are Mitchel's recipes?!? Due to the nature of this CSA (diverse and ever changing), we had to make some last minute crops switching on account of a sudden abundance of green beans and blueberries.  Therefore, Mitchel’s recipes for what would have been a cucurbit heavy CSA will be bookmarked for the next cucumber-squash-zucchini week. 

Grilled Summer Veg with Creamy Sesame Dressing BY MOLLY BAZ

https://mollybaz.com/grilled-summer-veg-with-creamy-sesame-dressing/#memberful_done

SERVES: 4 Silken tofu is the magical miracle ingredient in this creamy mayo-less sesame dressing. If it sounds weird to blend tofu into a dressing….it’s not. It Lends body and a subtle soy flavor that gets bolstered with sesame seeds, sesame oil, and garlic.As for the grilled vegetables, really ,the world is your oyster here. I’ve suggested some green things that cook quickly and go well together but I’ve also used this dressing on grilled or roasted mushrooms, and drizzled over baked sweet potatoes, so don't feel like you have to stick to the script.The recipe will yield twice as much dressing as you need and that’s intentional – no sense in busting out the blender for one meal. 


ACTIVE TIME: 45 MINS TOTAL TIME: 55 MINS

PRODUCE:

4 garlic cloves

2 lbs green summer vegetables (zucchini, asparagus, snap peas, scallions or green beans)

1lemon 

PANTRY 

4 teaspoons toasted sesame oil

¼ cup toasted sesame seeds

½ cup plus 2 tablespoons canola oil

 ⅓ cup unseasoned rice vinegar 

1tablespoon soy sauce 

Kosher salt, lots of freshly ground black pepper 

PROTEIN 8 oz soft tofu 

1. MAKETHE CREAMYTOFU SESAME DRESSING: 

In a small food processor or blender, combine 8 ounces soft tofu, 4 teaspoons toasted sesame oil, ¼ cup toasted sesame seeds, 2 garlic cloves, ½ cup canola oil, ⅓ cup rice vinegar, 1 tablespoon soy sauce. Blend or blitz until very creamy. Season with salt and lots of freshly ground black pepper - it should be noticeably peppery. Finely grate the zest of half a lemon into the dressing and blitz once more. Set dressing aside.

2. GRILL: Prepare a grill for medium-high heat. If using zucchini, cut into ½” rounds or planks. Snip the ends of any green beans or peel the strings of snap peas, if using. Combine all the prepped veg (2 pounds total) in a large mixing bowl. Drizzle with a few tablespoons of canola or olive oil and season with salt and pepper. Finely grate 2 more garlic cloves over the veg and toss to coat. Arrange the veg on the grill and cook until charred in spots and softened but not mushy–you be the judge. Everyone likes their vegetables cooked to a different doneness. Get some good color and then start tasting.

3. SERVE: Spread some sesame sauce on a serving platter.Top with the grilled veg. Finely grate some more lemon zest over everything and squeeze the juice of the lemon over just before serving. Finish with more sesame seeds.

Serves 4

This is it guys. The crispy eggplant you have all waiting for… The trick is to slice it thick-ish and salt it generously. Let it sit out releasing puddles of water. Pat dry aggressively, cover in corn starch aggressively and then fry in hot oil until it comes out golden and dark brown in some places (you want to make sure the eggplant meat inside is cooked, custardy and sweet). I have topped the eggplant in with garlicky tahini, amba (mango pickle sauce), fresh parsley and sea salt but you can really do whatever you want here. Someone suggested drizzling it with honey or silan (date syrup) and once I tried that...you’ll see.

1 large eggplant or 2 medium eggplants

kosher salt

1 cup cornstarch

4 cups canola oil or any oil with no flavor and a high smoke point like grapeseed, sunflower, veggie

sea salt to finish

serve with garlicky tahini (recipe below), amba, fresh parsley, fresh lemon, parsley, honey

  • Slice the eggplant in 1/2 inch thick pieces. You have the option of keeping the skin on or removing the skin. I keep it on, because I don’t like to waste it but if you remove the skin, it will get even crispier. Place the eggplant slices on a sheet tray and generously salt the eggplant. Let it sit out at room temp for at least 1 hour. Puddles of liquid will come out of the eggplant.

  • Before frying, take a kitchen towel and pat down the eggplant well, drying them off as much as possible. Slice in half on a diagonal (I think they are too big to fit in a sandwich or a pita this way so I like to slice them in half) Place the cornstarch in a bowl and toss each piece in the cornstarch well. Shake off excess and place on a dry sheet tray. Heat up the oil in a deep pot. If you don’t have a thermometer (which I don’t) heat on high and sprinkle a little cornstarch in the oil. If it sizzles it should be ready. Turn the heat to medium high it should be around 350 degrees f and add in the first piece. I like to fry one at a time so that the oil temp stays up (if you overcrowd the oil the temp will come down and the eggplant wont fry they will soak)

  • Flip the eggplant over once the bottom is golden and brown in some places around 1-2 minutes. When the other side is golden another 1-2 minutes remove from the oil and place on a paper towel to let dry. Immediately season well with sea salt.

  • Serve this eggplant on its own, on sandwiches, in pitas…you can do a lot with it. 

garlicky tahini

  • 1/2 cup tahini paste

  • 2 tsp fresh lemon juice

  • 1 small garlic clove, finely grated

  • large pinch kosher salt- or to taste

  • 3 tablespoons cup ice water

Place everything in a bowl and mix. The tahini will get thick and pasty but keep mixing. Add more water to loosen, if needed.

CSA WEEK 5

      P i c k l i s t

tomatoes - broccoli - summer squash - pickling cucumbers - zucchini - Thai basil - 

napa cabbage - blueberries - raspberries - garlic scapes

Oooof the flood, what a total kick in the ass part 2. 

This region is so thick with agriculture because of the awesome alluvial soils and the easy access to water that runs the rivers, the streams, and the brooks.  But how do we consider farming those perfect riverside fields when flooding becomes an annual event?  While Edgewater remained unscathed From last week’s storm, our dear buds lost 90% of their crop.These are the same dear buds that you read about last week that were trying to raise money to rebuild their employee, Ranaldo’s, home back in Jamaica. Same storm system, same path, wildly different landscapes, extreme latitude distance.  But Beryl gave 0 shits and took out both spots in mere days. We are all so connected-  You can’t make this stuff up.

So what does a bandaid look like to get through the rest of the season when you are drowning in crop failure? Sure- a go fund me is great.  Friends volunteering their time to pick up from the damage is also huge.  We offered our fields for their crew to harvest crops and sell. But what about the bigger picture?  What does this farming future look like for our friends at Joe's Brook Farm? And what does it look like right here on River Road?

 The storm systems and the erratic weather are only getting worse- iIt’s unclear how to plan, how to farm, and maybe we just take some decent guesses from here on out? That feels unsettling. This is our livelihood and a bad year can really hurt us as it is certainly hurting Mary, Eric, and their employees.  

Here is a bit more about the Skovstead’s and what they are experiencing- copy and pasted from their go-fund-me site. These donations will absolutely help out their crew get through the season.  I will link to it on the blog:

This week Mary and Eric Skovsted have had devastating loss to their farm from flooding. Joe's Brook Farm is a family-owned farm and has two field locations in Barnet, VT, one on Joe's Brook Road at their home and one along Rt. 5. Both were hit hard by the flooding and 10+ acres of crops are a total loss. All of the affected crops will need to be pulled out and the soil will need be beto be tested before they can replant. Mary and Eric have 10 employees. Three of these employees are from Jamaica and just had severe damage to their own homes from the same hurricane and are relying on their salaries to send money home for repairs. It is important to the Skovsteds that they can continue to pay their employees while they wait for other funding to cover losses. Money raised from this fundraiser will be used to pay employee salaries as well as to respond to damage to their farm.

If you're lucky enough to know Mary and Eric, you know them to be generous, kind, selfless, hard-working, and wonderful friends. Just about everyone reading this will have a connection to Mary and Eric. Eric has loaned you a tool when you needed one and he probably helped you with whatever project you were working on. Mary has passed along some extra tomatoes or given some extra flower starts. You've skated on the ice rink that they build each winter on their farm for anyone to use. You've chatted about recipes when you've picked up your CSA or learned something new about kale while at the farmer's market. You've rushed to the farmer's market to get their strawberries. Maybe you've won a CSA share at an auction where they have donated to support local organizations. They never hesitate to help someone else. They could use some help from all of us right now. Please consider supporting Joe's Brook Farm.

if you want to help other farms that are also in need of relief, please consider donating to NOFA-VT. They are a stellar organization that really passes around funds.  

Next week, I’d like to stop suggesting places for you to put your money.  Let’s see how it goes.  Fingers crossed for blue skies and just the right amount of rain.

FARMY FOODIE PRO-TIPS: 

Ripe for the grill: broccoli - summer squash - zukes - garlic scapes

PICKLERS: Yall, you have an abundance of pickling cukes this week.  I highly recommend pulling out your fave pickle recipe and getting right  into it.  I am so bummed that our dill planting is not lining up perfectly for this bounty, but so it goes.  I love a fermented half sour, throw garlic scapes in with the brine! Woo doggies!  Because of this double sided one sheet of paper  dilemma that I’m married to,  I will  include the half sour recipe on the blog, but for now, read up on bread and butter pickles: 

Bread and Butter Pickles (recipe from Mitchell, our beloved up the road nearly resident chef) 

What to do with all of those cucumbers? Here’s a recipe for delicious pickles—the kind you pile on burgers and sandwiches or chop up for potato salad. Although bread and butter pickles are traditionally made with small, crisp, thin-skinned Kirby cucumbers, they are also good made with larger slicing pickles or even with zucchini and yellow squash. Using maple syrup makes the pickles taste less sweet than they do when made with sugar.

A generous 2 pounds cucumbers, sliced a little less than ¼-inch thick

1 large white or yellow onion, thinly sliced

Kosher salt

1 ¾ cups cider vinegar

1 ¾ cups granulated sugar or pure maple syrup

1 teaspoon celery seed

1 teaspoon yellow mustard seed

1 teaspoon ground turmeric

In a large bowl, layer the sliced cucumber and onion with about ¼ cup of kosher salt. Cover with cold water and refrigerate for 4 to 6 hours or overnight. Drain and rinse well with cold water. Drain again.

In a large nonreactive saucepan, combine the vinegar, sugar or syrup, celery seed, mustard seed, and turmeric. Set over medium-high heat and bring to a boil. Reduce the heat and simmer the mixture for five minutes. Turn up the heat to high, add the drained cucumbers and onion, and bring it back to a simmer. Remove from the heat.

Using a slotted spoon, pack the pickles into two sterilized pint jars. Pour the hot liquid over the cucumbers, leaving ½-inch headspace. Wipe the rims, seal, and refrigerate for up to two months. (For long-term, room-temperature storage, process the jars for 7 minutes in a boiling water bath. Refrigerate after opening.)

Variation: Summer Squash Bread and Butter Pickles

Though less crisp, these summer squash pickles are no less delicious. Substitute 2 pounds of

assorted zucchini and yellow squash for the cucumbers. Proceed with the recipe as directed,

omitting the step of adding the zucchini to the boiling vinegar mixture. Instead, pack the sliced

zucchini and onions raw into jars and pour the boiling solution over the top.

Thai-Flavored Stir-Fried Cucumbers (recipe also from Mitchell, cheers!)

Although we usually think of eating cucumbers raw in salads and such, most old food cultures (French, Italian, Chinese) also enjoy them cooked. The French sauté cucumbers with butter and tarragon. Italians might use olive oil, garlic and thyme. You can vary the seasonings to suit your tastes and/or your menu, but I particularly like this combination of Thai flavors, which adds a

nice complexity to the vegetable.

6 cucumbers, about 2 pounds

1 tablespoons peanut or vegetable oil

2 garlic scapes, very thinly sliced

1 small chili pepper, seeded or minced, or a pinch of red pepper flakes

1 tablespoon Thai fish sauce

Pinch sugar

Juice of 1 lime

Generous handful of Thai basil leaves

Slice the cucumbers in half, lengthwise. Using a sturdy teaspoon, scrape out and discard the seeds. Peel the seeded cucumber halves. (Peeling them after seeding helps prevent the cucumbers from breaking.) Cut the cucumbers into unevenly sided, bite-sized pieces, all about the same size, roughly an inch or so. Heat a large sauté pan over high heat. Add the oil and when hot, add the garlic and chili. Sauté for a minute, being careful the garlic doesn’t burn. Add the cucumber and toss to cook. After

about a minute or two, when the edges of the cucumber begin to soften, drizzle the fish sauce around the perimeter of the pan, letting it sizzle as it falls to the bottom. A pungent aroma will fill the kitchen and then dissipate. Toss the cucumbers. Add a pinch of sugar and the juice of 1 lime, toss, and continue cooking until the cucumbers soften a little more. You want them to remain somewhat crisp, so don’t over do it. Add the Thai basil and continue tossing until the basil wilts. Serve.

—Cookbook author and food writer Mitchell Davis recently moved from New York City to the Upper Valley, just down the road from Edgewater Farm. For more recipes, subscribe for free to his weekly newsletter Kitchen Sense at www.kitchensense.substack.com

CSA WEEK 4

P I C K L I S T

tomatoes - cauliflower - cilantro - summer squash - cucumbers -

zucchini - basil - kale - GERANIUM!

This week the fields really leaned into extreme hot girl summer.  I would even go so far as to say that amidst the heat of the sun and occasional passing rain, there was a lot of self blanching going on (see cauliflower turn a hint of yellow, I call it sunkissed).  The next succession of fruits and veg are showing up in all their glory and they are here to PLAY.  For example, the trickling of cucurbits that occurred during the strawberry season has really turned into a full blown tidal wave of summer squash, cucumbers and zucchini.  Bushels upon bushels upon bushels are filling up nearly daily and now that we are no longer staring at the ground picking berries we can really get a good view of all there is to pick, and all there is to eat, and oh boy, it’s aplenty.  We’ve entered a state of abundance and overwhelm, and quite honestly it feels really good to be back here at this point in the season.  CSAers, yall are the lucky ones, the abundance gets handed out right to ya.

Looking ahead, there is blue to be found in the fields, and we are so pumped to enter the next round of fruit.  Fingers crossed for blueberries next week :)

As far as Hurricane Beryl goes, somehow all of our crew remained fairly unscathed, but other farmers that leave Jamaica and come North during our growing season were not as lucky.  For example, the home of Ranaldo (Melvin Blackwood) of Joe’s Brook Farm was badly damaged when wind ripped off half the roof and the whole house experienced severe water damage.  There is a lot to do here to make the house liveable again.  And goodness knows, it will take some serious dollars that are not too easy to come by.  Ranaldo says he can fix it when he returns to Jamaica.  His wife and daughters have begun the clean up.  Our buds at Joe’s Brook Farm, Mary and Eric  that work alongside him, will match the first $1000 raised in donations to help rebuild.  If any of you are looking to help with the clean up from Hurricane Beryl, this would be a great place to start.  To mail donations, make checks out to Melvin Blackwood and send them to:

Joe’s Brook Farm

1525 Joe’s Brook Road

St. Johnsbury, VT 05819


These intense weather systems really affect everyone everywhere.


FARMY FOODIE PRO-TIPS: 

Ripe for the grill: cauliflower - summer squash - zukes - garlic scapes

Geraniums for all!: This plant is an icon. She stands alone like a queen but also mixes well with others. Repot,  Full sun. Instant classic.   

Creamy Cucumber and Herb Salad

(recipe from Mitchell, our beloved up the road nearly resident chef) 

Just about every culture has a version of this salad. The dill makes this one reminiscent of eastern Europe, but change the herb and it could easily seem Italian or Japanese.


Makes 4 to 6 servings

3 or 4 medium cucumbers

1 ½ teaspoons kosher salt

½ cup sour cream or plain Greek yogurt, preferably full fat

3 tablespoons white wine vinegar

1 teaspoon sugar (optional)

1/4 teaspoon onion powder (optional)

Freshly ground black pepper

3 or 4 tablespoons chopped fresh dill, tarragon, chervil, basil, cilantro, mint, shiso, or a combination

2 or 3 scallions or spring onions, red or white, sliced (including green parts)

If using local, unwaxed cucumbers, or English or Persian cucumbers, slice them very thinly, preferably with a mandoline, food processor, or sharp knife.

Place the sliced cucumbers in a medium bowl. Sprinkle with the salt, toss to distribute, and let sit for 20 to 30 minutes on the counter to wilt. Drain off any liquid that pools on the bottom of the bowl.

In a small bowl, blend the sour cream, vinegar, sugar and onion powder, if using, and a generous grind of black pepper. Add to the cucumbers along with the fresh dill and scallions. Mix well, taste, and adjust the seasoning before serving.

Summer Squash Salad with Mint

(recipe from Mitchell, our beloved up the road nearly resident chef) 

I first fell in love with this salad when my friend, chef Tony Liu, served it at Morandi in NYC. I needed the recipe. Tony is now chef/owner of The Queensboro in Jackson Heights, NY. Worth a visit.

Makes 4 servings

1/4 cup dried currants, raisins, or other dried fruit

1 teaspoon cayenne pepper

1/4 cup raw pine nuts

2 medium green zucchini, thinly sliced lengthwise on a mandoline or with a carrot peeler, or finely julienned

2 medium yellow squash, thinly sliced lengthwise on a mandoline or with a carrot peeler, or finely julienned

1 green Serrano chili, seeds removed, thinly sliced

1/4 cup extra-virgin olive oil

Juice from 1 lemon

1/2 bunch mint, chopped

1/4 cup pitted black olives, preferably oil cured, chopped

1/4 cup sliced ricotta salata or crumbled feta

Salt

Freshly ground black pepper to taste

Combine the currants or other dried fruit and cayenne with 1/2 cup of water in a small saucepan. Bring to a boil turn off the heat and let steep for 20 to 30 minutes. Drain. Meanwhile toast the pine nutson a baking sheet a 300°F. oven until lightly golden and fragrant, 8 to 10 minutes. Combine the yellow squash, zucchini, and Serrano chile with the olive oil and lemon juice. Add the mint, olives, ricotta salata, toasted pine nuts and drained currants. Gently toss together, season to taste with salt and pepper.

—Cookbook author and food writer Mitchell Davis recently moved from New York City to the

Upper Valley, just down the road from Edgewater Farm. For more recipes, subscribe for free to

his weekly newsletter Kitchen Sense at www.kitchensense.substack.com


CSA WEEK 3

P i c k l i s t

tomatoes - cauliflower - cilantro - beets - Thai basil - summer squash - celery - garlic scapes - lettuce - cucumbers 

Yup, it’s true, I am totally attempting to win yall over this week with two shiny red tomatoes so you won’t notice the sad hole in your CSA this week… the lack of strawbs.  So what the heck happened to our strawberry crop?  Why did our season feel too damn short. This is what we are thinking:  For one, tons of factors go into growing a perennial fruit crop.  It is not just May and June that need to be considered, but rather the whole year.  Remember that warm winter? How about those days of 70 degrees during sugar season?  

So across the Upper Valley when farmers noticed many different crops/trees/flowers carrying blooms, emerging from the earth and showing up to the party at the same time, we all kind of scratched our heads, and thought, “OK Summer how is this going to carry out.”  

Another oddity that felt blissful in the moment, was the warm nights of May.  It was very rare that temps dipped below 50 degrees, which is kind of unheard of for this region.  We are so accustomed to middle-of-May-2am-frost-scares at this point, that not experiencing them made for a much more well rested Spring.  However, the plants got no rest and while we slept.  They grew and grew and grew, revealing a real jack and the beanstalk effect.  

That well rested feeling of no frost Spring was extremely fleeting as we entered the Summer solstice.  Underneath that big strawberry moon we watched all berries of every variety ripen at the same time.  

And then came the heat.  Plants are most susceptible to stress when there is a high fruit load, and nothing brings on stress more than 4 days of 90 plus temps… 

and then came the hard rain AND heavy humidity.  

Lights out strawberry crop, better luck next year I suppose.   

ONTO THE NEXT FRUIT, hello tomatoes you thing of beauty, you are too perfect on your own, and even more astounding between two slices of bread.

Also, this week the beets are beautiful, the cilantro is fluffy, and the Thai basil could not be cuter and aromatic..

Cheers to the  holiday week, and before you know it, we will all be up to our ears in blueberries.

FARMY FOODIE PRO-TIPS: 

Take it outside and grill!

Trust me, all your friends will be so impressed when you show up to the 4th of july bbq with your 2 summer squash, 1 head of cauliflower, and smattering of garlic scapes. Just add EVOO, S&P


Anita’s Cauliflower by up-the-road-chef-on-call, Mitchell Davis:

I’ve adapted this recipe from my friend Anita Jaisinghani’s amazing cookbook Masala. Chef of Pondicheri in Houston, Anita’s food reflects the principles of Ayurveda and her commitment to sustainability. Most importantly, it is lick-the-plate delicious.

Serves 4 to 6

1 medium cauliflower (with leaves)

5 tablespoons ghee (clarified butter), vegetable oil, or olive oil

1 teaspoon black mustard seeds

1 medium onion, finely chopped

1 or 2 garlic scapes or garlic cloves, minced

½ teaspoon ground turmeric

1 ½ teaspoons sea salt

1 teaspoon mild red chili powder, such as Kashmiri chili

2 medium ripe tomatoes, diced (about 2 cups) or 1 cup canned crushed

tomato

1-inch piece ginger (not peeled), finely grated

1 teaspoon garam masala

Chopped fresh cilantro, for garnish

Remove any green leaves from the cauliflower and chop finely. Divide the head into 2-inch florets. Chop any stems finely and add to the leaves. Discard the tough, fibrous core.  In a wide, shallow sauté pan, heat the ghee or oil over high heat. Add the mustard seeds and as soon as they start to pop, add the onion and chopped cauliflower leaves and stems. Lower the heat to medium-high, and cook until the onion is soft and begins to brown, 8 to 10 minutes. Add the garlic, turmeric, cauliflower florets, and salt. Increase the heat to high and cook for another 7 to 8 minutes, until the cauliflower softens and begins to color. Add the chili powder, tomatoes, and ginger and bring to a simmer. Reduce the heat to low, cover, and cook until the cauliflower is tender, another 5 to 8 minutes or so. Sprinkle with the garam masala,

cover, turn off the heat, cover, and let sit for a few minutes to rest. Mix the cauliflower one last time, being careful not to break it up. Garnish with cilantro and serve.

Spicy Sichuan Smacked Cucumber Salad (one more from Mitchell! enjoy!)

This is a common Chinese salad of cucumbers that I first fell in love with at a mini chain of casual noodle shops in New York City called Xian Famous Foods. Although they are rightfully famous for their handmade Biang Biang noodles, stretched to order by slapping them on the

counter, it was their spicy cucumber salad I couldn’t get enough of. Smashing the cucumbers is a Chinese technique that helps draw out moisture when you salt them and creates a pleasant mouthfeel. The secret to the unique Sichuan zing is Sichuan peppercorn, not a true peppercorn at all, but the dried bud of the prickly ash that gives a numbing quality in your mouth. If you can’t find the spice itself, you can sometimes find Sichuan peppercorn oil, or a chili crisp with plenty of Sichuan pepper in it, such as the ubiquitous Lao Gan Ma, Fly By Jing brands. Otherwise, use a freshly cracked black pepper instead.

2 medium sized cucumbers (unwaxed), cucumbers

1 teaspoon kosher salt

2 cloves garlic, grated on a Microplane or minced to a paste

1 teaspoon sugar

2 tablespoon black Chinese vinegar, such as Chiangking, or Balsamic vinegar (if using, omit the sugar)

¼ teaspoon freshly ground black pepper

½ teaspoon toasted, ground Sichuan peppercorn or 1 teaspoon Sichuan peppercorn oil, or

additional ¼ teaspoon cracked black pepper

1 tablespoon soy sauce

2 teaspoons Sichuan chili oil or chili crisp, with sludge, or a favorite hot sauce

Place the cucumber(s) on a clean cutting board. Slice off the tips of both ends. Lay the wide part of a chef’s knife flat on the cucumber and press it down firmly or smash it with your fist to break the cucumber, as you would to peel a clove of garlic. Move the knife along the length of

the cucumber so it is smashed along its entire length. You should be able to pull the cucumber apart lengthwise in half, or else slice it. And then cut what you’ve got into bite-sized, misshapen pieces, about 1-inch or so wide. Place all the cucumber chunks and bits in a medium bowl,

season with the salt, toss, and let sit for 10 to 15 minutes to draw out some moisture. Drain off any liquid that accumulates in the bottom of the bowl. 

To the bowl of cucumbers add the garlic, sugar, vinegar, black pepper, Sichuan peppercorn, soy

sauce and chilli oil or crips and toss to combine.
—Cookbook author and food writer Mitchell Davis recently moved from New York City to the

Upper Valley, just down the road from Edgewater Farm. For more recipes, subscribe for free to

his weekly newsletter Kitchen Sense at www.kitchensense.substack.com


CSA WEEK 2

   P i c k l i s t

strawberries - garlic scapes - basil  - lettuce - broccolini - hakurai turnips - cucumbers - plants!

I did not intend to go right into week 2 with a weather charged sob story, but here we are. The heat followed by the rain did not demolish crops, but it certainly did not help. Watching the storm roll through and hit the fields was tough on the heart.  First and foremost, let’s talk about strawberries and rain. The two quarts you are receiving today are a part of an effort to clean off the current fruit and make way for the next flush. It is likely that your 2 quarts of berries may not be the sparkly shiny gems we all lust for, but they will absolutely serve a delicious purpose if eaten today or tomorrow, or, use them to make a jammy sauce to complement every biscuit in sight, ahem strawberry shortcakes (see pro tips). Because of the past week’s precipitation, this round of berries will not hold. But the later varieties should (weather dependent, lol).

Another unfortunate arrival this week are all the pests.  I am not entirely certain why they all decided to show up at the sametime, but I've been squashing countless horn worms in the tomato greenhouses and the wire worms are really starting to show their face and make trails in our radishes and our (legendary 2024) hakurai turnip patch. And don’t even get me started on the deer. Daily cute love notes I like to send to Ray have been replaced by deer eating lettuce photos, deer eating strawberries photos, and deer eating cucumber photos.  Not an easy time to farm, but a hell of a great time to be a pest. Some would say, it's buck wild.

MEANWHILE, in the Pick Your Own Strawberry patch, the berries are still showing up, and people are still so pumped to pick.  It’s awesome to hear from Anne and Jen about all the CSAers that have made their way down River Road this week to get in on the action. I do hope to see yall out there as it is certainly the season for stained red fingers/ a belly full of berries/ late night strawberry jamming/ etc.

PYO HOURS: 8am-noon WEATHER & CROP PERMITTING!

FIXED PRICES: CASH AND CHECK ONLY

1 quart: $7/ medium picking box: $25/ large picking tray: $44

FARMY FOODIE PRO-TIPS: 

Yall, get ready, and let me introduce you to new neighbor Mitchell! 

Somehow by the grace of something, Edgewater has been blessed by a neighbor that not only knows how to cook, but also has stacks and stacks of tested recipes.  We connected a few months ago when he popped into the greenhouses.  At that time, much of what you are currently eating from the farm existed in seed packs, waiting to be sewed.  Since then these seeds have sprouted into food and Mitchell is here to tell us how to eat it best.  Thank heavens for resident chef Mitchell Davis, as a result we all get to try new things and prep this bounty in new ways! I AM JAZZED.  If you too are jazzed, I highly recommend subscribing for free to his weekly newsletter Kitchen Sense,

Pickled Garlic Scapes recipe by mitchell!

Similar in flavor to kosher dill pickles because of their strong garlic flavor, these lacto-fermented garlic scape pickles require little effort beyond patience. They will last in the refrigerator for over a year. (I just shared some two-year old ones with Jenny and they were still delicious.) Eat

them as is or slice them to add to salads (egg, tuna, chicken, potato), or relish, or anywhere you might think to add pickles or capers.

I’m not giving amounts for this recipe because this is more of a technique (one you can use with just about any vegetable). Adjust the amounts accordingly, adding more brine in the same proportion as you need to submerge your scapes. Use kosher salt or pickling salt, not table salt,

the iodine in which will cause the pickles to discolor
Kosher salt

Hot water

Garlic Scapes

Other aromatics, such as bay leaf, dill seeds or flowering dill, yellow mustard seeds (optional)As for most lacto-fermented foods, your goal is to create a brine that is a 2.5 to 3% saline solution. That means for every 1000 milliliters of water, 25 to 30 grams of salt, or about 2 teaspoons of kosher salt per cup. Place 2 tablespoons and 2 teaspoons kosher salt in a mixing

bowl and add 1 quart (4 cups) hot water. Stir to dissolve the salt. Let sit to come back to room temperature, stirring occasionally to make sure no salt crystals remain at the bottom of the bowl.

Meanwhile, prepare the garlic scapes. Rinse the scapes and cut into 2-inch lengths just up until the bud, which you should discard. Tightly pack the cut scapes into clean canning jars, using the shoulder of the jar to wedge the scapes in. I like to use pint jars. If using aromatics, add a bay

leaf, ½ teaspoon of dill or mustard seeds, and/or some flowering dill to each jar. Once the brine is cool, fill each jar until the scapes are completely submerged. Cover the jars loosely and let sit at room temperature, out of the sun, for 5 to 7 days to ferment until your desired level of tartness. The timing will depend on the temperature of your room. Open the jars once a day to

release any gas that builds up. As the fermentation takes place, the liquid will turn cloudy, and the scapes will darken and sink. Taste them to check if they are done. When satisfied with their flavor, seal the jars and refrigerate until needed. You can strain the brine and repack the scapes

if you like a cleaner look, but it isn’t necessary.

—Cookbook author and food writer Mitchell Davis recently moved from New York City to the

Upper Valley, just down the road from Edgewater Farm. For more recipes, subscribe for free to

his weekly newsletter Kitchen Sense at www.kitchensense.substack.com

Here it is, everyone's summertime favorite: fresh, sweet strawberries atop a flaky, buttery biscuit — topped with whipped cream, of course!

PREP 25 min/ BAKE 10 to 12 mins/ TOTAL 1 hr 35 mins YIELD 9 biscuits

Berries

  • 2 quarts (1336g) strawberries, trimmed of their leaves

  • 1/2 cup (99g) granulated sugar

  • 2 teaspoons lemon juice, fresh preferred

Biscuits

  • 3 1/2 cups (420g) King Arthur Unbleached All-Purpose Flour

  • 1 teaspoon table salt

  • 1 tablespoon (11g) baking powder

  • 1/2 teaspoon baking soda

  • 1/4 cup (36g) buttermilk powder

  • 3 tablespoons (35g) granulated sugar

  • 8 tablespoons (113g) unsalted butter or 1/2 cup (92g) vegetable shortening, cold

  • 2 teaspoons King Arthur Pure Vanilla Extract

  • 1 large egg

  • 1 cup (227g) milk*

  • 2 teaspoons milk, optional; for topping

  • 2 teaspoons granulated sugar, optional; for topping

*Or substitute 1 cup buttermilk (227g) for the buttermilk powder and milk

Topping

  • 1 cup (227g) whipping cream

Instructions

  • To prepare the fruit: Mash 2 cups of the strawberries. Slice the remaining strawberries, and mix all of the berries with the sugar and lemon juice. Let rest 1 hour.

  • Preheat the oven to 425°F. Lightly grease a baking sheet, or line it with parchment.

  • To make the biscuits: Whisk together the dry ingredients, and work in the cold butter or shortening until the mixture is crumbly.

  • Whisk the vanilla and egg with the milk, then add all at once to the dry ingredients and stir until the liquid is absorbed.

  • Turn the dough out onto a lightly floured surface and knead four or five times, just until it holds together. Pat the dough out until it's about 1/2" to 3/4" thick, and cut it into 2 1/2" to 3" circles.

  • Place the biscuits on the prepared baking sheet, brush the tops with milk for a shiny surface, and sprinkle with sugar.

  • Bake for 10 to 12 minutes, until the tops are golden brown. Remove them from the oven and cool for 15 minutes before serving.

  • To assemble the shortcakes: Whip the cream until soft peaks form.

  • Just before serving, split open the biscuits, spoon half the berries and whipped cream on the bottom half, top with remaining biscuit halves, and spoon on the remaining berries and cream.

Tips from our Bakers

  • For highest-rising biscuits, use a sharp biscuit cutter, rather than a drinking glass. A sharp cutter cuts the edges cleanly, rather than mashing them together; a sharp cut allows the biscuits to rise higher.


CSA WEEK 1

  P i c k l i s t

strawberries - garlic scapes - arugula - bok choy - hakurai turnips -

basil - cilantro plant - plants for your garden!

Holy solstice light let it shine! Wow, what an entrance to Summer we have going on here.  Heat wave, upon strawberry season, upon the most perfect hakurai turnips we’ve ever grown at Edgewater.  Let’s all just knock off, celebrate JUNETEENTH with our CSA bounty, find some water and munch by the river side.  You in? Love this plan, meet ya there.

But don’t wait, start without me, something tells me we here on the farm have a big day of irrigation going on. Three days in a row of over 90 can really make the fields jump, bring on a ton of blossoms, ripen the fruit, and kill any strugglers out there. It’s a real “everything everywhere all at once” vibe.  

But all that aside, welcome! Welcome! Welcome! For all the returning CSA fam,  I’ve absolutely missed picking veg for ya.

And for all the new buds- Hi! Hi!! I am so happy to have you along for the best season of eating there is.  

And in case there is any confusion, these newsletters, recipes, emails, ESP’s, communications, vibrations are brought to you by me, Jenny.  The seeding and growing and picking and washing and setting up for the CSA is a total collaborative effort between all of us at Edgewater, field crew and farmstand crew especially.  

Please holler with any questions, curiosities, comments etc. It’s good to keep the momentum going throughout the season with some light vegetable banter, ya know?

ANYHOW, enter Summer Solstice and welcome this light, a big three cheers for Juneteenth, and goodness gracious enjoy and eat all these berries today, right now, in their absolute  prime. 

FARMY FOODIE PRO-TIPS: 

ARUGULA: its bagged unwashed, to remove grit, please wash :)

GARLIC SCAPE PESTO (it’s a scape season must)

YIELD About 1 cup recipe from the NYTimes

JENNY’S NOTE: No real measurements here, everything is to taste.

The star of this pesto is the garlic plant’s under-appreciated second offering: the fleeting garlic scape. The ingredients are straightforward except for the substitution of sunflower seeds for pine nuts. The seeds are a fraction of the cost and do the job just as well. A food processor is a must for this recipe. For pesto, ingredient order matters. Start with the scapes and process for about 30 seconds. Add the seeds until they are broken down and mixed well with the scapes. Scrape the sides of the bowl with a rubber spatula for wandering bits. Next, pour in the olive oil. If you have Parmesan cheese in chunks, add it now, but if it is grated, wait until the scapes and seeds smooth out. If you’re serving right away, add the basil and lemon juice. If not, hold back on the basil for now — otherwise the pesto will lose its vibrant color. Add generously to cooked spaghetti or spread on crusty bread.

INGREDIENTS

  • 1 cup garlic scapes, sliced crosswise (about 10 to 12 scapes)

  • ¼ cup raw sunflower seeds

  • ½ cup extra virgin olive oil

  • ¼ cup Parmesan cheese

  • ½ cup basil leaves

  • Juice of one lemon
    PREPARATION

  • Place the garlic scapes in a food processor and pulse for 30 seconds.

  • Add the sunflower seeds and pulse for 30 seconds. Scrape down the sides of the bowl.

  • Add the olive oil and process on high for 15 seconds.

  • Add the Parmesan cheese and pulse until the ingredients are combined.

  • Add the basil and lemon juice, and process until reaching the desired consistency.

  • Add salt to taste and serve immediately.

As for all the other crops included in this pick-list, welcome to salad season!

The following are some standby combos and quasi recipes I hold onto to brighten up all these greens for eating:

  • Rice noodle bowls!  Grain bowls!  Perfect vehicle for every green thing. Just add coconut aminos or tamari and sesame oil.  For protein you will have to look elsewhere- but as for the basil, bok choy, hakurai turnips- just chop and fold in.

  • GARLIC SCAPE PESTO SALAD DRESSING: 

    Remember all that garlic scape pesto you intend to make this week)? Take a couple of tablespoons of that and add the following: olive oil, vinegar, maple syrup, and lemon juice. Everything to taste- whisk to combine.  


This Bok Choy Kimchi is a quick kimchi recipe ready in 15 mins.! With Vegetarian or Vegan options, plus detailed instructions on using baby or regular bok choy.

  • 1 lb baby bok choy

  • 1 garlic scape

  • 2 bulb spring onions

For the sauce:

  • 0.4 oz garlic cloves 2 large, grated

  • 0.1 oz Ginger a tiny small knob, grated

  • 1.5 tbsp coconut aminos

  • 1 tsp coarse sea salt

  • 0.5 tbsp fish sauce

  • 1.5 tbsp gochugaru Korean red pepper flakes

  • 1 tbsp maple syrup

  • 2 tsp apple cider vinegar

For the garnish: Toasted rice sesame seeds, Toasted sesame oil to taste

Prep:

  1. Halve the baby bok choy, rinse, and pat them dry. Thinly slice the garlic scape and chop the spring onions. If using larger sized bok choy, separate them into leaves and make crosswise cut into small pieces.

  2. In a separate bowl, combine the sauce ingredients from garlic to vinegar.

Mix:

  1. For baby bok choy (halved): In a big mixing bowl, add the bok choy, onion, and the sauce. Gently toss to combine. Take care not to bruise the leaves.

  2. For larger bok choy (diced-up): Add the bok choy stalks, onion, and half the amount of sauce to the mixing bowl. Toss to combine for 2 minutes. Then add the leaves and the remaining sauce to combine for 1 minute.

Serve:

  1. Transfer them onto a large serving plate and sprinkle with sesame seeds, sesame oil, and scallions. You can serve them right away or chill them in the fridge for up to 2 weeks but best consume within 2-3 days for the crunchiest bok choy kimchi!

Notes

  • When you first combine the bok choy with the sauce, they will seem dry. Gently toss to distribute the seasoning evenly. The bok choy will continue releasing water as they marinate, creating a saucier consistency.

  • Select bok choy with firm stalks so they will last longer, more juicy, and crunchy.

  • Add an apple: If you don’t want to use maple syrup, apples will add sweetness to the dish. Add it to a blender or food processor with sauce ingredients and blend until creamy.

  • Korean plum vinegar: You can use it in place of maple syrup and apple cider vinegar.

  • Vegan fish sauce or Yondu seasoning (a South-Korean brand of all-purpose, savory umami seasoning) will keep this recipe vegan/vegetarian.

  • To store: Store in the fridge in jars with a tight lid for up to 2 weeks. The kimchi will continue to ferment slowly in the fridge and the texture will turn softer.

  • To make ahead: Pack the sauce and the bok choy separately. Combine them before serving.

FALL CSA WEEK 4

p i c k l i s t

KALE - MINT - LEMONGRASS - BROCCOLI - LEEKS - WATERMELON RADISH - 

GREEN PEPPERS - POBLANO PEPPERS - WINTER SQUASH - MIZUNA - HOTTIE HOT PEPS 

BREAD OF THE WEEK:  ANADAMA BREAD

THIS WEEK AT EDGEWATER…

Oh the bone chilling wind outside is making it completely difficult to motivate any sort of farming today, but so it goes.  Also, it is better to continue moving through the honey-do list now with no ice on the ground then wait til tundra sets in.  Every Fall, when darkness sets and the temps drop, I think of Pooh's take on winter projects.  He once said, “The chores taken place in winter take 5 times as long as they would in Summer” and I would like to add here, that this same chore once done in shorts and sunshine and lickety split is too often completed half ass, grumbling, and chilled to the bone. As we get closer to the winter solstice the farm grumblings become louder.  So pick that kale, cut back those gardens and tidy up quick before your fingers fall off. OR at least that’s where I’m at in early November.

Also, last night we bought airplane tickets for the crew- Roy, Jasper, Strong, Garnet, and Daniel- to return home next week, back to Jamaica.  Another sure sign that the winds have shifted, and it's time to wrap it all up.

But until then, much to do, more crops to pick (I believe the goal for today is to harvest all the brussels sprouts), and cookies to eat, bread to break.  Cheers to the BREAD CSA kitchen crew for continuing the baked good warming of bellies thus all our hearts.

In other news, we had the greatest broccoli harvest we’ve had all season this past Monday.  Broccoli has become a real challenge for us.  Alternaria disease, brought on and made worse by crops swimming in fields, made it nearly impossible for the plant to produce a solid green head.  Black spots were found on nearly every plant we tried to grow.  However the broccoli trajectory changed for the duration of the season when in October and some of September, the sun began to shine.  Here we are now, with an awesome harvest and no farmstand open to sell it through- thus a major CSA win for you, enjoy!

FARMY FOODIE PRO-TIPS: 

A NEW PUMPKIN LAKSA FOR A COLD NIGHT BY NIGEL SLATER

For 4

Winter squash, unskinned

cilantro and mint leaves, to finish

For the paste:

3-4 chiles

2 garlic cloves

thumb sized lump ginger

Stalks lemongrass

cilantro stems and leaves

2 tablespoons sesame oil

For the soup:

2.5 cups Chicken or veg stock

1¾ cup coconut milk

2 tablespoon fish sauce

1-2 tamari

juice of a lime

3.5 oz dried noodles, cooked as it says on packet, then drained

Cut and seed the squash into large chunks.  Cook in a steamer or in a metal colander balanced over a pan of boiling water until tender.  Remove from the heat.

For the spice paste, remove the stems from the chiles, peel the garlic, and peel and roughly chop the ginger and lemongrass.  Put them all into a food processor with the cilantro and the sesame oil and blitz until you have a rough paste.  

Get a large, deep pan hot and add the spice paste.  Fry for a minute, then stir in the stock and coconut milk and bring to a boil.  Let simmer for seven to ten minutes, then stir in the nam pla, tamari, lime juice, squash, and the cooked and drained noodles.  Simmer briefly, add the cilantro and mint leaves over the top and serve in deep bowls.  

It’s time we started treating vegetables like big old slabs of meat, don’t you think?

This is not their recipe but my riff on it, inspired by what I ate there; I used a small amount of the dry rub I put on ribs with a little less sugar, and then roasted various stalks of broccoli the way I always do before finishing it with a little cheddar (as they at the restaurant and which can totally be skipped because, honestly, I love cheese but it doesn’t add that much here). The vinegar dipping sauce is like a vinaigrette, minus the oil, and it cuts nicely against the broccoli and rub flavors, the way a squeeze of lemon juice usually does against green vegetables. This is a spectacularly simple and habit-forming way of making broccoli, so you’ll be glad this makes more rub than you’ll need.

Serves 2, heartily

Olive oil
About 1 pound broccoli, although the weight isn’t that important, either in 1 big head or 2 or so “trees”
Grated aged cheddar (optional)

Dry rub
2 teaspoons packed dark brown sugar
1 teaspoon paprika, ideally smoked but regular will also work
1 tablespoon chili powder
1 teaspoon onion powder
Chipotle powder or ground red pepper (cayenne) to taste
1 teaspoon coarse or kosher salt, and more to taste

Cider vinegar dip
1 tablespoon cider vinegar
1/4 teaspoon smooth dijon mustard
Pinch of salt, smoked flaky sea salt is wonderful here if you have it
Pinch of pepper flakes
Shake of smoked hot paprika or chipotle powder

Heat oven to 450 degrees F. Coat a large roasting pan with a glug or two of olive oil. Combine rub ingredients in a small dish. Taste a pinch; it should be flavorful, but more salty than sweet, with a kick. Make adjustments to taste.

Prep broccoli by peeling any knobby bits and outer skin off stalks. Cut smaller heads lengthwise through stem into two “steaks;” cut larger ones a second time into four wedge-shaped “steaks,” if desired. Place cut side down in roasting pan; drizzle tops very lightly with olive oil and sprinkle with rub. Roast for 20 minutes, until deeply brown underneath. While roasting, combine cider vinegar dip ingredients. Flip, coat cut side with more rub and roast for another 10 to 15 minutes, until charred at edges. Remove from oven and immediately grate a small amount of cheese over broccoli.

Serve with cider vinegar dip and, if you’d like to be more like the restaurant, with a little pile of smoked sea salt on the side. Eat with forks and steak knives.

Watermelon radish

Yall! Don’t be discouraged by the white turnipy looking thing that we swear is a radish! Grab a knife, slice open, and behold the most beautiful hot pink gem of root crop!  Taste great fresh on salads, roasted with olive oil, pickled in vinegar, all the things. 

PREP TIME: 10 MINUTES    COOK TIME: 10 MINUTES    SERVES: 4

  • 3 1/2 Tablespoons black sesame seeds

  • 1/8 teaspoon flakey sea salt

  • 1/4 cup tahini

  • 1 Tablespoon mellow white miso

  • 1 clove of minced garlic

  • 1/2 teaspoon fresh lemon juice

  • 1/2 teaspoon rice vinegar

  • 1/2 teaspoon tamari or soy sauce

  • 3 Tablespoons water + more to thin if necessary

  • 2 medium-sized watermelon radishes, very thinly sliced

  • 4 slices of good quality bread, lightly toasted

  • 2 scallions, minced, white and light green parts only

  1. Heat a small skillet over medium heat. Add the black sesame seeds and lightly toast, shaking the pan often until lightly toasted and fragrant, about 3 minutes. Remove from heat and let slightly cool. Using a mortar and pestle (or the back of a spoon) lightly crush the sesame seeds and sea salt together.

  2. With an immersion blender or small food processor combine the tahini, miso, garlic, lemon, vinegar, soy sauce and water. Blend until smooth and creamy-you want a thick consistency but smooth enough to spread on toast. Add more water, 1 teaspoon at a time until you reach the right consistency. Taste test and adjust seasonings if need be.

  3. Spread the tahini-miso sauce over 4 slices of toasted bread and top with a few slices of radishes and sprinkle each piece of toast with minced scallions and a few pinches of the sesame seed/salt mixture (Gomashio) and enjoy.


CSA WEEK 3

P i c k l i s t

GREEN PEPPERS - JALAPENO PEPPERS - CELERY - LETTUCE - FENNEL - CARROTS - 

ONIONS - PLUM TOMATOES - SAGE - WINTER SQUASH - SWEET POTATOES

BREAD OF THE WEEK:  APPLE CIDER BREAD

THIS WEEK AT EDGEWATER…

Welcome frost!  I am shocked at my exclamation and openness to this event, but jeez we are tired and plants are tired.  Both fields and humans are ready to button up, cover up, and take a long winter nap.  However, pre naptime, there is much to do. Since Friday of last week, we have been busy sweeping the fields of any non frost hardy fruit.  This list includes peppers of every variety, tomatoes, lemongrass, etc… the kol crops and carrots can handle a cold snap and often sweeten up with every below 32 degree night, so thankfully there is no hurry on that harvest.  But the rest is on go-time as our crew is seasonal and our honey-do list is long.  So as soon as frost arrived Tuesday morning, we began to break down the fields: Cut plants, pull drip tape, remove rebar, remove posts, etc… This is absolutely the less glamorous side of farming, but there is a feeling of completion and renewal in this field breakdown and tidying up.  

Another area of completion we hit yesterday was the Halloween carving of the very last of the pumpkin crop.  It feels good to say, what we did not sell, we carved and stuck a candle in.  

As far as other crops go, we have a cooler stacked high with bins full of already harvested beets and carrots, and watermelon radishes.  Soon leeks and cabbage and the rest of the carrots will be picked and join the cooler party.  Outside the cooler are bins of onions, sweet potatoes, regular potatoes, and we remain beyond fortunate to have greenhouse space to grow greens.  All that said, we will not go hungry this winter, and there is always plenty of food for all.  

Ok, I need to step away from this computer, put on 10,000 layers of wool, top it off with some fancy neoprene gloves and go finish the CSA pick.  I see flurries outside.  

FARMY FOODIE PRO-TIPS: 

WINTER SQUASH WITH CRISPY SAGE AND HONEY VIA EDEN GRINSHPAN

Winter squash cut into ½ inch thick slices (i keep seeds in!)

15 fresh sage leaves

2 tablespoons honey

2 tablespoons extra virgin olive oil

2 teaspoons kosher salt

½ teaspoon ground pepper

  1. Pre heat oven to 425

  2. On a baking sheet, toss the squash and sage with the olive oil, honey, salt and pepper.  Roast until the squash is tender and golden, 20 to 25 minutes, flipping once about halfway through.  Serve

Mirepoix Is the Foundation of Stews, Sauces, and More—Here's How to Make It:

The savory combination of celery, onion, and carrots (and sometimes other vegetables) is the silent MVP of so many recipes.

By Victoria Spencer  Updated on October 3, 2023

A big bowl of warm, hearty stew is typically full of flavors that go beyond the focal point (think: Beef Stew, Vegetarian Gumbo). If you've ever wondered what makes up the backbone of these liquid-based meals, then it's time to learn about mirepoix, one of the first things chefs learn in culinary school, and the foundation of flavor in so many dishes.

What Is Mirepoix?

A mirepoix is a combination of finely chopped aromatic vegetables that gives a subtle background flavor to dishes such as soups, stews, sauces, and braises. It's a French term that was reportedly devised in the 18th century by the cook to the Duc de Lévis-Mirepoix, a French field Marshal.

The classic mirepoix is made up of onion, carrot, and celery, but this version is only one of many possible variations. Mushrooms, parsnips, leeks, peppers, tomatoes, and garlic are all considered aromatic vegetables and can be used in endless combinations in a mirepoix. Other cuisines have flavor bases allied to the mirepoix:

Soffrito

The Italian soffritto is similar to a mirepoix. Like a mirepoix, it calls for onions, celery, and carrots, and sometimes pancetta and garlic.

The Holy Trinity

The "holy trinity" is used as the base of most soups and stews—including gumbo—in Cajun and Creole cooking in Louisiana. It includes onions, celery, and—instead of carrot—a bell pepper. Green peppers were substituted because they're easier to grow in southern Louisiana—plus they're delicious. It also differs from a mirepoix because the holy trinity uses equal amounts of each vegetable.

Sofrito

A sofrito is a Spanish flavor base. It is similar to the mirepoix in that it uses finely chopped vegetables but the vegetables used are different: onion, tomatoes, bell peppers, and garlic. This sofrito is the base of many recipes including paella, sancocho, and rice-and-bean dishes. A Puerto Rican version of sofrito is known as recaito, and often includes ajíes dulces (small sweet chile peppers). It is used in dishes such as the island's take on arroz con pollo.

How to Make a Mirepoix

For a classic mirepoix, use 2 parts onion to 1 part carrot and 1 part celery.

  • Rinse, trim, and peel the vegetables.

  • Chop them into uniform pieces. The shorter the cooking time of your recipe, the smaller the pieces should be, so that they effectively infuse the foods with flavor.

Using a Mirepoix

You can add the mirepoix uncooked to stocks and broths for a light dose of flavor.

To add richness to heartier stews and braises, "sweat" the vegetables first, cooking them with a little oil or butter over low heat until they start to release their juices into the pan.

Recipes that start with a mirepoix are many, from rich French chicken stews and French-style pork stews to those that start with a sofrito, like Spanish-style shellfish dishes. Almost every vegetable soup starts with a mirepoix. Once you know about this flavor base, you'll see how ubiquitous it is.

PICKLE YOUR JALAPENOS!!

Store-bought jars of pickled jalapeños are perfectly delicious. But if you feel like doing more work than unscrewing a cap—or if you bought a glut of peppers at the farmers market—you can make quick-pickled jalapeños (or anything) at home too. First, slice your peppers into rounds. There’s no law against using whole jalapeños, but smaller pieces will soak up the brine faster. Bring 1 cup distilled white vinegar, 2 Tbsp. kosher salt, 2 tsp. sugar, up to 2 Tbsp. spices (e.g., peppercorns, ­coriander seeds, and/or ­mustard seeds), chopped fresh herbs (like cilantro), and 2 cups water to a boil in a saucepan. You’ll want enough liquid to cover the peppers, so feel free to scale this ratio up or down as needed.

Transfer sliced peppers to clean glass jars and pour over the brine, leaving ½ inch of headspace between the liquid line and the rim. Screw on the lids and let the jars cool before transferring to the fridge. Your pickled jalapeños will be best after 48 hours and last up to two months refrigerated. 

FALL CSA WEEK 1 & 2 so belated

P I C K L I S T

october 18

carmen peppers - habanada pepper - hungarian hot wax - poblano peppers - zinnias - mizuna - red onion - garlic - cilantro - acorn squash - plum tomatoes - broccoli

BREAD OF THE WEEK: olive focaccia

P I C K L I S T

october 25

NAPA CABBAGE - CARROTS - GINGER - DAIKON RADISH - LETTUCE - SNACKING SWEETIE PEPS - CARMEN PEPPER - CAYENNE PEPPER - HABANERO PEPPER - LEEKS - PLUM TOMATOES - GARLIC - RASPBERRIES - HOUSE PLANT - CARVING PUMPKIN - FLOWERS   

BREAD OF THE WEEK: AUBERGINE BREAD

FARMY FOODIE PRO-TIPS: 

Literally meaning “sour stuff,” this is the everyday Vietnamese pickle that you’ve seen and eaten countless times in bánh mì, on rice plates, and in other dishes. Ðồ chua is typically made with daikon and carrot, but you can use jicama instead of the daikon for a crunchy-sweet result. It does require more time: You can’t massage it as it will just break apart and you need to chill the pickle 1–2 days to allow the flavors to fully develop before using. If using daikon, choose one that is dense with firm, smooth skin, which are signs that it enjoyed good growing conditions and will likely taste more sweet than bitter. Precut jicama may be sliced into matchsticks for this pickle.

Makes about 6 cups

2 lb. daikon (about 1), peeled, cut into 3x¼" matchsticks

12 oz. carrots (about 6 medium), trimmed, peeled, cut into 3x¼" matchsticks

4 tsp. Diamond Crystal or 2½ tsp. Morton kosher salt

4 tsp. plus 1 cup granulated sugar

2½ cups distilled white vinegar

Preparation

  • Step 1
    Toss 2 lb. daikon (about 1), peeled, cut into 3x¼" matchsticks, 12 oz. carrots (about 6 medium), trimmed, peeled, cut into 3x¼" matchsticks, 4 tsp. Diamond Crystal or 2½ tsp. Morton kosher salt, and 4 tsp. sugar in a medium bowl to combine. Let sit 20 minutes. You should be able to bend a piece of daikon to make the ends touch without it breaking. (If you need to speed up the process, you can massage and knead vegetables with your hands until softened, about 3 minutes.)
    Step 2
    Rinse vegetables in a large mesh sieve or colander under running water, then press or shake to expel excess moisture. Divide between two 1-qt. glass jars or airtight containers.
    Step 3
    Stir 2½ cups distilled white vinegar, remaining 1 cup sugar, and 2 cups lukewarm water in a medium bowl until sugar is dissolved. Pour into jars to cover vegetables; reserve any excess for making salad dressing (you may have about 1 cup liquid left over). Cover and let sit at least 1 hour at room temperature. Drain before using.
    Do ahead: Vegetables can be pickled 1 month ahead. Chill.


BAECHU KIMCHI BY MORIHOUSE (@mori.house)/ Makes about one 750ml mason jar

1 large Napa Cabbage**, about 1kg/2lbs

Sea Salt (non-iodized), fine to semi-fine- 3% the weight of the Napa Cabbage

3-5 GARLIC cloves, thinly sliced

zest of 1 Lemon, sliced into thin slivers

2 dried Togarashi Chili Peppers or Chile de Arbol, chopped (deseeded, optional)

3-5 cloves Garlic, crushed into a paste

3-5 Tbsp Gochugaru (Korean Chili Pepper Flakes)***

1 Tbsp Fish Sauce (optional)

Pickling Brine* or Filtered Water


JENNY’S NOTE: 

OTHER CSA CROPS TO ADD TO THIS KIMCHI RECIPE JULIENNED CARROTS/ SLICED DAIKON RADISHES/ MINCED OR GRATED GINGER

Supplies:

1x Mortar & Pestle

1x Large Mixing Bowl

2-3 Spoons for mixing

1x 750ml sterilized, air-tight Mason Jar

1x Knife or Cleaver

1x Heavy object like a large stone or a large mason jar filled with water for weighing down your pickles.

1x Dish Towel

1x Small jar or pitcher for collecting excess brine

1x Fork or utensil to press down the pickles into the jar

Prepare the garlic scapes, lemon zest and chili peppers as described. Cut your cabbage into 1/8ths lengthwise and then widthwise into approximately 3 inch chunks. (JENNY’S NOTE: Add your julienned carrots, sliced radishes, grated ginger here to the mix)

Place into a large bowl and scatter the salt, lemon zest, garlic and chili peppers over the cabbage. Gently massage the salt into the cabbage mixture evenly. As you are doing this, you will feel the cabbage excrete its water content. This will take just a few minutes.

Next use a plate or another round flat object which has a smaller circumference than the bowl, so it fits just inside rim and on top of the cabbage mixture. Using a large stone, mason jars filled with water or another heavy object, weigh the plate and cabbage down. Cover the top of the bowl with a towel to keep dust from getting in and let it sit weighed down like this for at least 3 hours to lightly pickle. After the 3 hours or more have elapsed, you will find the water from the cabbage will have filled the bowl to cover the kimchi in what is now a salty *pickling brine.

Decant the brine into a pitcher or jar and gently squeeze a little out of the cabbage mixture. At this stage you will have a fresh, lightly-pickled style of napa cabbage known in Japan as “Hakusai no Tsukemono”. If you don’t like spicy, you can skip ahead to the jarring stage.

Crush your garlic into a paste with a mortar and pestle and a couple pinches of salt to break it down easier. Add your gochugaru, fish sauce (if using) and using small amounts of the brine, make a paste similar in thickness to a tomato paste. Chuck this paste into the drained cabbage mixture, still in the original bowl, and massage all together, making sure the paste is distributed evenly.

Use the following final steps for both the spicy and non-spicy versions: Layer your kimchi into the mason jar in 3-4 stages. Between each layer, use a fork to gently press the kimchi down as flat as you can. Continue to do this until all the kimchi is in the jar. Give it a few more presses with a fork, getting as much oxygen and as many air bubbles out as possible. If your kimchi paste was the right consistency, brine will rise to the top as you press the air out of the kimchi. If not, add small amounts of brine until it does. If making only non-spicy Kimchi, you will definitely need to add some brine. This extra thin layer of liquid at the top will help to seal your kimchi during the beginning of the fermentation process. Seal the jar and place it in the coolest and darkest part of your home.

Next is the waiting! 1 MONTH is the sweet spot but while it may not be for everyone, do try to wait at least 5-7 days before tasting. It takes at least this long for there to be any noticeable fermentation. In the colder seasons, it may take even longer, up to 10 days. If you want to “taste-as-you-go”, be sure to use a clean utensil and DON’T double dip! However long your preferred fermentation time, you will need to help the kimchi release carbon dioxide gas every couple of days. You may notice that when you open it, the kimchi will bubble. Sometimes it will bubble like soda but it may also only bubble slightly or barely at all. Either way, you can rest assured that it is fermenting. Each time you release the gas, you will also notice the kimchi may have risen slightly. Using a fork press it down again as much as you can. Brine may or may not rise to cover the kimchi at this stage and that is ok.

Note: Depending on whether or not you sterilized your jar properly and the environment temperature, you may occasionally find trace amounts of white, blue or green mold on the top of your kimchi. DO NOT worry about this. Simply remove it from the kimchi or wipe it off if it is on the jar or lid. However, if you find black mold, I’m sorry to say your kimchi may have been contaminated by unwanted outside bacteria. At that stage, it is better to start over just to be safe. All this said, mold is highly unlikely using this method.

After 1 month (or shorter) has elapsed, enjoy your kimchi as a side to most of your favorite Asian dishes, cook it in a dish or eat it as a snack!

**Do not use standard or savoy cabbage to substitute. However, you can use Bok Choy (same weight) as a substitute if Napa Cabbage is nowhere to be found.

***Note: I have had some students use Cayenne Pepper, Paprika or Chili Powder in lieu of Gochugaru before, but please use caution as the spice levels between these differ substantially. If you are absolutely unable to get Gochugaru and still want to try making spicy kimchi, start by making your paste with just one tablespoon of one of these substitutes. Taste it first, then add more, tablespoon by tablespoon until you reach a spice-level which is tolerable for you. However, I suggest you do try to add Gochugaru as a regular item in your kitchen. It is very versatile and easy to find online or at Asian Markets.

CSA WEEK 16

P i c k l i s t

watermelon - cherry tomatoes - field tomatoes - lunch box peppers - onion -

corn - potatoes - basil - carmen pep

THIS WEEK AT EDGEWATER…

SO MANY FALL FEELS! This weekend's equinox totally hit like a ton of bricks.  As the light levels change, I find myself already reaching and hoping for every bit of sun to shine on us, our fields, etc… It is hard to experience a change of seasons as we moved right over Summer, experienced an eternal Spring, and now suddenly Fall is here with its demand that we put on at least one to two layers of woolies during morning harvest, spark our ovens nightly for tomato/pepper roasting, 

and consider which pumpkin reaches Martha Sterwart stoop status, as we move them out of bins and clean them up to sell.  These are all good things, BUT after a summer that was sun deficient, I am certainly not ready.  

However it is not all doom and gloom at Edgewater, I am but one salty farmer in a village of many!  Pooh seems particularly tickled about Fall’s entrance; he spends his days seeding cover-crop and jonesin for the nightly potato harvest. 

Yes! The great potato harvest has begun! And compared to last year’s crop- think back to last summer’s drought and 0 irrigation on the potato field due to debatably poor planning, but also, who knew we were gonna have an intense drought?!?!?- this crop looks baller.  Every variety is coming through with pretty decent yields.  Nightly, Pooh and Mike venture down the road well after morning pick and afternoon deliveries.  Mike drives the tractor with a gigantic potato harvester attached to it and Pooh drives the other tractor with a massive potato wagon to collect said spud.  They ride side by side - it is indeed darling as they both have a tendency to be real lone wolves.  Mike's potato harvester pulls the tots from the earth, moving each potato through the machine like Miss Pac Man through the maze (sans ghost).  The potato makes its way to the top of the harvester, goes through the hopper and lands in Pooh’s wagon- a real “he shoots he scores” moment for all.  Each morning after harvest, field crew then heads to the field, scoop’n up all the little spuds that did not make the hopper.  Those potatoes- those perfect tiny round little bits- that is what is in your CSA this week.

In other perfect carby news, we are NOW taking Fall CSA bread share sign ups on the internet- woop woop! Honestly, I can not think of anything better to compliment a CSA veg pick up on a cold Wednesday night than a fresh loaf.  

Here are the deets:

Made by our in house baked good masters, Laura and Kathleen

$46 for 5 weeks/ pick up in conjunction with FALL CSA/ Space is limited.

FARMY FOODIE PRO-TIPS:

ROAST YOUR TOMATOES, ALL OF THEM… 

Please see CSA WEEK 14 on the blog to jog your roasting/saucing making memories on how to!

Serves 2 

JENNY’S NOTE: highly recommended making way more of the shakshuka tomato sauce and canning or freezing for deep winter brunch.  All your friends will be so impressed :)

For the tahini 

1 cup tahini paste

2 tsp fresh lemon juice, plus more to taste

1 garlic clove, grated 

1 tsp kosher salt, plus more to taste

½ cup ice water, plus more if needed 

To make the tahini: In a medium bowl, whisk together the tahini paste, lemon juice, garlic, salt, and ice water. It will reach a weird, lumpy consistency, but don’t be afraid. Keep whisking until it smooths out and becomes light in color (if it doesn’t, it needs more ice water, so just add a bit more). Tahini sauce with the perfect consistency will drip through the tines of a fork, but just barely. Taste for seasoning, adding more lemon juice or salt if desired. Store in a jar in the refrigerator for up to one week. If the tahini gets too thick while in the fridge, just loosen it up with a little water before using.

For the shakshuka

2 tbsp extra virgin olive oil, plus more for drizzling 

1 small yellow onion, finely chopped

1 red pepper, finely chopped

Kosher salt and freshly ground black pepper

3 garlic cloves, finely chopped

1 tsp ground cumin 

1 tsp curry powder (optional)

½ tsp ground turmeric

1 tbsp harissa, store-bought 

6 medium tomatoes, finely chopped

Pinch of sugar

4 large eggs 

Fresh dill or parsley, for garnish

Challah, pita, or other soft white bread, for serving

In a large skillet with a fitted lid, heat 2 tablespoons olive oil over medium-high heat. Add the onion and pepper, and season well with salt and black pepper. Cook until the onion just begins to lightly brown, 6 to 8 minutes, then add the garlic, cumin, curry powder (if using), turmeric, and harissa. Sauté until fragrant and the onion is lightly browned, 1 to 2 minutes. Stir in the tomatoes and season with the sugar and a pinch each of salt and black pepper. Cover the pan and simmer over low heat until the sauce has thickened slightly, about 20 minutes. Uncover the pan, raise the heat to medium-high, and continue simmering, stirring occasionally, until the sauce is thick enough to cling to the eggs, 10 to 15 minutes. 

Use a large spoon to make four wells in the sauce. Crack an egg into each well, cover the pan with the lid, and cook over medium-high heat until the whites are set but the yolks are still runny, about 3 minutes. 

Remove the pan from the heat. Garnish with fresh dill or parsley and drizzle with olive oil and garlicky tahini. Serve hot with bread.

Crispy Roasted Potatoes with Garlic and Herbs – these are just classic. Once you figure out how easy this method is, it’s hard to make roasted potatoes any other way. You can totally omit the herbs and toss these potatoes in spices like, paprika, turmeric, curry powder….whatever flavor combinations you love. The key here is making sure you pre-heat the oven and space out your potatoes on the sheet tray so they have the ability to really crisp up and get golden and crunchy. 

  • 2 lbs New Potatoes

  • 1/4 cup extra virgin olive oil

  • 1 head garlic, crushed cloves

  • 5 fresh thyme sprigs- can substitute with dried

  • 3 rosemary sprigs- can substitute with dried

  • Or your sage from last week’s csa!

  • lots of Kosher salt and cracked black pepper to season

  1. Bring a large pot of salted water to boil and add in the potatoes. Boil for 10-15 minutes until a knife runs through the potato easily. Strain and let air dry for 5 minutes.

  2. Pre-heat the oven for 425 degrees F. Place the potatoes on a sheet tray and using the bottom of a cup or the heel of your hand press down on each potato. Make sure they aren’t touching. Season well with salt and black pepper. Sprinkle over fresh thyme, rosemary and drizzle over the olive oil.

  3. Tear the leaves and rub them releasing all the aromas. Move the potatoes around on the seasoned oil, being very careful not to bread the potatoes. They are very delicate. When the oven is pre-heated place the seasoned smashed potatoes in the hot oven and let roast for 20-25 minutes until golden. Remove and eat those Crispy Roasted Potatoes with Garlic and Herbs.

CSA WEEK 15

P i c k l i s t

watermelon - cherry tomatoes - sweet peppers - sage - kale - onions - corn

THIS WEEK AT EDGEWATER…

I am overwhelmed with joy to announce the return of kale.  On Monday I slogged my wet boots out into the field to pick you bunches upon bunches of collard greens.  After last week’s box of pure bulk, I was missing something green and fluffy to pick and basque in.  All the good fluffy crops have just absolutely failed this season- Lettuce, arugula, swiss chard, and kale have all taken such a hit.  But alas! I peered towards the hill and to my total delight, I spied the return of the sweet green fluff, the old comeback kid. Kale is supposed to be the workhorse of vegetables- the one crop that never says die.* So we were all aghast back in early August, as we watched this patch of kale look so sickly.  That week- we did our best, and used every trick we could.  We stripped all the sad leaves off the plant, spread pelleted fertilizer, and looked to the sun praying to see her shiny face.  A month and a half later, we have curly greens again.  Woot! Woot!

Don’t get me wrong, I love a stand of collard greens.  I’d be just as happy with collards as kale, But it’s been a minute since we all made kale chips and ate kale salad.  As far as other greens go, we’ve been trying like hell to grow lettuce all season.  However there is a woodchuck that continues to eat every last plant that we seed in the greenhouse, and if the lettuce makes it to the field, the deer are all over it.  All that said, we have big plans for our Fall CSA.  We planted up a whole greenhouse of lettuce starts, keeping the sides of the greenhouse down as much as possible.  Tim (of field crew) volunteered to sleep in said greenhouse with a bow, an arrow, a jar of peanut butter and a nine iron.  We’ll see if it comes to that.  

Bottomline here, welcome back kale, but it is now my belief that Collard Greens are the real workhorse all star champ veg.  

Other noteworthy crops of the week, SWEET COLORFUL ROBUST PEPPERS! The pepper fields are finally ripening with all the colors of the rainbow.  Hopefully we can get a good flush out of the crop before the wind breaks all the plants, or we get the first hard frost.  WHAT A SEASON!

*I am positive I mentioned this in a previous note back in late July, please forgive my broken record tendencies. 

FARMY FOODIE PRO-TIPS:

I have no words for this recipe – it is definitely one of my all time favourites. This is hands down the ultimate crowd pleaser dish, and it doesn’t get much easier than this. Packed with creamy feta, rich olive oil, olives, fresh sage, toasted sesame seeds, sweet honey, a touch of orange zest and a hint of chili pepper, this dish is pure goodness. I mean, who wouldn’t want this?! If you are entertaining and need to get something on the table that looks sexy and tastes like heaven, this Baked Feta with Olives, Sesame, Sage & Honey dish is for you 😉

  • 16oz Greek feta- pat dry 

  • 1/3 cup extra virgin olive oil

  • 3 strips orange zest- around half an orange

  • 1 tablespoon lightly toasted sesame seeds

  • 1/3 cup castelvetrano olives

  • 1/3 cup kalamata olives

  • Small handful of fresh sage- can also sub with fresh rosemary or thyme

  • 2 tablespoons honey

  • Half cayenne chili pepper, thinly sliced

  • Flaky sea salt

  1. Preheat the over to 400 degrees F.

  2. In a small baking dish, place the feta, olives, orange zest, toasted sesame seeds, sliced chili peppers and olive oil.

  3. Place into the preheated oven for 10-15 minutes.

  4. Set the oven to broil and let broil for 3-5 minutes.

  5. Remove, drizzle with honey, sprinkle Maldon sea salt and serve with crusty fresh bread.

  6. Enjoy that Baked Feta!

I also implore you to eat the above sage feta with ROASTED PEPPERS!! YES PLEASE!

THE FOLLOWING ROASTED PEPPER NOTES ARE FROM bonappetit.com via Alex Delaney:

You don’t need much to make roasted red peppers. Peppers (duh). Olive Oil. And some kosher salt. That’s it. You have most of that stuff at home already, so grab some peppers and let's do this.

There are two ways to roast peppers. Both involve some form of aggressive heat followed by a more mellow, lower-heat method as needed. Whether you’re an oven person or a stovetop person, your cutlet sandwich will be stacked with red peppers in no time. Here’s how we do it:

The Oven Method: Turn on your broiler. Yes, the broiler. That fire thing you might be scared of. It’s cool. Broilers are our friends. We promise. Cut red bell peppers in half and remove the core and seeds. Toss the pepper halves in a tiny bit of olive oil and spread them on a sheet pan, with the cut sides down and skin sides up. Our goal here is to get the skin charred enough to be able to easily remove it. Put the peppers under the broiler for 12-14 minutes, until the skins are black. Remove the peppers and turn your oven to 250°.

The peppers won’t be cooked all the way through from that time under the broiler. But the skins should peel right off. Let them cool a bit until you feel comfortable handling them, then use your hands or the back of a knife to peel the charred skins off of the peppers and then place the skinless peppers back on the sheet pan. Throw them back in your oven for about half an hour, until the peppers are tender and cooked through. Take them out, let them cool, and slice them into strips. Look at you! You roasted red peppers! Amazing!

The Stovetop Method: You can also recreate the broiler effect by laying peppers directly over an open flame. We would not suggest using that BIC lighter in your junk drawer. The flame on your (gas) stove will work much better. (Sorry to those of you with electric burners—hopefully you have a broiler?) Turn the flame on medium, place the peppers on the burner so they're in direct contact with the heat, and use tongs to rotate as needed so the skin gets dark and charred all over. Repeat this with as many burners as you need for as many peppers as you have. Maybe it’s two. Maybe it’s 736. We don’t know how much you like roasted red peppers. When each one is finished charring, sling it into a bowl and cover with plastic wrap—you want to let those bad boys steam a bit once they come off the burner.

Once you've charred all the peppers and let them all hang out in that steamy covered bowl, take them out, pull out the stem and seedy parts, open the peppers kind of a like a book and place them (charred) skin side up on your cutting board. Using your hands or the back of a knife, scrape off the charred skin. (It's okay if some won't come off; it won't kill you.) At this point the peppers should be mostly cooked-through, but if you want them a little softer you can go ahead and cook them over low heat in a Dutch oven with a glug of olive oil, stirring every once in a while, until they've softened to your liking.

JENNY’S NOTE: i roast my peppers by charring on the grill :)

Storage Maneuvers: Whether you went the stove or oven route, you should be looking at some tender, skinless roasted red peppers. Nice job. You can eat them immediately if you’d like, but the secondary goal is to store them so they’re ready to use at a moment’s notice. Sprinkle the peppers with a bit of kosher salt and transfer them into a glass jar or plastic Tupperware. Pack them in tightly, then add olive oil until the peppers are fully submerged.

Keeping the peppers submerged in the liquid will make sure they don’t spoil in the fridge—they should keep for at least a week this way. And since these peppers can hang around in the fridge for a minute, we'd suggest roasting more than two. Maybe not 736, like we suggested earlier...but definitely more than two.


CSA WEEK 14

P i c k l i s t

watermelon - roma tomatoes - garlic - poblano pepper - 

Cherry tomatoes - carmen peppers - lunchbox peppers - carrots

THIS WEEK AT EDGEWATER…

We remain swimming in field tomatoes.  I believe the crop of plums might be at peak, or nearing peak yields right now.  The plants are dripping with fruit, and this abundance is simultaneously soul-nourishing-farmer-pleasing and totally overwhelming.  Being rich in tomatoes lends itself to a real feeling of urgency.  A crop based time crunch.  

For one, as soon as the fruit ripens, we have only so much time until the juice of the tomato bursts through the skin and rots the fruit.  The crew has done an incredible job of staying on top of the pick, however it is inevitable that some of the cherries and plums will rot before we move/sell/cook/eat them. 

The second feeling of urgency comes when the weather turns and the nights move toward fall and flannel.  This is that moment in between seasons that makes me want to harvest everything all the time by day and preserve via canning or freezing all the time by night.  This harvest rush makes for a real crazy person (i.e. me).

This week’s CSA share 100% reflects that crazy.  Please join me as we get into it and go deep with tomatoes.  By Sunday I expect everyone of your countertops to be tomato splattered and every dish piled high in your sink. But come JANUARY, you will be so pleased that you followed suit and took to heart the farmy foodie canny pro-tips.  

Let’s CAN people!

 (wait wait let me try again) 

We CAN do this!

FARMY FOODIE PRO-TIPS the canners edition: 

by far my fave way of preserving cherries and plums

It is simple and the only ingredients you need are tomatoes/salt/pepper/GARLIC/olive oil.

READ ON…

Cherry, grape or small Roma tomatoes

Whole cloves of garlic, unpeeled

Olive oil

Herbs such as thyme or rosemary (optional)
Preheat the oven to 225°F. Halve each cherry or grape tomato crosswise, or Roma tomato lengthwise and arrange on a parchment-lined baking sheet along with the cloves of garlic. Drizzle with olive oil, just enough to make the tomatoes glisten. Sprinkle herbs on, if you are using them, and salt and pepper, though go easily on these because the finished product will be so flavorful you’ll need very little to help it along.

Bake the tomatoes in the oven for about 3 hours. You want the tomatoes to be shriveled and dry, but with a little juice left inside–this could take more or less time depending on the size of your tomatoes.

Either use them right away or let them cool, cover them with some extra olive oil and keep them in the fridge for the best summer condiment, ever. And for snacking.

  • JENNY’S NOTE:  Smitten’s slow roasted tomatoes stop there… but I am suggesting you take it one step further.  Let’s can :)

  • STEP 1: Prepare your jars and lids- clean them, dry them/ get em lined up and ready.  

  • STEP 2: Prepare your water bath (big pot with boiling water)

  • STEP 3-STEP 100: is an excerpt from Tart and Sweet: 101 Canning and Pickling Recipes by Kelly Geary and Jessie Knadler (Rodale, 2011). The excerpt is from Chapter 6: Summer. I am also going to provide their favorite recipe to can tomatoes in case you want to go the “whole” tomato route.  However, if you want to take your newly roasted tomatoes and skip ahead to the canning part, go ahead and ladle your warm batch of tomatoes into jars, skip to bullet point 3 and proceed with the lemon juice. But do not add water- any juice leftover from your smashed down cherry tomatoes is enough!

Canned Tomatoes 

• 12–15 pounds tomatoes, blanched, peeled, andcored
• About 8 cups water per quart jar
• 2 tablespoons bottled lemon juice (or 1 tablespoon per pint jar)
• 1 teaspoon kosher salt (or 1/2 teaspoon per pint jar)

1. Leave the tomatoes whole or quarter or halve them, as desired.

2. Bring the water to a boil in a large saucepan (you may need more or less, depending on the size and cut of the tomatoes). Reduce the heat, but keep the water hot.

3. Place the appropriate amount of lemon juice and salt in each hot jar. Top with raw tomatoes.

4. Ladle hot water into the jars to cover the tomatoes, leaving 1/2 inch headspace. Check for air bubbles, wipe the rims, and seal. Process quarts for 45 minutes, pints for 40 minutes, adjusting for elevation.

YIELD: 4 quarts or 8 pints

Ok DO YOUR BEST HERE PEOPLE! I Highly recommend you get yourself a copy of this book. It is extremely user friendly and chock full of all my fave ways to preserve. Writing it one more time for the boys in the back:

Tart and Sweet: 101 Canning and Pickling Recipes by Kelly Geary and Jessie Knadler 

And if you are not ready to can, but do want roast your maters go ahead and these little gems on toast, with eggs, by the spoonful, or make soup:

Roasted Tomato and Goat Cheese Soup from the cook book: lucid food

serves 4

12 ripe tomatoes

2 cloves garlic, peeled and smashed

1 yellow onion, coarsely chopped

1 tablespoon honey

2 sprigs fresh rosemary

2 tablespoons balsamic vinegar

4 tablespoons olive oil

Salt and freshly ground black pepper

1 dried bay leaf

1/4 cup fresh goat cheese


Preheat the oven to 425°F.
Core and quarter the tomatoes and scoop out the seeds, reserving the seeds and cores for the stock. In a large bowl, toss the tomatoes with the garlic, onion, honey, rosemary, 1 tablespoon of the vinegar, 3 tablespoons of the olive oil, and a dash of salt. Spread the mixture on a baking sheet and roast for 40 minutes, stirring occasionally. Remove the rosemary and set aside.
Combine the tomato scraps, bay leaf, and 1 cup water in a pot and bring to a boil over high heat. Decrease the heat and simmer, uncovered, for 15 minutes. Strain the stock into a bowl and discard the solids. Rinse the pot and return the stock to the pot. Add the roasted tomatoes. Bring to a boil over high heat, then decrease the heat and simmer, uncovered, for 5 minutes.
Let the soup cool for 10 minutes, then pour into a blender. Add the cheese and blend until smooth. With the blender running, add the remaining 1 tablespoon olive oil. Season to taste with salt.

Garnish the soup with the remaining 1 tablespoon balsamic vinegar and a few grinds of pepper and serve.

CSA WEEK 13

PICK-LIST

watermelon - corn - eggplant - roma tomatoes -

cabbage - garlic - onions - purple pepper - jalapeno-

habanada pepper (orange crinkly pepper, my fave! Not spicy! Smoky and sweet) -

cilantro - oregano

NO FANCY PIC THIS WEEK BECAUSE LIFE GOT A HEAD OF ME…

BUT I’M HERE FOR THE RECIPES!

FARMY FOODIE PRO-TIPS: 

Tomatoes up the waz. 

MAKE SALSA! MAKE SAUCE! ROAST FOR WINTER! ROAST FOR NOW!

EAT THIS SALSA FRESH

Makes about 2 cups

2 tomatoes

¼ onion, chopped

2 jalapeños, finely chopped

1 garlic clove, finely grated

⅓ cup cilantro leaves with tender stems, finely chopped

3 tablespoons fresh lime juice

Kosher salt

Gently toss tomatoes, onion, jalapeños, garlic, cilantro, and lime juice in a small bowl; season with salt. Let sit, uncovered, to let flavors meld, about 10 minutes.

(THIS IS A COOKED SALSA, GREAT FOR CANNING AND EATING IN JANUARY)

MAKES 1½ CUPS

  • 4 medium Roma tomatoes(1 lb/453 g), cored and roughly chopped

  • 2 chiles chipotles for mild or 4 for hot, stemmed

  • 2 jalapenos, stemmed and seeded for a milder flavor

  • ¼ medium white onion (3.5 oz/98 g), roughly chopped

  • 1 garlic clove, peeled

  • 1 teaspoon Morton kosher salt (0.21 oz/6 g), plus more to taste

  • Fresh lime juice (optional)

DIRECTIONS

  1. In a medium saucepan, combine the tomatoes, chipotles, chiles de árbol, onion, garlic, salt, and ½ cup water. Bring to a boil over medium-high heat, reduce to a simmer, cover, and cook until the chiles and vegetables are soft, for about 15 minutes.

  2. Remove from the heat, cover, and set aside for 10 minutes to cool slightly. Transfer to the jar of a blender and purée on medium-low until almost smooth. Taste and season with more salt and lime juice if desired.

  3. FROM HERE, IF THE SPIRIT MOVES YOU, GRAB YOUR BALL JARS AND CAN! (Obviously google canning instructions if you are a newbie.  And if you are a newbie, dont be intimidated! You got this!)

MOM’S TOMATO SAUCE (FROM MY FAVE CANNING COOK BOOK TART AND SWEET)

1 Tablespoon olive oil

about 3 pounds of tomatoes chopped 

1 medium onion (or leek), chopped

3 tablespoons tomato paste

½ green bell or purple pepper, chopped

2 tablespoons white wine

½  red bell pepper or 1 full carmen pepper, chopped

1 teaspoon brown sugar

3 cloves of garlic, sliced or minced

kosher salt and pepper to taste

½ pound ground pork sausage (totally optional)

3 tablspn chopped herbs (oregano! Thyme! etc!)

10 fennel seeds

 Heat the oil in a large saucepan over medium heat.  Add the onion (or leeks), peppers, and garlic.  Cook until the vegetables are soft, about 6 minutes.  Add the pork and cook, breaking up the meat until it no longer shows pink, about 4 minutes.  Strain the grease if necessary.  Add the fennel, tomatoes, and juice, tomato paste, wine, brown sugar, salt, and pepper.  Simmer for 15 minutes.  Add the herbs and simmer for another 15 minutes, adjusting heat as needed

EAT ASAP ATOP SPAGHETTI OR FREEZE FOR FEBRUARY 


CSA WEEK 12

P i c k l i s t

Bok Choy - Napa Cabbage - Green beans - Shishito Peppers - Cayenne Pepper - Sweet Peppers - 

Cherry Tomatoes - Mint - Carrots - Cilantro

This week at edgewater: 

The cilantro continues to thrive.  I bet over the past few weeks you’ve had a hankerin for some basil… me too.  However, the herbs were flooded with river water back when we considered ark building, and it takes a minute to get the next planting going (yup, We are still seeding and planting over here!).  Also we’ve seen signs of downy mildew around the plants which is kind of like an airborne kiss of death for basil… So this Summer as a result, we continue to celebrate cilantro- who, as it turns out, loves a rain girl summer. I am aware that cilantro is not everyone’s fave herb- so thank goodness for Mrs. T and the mint she picked this week to distract the cilantro haters among us.  A new planting of parsley has started to fluff up and stretch its wings- and to be safe, we planted it in a greenhouse because you just can't trust the skies these days.  Fingers crossed you get dazzled with these bunches over the next few weeks, but until then, cilantro is queen.

Also over the next few weeks, get pumped!  It is officially cherry tomato overwhelm in the fields/ the packshed/ the farmstand/ the co-ops/ your kitchen etc.  Embrace this moment, and make some cherry roasted tomato candy to be eaten on everything all the time (recipe to come, probs next week).  

AND LASTLY FOR NEXT WEEK, we are in the midst of planning our Fall CSA, which is a mini extension of Summer, but sub out tomatoes for winter squash.  STAY TUNED FOR DEETS!

FARMY FOODIE PRO-TIPS: 

First off, bok choy + napa + carrots + hottie pep, HELLO KIMCHI! Cruise back on the Edgewater Farm CSA blog to week 4, for an easy peasy kimchi recipe.  Look for, BAECHU KIMCHI BY MORIHOUSE (@mori.house)

(This is admittedly an extremely New England version of a Thai Salad. It does its best to mimic the heavenly Som Tam papaya salad that you will find all over Thailand, but here we are in the upper Valley with 0 papayas in sight.  Give it a shot, I think you will be delighted with the results)

  • 750g raw french green beans

  • 1 cup baby tomatoes (halved)

  • 2 yellow onions

  • 1 1/2 cups raw peanuts

  • 1/2 cup grapeseed oil

  • 1 cup fresh cilantro leaves

  • 1 cup fresh mint leaves

  • 1 cup fresh basil leaves

Dressing

  • 2 cloves garlic, finely minced

  • 2 tbsp fresh lime juice

  • 3 tbsp white sugar

  • 3 tbsp fish sauce

  • 1 tbsp fresh birds eye chili, diced

Instructions

  1. Preheat your oven to 350 degrees and place raw peanuts on a baking sheet.

  2. Slice onions in thin half-moon rings, and then heat up grapeseed oil on medium heat.

  3. Roast the peanuts in the oven for about 10 minutes until they start to brown.

  4. Cook the onions for 15-20 minutes until they're brown and crispy. Stir every few minutes so they brown evenly.

  5. In the meantime, prepare the rest of the salad. Mince the garlic, birds eye chili, and slice your tomatoes if you haven't already. Clean and cut your green beans into bite sized pieces.

  6. In a large bowl, make the dressing by combining all of the ingredients using a whisk (garlic, fish sauce, lime juice, sugar). Add half of the diced chilis and taste the sauce to see if it's the right level of spice before adding more.

  7. Once your onions have finished cooking, remove and place on a plate lined with a paper towel.

  8. Remove your roasted peanuts and once cool, lightly chop them.

  9. Add your green beans and tomatoes into the large bowl and toss with the fresh herbs. You can keep this for a few hours in the fridge.

  10. When you're ready to serve, add in the fried onions and roasted peanuts.


Salsa Very Verde

FROM THE cookbook,

That Sounds So Good by Carla Lalli Music (which i highly reccomend getting a copy :)

JENNY’S NOTE: My brilliant friend Claire made this last week, and I had to nab the recipe for ya.  You might need more herbs than what is in the CSA this week, BUT I highly recommend holding onto this recipe, making it with what you have in sight and schmearing on everything.  It’s too damn good. 

  • 2 oil-packed anchovy fillets

  • Kosher salt

  • 1/2 teaspoon crushed red pepper flakes

  • 1 garlic clove, finely grated

  • 1 shallot, minced (your red onion from last week is fine)

  • 2 tablespoons capers, drained and finely chopped

  • 1-inch pieces spicy green chile (such as jalapeño or serrano), finely chopped

  • 2 cups thinly sliced tender herbs (such as basil, parsley, tarragon, chervil, chives, cilantro, and/or mint), loosely packed

  • 1 cup extra virgin olive oil

  • 1 tablespoon cider vinegar

  • Freshly ground black pepper

  • Place anchovies on cutting board and sprinkle with Kosher salt. Finely chop anchovies, then use the edge of your knife to smash them against the cutting board until they become a paste. Scrape into a medium bowl and add red pepper flakes, grated garlic, shallot, capers, and green chile. Add the chopped herbs and olive oil and stir. Once combined, add cider vinegar and taste to adjust seasoning with salt and pepper.


Charred Shishito Peppers

(THE SECOND* SIMPLEST WAY TO ACHIEVE THE PERFECT BITE)

  • 2 teaspoons grapeseed or olive oil

  • 1 pound shishito peppers

  • Flaky sea salt

Directions

  • In a large cast-iron skillet, heat 1 teaspoon of the grapeseed oil. Add half of the peppers and cook over moderately high heat, turning occasionally, until charred and tender, about 4 minutes. Transfer to a large bowl. Repeat with the remaining oil and peppers.

  • season with flaky sea salt. Transfer to a platter; eat  ASAP

*FIRST SIMPLE WAY TO ACHIEVE EATING PERFECTION INVOLVES ONE TOMATO AND A DASH OF SALT


CSA WEEK 11

P i c k l i s t

Potatoes - Corn - Garlic - Onion - Green bean - Cuke - Summer squash - Italian frying peppers - Hungarian Hot Wax Pepper - Cherry Tomatoes - Eggplant - Collard Greens

This week at egdewater:  

All sorts of weather this week resulting in some movement toward ripening but unfortunately the nights are still so cold!  The pepper field remains mostly adorned with green fruit aside from these carmen peppers- the italian frying peppers- that are in your share this week.  Like a watched pot that just won’t boil, so too these peppers just won't ripen.  However, the field tomatoes are finally kicking in and we are all so jazzed about this late August candy otherwise known as cherry tomatoes.  It is actually so incredible what a couple of days of sunshine on a field can do to a stunted looking crop.  With Sunday’s perfect Summer weather, suddenly the fields jumped and the plants perked right up.  We are all just holding on so hard to these few days of SUN while we can before we go right back into the dreary mess this coming Friday.

In other news, we are in that very sweet spot of Summer- the time in between school starting and camp ending and all the college kids returning to school.  It is a time in which all child care suddenly disappears and we get two special guests full time on our field crew.  A very funny but also quick to fall apart 4 year old, and a 7 year old who loves being on field crew for the camaraderie and the snacks but not entirely for the actual work.  These make for very interesting days.  

Many moments as a mom and a farmer i think the following, 

“Teach your children well… unless you kill each other first”

“should i just say “f” it and take them to the beach?”  

“Where is the nearest snack? Why won’t this cucumber or sweet pepper or cherry tomato do the trick?”

“Thank heavens for farmstand cookies”

“Nothing is possible without grandparents” (in particular Grannie Annie, aka Anne Sprague co-founder farmer of Edgewater)

These kiddos were born and raised here, so they absolutely know the drill, but it still remains a challenge to take them to work. However, when it is good, it is very good- and nothing feels better than working alongside your kiddo while everyone is in the flow of farming.  But the moments of flow are so very unreliable.  We are in the middle of our big harvest season.  This is akin to asking an accountant to take their kiddo to work during tax season, ya know?  All this said, at the end of the day we are all a little grumpy, and tired and hungry, but I am positive that by next Thursday, when they do go back to school, we will be missing them on the crew.  Because while they are both total pain in the butts, they are also totally lovable and silly and very much a piece of the Edgewater Farm puzzle.  So if you open your delivered box this week, or pick up your farmstand share and your vegetables look a little curious- maybe an overly peeled onion? Or a green potato? Please know that they were likely touched and picked and peeled by the hand of a tiny person on the cusp of figuring it all out.  ENJOY!

FARMY FOODIE PRO-TIPS: 

Peanut Butter & Greens Sandwich

Makes 1 sandwich RECIPE BY: LUKAS VOLGER

  • 2 slices sandwich bread

  • 3 tablespoons natural peanut butter

  • Salt, if needed

  • 1/4 - 1/3 cup Marinated Greens (see below)

  • Sriracha

  • 1 scallion, white green and white parts, thinly slicedOlive oil or butter

  • Flaky salt

Spread both sides of the bread with peanut butter and, depending on the saltiness of the peanut butter, sprinkle it with salt to taste. Spread the marinated greens over one slice and top with the scallion, and sriracha to taste. Close the sandwich.

Place a skillet over medium heat. When hot, pour in a thin film of olive oil or melt a pat of butter in it. Place the sandwich top-side down and cook until golden brown, about 3 minutes, pressing down gently if needed so that it begins to brown. Add a bit more olive oil or butter if the pan looks dry, then flip and repeat. Sprinkle the sandwich with a pinch of flaky salt, slice in half, and serve immediately.

Marinated Greens… Makes about 2 cups

PSA, JENNY’S NOTE: Even if you do not make this sambo, I encourage you to make these greens.  They are awesome on their own, or throw them into scrambled eggs, frittata, eating atop rice, etc… 

  • 2 bunches (about 1 1/2 pounds) leafy greens: hello, Collard Greens!

  • 2 tablespoons olive oil, divided

  • 1 clove garlic, minced

  • Pinch red pepper flakes, or to taste

  • Salt

  • Fresh lemon juice

Trim off and discard the tough stems from the greens. Heat 1 tablespoon of the olive oil in a wide skillet or saucepan over medium-low heat. Add the garlic and red pepper flakes and stir for about 1 minute, until fragrant. Pile in the greens, in batches if necessary, and add a splash of water (you can also cover with a lid to compress them). Add a big pinch of salt and gently cook, stirring with tongs, until wilted and tender. Cooking times will vary depending on type of green, so watch and taste as you go. If cooking a combination of different greens, cook each type separately. Add a splash of water to the pan if it dries out.

Transfer to a colander to drain and cool until safe to handle. Gently squeeze out excess liquid using your hands or a spatula or wooden spoon, pressing against the side of the colander. Coarsely chop the greens, then transfer them to a medium bowl and toss with the remaining 1 tablespoon olive oil and a few drops of lemon juice. Taste and add more lemon, red pepper flakes, or salt as needed.

SERVES: 4 (aka Crispy Chili-Yogurt Chicken Legs over Schmaltzy Bread) 

ACTIVE TIME: 35 MINS TOTAL TIME: 1 HR 20MINS 

This chile-flecked yogurt marinade gets stained bright orange when blended with mild chile flakes such as Aleppo pepper or Gochugaru. You’ll notice that I’ve given a much smaller quantity of Italian red pepper flakes (also known as pepperoncini) as a substitute. These are much spicier, so you won’t need as much, and therefore they won't strain the yogurt a rich hue. But they’ll work great nonetheless. Use whatever you’ve got! If you’ve ever made Samin Nosrat’s Buttermilk Marinated Roast Chicken, you may be familiar with the tenderizing effect that sour dairy has on meat--the enzymes in dairy products like buttermilk or yogurt help to break down the proteins in the chicken, resulting in supremely tender meat with an undeniable tang. As for the slices of bread that's it beneath the chicken,stale bread, which has dried out, will resist sogging out underneath the chicken and lead to crispier fried edges. If you only have fresh bread, slice it up and leave it out at room temperature to dry out for a few hours if possible. If you don’t have time for that, you’ll just need to embrace the crispy gone soggy factor (which I happen to think is pretty special in its own right). 

PRODUCE 

2 whole heads garlic

4 large shallots

2 large bunches kale, collard greens, Swiss chard or spinach

1 lemon 

PANTRY 

2 tablespoons fennelseed

¾ teaspoon ground cinnamon 

5 tablespoons olive oil Kosher salt

freshly ground pepper 

½ loaf crusty, stale sturdy sourdough bread (the staler the better, really)

2 tablespoons mild chili flakes(Aleppo, or Gochugaru) OR 2 tsp hot red pepper flakes(Italian) 

DAIRY

1 cup whole milk yogurt 

MEAT 

4 bone-in,skin on chicken legs(about 2½ pounds)

1. Marinate the chicken: In a blender combine 2 tablespoons fennel seed, 2 tablespoons mild red chili flakes(or 2 teaspoonsItalian red pepper flakes), and ¾ teaspoon cinnamon. Blend on high until the spices are finely ground. Add 1 cup yogurt, 2 tablespoons olive oil, 8 garlic cloves, ½ teaspoon salt, and blend again until smooth. Pat 4 chicken legs dry, and season all over with salt. Place the chicken in a baking dishor large resealable plastic bag. Pour the chili yogurt all over the chicken and let sit, turning occasionally, at least 1 hour and up to overnight. Arrange a rack in the center of the oven, and preheat the oven to 450 when you’re ready to cook.

2. Meanwhile, prep your veg and bread: Slice the stale bread into three or four 1” thick slices. (They ultimately need to fit in a 9 x 13 baking dish in a single layer so think about that as you decide how many you’ll need) Peel 8 small shallots, cut them in half through the root end. If your shallots are large, cut them in quarters. Cut the remaining head of garlic in half crosswise. Cut or tear 2 bunches of greens into 3 inch pieces(if you’re using kale or collards, you’ll want to remove the tough centerstem). 

3. Roast the chicken: Place the shallots, halved garlic and bread in a clean 9 x 13 baking dish. Drizzle all over with 3 tablespoons olive oil and season with salt and pepper, turning to coat everything. Arrange the chicken legs on top of the bread and vegetables. Roast, until the bread is golden brown and very crisp underneath, 25-30 minutes. The chicken will not yet be browned and crisp. Using tongs, move the chicken legs to a plate momentarily, while you flip the bread slices over, and stir the shallots and garlic. Return the chicken legs to the bread, and continue to roast until the chicken skin is crisp and deeply burnished, 12-16 minutes longer. Transfer the chicken and bread to a plate or cutting board to rest.

4. Add the greens and finish: Stir the greens into the baking dish along with the shallots and garlic, drizzle with some more olive oil, season with salt and pepper, and return to the oven to cook,stirring once halfway through until wilted and tender, 5-10 minutes longer depending on what greens you’re using. If it looks like the drippings at the bottom of the pan are burning you can add a couple of tablespoons of water to loosen them up. Squeeze the juice of 1 lemon all over the greens, chicken and bread. Divide the bread,shallots, and greens among serving bowls. Top each one with a chicken leg. Serve the roasted garlic alongside for schmearing on the schmaltzy bread.