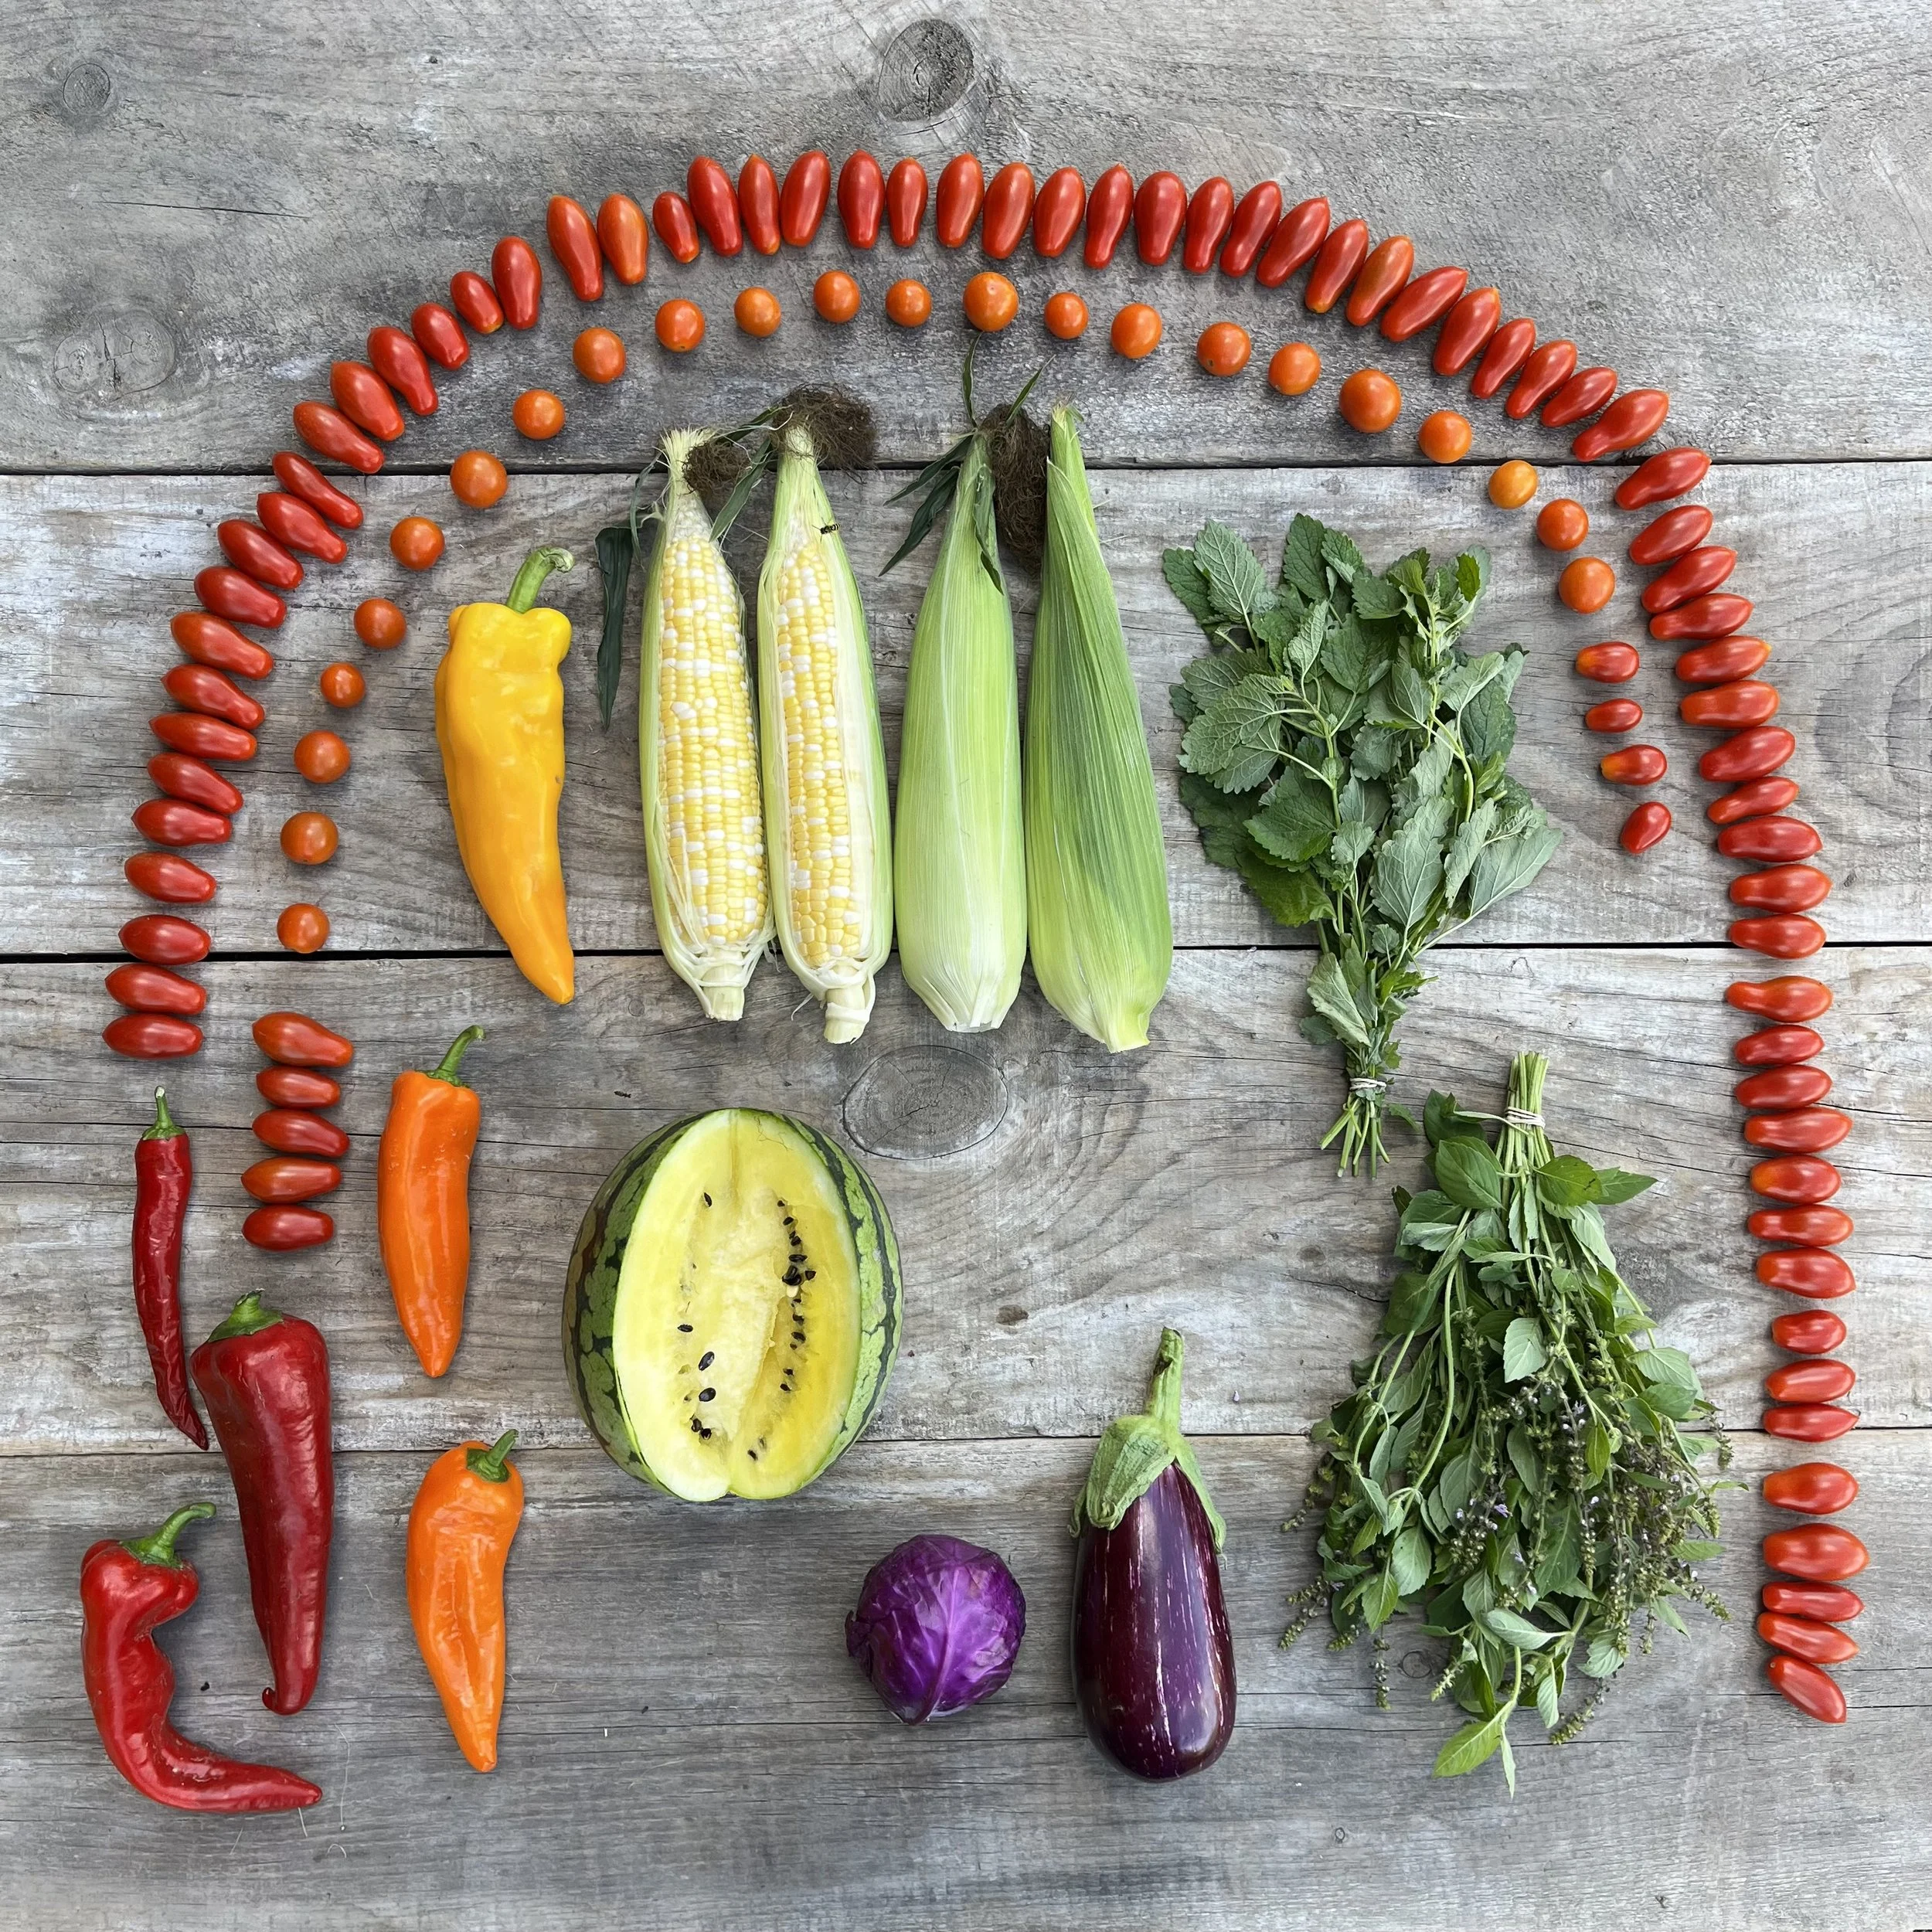
FALL CSA WEEK 6

P I C K L I S T

LEEKS - RUTABAGA - CELERIAC - WATERMELON RADISH - RED KURI WINTER SQUASH - BROCCOLI - FENNEL - SPICY SALAD GREENS (ARUGULA & MIZUNA) - TINY RUSSET STORAGE POTATOES
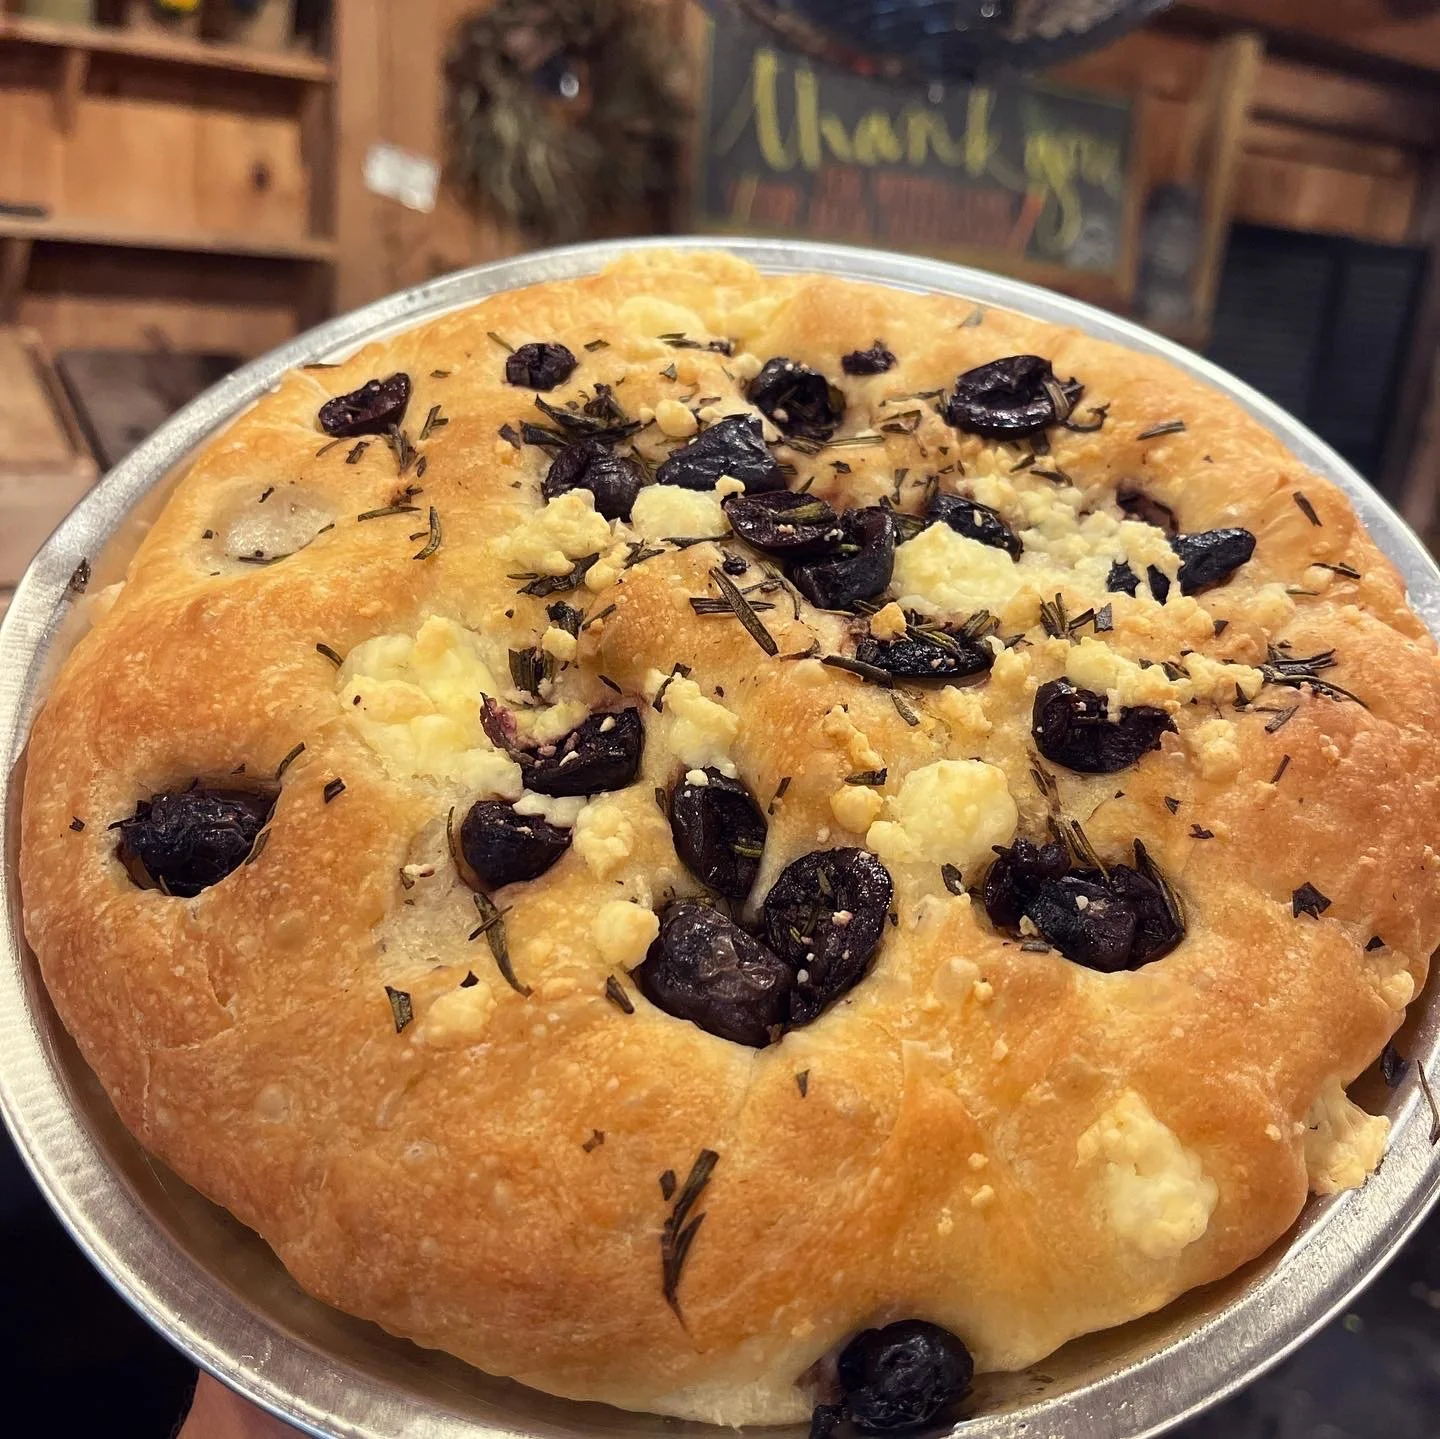
BREAD: FROZEN PIZZA DOUGH

It’s a real who’s who of root veg this week- so I won't bore you all with the weather and how it totally dominates our everyday life (as per usual) at Edgewater.  But most importantly, let it be known that our field crew drops from 8 to four farmers this coming Saturday when Roy, Garnet, Strong, and Jasper head back home to Jamaica.  Can’t get too emotional over their leaving just yet, we have a ton to accomplish before that day- and like most professional farmers do, we will continue to bury our feelings in farm chores: cleaning squash &  bagging potatoes.  But goodness gracious,  they will be missed- and every day until they leave, we will celebrate field crew love via baked goods fresh from the farmstand kitchen. Today it’s carrot ginger muffins. Tomorrow it’s ginger cookies. Thursday, it’s donuts from Jumbo Honey Bun Bakes.  Who knows what Friday will bring- But Saturday, there will be hugs and tears.  

Pro-tips:

Storage heads up: Friends! Are you experiencing refrigerator overwhelm with all this veg?!? Here is a little heads up, if it is a root or an allium or a squash, and you are not eating it tonite, leave it out… maybe even make yourself a cutesy little counter top cornucopia of CSA goods… OR, if you do not anticipate meal making in the next little bit with said allium, root, or squash, do keep in a cold area of your home- but not freezing! MUDROOMS AND GARAGE SPACES are great places to hold veg.  Ray can attest to this, as he often comments on my vegetable hoarding skills as he steps over eurocrates and bushels of beets and onions and squash to enter our house.  You too, can start hoarding your veggies today with your fancy ½ bushel box of baby russet potatoes.  It will keep for a long time if stored correctly- think cool and dry.

Rutabaga… Because it would not be a proper Fall CSA without a rutabaga.  

Let it be known that the rutabaga is by far the least sexy veg.  However there is a case to be made for the rutabaga.  Like turnips, they roast beautifully when chopped, and taste great as a mash.  And people swear by them when paired with pork.  Nigel Slater has tons of great recipes to explore around this root. I highly recommend a google sesh searching “nigel slater” and “swede*” for your rutabaga recipe.  

*swede is another name for rutabaga  

WATERMELON RADISH: What appears to be your everyday root veg on the outside, is actually a ruby diamond on the inside.  Slice in half to be wowed, then proceed to eat.  Great roasted (like you would a beet), shaved thin in salad or crudite’ it up into spears with dip of choice.

CELERIAC (aka celery root): For those that are experiencing this veg for the first time, again prepare to be wowed.  There are sooo many recipes on google for what to do with this alien looking rooty cutie- but the bottomline here, it is a less starchy potato with a hint of celery.  Roast in cubes with salt and pep,  boil to mash, or follow the next recipe below…

Garden keeper's pie is a cozy vegan main course with beets, lentils, herbs, and a creasy celery root topping. Perfect for a holiday meal.

PREP TIME:45 MINS/ COOK TIME:1 HR 35 MINS/ TOTAL TIME:2 HRS 20 MINS/ SERVINGS 4

 FILLING:

1 tablespoon olive oil

1 cooking onion, diced

2 cloves of garlic, minced

1 sprig of rosemary, leaves minced

4 sprigs of thyme, leaves removed and divided

pinch of chili flakes, optional

2 teaspoons balsamic vinegar

5 cups-worth of small diced root or tuber vegetables or squash (I used a mix of butternut squash, carrots & beets)

⅓ cup black or french lentils, rinsed

2 ½ cups vegetable stock

1 teaspoon tamari soy sauce

sea salt, to taste

ground black pepper, to taste

2 teaspoons arrowroot powder

1 tablespoon cold filtered water

 CELERY ROOT MASH:

3 cups peeled and diced celery root

2 cloves of garlic, peeled

1 ½ tablespoons olive oil, plus extra

¼ cup unsweetened non-dairy milk

Notes: These are rough measures, but this isn’t a fussy endeavor by any means. You’re just making one big sauté, thickening it with arrowroot, topping it with a rustic mash and baking it until the whole thing bubbles and browns.

Some cooked beans would fill in nicely for the lentils. Just make sure you throw them in closer to the end of the cooking process.

 Preheat the oven to 400°F. Lightly oil 4 ramekins/cocottes/mini gratin dishes with at least 8 oz/1 cup capacity. Place dishes on a sheet pan and set aside.

 For the filling, heat the 1 tablespoon of olive oil in a large pot over medium heat. Add the diced onion and sauté until very, very soft, about 5 minutes, stirring often. Add the minced garlic, rosemary, thyme, and chili flakes (if using) to the pot and stir. Sauté until the garlic is very fragrant, about 45 seconds. Add the balsamic vinegar and stir. Add the 5 cups of diced vegetables and the lentils to the pot and stir to coat everything in the oil. Season heartily with salt and pepper. Sauté the vegetables and lentils another two minutes or so, stirring often.

Add the vegetable stock and tamari and stir. The liquid should cover all the vegetables and lentils nicely, by about a half inch. Bring the mixture to a boil and then simmer until the vegetables are tender and the lentils are just soft, about 45 minutes. It helps if you place a lid on top of the pot slightly askew, leaving a little gap for air to escape.

When the filling is done, in a small bowl mix together the arrowroot powder and cold water. Scrape this slurry into the pot with the filling and stir to mix it in. Remove the pot from the heat.

For the celery root mash, place the diced celery root and garlic cloves in a medium saucepan. Cover the vegetables with cold water/vegetable stock if you like, and then place the pot over medium heat. Bring the mixture to a boil and then simmer until the celery root pieces are tender, about 15 minutes.

Drain the celery root and garlic, and place it in a food processor fitted with the “S” blade. Pulse the vegetables a couple times to get them moving. Add the olive oil, unsweetened almond milk, and some salt and pepper. Run the motor on high until you have a cream, homogenous mixture. Check it for seasoning and adjust if necessary.

Divide the filling amongst the 4 oiled dishes. Then, divide the celery root mash among the tops of the 4 dishes, smoothing it out with a butter knife or spatula. Drizzle a bit of olive oil on top of each pie and sprinkle with salt, pepper, and thyme leaves. Place the assembled pies back on the baking sheet and slide into the oven. Bake the pies until the filling is bubbling and the tops are very lightly browned, about 20 minutes.

From The First Mess (thefirstmess.com)/ SERVES: 2-3
NOTES: This recipe is so versatile: use any steamed/roasted/grilled/raw vegetables you like, noodles of whatever persuasion you prefer. But the sauce! Please keep the sauce :)

soba:

2-3 portions of soba noodles (I like a 1:1, sometimes 1:2, noodle + veg ratio, but make as much as you prefer)

1/2-1 full bunch of broccoli, cut into florets (save the stalks for green juice or maybe some pesto?)

sauce:

1-2 garlic cloves, grated on a rasp

1 inch of fresh ginger, peeled + grated on a rasp

1 tbsp tamari soy sauce

splash of maple syrup/brown rice syrup

1/2 tsp light miso

hot toasted sesame oil to taste

2 tbsp olive oil

pinch of cayenne or chili flakes

juice of 1/2 a lime

4-5 brazil nuts, chopped + divided

Cook the soba noodles according to package directions. This usually takes anywhere from 8-10 minutes once your water's boiling. Drain them and rinse with cold water. While the noodles are cooking, in a small bowl whisk/stir together the grated garlic, ginger, tamari, maple syrup/brown rice syrup, miso, hot toasted sesame oil, olive oil, cayenne, lime juice and chopped brazil nuts. Add a little fresh ground black pepper if you want. Set aside.

Steam the broccoli to a point you find enjoyable. I like mine still sorta raw-ish, so once the water's simmering in the pot, that steamer basket hangs out for about 3-4 minutes.

Divide the noodles and broccoli among bowls, drizzle the sauce on top, sprinkle the tops with some extra chopped brazil nuts if you like and serve.

FALL CSA WEEK 5

P I C K L I S T

COLLARD GREENS - SWEET POTATOES - OREGANO - PURPLE TOP TURNIPS - LEEKS - ACORN SQUASH - CARROTS - GARLIC - BEETS - MINI BROCCOLINI BUNCHES - LETTUCE 

BREAD: CHEDDAR JALAPENO SANDWICH BREAD (!!!)

Oh Goodness gracious, it is impossible to hide from all this change that is currently brewing.  So much energy around the election, the Lunar eclipse, and now the weather.  On Monday Roy and I were harvesting collard greens in tank tops and the sun felt so hot and so good, and we were both so aware of this extremely fleeting moment.  On Tuesday we all woke up, stepped outside to greet the day and promptly ran back inside to put on 10 more layers, all our woolies, and our neoprene gloves.  We saw this change coming about a week ago in the 10 day forecast. Ever since, we’ve been working hard to accomplish as many outdoor tasks as possible before the hard frosts really sets in.  For example, Carrots are being dug and stored nearly daily.  Turnips also harvested.  And around the farm, the great button up for winter continues. Tasks include pulling rebar from the field, storing remay in bins, cleaning greenhouses, oiling tools, etc….  Also we’ve been thoughtful in what we pick and when.  Allie and I knew this day would come in which we’d be hemming and hawing over late fall harvests while on the 48th bunch of kale and the chill drops right into your bones.  So this week we treated ourselves to harvesting from inside a greenhouse.  Oh it is such a farmers dream!  When temps turn south, you step right in, shut the door, and you are existing in a tropical bubble.  Ray was savvy enough to think ahead about this. While we were still harvesting for Summer CSA back in August, he was seeding, planting and prepping for this moment in which it is waaaaaaay more fun to pick in a toasty greenhouse than the blustery cold.  So on Monday of this week when the sun was hot, we picked all the field veg: collards, oregano, leeks, purple top turnips and on Tuesday we harvested baby broccolini bunches and lazy lettuce from the greenhouse while outside the cold wind blew. 

Pro-tips:

MINI BROCCOLINI BUNCHES: I know! I know! These cuties are too small to base an entire meal off of, BUT they are so dang tasty!  Eat the whole thing, stalk, leaves, flowers, etc! Hopefully by cutting all the plants back we will see a regrowth by the last CSA pick up (fingers crossed)!

Beet and Turnip Gratin Servings 8 by Brandon Matzek

  • 9 tablespoons unsalted butter, divided (1 for the skillet, 8 for the sauce)

  • 4 1/2 pounds mixed beets and turnips (I used red, gold and chioggia beets, peeled and sliced thin crosswise (I used an mandolin)

  • 3/4 cup finely chopped leeks

  • 2 teaspoons minced garlic

  • 2 teaspoons chopped fresh oregano

  • Kosher salt

  • Freshly ground black pepper

  • 3/4 cup chicken stock, preferably homemade

  • 1 tablespoon chopped fresh chives

  1. Preheat the oven to 400°F. Grease a 12-inch cast iron skillet with 1 tablespoon of butter.

  2. Working from the outside in, tile sliced beets and turnips in a rosette pattern. I started with red beets on the outer edge, then gold, turnips, and chioggia. If you don't want to fuss with all of that, check out the note above.

  3. Warm 3 tablespoons of butter in a small skillet set over medium heat. Add shallots and cook until soft, stirring frequently (about 4 minutes). Add the garlic and thyme and cook, stirring constantly, for 1 minute more. Take the pan off the heat, and stir in the remaining 5 tablespoons of butter. Once the butter is melted and incorporated, season to taste with kosher salt and freshly ground black pepper.

  4. Pour the butter-garlic mixture evenly over the prepared beets and turnips, then pour over the chicken stock. Cover the skillet tightly with foil, then bake in the oven for 45 minutes. Remove the foil and cook until the top of the gratin is just starting to brown and get crispy (about 30 minutes). Let the gratin cool for 30 minutes. Sprinkle with chopped chive just before serving.


SERVINGS: 6/ TIME: 4 HOURS, MOSTLY HANDS OFF 

 I was unable to get ham hock or smoked turkey wings the week I made these (in the more unevenly-stocked months of the pandemic) and decided to use bacon (8 ounces thick-cut in 2-inch segments) instead for the smoky flavor. The broth doesn’t have the depth of a broth made with bones, but the flavor was excellent.

  • SMOKY SOUL STOCK2 smoked ham hocks or smoked turkey wings (see Note)

  • 2 medium onions, quartered

  • 4 celery stalks, including leaves, halved

  • 2 carrots, trimmed and quartered

  • 2 garlic cloves, peeled and smashed

  • 1/2 teaspoon black peppercorns

  • 2 bay leaves

  • GREENS AND DUMPLINGS1 1/2 quarts Smoky Soul Stock (above)

  • 1/2 cup chopped onion

  • 1 garlic clove, minced

  • 1 pound collard greens

  • 2 small dried red chile peppers or 1 teaspoon crushed red pepper flakes

  • 3/4 teaspoon salt, plus more to taste (used 2t diamond in greens)

  • Black pepper

  • 1/2 cup all-purpose flour

  • 1 1/2 cups coarsely ground cornmeal

  • 1 teaspoon baking powder

  • 1 teaspoon granulated sugar

  • 2 tablespoons unsalted butter

  • Salt, to taste

Make the Smoky Soul Stock: In a large heavy stockpot, bring 3 quarts water, the smoked meat, onions, celery, carrots, garlic, peppercorns, and bay leaves to a boil. Reduce the heat, and simmer, partially covered, until the flavors are well-blended, about 2 hours. The broth develops a stronger flavor the longer you let it simmer.

Remove the meat from the broth. When cool enough to handle, pull it off the bones (discard the skin, fat, and bones). Chop the meat and reserve for another use. Use a fine-mesh sieve to strain the stock. Refrigerate the stock until the fat floats to the top. Use a slotted spoon to skim off the fat and discard. Store the stock tightly covered in the fridge or freezer.

Make the Collard Greens with Cornmeal Dumplings: In a saucepan, bring the stock, onion, and garlic to a boil over high heat. Reduce the heat, cover, and simmer while preparing the greens.

Thoroughly wash the greens and trim away the stems, if desired. Discard the stems or chop small. Stack 2 or 3 leaves on a cutting board and roll tightly into a log. Slice the greens crosswise into 1/4-inch-wide ribbons. Place the greens and the chiles in the broth and return to a simmer. Cook, covered, for about 1 1/2 hours for very tender greens; you may cook them for less if you have young greens or prefer greens with more chew. Season to taste with salt and black pepper. Spoon out about 1 cup of the potlikker (the cooking broth) and set aside.

Meanwhile, in a small bowl, whisk together the flour, cornmeal, baking powder, sugar, and 3/4 teaspoon salt. In a small saucepan, melt the butter. Add the reserved potlikker, and heat to just below boiling. Remove the potlikker mixture from the heat and whisk half of it (1/2 cup) it into the dry ingredients, and more if needed, 1 tablespoon at a time (I needed almost the full cup to reach a thick batter consistency). Let stand 5 minutes. When cool enough to handle, use wet fingertips (or in my case, a big scoop) to shape the dough into 6 dumplings.

During the last 15 minutes of the collards’ cooking time, carefully drop the cornmeal dumplings into the pot with the greens, making sure the dumplings rest in the potlikker. Cover the pot and simmer until the dumplings are cooked through, 10 to 15 minutes.

Serve the greens and dumplings in bowls with plenty of potlikker.

FALL CSA WEEK 4

P I C K L I S T

RADISH - LETTUCE - BEET GREENS - CELERY - BROCCOLI - SPAGHETTI SQUASH - ONIONS - CARROTS - SWEET PEPPER - POTATOES - DECORATIVE GOURD

BREAD: AUBERGINE BREAD

Today we thank this very kind weather for allowing us to move into Fall harvest and farm clean up with real ease.  Historically, come November, I am deeply buried in layers with fingers freezing.  But not this Fall.  Pooh once told me many many moons ago, that everything you do in winter and Fall is 10 times harder and slower then the same task in Summer.  There is so much truth in that statement.  When the weather drops, farm equipment and trucks take way longer to start, fingers go numb in seconds, and when ice hits, forget about it- it takes 10 years just to walk to the packshed from the greenhouses.  However, this Fall hits like a warm cozy blanket.  

Fall cleanup to us means pulling irrigation, mowing off plants, and making sure cover crop seed is down. We finished the potato harvest last Saturday and lack of Summer moisture left us with less than half of a crop, our lowest yields per acre in the last 15 years. But the crop that is there looks pretty good. We knew the harvest wasn't going to be great when there were few sets of tiny tubers in August (when we usually think about harvesting). Yesterday the crew planted next year's garlic crop (total allium magic), then went and pulled some decent fall carrots while Allie and I harvested in t-shirts and no gloves for today’s CSA- not bad at all for this time of year.  SOAK UP THAT SUN EVERYONE! 

And lastly, as mentioned in this morning's email, Our lead kitchen queen Laura, is now taking Thanksgiving PIE orders through her side baking hustle, JUMBO HONEY BUN BAKES! Everything Laura does is pastry gold- you would be a fool not to seek out and indulge in everything she makes.

FOR MORE INFO ON JUMBO HONEY BUN THANKSGIVING PIE ORDERS, HEAD HERE:

Also, great news for PIE pick up, 

one of the options is in conjunction with the last Fall CSA on Tuesday, Nov. 22nd 4-6pm at our farmstand 

and if you'd rather make your own pie, but still wanna try out and devour all things jumbo honey bun

then head this Saturday, NOV. 5th, to the Reading Greenhouse ART FAIR, 10am-4pm. 

We will be going promptly at 10 for breakie treats, See ya there :)

Pro-tips:

Prep Time 25 mins/ Cook Time 40 mins/ Total Time 1 hr 5 mins/ Servings 4

Lime Peanut Sauce

  • ½ inch fresh ginger, peeled and chopped

  • 2 cloves garlic, chopped

  • 1-2 teaspoons hot sauce of your choosing

  • 2 tablespoons peanut butter

  • ½ teaspoon lime zest

  • 1 tablespoon lime juice

  • 1 tablespoon rice vinegar

  • 2 teaspoons agave nectar

  • 1 tablespoon tamari soy sauce

  • ¼ tsp toasted sesame oil (optional)

  • ½ cup grapeseed oil

Spaghetti Squash Noodle Bowl

  • 1 large spaghetti squash, cut in half lengthwise and seeds scooped out

  • 4 cups thinly sliced kale

  • 4-5 cups broccoli florets

  • ½ small red onion, thinly sliced

  • ½ cup chopped toasted nuts (cashews, almonds etc)

  • 3 tablespoons sesame seeds, toasted

  • ½ cup chopped cilantro or parsley

  • sea salt and ground black pepper, to taste

Instructions

  1. Preheat the oven to 375°F.

  2. Combine all of the sauce ingredients in a blender and blend until fully incorporated. Taste for seasoning and set aside.

  3. Line a baking sheet with parchment and place the squash halves, cut side down, onto the sheet. Bake for about 40 minutes, or until the flesh pulls away in easy strands.

  4. While the squash is baking, place the sliced kale in a large bowl and set aside.

  5. Once you’ve taken the squash out of the oven, set a medium saucepan with about an inch of water over medium heat. Bring it to a simmer. Place the broccoli florets into a steamer basket and drop it into the pot, closing the lid on top. Let the broccoli steam for 3-4 minutes, or until tender. Keep warm.

  6. While broccoli is steaming, scrape the spaghetti strands out with a fork into the large bowl with the sliced kale. The heat from the squash should wilt the kale slightly. Pour a big splash of the dressing into the bowl, season with salt and pepper and lightly toss the squash and kale.

  7. Remove broccoli from the heat. Portion the squash and kale into 4 bowls. Top each bowl with the steamed broccoli, red onions, chopped nuts, sesame seeds, chopped herbs and extra sauce.

Equipment

  • Blender

Recipe Notes

  • Definitely use the sharpest knife you've got for the spaghetti squash. You don't want to be pulling a stubborn knife out of a half-cut squash.

You could also use tahini, almond butter, or sunflower seed butter in place of the peanut butter

MIREPOIX YOUR CARROTS ONIONS CELERY before you make your soups!!

Mirepoix is the magical combination of carrot-onion-celery.  This Is the base of all things delicious- think sauce, stew, soup, stock, etc… These vegetables are diced, cooked for a long time in a fat of your choice on gentle heat without browning- the intention being to sweeten rather than caramelize. Similarly, is Creole version known as the Holy Trinity using onion, celery, and sweet peppers!  As we enter soup season- adopting this holy trinity seems appropriate.  

Many types of cuisine have a term for this way of building a flavor base with chopped and gently sauteed vegetables. The Italians say soffrito, the French say mirepoix, but we can all agree that it creates a subtle but rich depth of flavor in all kind of soups, braises, and more.  Carrot, onion, and celery are the classic players, but there are as many approaches to sweating as there are names. You can chop in a tiny, regular dice or in rougher chunks; you can swap in ingredients on hand in a ratio that tastes right to you. A Manhattan restaurant kitchen I cooked in used fennel in addition to the classics, and cooked each vegetable separately before mixing them together to form a base for a whole array of sauces.

Here are the essential things to keep in mind whenever you're starting a dish with sweating, where the goal is not to make the vegetable flavors assertive individually but rather to set the stage so that starring ingredients added later can shine.

  1. Slow and low heat wins the race. Heat the oil in your pan only enough that it makes the barest sizzle when the vegetables go in, and keep it low. The idea is to soften and flavor the vegetables gradually; they should barely darken in color.

  2. A big pinch of salt draws out moisture quickly and speeds UP the process.

  3. Keep a watchful eye as the mixture cooks; at a certain point it will begin to noticeably darken in color, which will affect flavor. That's not necessarily bad, but depending on the other ingredients in the dish you may want a more delicate or a more intense flavor from the vegetable base.

  4. You'll get much more tenderness and flavor this way vs. adding aromatic vegetables to a soup later. A broth will never go above the temperature of boiling water, whereas low stove heat channeled through a small amount of oil or butter will heat vegetables beyond the boiling point and do more to soften and concentrate their flavor.

It's up to you how long you let your vegetables sweat (or how soon you take mercy on them). But a good handle on the process will go a long way towards letting you consistently reproduce recipes in your own kitchen--and, I suspect, will keep your friends coming back for second bowls of whatever you're cooking up this fall. --Chris Morocco


FALL CSA WEEK 3

P I C K L I S T

JACK O LANTERN - BRUSSEL SPROUTS - LEEKS - POTATOES - JALAPENOS - SWEET PEPPERS - LEMONGRASS - CARROTS - GARLIC - PLUM TOMATOES - SQUASH - MINT

BREAD: OLIVE/ROSEMARY/FETA/ FOCACCIA

Yall.  In an effort to keep the majority of you still showing up to CSA as a result of too many jalapenos, and what the heck do we do with lemongrass, I am moving right into the pro-tips.  But let it be known, that while it is a balmy 70 degrees outside right now (Tuesday afternoon), the temps took a dive this week, the fog did not set, and the farm got frosted.  As a result, please enjoy MAYBE the v last peppers of the season.  Cheers!

Pro-tips:

serves 4

JENNY’S NOTE: I LOVE THIS RECIPE- The flavors are perfect for when the weather turns… but I got bad news in regards to flavors.  With a very heavy heart, I regret to inform you that there will be no fresh ginger making its way to our Fall CSA this year.  For many reasons- many of which are speculations- our ginger crop never really took off.  We do have a little crop growing in a greenhouse, but it is pretty small compared to past years.  However, this dish demands ginger.  Same with Cilantro. If you are a cilantro lover, do source elsewhere… As for the rest: garlic, hot peps, pumpkin/winter squash, lemongrass, mint, we got you. 

A great long ingredient list here, but everything is available in 2 swoops, one right here at CSA pick up, & the next upstreet, at the local Asian grocery (Yipings Asian Market in West Leb)

  • pumpkin - 1 cup  unpeeled weight

  • small red bird's eye chillies - 5

  • garlic - 4 cloves

  • a lump of ginger the size of your thumb

  • plump stalks of lemon grass - 2

  • lime leaves - 6

  • cilantro roots - 5 or 6

  • Cilantro leaves - a large handful

  • a little vegetable oil

  • chicken or vegetable stock - 500ml

  • coconut milk - 1 ¾

  • Plum tomatoes - 4 diced

  • nam pla (thai fish sauce) - 2 tbs

  • the juice of a lime

  • dried noodles - 1 cup

  • mint leaves - a large handful

  • Cut the pumpkin into large chunks and place on the top of a steamer. Or, steam it in a colander over a pan of boiling water. The pumpkin should be tender in 12-15 minutes. Remove from the heat.

  • To make the spice paste, chop the chillies, removing the seeds first if you wish. Peel the garlic and the ginger and chop roughly; put into the bowl of a food processor. Discard the outer leaves of the lemon grass then roughly chop the inner heart leaves, shred the lime leaves and add them to the chillies. Scrub the cilantro roots and cut them off, putting them with the chillies, along with half the cilantro leaves and stems. Blitz them to a pulp, adding a little oil if the mixture needs it to go round.

  • Place a fairly deep pan over a moderate heat, add half the spice paste (keep the other half in the fridge for tomorrow) and fry it, moving it round the pan so it does not scorch. Do this for a minute or two then pour in the stock and coconut milk and bring to the boil.

  • Cut the tomatoes in quarters, and add them with the nam pla and the lime juice. They will take seven to 10 minutes to cook. Add the chunks of pumpkin and continue cooking for a minute or two. Place a swirl of noodles in each of the four bowls, pour over the laksa and add the mint and remaining coriander leaves.


AND IF YOU STILL HAVE LEMONGRASS LEFTOVER: cut & freeze in ziploc to store, add it to chicken broth, or boil for tea :)

½ lb. brussels sprouts, trimmed, halved

¼ cup extra-virgin olive oil

½ tsp. kosher salt, plus more

Freshly ground black pepper

¼ cup Mike's Hot Honey (JENNY’S NOTE: a combo of honey, vinegar, chillies.. Add ingredients together to taste!)

⅓ cup sherry vinegar or red wine vinegar

3 Tbsp. unsalted butter

1 tsp. finely grated lemon zest

Flaky Sea Salt for garnish

  • Place a rimmed baking sheet on bottom rack of oven; preheat to 450°. Toss brussels sprouts and oil in a large bowl; season with salt and black pepper.

  • Carefully remove baking sheet from oven. Using tongs, arrange brussels cut side down on baking sheet. Roast brussels on bottom rack until softened and deeply browned, 20–25 minutes.

  • Meanwhile, bring Mike's Hot Honey to a simmer in a small saucepan over medium-high heat. Reduce heat to medium-low and cook, stirring often, until honey is a deep amber color but not burnt (it will be foamy, that’s okay), 3–4 minutes.

  • Remove from heat and add vinegar and whisk until sauce is smooth (it will bubble up quite aggressively when you add the vinegar before settling). Return saucepan to medium heat, add butter and ½ tsp. salt, and cook, whisking constantly, until glaze is glossy, bubbling, and slightly thickened, 3–4 minutes.

  • Transfer brussels sprouts to a large bowl. Add glaze and toss to combine. Transfer to a platter and top with lemon zest and flaky sea salt.

LEEKS: cut in half lengthwise and Roast with olive oil until brown. Shave fresh parm on top.  That’s it.  Now please do that on repeat forever and ever, you will be elated every time.


JALAPENOS!!! I KNOW I KNOW! There is indeed an overwhelming amount of jalapenos here… But not so overwhelming if pickled!  OOOORRRRR….

FROM BON APP, Makes 26–30

6½ oz. sharp cheddar, preferably orange

½ cup sliced pickled jalapeños

1 cup (125 g) all-purpose flour

½ cup (1 stick) unsalted butter

½ cup whole milk

1 tsp. Diamond Crystal or ½ tsp. Morton kosher salt

¼ tsp. freshly ground black pepper

5 large eggs, room temperature

  • Step 1
    Preheat oven to 425°. Line 2 baking sheets with parchment paper or silicone baking mats. Once you turn on the stove, the dough comes together fast—so get prepared: Grate 6½ oz. sharp cheddar, preferably orange, on the large holes of a box grater. Set 2 Tbsp. aside for sprinkling over gougères later (you should have about 1½ cups left). Finely chop ½ cup sliced pickled jalapeños on a cutting board. Place 1 cup (125 g) all-purpose flour in a small bowl. 
    Step 2
    Cut ½ cup (1 stick) unsalted butter into tablespoon-size pieces. Transfer to a medium saucepan and add ½ cup whole milk, 1 tsp. Diamond Crystal or ½ tsp. Morton kosher salt, ¼ tsp. freshly ground black pepper, and ½ cup water.
    Step 3
    Bring to a simmer over medium-high heat. Reduce heat to medium-low, add flour all at once, then stir vigorously with a wooden spoon until mixture balls up and no spots of dry flour remain, about 30 seconds. Continue to stir with gusto, smacking the dough along the sides and bottom of the saucepan (you’re looking to dry it out without it taking on any color), 3 minutes. You’ll see a film develop on the bottom of the saucepan that will mostly be reabsorbed as you keep stirring. Let cool slightly, 1–2 minutes.
    Step 4
    Continuing with your wooden spoon or switching to an electric mixer, add 4 room-temperature large eggs, one at a time, beating after each addition until fully incorporated (about 30 seconds). Don’t worry if the mixture looks curdled or broken. Separate yolk from remaining 1 room-temperature large egg over a small bowl to catch egg white. Reserve yolk for another use; add egg white to pan and beat until mixture comes together into a smooth, glossy, shiny, and thick batter, 1–2 minutes. Add cheese and jalapeños and stir or beat just until evenly distributed.
    Step 5
    Using a 1½ Tbsp. (#40) cookie scoop or a (heaping) tablespoon, portion scoops of batter onto prepared baking sheets, spacing 1" apart. Sprinkle a little of the reserved grated cheese over each gougère.
    Step 6
    Place in oven and immediately reduce oven temperature to 375°. Bake until super puffy and golden brown all over, 22–28 minutes. Serve warm or at room temperature.


FALL CSA WEEK 2

p i c k l i s t

CORN - GREEN TOMATOES - BRASSICAS - ONION - SWEET CARMEN PEPPERS - HABANADA PEPPERS - 

POBLANO PEPPERS - EGGPLANT - PARSLEY - KALE - SWEET POTATOES - MUMS!

BREAD: HAZEL’S OATMEAL :)

It seems that everyone around us has experienced multiple frosts as we at Edgewater still enjoy eternal Summer harvest courtesy of the blanket of fog that sets in nightly along the Connecticut River.  The fog does a beautiful job in protecting our non hardy crops.  As the fog rolls in, it creates a thermal blanket that traps the heat beneath it, keeping the plants warm.  As a result, our pepper, eggplant, and tomato fields remain green and debatably lively.  That said, production of these crops has slowed down considerably due to the change in light levels and lack of 75(+) degree days.  So we still have cherry tomatoes, but they are very slow to ripen.  This slow to produce feels deeply relatable at this moment in time, anyone else experiencing Summer time burn out? Let’s nod in solidarity shall we?

Hopefully this coming week will be met with much more sleep, kitchen lingering and nourishing food eating, as we gear up for the final Fall harvest push.

In very exciting harvest news, our grandiose potato digger has finally left the barn and is currently enroute to the Windsor plateau field where the majority of our spuds are planted.  Fingers crossed, the potato harvest will begin today!  If you happen to see a wagon of tater tots heading north on route 12A from the covered bridge to River Road in the next week, give a wave and a friendly honk- The driver will most likely be Ray or Mike hauling our spuds from field to farm.

Lastly on farm updates, we finally caught up on weeding perennial crops of strawberries and raspberries and are currently tackling the blueberries.

 And now let’s get into the meal making of it all…

 Pro-tips:

Prep Time 20 mins/ Cook Time 35 mins/ Total Time 55 mins/ Servings 4 -6

Spicy Almond Dressing

  • ½ cup sliced almonds, soaked for 1 hour and drained

  • 2 cloves garlic, peeled

  • 1 tablespoon nutritional yeast

  • ¼ cup water

  • 2 tablespoons olive oil

  • 1 tablespoon white wine vinegar

  • 1 tablespoon lime juice

  • 1 teaspoon Tamari

  • 1 teaspoon maple syrup

  • 1 teaspoon Dijon mustard

  • 1-2 teaspoons hot sauce of choice, or to taste

  • sea salt and ground black pepper, to taste

Kale Power Salad

  • 2 teaspoons nutritional yeast

  • 1 ½ teaspoons garlic powder

  • 1 ½ teaspoons onion powder

  • 1 ½ teaspoons sweet paprika

  • 1 ½ teaspoons chili powder

  • 2 medium sweet potatoes (about 500 grams), peeled and diced into 2-inch pieces

  • 1 350 gram block firm OR extra firm tofu, drained and torn into little pieces

  • 4 tablespoons olive oil, divided

  • sea salt and ground black pepper, to taste

  • 2 tablespoons arrowroot powder

  • 2 tablespoons cornmeal

  • 6 cups chopped kale, lightly packed

  • 1 tablespoon lime juice

  • 1 teaspoon maple syrup

  • 1 ripe avocado, peeled, pitted and chopped

  • 1 small red onion, sliced thin

  • ¼ cup toasted sliced almonds

Instructions

  1. Preheat the oven to 425°F. Line a large baking sheet with parchment paper.

  2. Make the spicy almond dressing. In an upright blender, combine the almonds, garlic, nutritional yeast, water, olive oil, white wine vinegar, lime juice, Tamari, maple syrup, Dijon mustard, hot sauce, salt, and pepper. Blend the mixture on high until smooth and creamy. If it's a little thick and pasty, just add a big splash of water and blend it again. Taste the dressing and check for seasoning, adjust if necessary, and set aside.

  3. In a small bowl, make a little spice blend: stir together the nutritional yeast, garlic powder, onion powder, paprika, and chili powder. Set out two medium bowls. Place the chopped sweet potatoes in one of the bowls and the tofu pieces in the other. Using a clean kitchen towel, really do your best to blot all moisture from the tofu.

  4. Divide the spice blend evenly amongst the sweet potatoes and tofu. Drizzle both the sweet potatoes and the tofu with 1 ½ tablespoons of olive oil. Season both with salt and pepper. To the tofu only, add the arrowroot and cornmeal. Toss the sweet potatoes until evenly coated. Then, using a spatula, toss the tofu bits until evenly coated.

  5. Spread the sweet potatoes and tofu out on opposite sides of the baking sheet. Give each piece as much space as you can. Pop the baking sheet into the oven and roast for 35 minutes, stirring and flipping the pieces at the halfway point. At the end of the roasting, the sweet potatoes should be tender and the tofu bits should be crunchy on the outside.

  6. In a large bowl, combine the kale, remaining tablespoon of olive oil, lime juice, maple syrup, salt, and pepper. Use your hands to massage the kale until it’s slightly tenderized, about 1 minute.

  7. Drizzle the top of the kale with some of the spicy almond dressing. Then top with roasted sweet potatoes, crispy spiced tofu bits, avocado, and red onion. Drizzle more of the dressing on top. Finish the salad with the toasted sliced almonds. Enjoy immediately.

Recipe Notes

  • You can substitute raw sunflower seeds or cashews for the almonds. 

  • I go up to about 1 tablespoon of hot sauce total in my dressing. I like the zing and the hot sauce that I typically use for things like this (Cholula) isn’t overly hot. 

  • If you’re using coconut aminos in place of the Tamari, I would double the amount to 2 teaspoons. 

  • You can substitute cornstarch for the arrowroot.

  • Use the biggest baking sheet you’ve got for the sweet potatoes and tofu. You want to give each piece as much space as you can!

This vegan kale power salad is so satisfying and loaded with flavour. Kale is topped with tender roasted sweet potatoes, crispy baked tofu bits, avocado, red onion, and a super creamy spicy almond dressing that you'll want to drizzle on everything!


Sweet potato bags: Inside you will find unwashed cuties in all shapes and sizes that should be stored in a cool dry place until use.  We left them unwashed for storage purposes, as they keep longer when dirty.


Kale: Yes, you are seeing aphids on the leaves.  Shake off or leave on for extra protein.

Recipe from Atlanta restaurant, THE FLYING BISCUIT

Yield: 4 to 8 servings

Ingredients

6 cups canola oil

4 green tomatoes, medium size

3 cups all-purpose flour (1 1/2 cups of flour reserved for the cornmeal breading mix)

2 1/2 cups milk

2 large eggs

1/2 cup cornmeal

1 tablespoon kosher salt

1 tablespoon celery salt

1/2 tablespoon cayenne pepper

1 tablespoon ground black pepper

1 teaspoon onion powder

Pinch paprika

4 ounces goat cheese

2 cups The Flying Biscuit Cashew Relish

Cashew Relish:

1/3 cup fresh cilantro

2 large red jalapenos

1 1/2 cups cashews

3/4 cup honey

1/3 cup white vinegar

Directions

  • While preparing the dipping process for the tomatoes, heat oil in large pot until the oil reaches 350 degrees F. You will need a slotted spoon to drop the tomatoes into the hot oil. De-core and cut the ends off green tomatoes. Cut tomatoes 1/2-inch thick and set aside in medium bowl.

  • In small bowl, set aside 1 1/2 cups all-purpose flour. In medium bowl, mix milk and eggs to create an egg wash. In large bowl, combine remaining flour, cornmeal and salt. Add celery salt, cayenne, pepper, onion powder, and paprika. This is the cornmeal breading mixture for the tomatoes.

  • Line a sheet pan with parchment paper to place the breaded tomatoes on after final dredging. Begin the dipping process by dredging the tomatoes in the all-purpose flour, then the egg wash, and finally through the cornmeal breading mixture. Repeat this process until all the tomatoes are breaded. Once the oil has reached 350 degrees F, begin frying until golden brown. Tomatoes will float to the top when finished cooking. Drain on paper towels. Garnish with cashew relish and finish with a dollop of goat cheese.

Cashew Relish:

  • Clean and pick cilantro leaves off stems. Cut stems off jalapenos and roughly chop. Combine cashews, chopped jalapenos and cilantro in food processor and pulse until combined. Do not puree, it should be a rustic mix. Pour mixture into bowl, and add honey and vinegar and mix thoroughly.


FALL CSA WEEK 1

P I C K L I S T

CORN - TOMATO - BEETS - POTATOES - GARLIC - ONION - APPLES - WINTER SQUASH -

 CABBAGE - LETTUCE - RADISH - LEMON BALM - HOUSEPLANT -  PEPPER - MELON

Hoorah! Fall CSA is here!  This is the time of year when we begin to exhale after a long season of non-stop growing/picking.  While we are still deep in the harvest phase of our farming season it is approached without the same intensity and fervor as planting season in May, strawberry season in June or Blueberries in July.  Rather, we pause daily to sip on our coffee and occasional donut rather than burn our mouths trying to gulp and go.  There is still much in the ground to pick and store, but with the change in light levels and drop in temps, it is not like anything will be going to seed anytime soon.  However, frozen ground is on the horizon, so we can’t totally hibernate and catch up on the most recent season of Stranger Things just yet.  Other things on the Edgewater shortlist include planting garlic for next season, keeping up with raspberries, harvesting roots, buttoning up fields, rolling up greenhouses, digging potatoes, and eating as many fresh baked cookies made in the farmstand’s kitchen as possible before the kitchen staff goes on Winter Break. 

Pro-tips:

Lemonbalm: make tea! Let leaves steep in hot water- add honey if desired- enjoy.

 LENTIL, CABBAGE, AND FETA SALAD WITH FRIZZLED ONIONS BY LUKAS VOLGER

JENNY’S NOTE: This is a GO-TO recipe in my house- big hit with all.  We never have all the ingredients.  Many times we’ve made this without the lentils or onion- BUT the main players here are cabbage, feta, toasted almonds, fresh herbs, salt, and dressing.  If you can gather those essential foods then chop on and eat up!  Also, the book this recipe is from, START SIMPLE by Lukas Volger (Copyright © 2020 by Lukas Volger. Published by Harper Wave, an imprint of HarperCollins Publishers. Reprinted by permission.) proves to be an excellent harvest eating resource.   

INGREDIENTS:

½ cup brown, black or dark green lentils

Salt

½ medium white or yellow onion

Olive oil

5 cups sliced cabbage

¼ teaspoon sugar

2 tablespoons red or white wine vinegar

2 teaspoons dijon mustard

¼ teaspoon honey

½ cup crumbled feta cheese

1.2 cup coarsely chopped toasted almonds

½ cup parsley leaves or dill fronds

Combine the lentils with 1 cup water and ½ teaspoon salt in a small saucepan.  Bring to a simmer, cover, and cook until tender, 12 to 18 minutes, depending on which lentils you use.  Drain off and liquid left in the pan and allow to cool.

Meanwhile, slice the onion into paper-thin wasps, preferably using a mandolin, or working carefully with a chef’s knife.  Warm about ¼ inch of the olive oil in a small skillet over medium heat.  Dip a piece of onion into it to ensure it’s properly hot- it should sizzle immediately- then add all the onions.  Cook, stirring often with a fork, untl they get crispy and turn a reddish-brown color, 10 to 20 minutes. Watch carefully for the final few minutes, as they burn easily.  Use a slotted spoon to transfer them to a paper towel- lined plate and sprinkle with salt.  SAVE THE OIL!

When the oil has cooled until it’s safe to handle, strain it through a fine mesh sieve or coffee filter to remove all solids into a glass jar (I use a 3-inch strainer for this task).

Toss the cabbage, ½ teaspoon of salt, and the sugar in a colander and let soften for 15 to 30 minutes, then gently press with a spatula to drain off excess liquid.  

Combine the vinegar, mustard, and honey in a jar, along with the 3 tablespoons of the cooled onion-cooking oil.  Shake to emulsify.  

Fold the cabbage, lentils, cheese, almonds, and parsley leaves with most of the dressing in a serving bowl.  Taste and add more dressing if needed.  Pile the frizzled onions on top, tossing them into the salad at the table it’s being served.  


NOTE ON YOUR CORN: This stuff is not  the freshest, but ideal for soups, read on for soup inspo…

Prep Time 25 mins/ Cook Time 30 mins/ Total Time 55 mins/ Servings 6

Ingredients

  • 1 tablespoon olive oil

  • 1 medium yellow onion, chopped

  • 1 teaspoon paprika

  • 2 sprigs fresh thyme, leaves minced

  • 1 lb potatoes, scrubbed and diced into 1-inch pieces

  • 1 ¾ cups cooked white beans, drained and rinsed

  • sea salt and ground black pepper, to taste

  • 1 hot pepper/chili of choice, minced (see notes)

  • 1 clove garlic, minced

  • ½ cup beer (I used Muskoka Brewery Harvest Ale)

  • 5 cups vegetable stock (See notes!)

  • 5 cups corn kernels, scraped from about 5-6 cobs of corn

  • ¼ cup fresh lime juice

  • ½ cup roughly chopped fresh cilantro

Instructions

  1. Heat the oil in a large soup pot over medium heat. Add the onions and saute until soft and translucent, about 5 minutes. Add the paprika and thyme and stir. Add the potatoes and stir to coat in the spices. Add the white beans, season everything with lots of salt and pepper, and stir.

  2. Add the chili and garlic to the pot and cook until fragrant, about 30 seconds. Slowly pour in the beer. Let it froth up and then gently stir. Bring the beer and vegetables to a boil. Then, add the vegetable stock to the pot and give it another stir.

  3. Cover the pot and bring the chowder to a boil. Reduce the heat to a strong simmer and let the soup cook, covered, until the potatoes are completely tender, about 15-17 minutes.

  4. Once the potatoes are tender, add the corn and continue to simmer the chowder until the kernels are cooked and slightly soft, about 5 minutes. Then carefully ladle half of the hot chowder into an upright, vented blender (like a Vitamix). Turn the blender on and slowly bring the speed up to high. Blend the harvest corn chowder until creamy and smooth, about 40 seconds.

  5. Return the blended portion of the chowder to the pot and stir to combine. Stir in the lime juice as well. Check for seasoning at this point and adjust if necessary. Serve the harvest corn chowder hot with chopped cilantro on top and extra black pepper.

Equipment

  • Blender

Recipe Notes

  • I blend half of this chowder to give it a creamy texture, but if you’d like yours to be SUPER creamy, throw a handful of soaked cashews into the blender as well.

  • I used a freakishly hot banana pepper from my garden here. A jalapeńo would be amazing!

  • If I know that I’m making corn chowder, I like to simmer some really good homemade vegetable stock with scraped corn cobs beforehand. If you only have time for boxed stock, just give it a boil with the scraped cobs for 20 minutes or so. It will still make a difference!

  • If you avoid alcohol, just use more stock and add a touch more lime at the end.

  • Corn and potatoes are starchy and need lots of salt and acidity to come alive. Season liberally!

Vegan harvest corn chowder is made hearty with white beans and flavourful with beer, lime, hot peppers, and cilantro. So cozy and delicious.

CSA WEEK 17

p i c k l i s t

PARSLEY - REDBOR KALE - SHISHITOS PEPPERS! - HABANADAS PEPPERS! - CAYENNE PEPPER! - JALAPENO PEPPER! - BEETS - BUTTERCUP WINTER SQUASH - CARROTS- HEIRLOOM FIELD TOMATOES - CORN - ONION - GARLIC

Content Warning: this newsletter talks about food, if you are fasting in recognition of the holiest day of the Jewish Calendar, then please feel free to pause until tomorrow…. Ok?

And now let’s get into it: our Summer CSA ends this week! What in the world are we all supposed to eat after this week’s goodies run out? Cereal?! Hot dogs? Nightly takeout from Brownsville Butcher and Pantry? JK, As you all know our Fall CSA begins in a week, so this is certainly not the end of fresh veg for those that signed up.  In fact for many of you, the fun starts next Wednesday (first FALL CSA!) when our efforts go into filling the farmstand with towers of brussel sprouts, bins of onions, trays of greens and if you are smart and gluten friendly- a fresh warm loaf of bread (via add on bread share).

  And as for the fields this week, they did get a light frost two nights in a row.  Some plants are toast but the majority remain and they will continue to kick around until a deep kill frost hits and the fog breaks.  Truthfully, none of us expect the peppers, corn, and cherry tomatoes to stick around much longer, but while they are here, we will love them dearly and pick them with pretend Summer delight.  The brassicas and other greens have no problem with these cool temps, and we have enough greenhouses growing food to keep our bellies full and happy through the Winter Solstice (and beyond?).  

In other field topics, we are all impatiently waiting for the tops on the potatoes to properly dry so we can begin to dig the spud field using our fave large piece of equipment, the potato harvester- this will save an insane amount of time.  We are all a little sick of hand digging and our fingernails could use a break.  For real, the pain of hitting your finger nail into a potato while digging into the soil is a shock to the system for daaaaays.  

But the most pressing topic to really hit today is all the food we ate together these last 17 weeks.  From strawberries in June, to blueberries in July and Melon into the end of September.  We ate like kings and queens! And come January, I guarantee you, the onslaught of Equinox peppers will be missed as you sip on your dried tulsi tea.  Moreover, a huge shout out to all CSAers near (farmstand pick up!) and far (Eastman! The Studio! Novo Nordisk! Windsor! Brownsville!).  I don’t know what the CSA means to you- is it just groceries? Is it more? But for me, the CSA gives my every week real meaning and rhythm.  With the help of so many awesome hands and fellow farmers (Ray, Roy, Garnet, Claire, Denroy, Carlington, Tim, Jasper, Strong, Joe and Mike, Mrs. T and Pam), I get to curate your meals from a field! That is a huge honor and I do not take it lightly.  And bottomline here, a massive cheers to you all for taking a chance on Edgewater this season, and I do hope to check in with you all again in the not too distant future.  

Peace, Love, and Habanadas, Jenny

Pro-tips:

 KALE SALAD WITH ROASTED SQUASH AND FENNEL

FROM START SIMPLE

(the above book is absolutely my go to for nearly all meals, treat yourself:

Copyright © 2020 by Lukas Volger. Published by Harper Wave, an imprint of HarperCollins Publishers. 

 The dressing - a mix of maple syrup, lemon juice, and olive oil, plus an optional jolt of ginger- could make anything taste good, and the salad, with its autumnal profile, works just as well in holiday menus as it does in packed weekday lunches… Add some crumbled feta if you’d like a tangy creamy element.

 2 cups winter squash cut into bite size pieces

1 to 1 ½ tablespoons maple syrup or honey

3 tablespoons olive oil, divided

2 teaspoons finely grated ginger (optional)

Salt & pepper

1 small fennel, cored (also optional!)

2 tablespoons fresh lemon juice

1 large bunch of kale (stemmed and torn into bite size pieces

¼ cup crumbled feta cheese (optional)

Parsley, (chopped)

Preheat the oven to 425.  Spread the squash on a baking sheet, then toss with 1 ½ tablespoons of the olive oil and sprinkle with a big pinch of salt and pepper.  Roast until tender, 15-20 minutes, stirring once or twice.  Cool.

Whisk together the remaining1 ½ tablespoons of olive oil, the lemon juice, maple syrup or honey, and ginger, if using, in a serving bowl.  Cut the fennel (if using) into thinnest-possible shavings, preferable using a mandoline or, if not, a very sharp knife.  Add the fennel and squash to the bowl with the dressing and stir to coat.  Let stand for about 5 minutes, which will soften up the fennel, then add the kale and toss with your hands.  Top with cheese if using and chopped parsley!

Grounding roasted roots with herbed jalapeño yogurt sauce is a beautiful and simple side dish that features a delicious sauce.

PREP TIME:15 MINS/ COOK TIME:1 HR/ TOTAL TIME:1 HR 15 MINS/ SERVINGS 4 -6

ROOTS:

  • 1 lb carrots (5 medium), peeled and chopped into 2-inch pieces

  • ½ lb beets (3 medium/4 small) peeled and chopped into 1-inch wedges

  • 1 tablespoon olive oil

  • 1 ½ teaspoons za’atar spice

  • sea salt and ground black pepper, to taste


YOGURT SAUCE:

  • 1 cup mixed herbs, packed (I used parsley, dill & basil), plus extra for garnish

  • 1 small jalapeño pepper, seeded and chopped (I left some of the seeds because I like the heat)

  • 1 garlic clove, peeled

  • 2 tablespoons shelled and salted pistachios, plus extra for garnish

  • 2 tablespoons olive oil

  • 1 tablespoon lemon juice

  • sea salt and ground black pepper, to taste

  • 1 cup thick non-dairy yogurt (see notes for recommendations)

Notes

  • I would make this a meal by serving it in a grain bowl-style setup with some cooked farro, white beans, and a big handful of chopped/baby greens per person.

  • I used carrots and beets, but any mixture of root vegetables you like is good. You’ll need 1 ½ pounds.

  • If you don’t have za’atar spice blend, that’s fine! Just use salt and pepper. The sauce is super flavourful.

  1. Preheat the oven to 375°F. Line a 9x13x2 baking dish with parchment paper.

  2. Place the chopped carrots and beets in the baking dish and toss them with the olive oil, za’atar, salt and pepper. Once the vegetables are evenly coated, spread them out into a single layer and slide the dish into the oven. Roast the vegetables for 1 hour, taking them out at the halfway point to stir them up and flip them over.

  3. Make the herbed jalapeño yogurt sauce: In a food processor, combine the herbs, jalapeño, garlic, pistachios, olive oil, lemon juice, salt, and pepper. Pulse the machine a few times until everything is finely chopped, scraping down the sides of the bowl with a spatula  if necessary. Add the non-dairy yogurt to the food processor and pulse until the sauce is fully combined and uniformly light green. Check the sauce for seasoning and adjust if necessary.

  4. To serve: Spread the herbed jalapeño yogurt sauce out on the base of your serving plate. Pile the roasted root vegetables on top of the yogurt sauce.

  5. Garnish the grounding roasted roots and herbed jalapeño yogurt sauce with extra chopped herbs and pistachios. Serve warm or at room temperature.


Corn!

Heads up yall, this corn was picked on Saturday pre-frost as a just in case frost precaution.  It’s great for soups or freezing for winter!  

To freeze: blanch in boiling water, let cool, remove kernels, put in zip lock bag, and freeze!

CSA WEEK 16

P I C K L I S T

LEMONGRASS - RED KURI WINTER SQUASH - LEEKS - PLUM TOMATOES - CORN - COLLARD GREENS - WATERMELON - SWEET CARMEN PEPPERS - HABANADA PEPPERS - CAYENNE PEPPER

Since last week, everything has changed.  The equinox brought the real start of Fall and today it seems the trees are truly catching up.  Hot coffee is brought to the fields every morning in part for drinking but mostly to warm-up hands in between harvests.  But what I am really here to report on today is all the badassery that is being produced through our farmstand kitchen.  Made on site, utilizing all crops from the fields- and a couple of bought in staples- the farmstand crew lead by Laura Richardson has been pumping out all the eats to get us through both the daily veg pick (hello ginger cookies!), late afternoon lunches (tabouli! German potato salad! Carrot hummus!) and future winter meals (soups! Casseroles! Spreads! etc!). 

The freezers found in the farmstand are currently stocked with all these goods for sale. Right now is the time to head over and load up on the most delicious frozen meals and treats for your own later eating.  Our Farmstand closes for the season on Sunday, October 9th, so we all have 11 days to clean out our pantries and freezers, and make room for all your just bought Edgewater treats.  You can thank me for this major meal heads up in February when you are jonesing for reminders of Summer :)

Pro-tips

 (JENNY’S NOTE: yes this is a repeat lemongrass write up from previous CSA seasons, but it's pretty useful to read up on if you are a newbie CSAer and this is your first experience with lemongrass.  If anyone is curious what I will be doing with my lemongrass this week, I intend to add it to a massive batch of bone broth and chop the rest into 2 inch pieces to freeze for later broth/tea/curry/etc…)

As its name suggests, lemongrass is a grass with botanical origins that stretch across South and Southeast Asia, from India and Sri Lanka to Indonesia and the Philippines… Used whole, chopped, or pummeled into a paste, lemongrass adds a light but complex flavor and aroma—simultaneously lemony (hence the name), gingery, and floral—to sauces, soups, and meats.

In some parts of the world, lemongrass is also treasured for its health benefits. When brewed into a tea, the plant is considered an immunity-boosting treatment for a wide variety of ailments including gastrointestinal distress, fever, and asthma.

How can you use it? In South and Southeast Asian cooking, lemongrass commonly conspires with ingredients like garlic, galangal (and/or ginger), cilantro, Thai basil, shallots, lime leaves, and coconut milk to create bold, complex flavors.

To prepare lemongrass, start by peeling the stiff outer leaves away from the stalk to reveal the slightly softer underlayers. Slice the grass in two spots, about half an inch from the root and approximately three inches up, where the whitish color begins to turn green.

The pale lower section of the lemongrass is the meatiest bit. Even so, it must be sliced thin and then finely chopped, pounded into a paste with a mortar and pestle, grated with a box grater, or tossed in a food processor so that it isn’t too tough to chew. This is frequently how lemongrass is used in Cambodian cooking, Yun says, especially in the preparation of the spice paste kroeung.

Lemongrass is often finely chopped or pounded in order to break down the tough stalks.

But while only the lower bulb of the lemongrass stem is edible, every portion of the stalk has a role to play in the kitchen. The fibrous upper section of the stalk is full of tons of lemony, gingery goodness. To release the flavorful oils, both Yun and Payumo like to bash or flatten the lemongrass stalk with a cleaver or the side of a large knife. Payumo will also sometimes bend the stalk back and forth a few times instead of smashing it to release the oils.

Fresh lemongrass stalks work best in dishes like soups and slow-roasted meats that simmer for long periods of time. In Filipino cuisine it’s commonly stuffed inside whole pigs or chickens and then roasted, Payumo says. Extensive simmering or roasting is also the best use for dry lemongrass, which rehydrates as it cooks. Like with bay leaves, remove the lemongrass stalks from the dish before serving. 

How should you store it? If you store it right, lemongrass will pretty much last forever. Wrapped loosely in a towel, the stalks will stay fresh and flavorful for a few weeks in the fridge. Otherwise, they’ll do just fine in the freezer, either uncut or pre-prepped. Try portioning minced, pounded, or grated grass into an empty ice tray for no-fuss future use. Dried and powdered lemongrass should be kept in sealed containers and out of the light.

Now go smash, slice, and pound away. You may not be getting to South or Southeast Asia this year, but with your new lemongrass skills, at least your culinary skills will permit you to imagine.

A good corn soup is creamy and naturally sweet; an even better corn soup is spicy, refreshing and addictive. In this recipe, it’s the combination of shallots, garlic, ginger, chiles and coconut milk, rather than heavy cream or butter, that makes the soup at once cooling and rich. It’s a dinner in a bowl (and a vegan one at that), but it would surely welcome a side of steamed rice or salad of leafy greens. To serve, add garnishes that are any combination of spicy (extra fresh chile or store-bought chile oil), crunchy (toasted coconut, chopped peanuts or cashews, fried shallots) or fresh (torn cilantro, chopped scallions), and it’ll be even more dynamic.

  • 4-5 ears yellow or bicolor corn (or 5 cups frozen corn kernels)

  • 2 tablespoons olive oil

  • 2 shallots (or leeks!), thinly sliced into rings

  • 3 stalks lemongrass cut into 2 inch long pieces

  • 3 garlic cloves, minced

  • 1(1-inch) piece ginger, peeled and minced

  • 1 serrano chile (or other chile), minced

  • 2 small red potatoes (6 to 8 ounces total), cut into ½-inch cubes

  • 2 ½cups vegetable broth (or 2½ cups of hot water whisked with 1½ teaspoons jarred bouillon)

  • 1(15-ounce) can full-fat coconut milk

  • 1 tablespoon lime juice (from ½ lime)

  • Kosher salt, to season

  • Torn cilantro leaves, toasted coconut flakes, chopped roasted peanuts, crispy fried shallots, lime wedges and more sliced Serrano chiles, to serve (optional)

Step 1
Cut the corn kernels off the cobs and transfer to a bowl. Using the back of a butter knife, scrape the cobs so that all of the milky juices collect in the bowl and the cobs look completely dry, like wrung-out sponges. Set aside. (If using frozen kernels, skip this step.)

Step 2
In a large stockpot over medium heat, heat olive oil. Add shallots (or leeks), garlic, lemongrass, ginger and chile, and sauté, stirring occasionally, until soft and fragrant, 3 to 5 minutes. Add corn kernels and juices to the pot, and sauté until the corn is softer and brighter, about 3 minutes more.

Step 3
Add potato pieces, and stir to coat, 1 to 2 minutes.

Step 4
Now, pour in the vegetable broth and coconut milk. Bring to a boil, reduce to a simmer, cover, and cook for 8 to 10 minutes, until the potatoes are tender all the way through. Remove the lemongrass stalks.

Step 5
Use an immersion blender to roughly purée the soup, so that it’s creamy with some kernels of corn, chunks of potato, and chile flecks remaining. (Alternatively, ladle about half of the soup into a blender, blend until smooth, and return to the pot.) Season with lime juice and salt, and mix to combine. Ladle soup into bowls and garnish with toppings of your choice.


CSA week 15

p i c k l i s t 

CHERRY TOMATOES  - CARMEN PEPPERS - LUNCH BOX PEPPERS - POBLANO PEPPERS - 

SHISO - SOY BEANS (EDAMAME) - CORN - CAULIFLOWER

Between the big bunch of soybeans (edamame), the insane abundance of peppers, and shiso, I am going to to go hard on the pro-tips section so yall don’t feel overwhelmed by the influx of “wtf do i do with all of this (fill in the crop)” thoughts.  

But let it be known that in farming this week, we continued to be thankful for the rain while also wondering where it's been all Summer.  Feels like a real slap in the face to May, June, July, August and all the crops that could have been.  

The Fall equinox is so near (tomorrow!) and the weather is dipping right down. We had our first below forty degree night since May. While I still believe we are a while until we catch a kill frost, these cold nights prioritize how we manage what we pick. The new plan is to wrap up the winter squash harvest, keep up with our colored peppers, and bean plantings and pick a ton of corn. Those being the larger acreage crops that will only tolerate a light frost. We still have plenty in the ground - think roots crops: potatoes, carrots, beets- that are much more rugged and we will continue to harvest those until hard frost and the ground freezes- FALL CSAers, get so pumped- you will be spoiled with all the hearty roots to come.

Pro-tips:

SHISO Butter (To smother on your corn!)

2 tablespoons extra-virgin olive oil

5 medium shallots (or onions) (thinly sliced)

¼ cup soy sauce

14 medium shiso leaves (coarsely chopped (about 2/3 cup) or 1 tablespoon chopped tarragon)

1 teaspoon crushed black peppercorns

1 stick unsalted butter (4 ounces softened)

 In a medium skillet, heat the olive oil. Add the shallots or onions and cook over moderate heat until softened and lightly browned, about 10 minutes. Add the soy sauce and simmer until evaporated, 2 minutes; let cool.

In a bowl, mix the shallots, shiso leaves and peppercorns into the butter. Transfer to the refrigerator- spread on corn/toast/seafood/steak as needed

 If making a large batch and storing in the freezer:

parchment paper

air tight containers that are freezer safe

 For storing in jars

  • vinegar (plain, balsamic, white/red wine, or apple cider)

  • mineral salt

  • olive oil

  • clean pint sized mason jars

PREPPING PEPPERS:  There are two ways to prepare your peppers for roasting:

  • 1. Simply roast the whole pepper, seeds, stem and all. (This will work with all roasting methods.)

  • 2. Slice the peppers in half lengthwise, remove the stem and seeds, and place on the baking sheet cut side down. (Use this method for the oven method and/or when using a baking sheet. These peppers require no flipping, only rotating of the baking sheet. This is my favorite way of roasting peppers.)

 ROASTING METHODS:

Oven: Preheat oven to 475 degrees F. Line a baking sheet with parchment.

Place peppers on baking sheet. Bake 4 – 5 inches from the flame. If using an electric oven or there is no flame, place baking sheet on the middle rack. Roast peppers for 40 minutes, turning at least once during cooking using sturdy tongs (if peppers are sliced in half no need to turn, just rotate the baking sheet 180 degrees). They are ready when charred/blackened and blistered. Whole peppers will still be full of air and puffy once removed from the oven. As the peppers cool they will deflate and become wrinkly looking. 

Broiler: I used to have an oven where the broiler was underneath the oven, now mine is in the oven. Either way, turn broiler to medium – high (or 500 degrees if yours is by numbers) and char peppers turning every so often until browned and blackened. If you’ve prepped your peppers by slicing in half, no need turn the peppers, simply adjust the baking sheet turning it to get all the peppers charred. This may take anywhere from 15 – 25 minutes.

 Open Grill: Place whole peppers on their sides over an open flame on the grill, turning every now and then until nicely charred all over. Depending on how big your grill is will determine how many you can do at one time.

Stove Top: If roasting just 1 or 2 peppers, you can roast it over the gas burner of your stove (I suppose you could do 4 peppers utilizing each burner). Place pepper on its side and adjust the flame so it ‘licks’ the peppers. Keep an eye on it and turn it as needed to blacken and char, about 15 – 20. This tends to be a more time consuming method since you have to be so watchful.

From here use right away to make hummus, romesco, soups, layer on sandwiches and toss in salads, etc.

STORING:  

Refrigerator: Great for short term storage. Keep leftovers in an airtight container in the refrigerator for up to 5 – 6 days.

If you coat them with a little oil they will last for a couple of weeks. You can even add some of the pepper juices to the container.  To always be safe, at the first sign of mold or spoilage, throw it away immediately. 

If storing for longer, you have a couple simple options:

Freezing: This is my favorite method of long term storing, as it is not blended with any other flavors, it’s super easy to do, and they thaw out amazingly well.  Freeze your peppers in a tightly sealed container. They thaw out pretty fast once removed from the freezer making this a nice way of preserving your precious peppers.

Vinegar Method: This method will leave your peppers with a little bit of tang from the vinegar, in some cases it may overpower them, but it’s a great way to store them. Use these peppers for sauces, dips, and soups.

Place peppers in a jar with a little salt, vinegar and pepper juices.  To do this you’ll want to sprinkle your peppers with a generous pinch of mineral salt and mix well.  Place 1/2 inch of vinegar at the bottom of your pint sized mason jar, add peppers leaving about 1 1/2 inches headspace.  Using the handle of a spoon or fork, poke along the inside edges of the jar to release air bubbles (this is important), pour reserved pepper juices over top so peppers are completely covered, leaving 3/4 inch room.  Add about 1/8 inch of olive oil over top to keep air out, leaving 1/2 inch headspace.  Seal and place towards the back of the refrigerator. Will be good for up to 2 months, maybe even a little longer.  If you see any sign of mold or spoilage, throw away immediately!

By Setsuko Yoshizuka

1 pound unshelled edamame

2 tablespoons kosher salt, more to taste

Bring a large pot of water to a boil, then add the salt.
Add edamame to the boiling water and boil for 4 to 7 minutes, or until softened.

Drain edamame in a colander. Taste 1 bean, and if it's not salty enough, sprinkle more salt over boiled edamame.
Spread the edamame on a flat tray to cool. Serve chilled.  Edamame can also be served at room temperature. If you are going to add more salt, make sure it's a coarse sea salt or kosher salt.

 How to Store and Freeze Edamame: Cooked edamame will keep in the refrigerator for about four or five days. You can also freeze the edamame after you've cooked it. Freeze in a zip-close bag and thaw in the refrigerator when you're ready to eat it.


CSA WEEK 14


p i c k l i s t

 CHERRY TOMATOES  - FLAT LEAF PARSLEY - SWEET CARMEN PEPPERS - 

CORN - ONION - GREEN BEANS - EGGPLANT - KALE - SHISHITO PEPPERS!

This week we are dealing with the good (your kale), the bad (aphids on the kale), and the ugly (it’s just not that cute).  However, the aphids (the tiny white and green bugs for those that are unfamiliar) don’t really do MUCH damage to the kale nor do they modify the taste, so they are not a huge concern to us farmers.  We will not lose an entire crop because of them.  But you, the eater of the kale might be thrown off by a tiny colony making home in your food.  If that is the case, wash your greens OR tear off the piece of kale with tiny aliens living in it, and carry on with your meal making. Another not so super cute look this week involves your green beans.  They are good and delicious BUT some of them are marked with what looks like rust.  This is due to plant density and often happens towards the end of a green bean plant’s life cycle.  Bottomline here, this green bean plant gave their all from sprout to harvest, and we are the lucky eaters along the way.  Let us consider this rust a mark of age and prestige.  

Other news from the week: we finally wrapped up our onion harvest which amounts to about half a normal sized crop for us.  We celebrated this - not even close to a- victory with our field crew and after hour beers on Saturday night on our front porch underneath the most brilliant harvest moon.  Three of our eight greenhouses we set aside for Fall CSA have been planted up with all sorts of green things- lettuce, kale, chard, asian greens, herbs, etc- all to balance out the bounty of root crops that lie ahead.  Oh, and my favorite update from the week came about while picking cherry tomatoes in which I learned ALL ABOUT the MacDonald’s Farmers Almanac (not to be confused with the Ronald variety).  This is a book that is heavily leaned on by the Jamaican farmers on our crew.  The book guides you through the growing season by using the moon as a tool for when and what to plant.  For example during a full moon in September, you harvest your carrots, during a new moon in June, you seed your beets.  Roy, a long time farmer that splits his time between here at Edgewater and back home in Jamaica, has a few employees working for him in Jamaica.  Because he is not there from May-November, he uses the Almanac to guide his decisions.  So far so good he says.  He has been looking to Macdonald’s (but actually the moon) for farming guidance for over 20 years now.  So awesome to learn about this practice, and maybe it’s not a bad idea to look to the moon for guidance as it is such a constant! Not to mention the force it has on tides and birth!

Lastly, I’m already looking forward to next week’s CSA when we begin to harvest our soybean planting (hello edamame!)

Pro-tips:

Yield: 4 servings

  • 2 cloves garlic, crushed

  • 2 teaspoons ground cumin

  • 2 teaspoons ground coriander

  • 1 teaspoon chili flakes

  • 1teaspoon sweet paprika

  • 2 tablespoons finely chopped preserved lemon peel (available in stores)

  • ⅔ cup olive oil, plus extra to finish

  • 2 medium eggplants

  • 1cup fine bulgur

  • ⅔ cup boiling water

  • ⅓ cup golden raisins (optional)

  • 3½ tablespoons warm water

  • 2 teaspoons parlsley, chopped, plus extra to finish

  • 2 teaspoons mint, chopped

  • ⅓ cup pitted green olives, halved

  • ⅓ cup sliced almonds, toasted

  • 3 green onions, chopped

  • 1½ tablespoons freshly squeezed lemon juice

  • ½ cup Greek yogurt (optional)

  • Salt

  1. Preheat oven to 400 degrees.

  2. To make the chermoula, mix together in a small bowl the garlic, cumin, coriander, chili, paprika, preserved lemon, two-thirds of the olive oil, and ½ teaspoon salt.

  3. Cut the eggplants in half lengthwise. Score the flesh of each half with deep, diagonal criss cross cuts, making sure not to pierce the skin. Spoon the chermoula over each half, spreading it evenly, and place the eggplant halves on a baking sheet, cut side up. Put in the oven and roast for 40 minutes, or until the eggplants are completely soft.

  4. Meanwhile, place the bulgur in a large bowl and cover with the boiling water.

  5. Soak the raisins in the warm water. After 10 minutes, drain the raisins and add them to the bulgur, along with the remaining oil. Add the herbs, olives, almonds, green onions, lemon juice and a pinch of salt and stir to combine. Taste and add more salt if necessary.

  6. Serve the eggplants warm or at room temperature. Place ½ eggplant, cut side up, on each individual plate. Spoon the bulgur on top, allowing some to fall from both sides. Spoon over some yogurt, sprinkle with parsley and finish with a drizzle of oil.


GARLICKY NIGELLA GREEN BEANS From Eden Grinshpan’s book EATING OUTLOUD

serves 4

1.5 teaspoons kosher salt, plus more for boiling water

1 pound green beans trimmed

¼ cup extra virgin olive oil

1 tablespoon nigella seeds or sesame seeds, lightly toasted (or no seeds at all- this will still be insane)

1 large garlic clove, grated

Grated zest of 1 lemon

Juice of ½ lemon

 Bottomline, a quick and easy way to demolish these beans and obsess over how good…

 Bring a large pot of salted water to a boil.  Add the green beans and cook until just tender, about 1 minute.  Drain and transfer the beans immediately to a serving bowl.  Toss with the salt, olive oil, nigella seeds, garlic, lemon zest, and lemon juice and serve warm.


One big ass kale salad

I need yall to know that all week I’ve been eating one big ass kale salad, and you should too! KEEPS FOR DAAAAAAYS!  All you need is your big old bunch of kale, Olive Oil, lemon juice, honey, feta, salt, pepper and minced garlic.  Add everything to taste, massage together for a few minutes to break down the kale and, VOILA! Lunch after lunch after lunch until gone :)

CSA WEEK 13

P I C K L I S T 

CHERRY TOMATOES  - PLUM TOMATOES (4.5 LBS!) - SWEET CARMEN PEPPERS - POBLANO PEPPER - 

CORN - LETTUCE - FENNEL - GREEN BEANS - GARLIC - THAI BASIL -

HERBY BOUQUET! (THYME, OREGANO, PARSLEY)

We- plants and people- are all totally mesmerized by the rain received on Monday and Tuesday.  For the first time this season, the ground is sufficiently soaked, the crops are sufficiently quenched, and all we can say over and over is, Hallelujah!  By the time you read this Wednesday afternoon, the world will certainly appear more saturated with color and your eyes may have already adjusted, but from where I sit on this Tuesday afternoon, I'm already daydreaming about the Wednesday morning, fog lift and big reveal. Ooooh la la!

A note about your box, it’s giving East meets West.  With Thai Basil, Garlic and green beans, you could easily throw together a stir fry or curry- and the CSA this week was meant to build around that.  But then plum tomatoes begged to be picked and there was NO looking back.  Enter a nearly 5 pound bag of plum tomatoes and a bouquet Garni of parsley, oregano and thyme to complement.  So get your ball jars ready, preheat that oven and while it warms, make yourself a curry to fuel you for the next 10 hours.  Below you will find tips on saucing and canning said tomatoes.  Take note, hang this newsletter on your fridge and refer to it often as you slice, roast, and jar all the things.  

In other news this week, we continued with the onion harvest that remains ok at best.  Post onion pick, we cruised up the hill to the pumpkin field and holy smokes, they look soooooooo goooooood! Extra o’s included to emphasize the beauty of it all.  Last year our crop did not make it, so it feels so wonderful to see these bushy cucurbits fruit up and grow proper pumpkins and squash.

Pro-tips:

 MOM’S TOMATO SAUCE (FROM MY FAVE CANNING COOK BOOK,  TART AND SWEET)

1 Tablespoon olive oil

about 3 pounds of tomatoes chopped 

1 medium onion, chopped

3 tablespoons tomato paste

½ green bell pepper, chopped

2 tablespoons white wine

½  red bell pepper or 1 full carmen pepper, chopped

1 teaspoon brown sugar

3 cloves of garlic, sliced or minced

kosher salt and pepper to taste

½ pound ground pork sausage (totally optional)

3 tablspn chopped herbs (oregano! Thyme! etc!)

10 fennel seeds

  Heat the oil in a large saucepan over medium heat. Add the onion (or leeks), peppers, and garlic.  Cook until the vegetables are soft, about 6 minutes.  Add the pork and cook, breaking up the meat until it no longer shows pink, about 4 minutes.  Strain the grease if necessary.  Add the fennel, tomatoes, and juice, tomato paste, wine, brown sugar, salt, and pepper.  Simmer for 15 minutes.  Add the herbs and simmer for another 15 minutes, adjusting heat as needed.  Freeze in yogurt containers (leaving head space for liquid expansion) to enjoy all winter. Don’t add the meat and can in jars! (see canning instructions below)


BY Marisa McClellan

I’m elbow-deep in roma tomatoes at the moment, but wanted to drop by with a few words on one of the ways I’m preserving these scrumptious gems. Long, slow roasting in a 200 degree oven. This treatment shrinks their mass, concentrates their flavor and transforms them into something savory and succulent.

It is so easy to do, I feel a little silly offering instructions. Wash, dry and slice the tomatoes in half. Lay them out cut-side up on parchment-lined rimmed cookie sheets, drizzle with olive oil and sprinkle with a bit of salt. Put in the oven and roast at 200 degrees (truly, no hotter than that) for 10-12 hours. I realize that sounds like an inconveniently long time, but I tend to do this overnight, timing it so that they’re finished when I get up in the morning. Works perfectly.

I don’t can these tomatoes (honestly, I don’t think you can). I simply cool them, freeze them on the cookie sheets where they were roasted, pack them into jars or freezer bags and store them in the freezer. Easy for year-round additions to pastas, sauces, salads and more.

Just one word of warning. They are so delicious that they may not make it into the freezer for storage. I took a cookie sheet’s worth to a potluck tonight and served them on top of baguette slices that had been smeared with goat cheese. One person told me that he doesn’t really even like tomatoes, but couldn’t stop eating these.  Sharing is caring!

Preserve the bounty of your tomato vines through waterbath canning. Follow these directions for whole, halved or quartered tomatoes packed in water.  These instructions are also helpful for referencing when canning sauce- just add lemon juice and salt per jar and process in waterbath, read the following for more tips:

You will need

  • 2-1/2 to 3-1/2 lb ripe tomatoes (about 8 to 11 medium) per quart

  • Water

  • 1/4-1/2 tsp Ball® Citric Acid or bottled lemon juice

  • Salt, optional

  • Ball® Glass preserving jars with lids and bands  

  1. Prepare boiling water canner. Heat jars in simmering water until ready for use. Do not boil.  Wash lids in warm soapy water and set bands aside.

  2. Wash tomatoes. Dip in boiling water 30 to 60 seconds. Immediately dip in cold water. Slip off skins. Trim away any green areas and cut out core. Leave tomatoes whole or cut into halves or quarters.

  3. Prepare tomatoes according to raw or hot pack recipe.

  4. Add ½ tsp Ball® Citric Acid or 2 Tbsp bottled lemon juice to each hot quartjar. Add ¼ tsp Ball® Citric Acid or 1 Tbsp bottled lemon juice to each hot pintjar.

  5. Pack tomatoes into hot jars according to raw or hot pack recipe. Add 1 teaspoon salt to each quart jar, 1/2 teaspoon to each pint jar, if desired. 

  6. Remove air bubbles. Wipe rim. Center hot lid on jar. Apply band and adjust until fit is fingertip tight.

  7. Process filled jars in a boiling water canner 40 minutes for pints and 45 minutes for quarts, adjusting for altitude. Remove jars and cool. Check lids for seal after 24 hours. Lid should not flex up and down when center is pressed. 

Raw pack

  1. Pack tomatoes into hot jars leaving 1 inch headspace.

  2. Ladle hot water over tomatoes leaving 1 inch headspace. Add 1 teaspoon salt to each quart jar, 1/2 teaspoon to each pint jar, if desired.

Hot pack

  1. Place tomatoes in a large saucepot. Add water to cover. Bring to a boil and boil gently 5 minutes, stirring to prevent sticking.

  2. Pack hot tomatoes into hot jars leaving 1 inch headspace.

  3. Ladle hot cooking liquid over tomatoes leaving 1 inch headspace. Add 1 teaspoon salt to each quart jar, 1/2 teaspoon to each pint jar, if desired. 

CSA WEEK 12

p i c k l i s t

CHERRY TOMATOES  - SWEET CARMEN PEPPERS - CAYENNE PEPPER - MELON - 

EGGPLANT - CORN - BARBIE CABBAGE - TULSI BASIL - LEMON BALM

I probably announced prior that we are swimming in abundance, but now it’s game on. All tomatoes of every variety are dripping off the stems, and every pepper is literally ripe for the picking.  Late August is the time of year to really think about your winter kitchens.  What from the 2022 harvest do you want to take with you into the colder months ahead?  Aside from the frozen berries in June, our home pantry will be stocked with canned salsa verde, ketchup, roasted cherry tomatoes, roasted peppers, and banh mi pickles to start.  We will also roll out fermenty things when the temps drops (think kimchi and sauerkraut).  If you are curious about stocking up and holding on so deeply to Summer vibes in the form of mason jars filled with pickles and condiments and kimchi, reach out to the farmstand!  You can special-order veg in bulk for all your canning/freezing/ fermenting needs.  Your winter kitchen will thank you.  

FARMSTAND VEG BY THE HALF BUSHEL ORDER LINE: 603-298-5764

And while I am writing all of the above food preservation goals, I am also struggling with the honest fact that there are just not enough hours in the day and just not enough days of Summer.  With all there is to harvest, we are still battling the weeds that are still shading out the Summer crops.  Also, there is Fall CSA seeding and planting (which I am so excited about- the mizuna! The ginger! Winter squash! etc).  So when will I actually take time to Winter food prep? Sundays? Yeesh.

There has not been a moment all Summer when any of us have felt “caught up” with the fields. The work is constant, and while we could all probably use a break- we are also total masochists that find great joy in pulling crab grass on 90 degree days and picking cherry tomatoes til dark.  That said, the farm kiddos demand we take breaks, eat snacks, and go for swims, so I might be a little grateful to them for keeping our priorities straight.

In other news this week, aside from the relentless to-do list that just won’t quit, field crew began the great onion harvest of 2022.  Which may or may not turn out so great as these alliums have been living underneath the shade of, yup, more weeds. 

But guess who has been getting up early every morning to weed the herb field?  Our hero Mrs. T.. I am pretty sure that every CSA herb from here on out is surviving because of this morning shift.  Future Fall CSAers, take note, there will be parsley, oregano, thyme, thai basil, lemongrass, lemonbalm, rosemary, mint, cilantro, etc… 

Pro-tips:

Back to school?: Fill that lunch box with cut up peppers, melon, and cherry tomatoes

Your herbs: Tulsi! Lemon balm! Make tea, and calm your brain.  OR, hang upside down to dry in and store it for winter tea sipping.  

Pickled herby charred peppers

from cookbook Eating Outloud by eden grinshpan

Makes about 4 cups

Growing up, there were always pickled peppers in our fridge. My dad loves them, and we’d take them out whenever we had a smoked meat brunch, or pretty much any other Sunday spread. I’ve made my own version of those peppers, and mine uses a simple pickling technique. Just make sure to char your peppers really well before pickling them so the pickles get fully infused with smoky flavor.

5 bell peppers (a mix of orange, yellow, and red)

⅔ cup extra-virgin olive oil

2 sprigs fresh oregano

¼ cup red wine vinegar

¼ cup balsamic vinegar

2 tablespoons torn fresh basil leaves

2 garlic cloves, thinly sliced

2 teaspoons kosher salt

2 teaspoons sugar

• 1 Using a gas stovetop burner or a grill and a pair of long tongs, char the peppers over an open flame until they’re fully blackened and blistered all over. Place the charred peppers in a large bowl and cover with plastic wrap or a clean towel. Let the peppers steam for 20 minutes.

• 2 When the peppers are cool enough to handle, slip off the skins and pull out the cores and discard. Slice the peppers lengthwise and place them in a large jar with the olive oil, oregano, red wine vinegar, balsamic vinegar, basil, garlic, salt, and sugar. Shake the jar well to mix. Store in the fridge for at least 3 days before using, and up to 2 weeks. Let come to room temperature before serving so the oil can liquify again.

Sabich, a popular Israeli street food, is a pita-busting combination of a bunch of great appetizers. To serve these to a group, you can set out the assorted fillings on individual plates and platters and let guests build their own.

2 tablespoons za’atar

3 garlic cloves, finely grated, divided

½ cup plus 2 tablespoons olive oil, divided

1 large or 2 medium Italian eggplants (about 20 ounces), cut into ¾-inch-thick rounds 

Kosher salt

½ cup parsley leaves with tender stems

½ cup plus 2 tablespoons chopped chives, divided

½ cup tahini

2 Persian cucumbers, quartered, cut into ½-inch pieces

1 pint cherry tomatoes, halved

¼ cup chopped mint

2 tablespoons fresh lemon juice

1 cup prepared hummus

3 tablespoons (or more) harissa

½ teaspoon ground cumin

Toasted pita, thinly shredded cabbage, quartered hard- or soft-boiled eggs, and Israeli pickles (for serving)

Place a rack in center of oven; preheat to 450°. Whisk za’atar, 2 garlic cloves, and ½ cup oil in a small bowl. Spoon over both sides of eggplant rounds (about 1 tsp. per side) and rub into flesh. It will absorb, so use all of the za’atar oil! Generously season with salt. Roast eggplant on a wire rack set inside a rimmed baking sheet until tender and beginning to brown in spots, 35–45 minutes.

Meanwhile, pulse parsley and ½ cup chives in a food processor until finely chopped. Add tahini and pulse until smooth. With the motor running, slowly drizzle in ½ cup water and continue to pulse until sauce is the consistency of a thin yogurt; season with salt.

Toss cucumbers, tomatoes, mint, lemon juice, and remaining garlic clove, 2 Tbsp. oil, and 2 Tbsp. chives in a medium bowl; season Israeli salad with salt.

Mix hummus, harissa, and cumin in a small bowl (if you like it spicy, add more harissa).

Generously spread tahini sauce and hummus mixture inside pita. Place a few rounds of eggplant (or one if using a large eggplant) inside. Stuff pita with Israeli salad, cabbage, eggs, and pickles.

AND IF YOU HAVE ANY PEPPERS LEFTOVER, CLAIRE SAYS: 

“GRILL(or roast), THEN PLACE IN A FOOD PROCESSOR WITH FETA AND PARSLEY”.  

The results are whipped spreadable magic. 

CSA WEEK 11

p i c k l i s t

TOMATOES! - CHERRY TOMATOES  - SWEET CARMEN PEPPERS - HOTTIE PEP - CARROTS - MELON - 

CORN - RED ONION - GARLIC - COLLARD GREENS - BASIL - PATTY PAN SQUASH

Here to announce the following: Fall CSA is quite literally around the corner! Read on for all the info…

The Fall CSA is a way to keep our beloved community (you!) eating all the good crops and stay involved with the farm even after the farmstand shuts down mid-October.  From mid October through late November, there is still so much to harvest, so much to make, and so much to enjoy.   I just love it.   

One pick up location: THE FARMSTAND, One pick up time: 4:30-6:pm 

And now the good deets:

1) 7 weeks of real hearty Fall abundance.  Think: root veggies, winter squash, greens, herbs, the last of the peppers and tomatoes,  etc..).  Newsletter + recipes also included. COST: $250

2) ADD ON BREAD SHARE Cost: $55

3) ADD ON KITCHEN STOCK UP SHARE (salsa, sauces, pesto, jam, fermenty treats) Cost: $70 

4) Pick up location is on farm in Plainfield NH 

5) PICK UP TIME: 4:30-6pm

6) PICK UP DAY: WEDNESDAYS! (with a special pre-thanksgiving pick up on Tues. NOVEMBER 22nd)

7) Begins October 12th- November 22nd (you must sign up for the 7 consecutive weeks)

8) COST FOR FALL CSA: $250 / COST FOR BREAD SHARE ADD ON: $55 / COST FOR KITCHEN GOODS ADD ON: $70

Sign up at the FARMSTAND (cash or check) or ONLINE

Pro-tips:

The following is a HUGE LABOR OF LOVE, and i curse myself about 30 minutes into making this pie and swear i’ll never make it again.  It’s so much work! BUT the results are legendary, it tastes like August, and it is the ultimate all ages crowd pleaser, bringing me back year after year.  Gluttons for punishment, read on...

 2 cups all-purpose flour

1 tablespoon baking powder

1 3/4 teaspoons salt, divided

3/4 stick (6 tablespoons or 3 ounces) cold unsalted butter, cut into 1/2-inch cubes, plus 2 teaspoons melted

3/4 cup whole milk

1/3 cup mayonnaise

2 tablespoons fresh lemon juice

1 3/4 pounds beefsteak tomatoes

1 1/2 cups corn (from about 3 ears), coarsely chopped by hand (my preference) 

2 tablespoons finely chopped basil, divided (skipped this, no harm was done)

1 tablespoon finely chopped chives, divided

1/4 teaspoon black pepper, divided

7ounces coarsely grated sharp Cheddar (1 3/4 cups), divided

 Whisk together flour, baking powder, and 3/4 tsp salt in a bowl, then blend in cold butter (3/4 stick) with your fingertips or a pastry blender until it resembles coarse meal. Add milk, stirring until mixture just forms a dough, then gather into a ball.

Divide dough in half and roll out one piece on a well-floured counter (my choice) or between two sheets of plastic wrap (the recipe’s suggestion, but I imagined it would annoyingly stick to the plastic) into a 12-inch round (1/8 inch thick). Either fold the round gently in quarters, lift it into a 9-inch pie plate and gently unfold and center it or, if you’re using the plastic warp method, remove top sheet of plastic wrap, then lift dough using bottom sheet of plastic wrap and invert into pie plate. Pat the dough in with your fingers trim any overhang.

 Preheat oven to 400°F with rack in middle. If your kitchen is excessively warm, as ours is, go ahead and put the second half of the dough in the fridge until you’re ready to use it. Whisk together mayonnaise and lemon juice.

Cut an X in bottom of each tomato and blanch in a large pot of boiling water 10 seconds. Immediately transfer with a slotted spoon to an ice bath to cool. Peel tomatoes, then slice crosswise 1/4 inch thick and, if desired (see Notes above recipe), gently remove seeds and extra juices. Arrange half of tomatoes in crust, overlapping, and sprinkle with half of corn, one tablespoon basil, 1/2 tablespoon chives, 1/2 teaspoon salt, 1/8 teaspoon pepper and one cup of grated cheese. Repeat layering with remaining tomatoes, corn, basil, chives, salt, and pepper. Pour lemon mayonnaise over filling and sprinkle with remaining cheese.

 Roll out remaining piece of dough into a 12-inch round in same manner, then fit over filling, folding overhang under edge of bottom crust and pinching edge to seal. Cut 4 steam vents in top crust and brush crust with melted butter (2 teaspoons). Bake pie until crust is golden and filling is bubbling, 30 to 35 minutes, then cool on a rack. Serve warm or at room temperature.

Do ahead: Pie can be baked 1 day ahead and chilled. Reheat in a 350°F oven until warm, about 30 minutes.


SERVES: 4

NOTES: Like any decent burrito or wrap-type thing, overstuffing these will lead to failure/messes everywhere. If you’re transporting them, I would recommend securing with toothpicks before you go anywhere, just so there aren’t any surprises at your destination.

 1 block of tempeh, cut into half inch strips

1 chili, sliced

4-5 sprigs of basil, divided

splash of red wine vinegar

1 shallot, peeled and sliced

olive oil

salt + pepper

1/2 cup quinoa

handful of sundried tomatoes (not the oil-packed ones), small dice

2 cups cooked chickpeas

2-3 tbsp tomato sauce

8 large collard leaves

2 ripe tomatoes, sliced (or 1/2 pint of grape tomatoes halved)

balsamic glaze/reduction (optional!)

 In a shallow dish, place the tempeh pieces, sliced chili, 2-3 tablespoons of chopped basil, the red wine vinegar, sliced shallot and a good glug of olive oil. Season the mix with salt and pepper and toss to coat the tempeh. Cover and set aside for 20 minutes.

Combine the quinoa with 1 cup of water and a fat pinch of salt in a small saucepan over medium heat. Bring the quinoa to a boil and simmer until all water is absorbed, about 15 minutes. Scrape quinoa into a medium mixing bowl and allow to cool.

Once cool, to the quinoa add a glug of olive oil, 2-3 tbsp chopped basil, the diced sundried tomatoes, and some salt and pepper. Toss to combine.

In a shallow dish, mash the chickpeas with the tomato sauce, salt, pepper and a splash of olive oil. You want a mixture that kind of holds together but also a few whole chickpeas too. Set aside.

Heat a grill to high and place the marinated tempeh slices on the grates. Grill both sides until char marks appear, about 4 minutes per side.

To make the collard wraps, start by laying one collard leaf down on a cutting board so that it’s on a horizontal orientation. Lay another collard leaf on top, overlapping the stem ends considerably. You should have an almost solid rectangular-ish sheet of collard green now. It almost looks like a very chunky figure 8. Spoon some of the chickpea mash into the middle, pressing it down. Lay two tempeh slices on top of the chickpea mash. Then place some sliced tomato on top of the tempeh. Place a few slices of tomato and whole leaves of basil on top. Finish with a drizzle of balsamic glaze if you like. Pull up the long side of the collard wrap and fold it over the filling. Bring in the short sides as if you were making a burrito. Then roll the whole thing until you’ve sealed the wrap.

Repeat this process with remaining ingredients. Secure wraps with toothpicks if necessary. Slice wraps in half to serve.

CSA WEEK 10

P I C K L I S T

TOMATOES! - CHERRY TOMATOES  - SWEET CARMEN PEPPERS - PURPLE PEPPERS - CARROTS - CABBAGE - OREGANO - CILANTRO - EGGPLANT - MELON - CAULIFLOWER -SHALLOTS 

This newsletter is written from my house, where I will be all day today, tomorrow and the foreseeable future as I am currently posted up with a sick kiddo and a perfectly well (and wild) 3 year old.  We are all bumming pretty hard over here and fingers crossed will make it to the Cornish Fair by the weekend.  Meanwhile the field crew is coming together and providing the CSA team with ample support.  Just last night they were in the fields bunching all your carrots and we are all so lucky they had already swept the cabbage and cauliflower field on Saturday.  I continue to be grateful for both Mrs. T on early morning oregano duty and Claire on all the other duties.  While I was painting my nails for the 16th time, pondering all the popsicles I should be making with the melons and pushing liquids into this young blood next to me, she was bunching all the cilantro, picking all the tomatoes and peppers and counting out 215 one million times while simultaneously texting me v funny notes from the field.  Another hero of this week is my sweetheart and team mate, Ray Sprague- who is keeping it all together while non-stop pivoting.  He has not made it home before 9pm the past few days- and I like to think he is hitting up the west leb strip and partying super hard, a la applebees, kotos and icecream 4U.  But the truth is, he is labeling, washing, boxing up, and attempting to stay on top of field crops and farm organization while the farm is out 4 people (2 people on vacation, 1 person still in Jamaica, and me with the sickies).  

ALSO, kuddos to Ray and Roy for calling it on blueberry season- it’s been a great run with awesome fruit, but goodness gracious, it was time to walk away and pick melons and cherry tomatoes instead.  

 In conclusion, this week has been a challenge but the fields overfloweth, therefore the CSA parties on.

Pro-tips:

CLAIRE’S FIRST IMPRESSION 

AKA WWCD (WHAT WOULD CLAIRE DO WITH ALL THIS VEG?): STIR FRY AND/OR RATATOUILLE

This salad is only worth making when tomatoes are in season and full of flavour. It should be acidic and tangy, and will taste amazing alongside a piece of slightly charred meat from the barbecue.

  • crustless rustic bread (stale or fresh) - sourdough or ciabatta, for example - cut in 2-3 cm cubes

  • Salt and pepper

  • 2 small cucumbers, cut into 2cm pieces

  • 3 tomatoes, cut into wedges

  • ½ red onion or shallot, thinly sliced

  • 1 red pepper, cored and cut into large pieces

  • 1 bunch cilantro, roughly chopped

  • 2 tsp sumac (optional)

  • Grated zest and juice of ½ lemon

  • 1 garlic clove, crushed

  • 1½ tsp red-wine vinegar 

  • 3 tbsp olive oil

  1. Preheat the oven to 325F

  2.  Spread out the bread on a roasting tray, brush with olive oil and sprinkle with some flaky salt. Bake for 20 minutes until crispy and golden, then leave to cool.

  3. Mix all the other salad ingredients and adjust the seasoning to taste. Just before serving, mix in the toasted bread, using your hands.


Chimichurri: 

The following recipe was provided by my best friend, Natanya, who says this chimichurri  i’s so good you could drink the stuff… Also, there are a few ingredients you are missing here- no parsley or garlic this week, but I highly recommend picking up these extra ingredients to make said condiment.  Farmstand folks, this will be particularly easy for you.  

 As for what to do with chimichurri, people love it on meat and fish, but i think it's awesome on everything.

 1 whole bunch cilantro, leaves and tender stems

1/2 bunch parsley, leaves

3 stems fresh oregano leaves

1 large shallot

2-3 cloves garlic

1 small red chili (fresno or jalapeno, seeds removed)

1/2 cup red wine vinegar

1/2-1 cup olive oil

Salt to taste

 Instructions: put everything but olive oil in food processor. With the motor running add olive oil until everything is incorporated and reaches the desired consistency. 

Enjoy!

Jenny’s note: the recipe calls for mint, but i think it would be insanely good with cilantro and or oregano!

 This is like eggplant bruschetta, except the eggplant is the bruschetta, topped with a Mediterranean summer salsa of a salad.

Feta is a great alternative to ricotta salata. If you’re put off by the sharpness of fresh onion, pour the red wine vinegar over it in a dish, and let it sit for 10 minutes, tossing it from time to time, before adding it to the salad. No need to add additional vinegar if you do. If you don’t like capers, you can substitute green or black olives. If you don’t care for mint, you can substitute flat-leaf parsley. If you don’t care for eggplant, well, thank you for reading along anyway! Ahem, or brush pitas or flatbreads with olive oil, grill them and dollop this salad/salsa on top.

  •  1 to 2 tablespoons plus 4 teaspoons olive oil

  • 1 1/2 pounds eggplant (about 2 medium), in 3/4- to 1-inch slices

  • 2 ounces (1/2 cup) chopped or crumbled ricotta salata

  • 2 tablespoons capers, drained

  • 1/3 cup finely diced red onion

  • 3 seeded, diced medium tomatoes (1 1/2 cups)

  • 3 tablespoons minced fresh mint leaves

  • 2 teaspoon red wine vinegar

  • Freshly ground black pepper.

 Preheat oven to 425 degrees. Coat a large baking sheet generously with olive oil, about 1 to 2 tablespoons. Arrange eggplant rounds in a single layer. Sprinkle with salt and freshly ground black pepper. Roast, without disturbing, for 15 to 20 minutes. Carefully flip each piece: the undersides should be blistery, dark and a bit puffy and should release from the pan with no effort. If they’re not, let it cook longer. Once flipped, sprinkle them with additional salt and freshly ground black pepper and return the pan to the oven for another 10 to 12 minutes or so, until the undersides match the tops.

[Alternatively, on the grill: Brush eggplant slices with oil; sprinkle with salt and pepper. Grill eggplant slices until slightly charred and tender when pierced with knife, about 5 to 7 minutes per side.]

 Meanwhile, mix your ricotta, capers, onion, tomatoes, mint, vinegar and remaining 4 teaspoons olive oil in a small bowl. Taste for seasoning; ricotta salata tends to be quite salty so I don’t find that this dish needs more than a pinch of salt, if that. Add more vinegar, if desired. Add freshly ground black pepper, to taste.

 When the eggplant discs are done, arrange them on a serving platter. Scoop a spoonful of the salad over each round. Eat immediately.

CSA WEEK 9

p i c k l i s t

TOMATOES! - CORN! - CHERRY TOMATOES - JALAPENO PEPPERS - SWEET CARMEN PEPPERS - 

MELON - SHISO - THAI BASIL - FUNFETTI ZUCCHINI - CLASSIC  ZUCCHINI - FENNEL - ARUGULA - ZINNIAS

I imagine when you read this your body will be in total peace and relaxation with the 10 degree drop in temps that is supposed to come our way Wednesday.  But from here- Tuesday- it remains bloody hot.  The air is thick, and the sun is just demolishing us all.  It would be one thing if our work schedule for the day revolved around a swimming hole and the act of jumping in it, but that is not the case.  This heat wave is relentless and we are feeling it. 

Every morning we rise to beat the heat, but as soon as that sun peeps through, forget about it.  All of us: plants, people just go to wilt mode.  Very little complaints are heard from the field crew, but it’s not necessary,  you can see how the day is going by the drench of the shirt.  The sweat is also an indicator of where people have been. For example,  If it looks like someone just walked out of a swimming pool in all their clothes, then you know they’ve been picking tomatoes in a greenhouse.  If it looks like someone just got sprayed by an elephant truck, then I would guess that farmer just came from the blueberry fields.  

It’s a lot of work to remain upright, but if we all leave the crops to take a little beach holiday, then they will ripen into rot.  So we work 6 days of the week, and from the fields you can hear friends reminding friends to take gas.*

As far as crops go, some of them like our tomatoes are thriving.  Others, like our brassicas- broccoli in particular- are struggling.  What is usually a blueish green veg currently has a yellowish tint to it indicating stress.  Downy mildew and other airborne diseases are making their way north, and this thick heat is really providing a great habitat for that stuff to thrive and travel.  Farming is no breeze right now.  But I’m trusting the weather apps, and come tomorrow morning, the breeze will come.  

One more thing while I got a soap box- I hate when farmers complain about the weather- and I admittedly do it way more often than not.  But damn, it sure would be nice to experience for once farming in perfect conditions.  Gonna have to ask the elders, Anne and Pooh about farming pre extreme climate change- I promise to report back next week.  

In other news that feels very important, the watermelons are coming!  Every other day we go through the melons (cantaloupes and honeydew) crossing our fingers that the next row over is ready.  We’ve wasted a couple of watermelons to foolish impatience (not quite ripe).  But this past Saturday, on August 6th (also Jamaica’s independence day!!) we picked two from the field that were ripe and ready.  It all feels like a spiritual experience when you find the first ripe watermelon of the season.  Therefore it is mandatory to stop all harvest, put down all bushel baskets, take a slice and rejoice in the best fruit there ever was.

*take gas: field crew code for drink water  

Pro-tips:

CLAIRE’S FIRST IMPRESSION: salad and poppers

Starting a new section this week called Claire’s first impressions in which I ask the most bomb chef I know to look at this list and tell us all what to make.  Without hesitation she said salad, then paused and said, “but let me tell you what I’m gonna do with the jalapenos…”

  1. Slice in half

  2. Fill with goat cheese

  3. Roast or grill

  4. Devour as per usual

And as for me, i plan to pickle….

1) slice your peppers into rounds. There’s no law against using whole jalapeños, but smaller pieces will soak up the brine faster.

2)  Bring 1 cup distilled white vinegar, 2 Tbsp. kosher salt, 2 tsp. sugar, up to 2 Tbsp. spices (e.g., peppercorns, ­coriander seeds, and/or ­mustard seeds), chopped fresh herbs (like cilantro), and 2 cups water to a boil in a saucepan You’ll want enough liquid to cover the peppers, so feel free to scale this ratio up or down as needed.

3)Transfer sliced peppers to clean glass jars and pour over the brine, leaving ½ inch of headspace between the liquid line and the rim. Screw on the lids and let the jars cool before transferring to the fridge. Your pickled jalapeños will be best after 48 hours and last up to two months refrigerated. 

makes 12 Servings

DIPPING SAUCE

1/2 cup fresh lime juice

3 tablespoons fish sauce (such as nam pla or nuoc nam)

3 tablespoons sugar

2 fresh red Thai chiles or 1 red jalapeño or Fresno chile, thinly sliced

 SUMMER ROLLS

4 ounces bean thread noodles (cellophane or transparent noodles)

12 8'-9' rice paper rounds

Tofu or other cooked protein cut into strips

1 cup fresh Thai basil leaves

1 cup fresh shiso leaves plus 1 tablespoon chopped

1 cup fresh mint leaves

1 cup cucumber, cut into matchstick-size pieces

1 cup sweet carmen pepper cut into matchstick-size pieces

12 small arugula leaves

Preparation

DIPPING SAUCE

Step 1

Mix all ingredients in a medium bowl. DO AHEAD Can be made 1 day ahead. Cover and chill.

SUMMER ROLLS

Step 2

Put noodles in a large bowl. Pour enough hot water over to cover; let stand until softened, about 10 minutes. Drain. Transfer to a large bowl of ice water to cool; drain and set aside.

Step 3

Fill a pie plate with warm water. Working with 1 rice paper round at a time, soak rice paper in water, turning occasionally, until just pliable but not limp, about 30 seconds. Transfer to a work surface. Arrange 3 tofu strips across the center of round. Top with some leaves of each herb, then cucumber, and pepper. Arrange a small handful of noodles over. Place 1 arugula leaf over, torn or folded to fit. Fold bottom of rice paper over filling, then fold in ends and roll like a burrito into a tight cylinder. Transfer roll, seam side down, to a platter. Repeat to make 11 more rolls. DO AHEAD Can be made 1 hour ahead. Cover with a damp kitchen towel and refrigerate.

Step 4

To serve, cut rolls in half on diagonal. Add chopped shiso to dipping sauce.

 And now with all leftover greens, lets make SALAD

The following crops are begging to be made into a salad:

Shiso - Thai basil - arugula - fennel (thinly slice!) - zucchini (shave thin using a peeler!)

WEEK 8

P I C K L I S T

TOMATOES! - EGGPLANT - KALE - SHISHITO PEPPER - HUNGARIAN HOT WAX PEPPER - ONION - 

BLUEBERRIES! - CUKES - BASIL - CILANTRO - ZINNIAS

First off, the pick on Saturday was tons of fun and yall pulled so many blueberries from the field! Hope to make another pick like that happen again for yall some time.  Outside of the blueberries, field cherry tomatoes and sweet peppers are ripening and we appear to be on the cusp of a massive melon harvest.  We are basically surrounded by ripe Summer candy everywhere we go.

In other news, Edgewater Farm has not one, but two newsletter/blog/updates to offer.  First off is this weekly letter that you know pretty well by now, and the other is written by Pooh Sprague. Pooh and Anne started this farm in 1974.  48 years later, Pooh keeps up with tractor work, greenhouse propagation, unseen tasks, and a very strict napping routine (grandkids be warned!).  He offers real perspective through the written word.  Here is his latest from August 1st:

We have been in a drought this summer, and it's been a struggle. It is coupled with the fact that our field crew is understaffed as our Jamaican H2A workers have  all been delayed by at least a week. One gent who was supposed to be here on June 5th still hasn’t gotten his “ok” to come up. This is due to politics, bureaucratic turf wars in both Jamaica and the US. The end result is a very tedious and expensive SNAFU for us.

But despite these challenges we really haven’t lost much in the way of crops.  No yet.  We are experiencing a very nice blueberry crop this year. Sweetness is up, as well as the size and plant production. We would like to take the credit as farmers, but the sorry truth is that we can’t honestly assign it to our cultural wizardry or management practices. It just… is.  Alternately a confluence of weather events and oversights on our part resulted in a mediocre strawberry crop, a crop in which we invested a lot time and money. But the sun has produced the sweetest corn, tomatoes and melon in many years.    Our potato crop this year has had tough sledding,  however we are  looking at a potential bumper crop of other fall vegetables.   

A summer drought such as this years’ seems to defy and thwart our best efforts.  Why does Dave Pierson (farmer in Braford vt) tell me the storm front produced 1.65” inches of water on his farm and we don’t get a drop?  Closer to home Ray will report 3/4” of rain when we (in Plainfield) only have .2” in our rain gauge.  I have used an expression when  explaining  to lay people that it takes a bit of Zen temperament to accept all the things in agriculture that are out of reach or control. It is simply that we farmers are not “in the driver’s seat.”

We all think that technology will solve all our problems. And technology has given us some great achievements. But I think the climate change and the pandemic have amply demonstrated that we are often wrestling with natural forces that may well exceed our ability to cope with or begin to control. Forces natural as well as unnatural forces: politics, supply, input costs.  There is the issue of invasive species. There may have been some slowing down the advancement of invasive species by identifying them and trying to contain them, but so far as I can see garlic buckwheat, purple loosestrife, Japanese knotweed and Norway Maples have clearly settled in among us along with the northward march of ticks. I don’t believe we have the ability, technology or fortitude to stop them… 

Farming is all about coping and accepting the march of natural forces, and trying to adapt to them, all while trying to earn a living. There could be an upside resulting from all these natural forces. There are always hidden benefits to counter the down side. Today’s invasive species could well be tomorrow’s beneficial pollinator, tomorrow’s new food group, raw material or hot new ornamental.  Today the Norway Maple is maligned, but in an era of warming climate when the northern limits of the sugar maple are advancing ever northward, we may be welcoming the ornamental and perhaps economic  products of the Norway Maple. As hated as Japanese knotweed is, it is a tremendous late season source of nectar and pollen for pollinator and beneficial insects, especially honeybees, whom never had a good late season nectar and pollen source before knotweed arrived. I guess we will have to develop the right perspective and attitudes. But I still wish we could have a rainy day that leaves us with two inches in the rain gauge.

Pro-tips:

Asked picking partner Claire what she would do with this CSA box, and she very promptly answered: MEZZE PLATTER.  Here are some recipes to inspire and get you started…

(this is a real fave when eggplants roll in)

2 eggplants

1/4 cup garlicky tahini (I just added a grated garlic clove to my tahini)

1 tsp kosher salt

1 tsp fresh lemon juice

pomegranate seeds (optional in my opinion/ maybe use something else sweet and tart to keep it local… raspberry?)

pomegranate molasses (optional again/ honey or maple syrup to keep it local)

fresh mint

fresh basil

za’atar olive oil (In a bowl combine 2 tablespoons za’atar spice with 3 tablespoons extra virgin olive oil; stir until blended)

Heat a grill (high heat). You can also use the burner on your stove, just be sure to line it with tinfoil. Score the skin of the eggplant. Place on a very hot grill for 30 minutes until the skin is black and the eggplant has deflated, is fully cooked and has developed a smoky flavor, making sure to turn the eggplant several times on the grill.

  • Let cool on a strainer so all the juices drip away. Once cooled, remove the skin from the eggplant meat and place in a bowl with 1/4 cup of the garlicky tahini, fresh lemon juice and the kosher salt. Mix with a whisk until all is combined. You may need to add more garlicky tahini depending on the size of the eggplants.

  • Place a cup full of the dip into a bowl and using your spoon to spread it so there is a well in the center. Drizzle around a teaspoon of pomegranate molasses on top, then 1/2 tsp of the za’atar olive oil. Sprinkle on pomegranate seeds and garnish with leaves of fresh basil and fresh mint. Serve with warm bread. If you can’t find warm pita, challah works great too.

SERVINGS: 2 TO 4/ TIME: 10 MINUTES (jenny grew up on this stuff)

  • 2 medium roma tomatoes, cubed

  • 1 pound seedless (English) or Persian cucumbers, unpeeled, cubed

  • 1/2 medium red onion or 4 scallions, finely chopped

  • 3 tablespoons finely minced fresh parsley

  • Juice of half a lemon, or more to taste

  • 2 to 3 tablespoons olive oil

  • 1 1/2 teaspoons sumac powder

  • Salt and pepper, to taste

You can either toss all of the vegetables in one large bowl, and pour over it the parsley, lemon juice, olive oil and sumac mixture you whisked separately in a small bowl, or if you’re in a hurry just toss everything all at once.

Other additions: 1/2 to 1 cup crumbled or cubed feta, 1 bell pepper, cut into cubes, 1 15-ounce can of chickpeas, rinsed and drained, 1/2 to 1 cup coarsely chopped olives, 1 to 2 tablespoons finely minced mint or dill or pita chips (see below). You could also whisk a couple tablespoons of tahini into the dressing for a thicker, sesame-coated flavor.

This recipe is from Bon Appetit and it's a terrific go to for every shishito you encounter from now till frost

2 tablespoons extra-virgin olive oil

3 cups whole shishito peppers or Padrón chiles

Flaky sea salt

Heat oil in a large cast-iron skillet or other heavy skillet over medium-high heat. Cook peppers, turning occasionally, until they begin to blister on all sides. Sprinkle with salt and serve immediately.

CSA WEEK 7

P I C K L I S T

TOMATOES! - FENNEL - SAVOY CABBAGE - BELL PEPPER - GOLDEN BEETS - GREEN BEANS -

TULSI - LEMON BALM - BLUEBERRIES! - CUKES - PSYCHEDELIC GOLDEN ZUCCHINI

Yall, we are reaching peak season (or are getting very close).  Summer crops are coming in hot right now, and the fields are booming with fruit, veg, and weeds.  Corn, eggplant, sweet peppers, and watermelons are on the horizon, but for now the colors of the heirloom tomatoes and the flavor picked out of the blueberry field is bonkers good.  As far as field tasks go, we are totally stretched.  Tomatoes need stringing and staking, weeds need to be annihilated, Greenhouses need to be gutted, cleaned and planted, etc… But it remains damn near impossible to walk away from the blueberries.  The field is still loaded with fruit and it is hard to have anything but blueberry tunnel vision with plants that look that good.  

You should come check it out, and see for yourself THIS Saturday!

Pop-up PYO Blueberry party for CSAers.  This is not a gleaning, as we are right in the middle of the season and the picking is AWESOME.  We are still working out the details of how much we can have yall pick, what row, etc but for now, heads up, you’re invited. 

WHO:  Open to the entire Edgewater Farm C.S.A. community

WHERE:  if you are coming from the North End of River Road, go past the Greenhouses and McNamara Dairy- turn left at the Cemetery.  (if you turn right, you will be swimming in the Connecticut River)

THE ADDRESS for all your googling: 355 River Road/ Plainfield, NH

WHEN: This Saturday!!!, JULY 30th from 3-5pm  rain or shine though we will cancel in case of thunder and lightning

HOW: You pick!  Bring your own picking cups! PRO-TIP:, if you have a used yogurt container and a shoelace, poke holes in the yogurt container, string the shoe laces through and make yourself a picking necklace- it’s fashion forward and an extremely efficient way to pick- very hip, all the kids are doing it.  

WHY: Because the picking is the best we’ve seen in years- branches are dripping with fruit, and sharing is caring.

Pro-tips:

SOUR CREAM SLAW WITH FENNEL

From my second favorite cook book, START SIMPLE by Lukas Volger

1 small savoy or napa cabbage (though i think your kale shredded could work here instead!)

1 medium fennel bulb, cored and very thinly sliced, fronds reserved

¼ cup sour cream

1 tablespoons olive oil

1 tablespoon fresh lemon juice

1 teaspoon or more herbs de provence (thyme!!! Oregano, rosemary, etc)

½ teaspoon salt, or to taste

¼ teaspoon sugar

Pinch red pepper flakes

 In a serving bowl combine the cabbage (kale) and fennel.

In a small bowl, stir together the sour cream, olive oil, lemon juice, herbes de provence (thyme etc!), sugar, and red pepper flakes.  Taste and season with salt.  Add most of the dressing to the cabbage (kale) and fennel and taste, adding more if needed (you may have some dressing left over).  Coarsely chop about 3 tablespoons of the fennel fronds and stir them in.  You can eat this slaw immediately, but the flavors will meld a bit after and hour or so at room temperature.  

A crisp salad of pole beans, fennel, and parmesan cheese 

From my tried and true old standby eating bible, TENDER by Nigel Slater

Green beans 

Medium fennel bulb

Small, salad leaves (chop up your savoy!) 4 double handfuls… 

White bread- 2 thick slices

Oil for frying the bread

For the dressing:

Tarragon vinegar- a tablespoon 

Dijon mustard- a teaspoon

An egg yolk

Olive oil- a scant ½ cup

Grated parmesan cheese- 3 tablespoons, plus a block of parm for shaving

Lemon juice- 2 teaspoons

 Trim the beans and boil them in lightly salted water or steam them, until tender.  Drain them under cold running water.  Cut the fennel bulb in half and shred finely.  Make the dressing by whisking the vinegar, mustard, and egg yolk together with a little salt and black pepper, then beating in the oil followed by the grated cheese.  It should be thick and creamy.  Squeeze in the lemon juice, stir, then set a side for a few minutes.  

 Put the “salad” leaves in a large bowl with the cooked beans and the fennel.  Cut the bread into small squares and fry in shallow oil until golden on all sides.  Drain the croutons on paper towels.  Toss the leaves and beans lightly with the dressing.  Pile the salad into two plates and shave pieces of parmesan over with a vegetable peeler.  I usually do at least 8 per salad, depending on my dexterity with the peeler.  Tip the hot croutons over the salad and eat straight away while all is fresh and crunchy.  

On your herbs this week:

This week’s herbs, tulsi and lemon balm, would love to be made into sun tea.  

 To make sun tea:

  1. grab a glass jar (I use the biggest mason jar i can find) 

  2. fill with herbs, and water

  3.  put in direct sunlight for a day.  

  4. Remove from sunlight, strain herbs and cool it down in the fridge.  Add a sweetener if you like, or drink straight up.  

  5. Experience total refresh

Also noteworthy, both these herbs -Tulsi and Lemon balm- are used medicinally to bring calm to the body and mind.  Which, for me and perhaps all of you, is extremely welcome as we enter high Summer, peak harvest, and Leo Season.  Good to have a little calm to relax the brain and body during the Summer hustle.  Also FYI, all the farmers are doing it- stopped in at our friends this week at Hurricane Flats Farm and saw their jar of herbs, brewing in the sunshine as well.  

And if you don't make sun tea, here are some more herby options:

USE the FRESH LEAVES:  Add chopped leaves to culinary dishes just as you would basil, dill, etc…

Store!:  Freeze leaves in ice cubes to add to summer drinks. Or hang upside in a cool, dark, and dry place.  When fully dry, strip leaves off branches and store in an airtight container.  

TULSI and  Lemon Balm can also be made into tinctures, infused honeys, elixirs, vinegars etc… for more on that give it a google.  

CSA WEEK 6

p i c k l i s t

TOMATOES! - CHIVES - CAULIFLOWER OR BROC - ROMAINE LETTUCE - NAPA CABBAGE - 

GOLDEN ZUCCHINI - SUMMER SQUASH - CUCUMBERS - CILANTRO - JALAPENO - BLUEBERRIES! - GARLIC

Out with the old (strawberries), in with new! Enter BLUEBERRY SEASON!  Blueberry season is turning out to be incredible and the field is LOADED with blue.  Such a relief to come into a successful crop of berries after such a poor turnout from our early summer red friends.  HOWEVER, all is not perfect at Edgewater farm.  We have chin high lambsquarter taking over the lettuce, the green beans, etc.  Crabgrass has found its way into every nook and cranny of field left unplanted.  And while we got a decent rain on Monday, we could absolutely use more..  

On weeds: oh geez, the same thing happens every year.  Come June, fields are clean, planted, and looking good.  We keep high hopes on staying on top of weeds- and make extremely empty promises to our crops, that you darling lettuce will see your full head of green/red/ or romaine size up without having to battle other unwanted plants for light… and then strawberry season hits.   And the strawberries beg us to spend the majority of our time bent over staring directly at them, and the row in front of us, for the next 5 weeks… and while we have turned the other cheek, the weeds go wild.  So I can assure you all that from the time you read this until the first kill frost  in October or November, we will either be harvesting or weeding, on repeat (and a little seeding/planting too).

In other (what I deem) extremely exciting news, Ray and I took a field walk today to check out crops to come.  The pumpkins look dynamite, the peppers are coming into it, and the watermelons are two-ish weeks away from ripening.  Bottomline here, the best of Summer is yet to come.  

Pro-tips:

Fried garlic chips from one of my fave cookbooks,

BURMA SUPERSTAR: ADDICTIVE RECIPES FROM THE CROSSROADS OF SOUTHEAST ASIA

by Desmond Tan and Kate Leahy

JENNY’S NOTE: Make the garlic chips, and add them to everything!  They are particularly perfect with the recipe for GINGER SALAD (next recipe down)

 Makes about ⅓ cup fried garlic and about ½ cup garlic oil

½ cup thinly sliced fresh garlic

½ cup canola oil (though i used olive oil and it turned out great)

 Line a heat proof bowl with a strainer.  Line a plate with paper towels.  In a wok or small saucepan, heat the oil over medium heat for a minute or two (the oil shouldnt be scorching hot).  Add the garlic and gently stir into the oil.  When bubbles start to form rapidly around the garlic, decrease the heat to low and cook, stirring often, until the garlic is an even golden color and nearly completely crisp, about 3 minutes.  If the garlic starts to darken too quickly, remove it from the heat and let it continue to fry in the oil.  If the garlic needs more time to fry, return the wok to low heat and continue to fry.  

Pour the contents of the wok into the strainer lined bowl.  Lift the strainer up and shake off of the excess oil.  Scatter the garlic onto the lined plate.  The garlic should crisp up as it cools.  The chips can be stored in an airtight container at room temperature for 1 month.  Store the oil in the fridge for upto 6 months.   


Ginger salad Again, from my fave cookbook, 

BURMA SUPERSTAR: ADDICTIVE RECIPES FROM THE CROSSROADS OF SOUTHEAST ASIA

by Desmond Tan and Kate Leahy

JENNY’S NOTE: I KNOW I KNOW, there is no ginger in your box this week to pickle, BUT make do with what you DO have.  For example i used pickled radishes instead of the pickled ginger and this Summer salad remained so bomb.  It’s basically all I want to eat now, you’re welcome.  

 4 cups thinly sliced romaine lettuce

1 ½ cups shredded cabbage

3 heaping tablespoons pickled ginger (or pickled radish!), chopped

2 tablespoons fried garlic chips

3 tablespoons fried yellow split peas (jenny says optional, i never include)

3 tablespoons cilantro

2 tablespoons sunflower seeds

2 tablespoons coarsely chopped toasted peanuts

2 tablespoons minced jalapenos

1 tablespoon sesame seeds

1 ½ tablespoons toasted chickpea flour

1 ½ tablespoon onion oil 

2 tablespoon juice from the ginger pickling liquid

2 teaspoon fish sauce

¾ teaspoon salt

1 lime or lemon cut into wedges 

In a salad bowl, combine the lettuce, cabbage, pickled ginger, fried garlic, split peas, cilantro, sunflower seeds, peanuts, jalapenos, and sesame seeds.  Sprinkle chickpea flour over the top and drizzle with oil and pickling liquid (or rice wine vinegar if you have no pickling liquid).  Add the fish sauce and salt (use more salt if not using fish sauce).  Squeeze 1 or 2 lime wedges over the top.  Using your hands, mix well and taste, adding more salt or lime juice if needed. 

 Adapted from Gourmet, November 2007 but found on smittenkitchen.com

 The dressing is a simple blend of buttermilk, apple cider vinegar, a touch of mayo, shallots, sugar, salt and pepper but the flavor is anything but. This is my new go-to creamy dressing. I am sure it would equally delicious with some crumbled blue cheese mixed in, if you’re into that kind of thing. The dressing would be really great on an iceberg wedge or romaine hearts salad, or any kind of everything-but-the-kitchen-sink mega mixed bowl. Like your lunch tomorrow.

1/2 cup well-shaken buttermilk

2 tablespoons mayonnaise

2 tablespoons cider vinegar

2 tablespoons minced shallot

1 tablespoon sugar

3 tablespoons finely chopped chives

1 pound Napa cabbage, cored and thinly sliced crosswise (4 cups)

6 radishes, diced

2 celery ribs, thinly sliced diagonally

Whisk together buttermilk, mayonnaise, vinegar, shallot, sugar, 1/2 teaspoon salt, and 1/4 teaspoon pepper in a large bowl until sugar has dissolved, then whisk in chives.

Toss cabbage, radishes, and celery with dressing.

Zucchini, summer squash, etc… But have you turned on your grill yet?!!? I hope the answer is a hard yes, and do yourself a favor and whatever does not end up in the above salads, GRILL!!

And if you need a recipe, the following looks awesome-  I will link to it in the tomorrow updated CSA blog, but I clearly ran out of space here…

The crosshatch pattern isn’t just for show (even though it does look cool)! It allows for the salt to fully penetrate the squash and also draws out some of the excess water so that the sweet, tangy glaze can be fully absorbed.

Ingredients

4 servings

4 medium summer squash or zucchini (about 1½ lb. total)

Kosher salt

cup honey

cup unseasoned rice vinegar

¼ cup low-sodium soy sauce

3 Tbsp. hot chili paste (such as sambal oelek)

2 Tbsp. vegetable or sunflower oil, divided

1 lime, halved

½ small shallot, thinly sliced into rounds

¼ cup coarsely chopped cilantro leaves with tender stems

1 tsp. toasted sesame seeds

Step 1

Prepare a grill for medium-high heat. Cut each squash in half lengthwise, then score cut sides in a ¼" crosshatch pattern with the tip of your knife. Toss squash and 1 tsp. salt in a colander; set over a bowl. Let sit 10 minutes, then pat dry with paper towels.

Step 2

Meanwhile, combine honey, vinegar, soy sauce, and chili paste in a small saucepan. Bring to a simmer over medium-high heat and cook, stirring occasionally, until reduced by half and slightly thickened (just shy of syrupy), 5–7 minutes. Remove from heat. Stir in 1 Tbsp. oil.

Step 3

Toss squash with remaining 1 Tbsp. oil in a large baking dish or plate. Turn squash cut side up, then brush with glaze.

Step 4

Grill squash cut side down until just beginning to char around the edges, about 3 minutes. Continue to grill, turning every minute or so and brushing squash with glaze on cut sides, until just tender and cut sides are lightly charred and shiny from the glaze, 6–8 minutes total. (Reserve any leftover glaze.) Transfer squash to a platter.

Step 5

Squeeze juice from 1 lime half into a medium bowl and add shallot and cilantro; season with salt and toss to combine.

Step 6

Drizzle squash with any leftover glaze. Top with herb salad and sprinkle with sesame seeds. Serve with remaining lime half alongside.

CSA WEEK 5

P I C K L I S T

TOMATOES! - BASIL - CELERY - BROCCOLI - LETTUCE - RADISH - ZUCCHINI -

SUMMER SQUASH - PICKLES - SHISO

This week the harvest really started to pick up, and I did everything in my power to not fill your share up with only zucchini, summer squash, and cukes.  While those three main players are certainly taking up the most space in your CSA, we did manage to pick some other crops to spice it up.  However, what is a CSA if there isn't a few weeks of bumper to bumper crops?  

Also this week, it remained incredibly dry- we could use some rain… and while it poured a minute ago, the thunderstorm swept through way too fast and is just not gonna cut it.  In the next couple of days, we’re going to have to start pumping water from the river to keep crops happy and healthy.  Seems simple enough, but I can assure you it is a HUGE pain in the butt, we’d all just prefer some rain.  

All you awesome CSA gleaners came out this past Saturday and took to the fields clearing every last berry there was.  Totally warmed my heart to meet y'all, and bring you to the very place in which your food’s been coming from.  This was the official end of strawberry season and next week, hello to blueberry season. WOOT! WOOT!

OH AND LASTLY, speaking of bumper to bumper and heavy yields, we are having a sale on pickling cukes at the farmstand: If you are pumped about pickling, fermenting, etc- get in on this: 

$20 half bushel/ $38 full bushel.  

Call 603-298-5764 to place your order, leave a message if no one answers!

PRO-TIPS: 

Enter tomato basil season! we have arrived people!!! In other words, take your tomato, take your basil, sprinkle salt, find some crusty bread, and eat every damn day.  

Shiso!!: I’m very into this herb.  Lately it’s made its way into EVERY dish. From salads to sautees to eggs to just all things. Even better when paired with sesame oil, rice wine vinegar, liquid aminos, etc (And if you’ve been doing the CSA for a while now, then i have become a broken record but also hype girl for those 3 ingredients, but i digress).  For the easiest summer salad there ever was, do the following: mix lettuce with chopped herbs (basil and shiso!) add sliced radishes, dress to your pleasing. It’s perfect every time.   

JENNY’S NOTE: This recipe is super similar to the last pickle recipe but it uses shiso and it is next level divine.

  • 1/4 cup sugar

  • 1/2 cup apple cider vinegar

  • 3 tablespoons mirin

  • 1 tablespoon salt, preferably sea or kosher

  • 5 Japanese cucumbers, or 2 English cucumbers

  • 8 shiso leaves (or substitute basil)

Put sugar, vinegar, mirin and salt into a non-reactive bowl. Whisk until the sugar and salt are dissolved.  

Slice cucumbers as thinly as possible. 

Gather the shiso leaves like a deck of cards, roll into a tube and slice, chiffonade-style, like you would with basil.

Add cucumbers and shiso to the marinade and stir. Try to cover the vegetables with the marinade. It's okay if the liquid doesn't submerge the cucumbers. They will break down and get smaller as they marinate.

Put the mix in the fridge and let marinate for at least 4 hours. Mix a couple of times if you can, but it's okay if you don't. Once pointed in the right direction, cucumbers tend to take care of themselves.

Serve, icy cold out of the fridge if you can.

JENNY’S NOTE: Apparently, Meghan Markle made zucchini bolognese, told the world about it and blew everyone’s socks off.  Claire, my picking partner/ food preservation master chef made this dish for me once and it did indeed stand up to the test and my socks were in fact blown right off- try it!

This recipe is shockingly simple, and only requires a handful of easy-to-grab ingredients: water, one bouillon cube, and zucchini. I also added an onion and some garlic in order to give the dish some aromatic quality (what’s pasta without garlic?).

I started by sautéing one small onion and two cloves of garlic in about a tablespoon of olive oil. As soon as they became translucent, I tossed in the sliced zucchini and sautéed it all together for a minute or two. Meanwhile, I put the bouillon cube in a measuring cup with one cup of hot water and let it dissolve. 

Then, you are just going to add that stock created out of the water and bouillon to the pot with the zucchini, onion, and garlic. At that point, it couldn’t get easier. Just stir well, cover the pot, and reduce to a simmer. Now, just let that zucchini slow-cook until it turns mushy.

Although you’re slow-cooking the zucchini for hours, you’re going to want to check it every half hour or so because if it looks too thick or dry, you’ll need to add more water. Meghan simmered hers for four to five hours, so throwing it in a slow cooker could work here — or just keep it on the stove at low heat and keep checking out the consistency. You may discover you are ready to serve it after only around 90 minutes or so — mine was plenty mushy by then!

Finally, make your pasta and mix with the sauce. At this point, you may want to add a bit of grated Parm. I also added crushed chili flakes for a touch of heat.


Sour Pickles  from one of my fave cookbooks, GEFILTERIA / Serving Size 1 Quart of Pickles

  • 2 cups water

  • 1 heaping tablespoon kosher salt or sea salt, plus more if needed

  • 1⁄2 teaspoon yellow mustard seeds plus more if needed

  • 1⁄2 teaspoon whole black peppercorns 

  • 1-2 bay leaves (dried or fresh)

  • 1 small cinnamon stick

  • 1/2 tsp whole coriander seeds

  • 1/4 tsp whole cloves

  • 2 sprigs fresh dill… (JENNY’S NOTE: i know i know, where is the dill??  Short on the herb for this week, but make without and add it to the brine next time… because you know there will be a next time… :)

  • 3 garlic cloves, crushed

  • 1 pound cucumbers 

  •  Pour the filtered water into a clean wide-mouth quart-size jar. Pour the salt into the water, cover with a tight-fitting lid and shake to dissolve the salt.

  •  Add the dried spices, dill and garlic, then add the cucumbers (or green beans). Pack the vegetables in tightly, squeezing as many as possible into the jar, making sure the brine covers the vegetables. If it doesn’t cover the cucumbers (or beans), mix a heaping 1 ½ teaspoons of salt with 1 cup of water. Pour in enough of this mixture to cover the vegetables. Seal the jar, affixing your fermentation pipe to the lid.

  •  Let the cucumbers (or beans) sit at room temperature for 4 to 7 days. You’ll notice that the cucumbers (or beans) will turn pale after about 2 days. The time the vegetables take to ferment fully will vary depending on air temperature and elevation. Taste them each day after the fourth day until the desired level of sourness is reached. The brine will begin to appear cloudy and may be a bit fizzy.

  •  When you are happy with the taste of the cucumbers (or beans), remove all white yeast or mold from the top of your jar, if any has appeared. Seal the jar and place the pickled vegetables directly in the refrigerator. They will keep for up to 6 months.

CSA WEEK 4

p i c k l i s t

GARLIC SCAPES - HAKURAI TURNIPS - LETTUCE - BEETS - CUKES -

SUMMER SQUASH - KALE - PARSLEY - SCALLIONS

POP-UP STRAWBERRY GLEANING THIS SATURDAY

Strawberry Season comes to a close this week so let’s all go glean some berries!  


Join us Saturday afternoon for the annual CSA pop-up Strawberry Glean

Pick all you want, for free and enjoy this New England past-time.


WHO:  Open to the entire Edgewater Farm C.S.A. community

WHAT:  A Strawberry Gleaning takes place towards the end of a crop's productive season.  The purpose of the glean is to invite the C.S.A. community to the field to pick off any extra berries for their (your) own kitchen.  The gleaning will take place rain or shine (preferably shine).  The field is yours to pick through and whatever berries you can find are yours.  Bottomline, All-You-Can-Pick-FREE-Berries

WHERE:  at Edgewater Farm (park by the greenhouses)

 THE ADDRESS for all your googling:   99 River Road/ Plainfield NH 03781

 WHEN: This Saturday  July 9th... 3:00pm- 5:00pm

 HOW: You pick.  Bring containers!! 

WHY: Because it's awesome, & the berries are free & delicious & there is still some decent fruit out there


A heads up::  As it is the end of the season, along with nice berries, you will find rot   


PRO-TIPS:

These smoky grilled beets are perfectly paired with a fresh mint and parsley pesto. A finishing touch of cultured vegan cashew cheese (but you can use feta if youd rather!) and peppery micro greens (but you can use your big head lettuce) rounds everything out. Ten-ish ingredients and simple cooking methods yield an unusual and flavourful vegetable side dish. Instructions for roasting the beets are also included in this recipe.

Prep Time20 minutes/ Cook Time50 minutes/ Total Time1 hour 10 minutes/ Servings4 -6/ AuthorLaura Wright

  • 2 bunches medium-sized beets, scrubbed (about 750 grams)

  • 2 garlic scapes

  • 1 tablespoon capers, drained

  • ¼ cup shelled pistachios

  • 1 cup mint leaves, very lightly packed

  • 1 cup parsley leaves, lightly packed

  • 2 tablespoons lemon juice

  • 2 teaspoons light miso

  • ⅓ cup olive oil, plus extra

  • ½ teaspoon smoked paprika

  • sea salt and ground black pepper, to taste

  • Handful chopped lettuce

  • 1 oz of feta

  1. Bring a large pot of salted water to a boil. Once boiling, drop the beets into the water. Bring the beets up to a boil. Lower the heat to a simmer and cook until the beets are tender when pierced with a knife, about 30-40 minutes. Drain the beets and set aside to cool slightly. Once you can handle them, slip the skins off of the beets. Set the peeled beets aside.

  2. While the beets are simmering, make the pesto. In a food processor fitted with the “S” blade, place the garlic scapes, capers, and pistachios. Pulse these items a couple times until finely chopped. Then, to the food processor, add the mint, parsley, lemon juice, miso, salt, and pepper (being careful on the salt because the miso and capers are quite salty). Pulse this mixture until the herbs are finely chopped. Then, with the motor on low, drizzle the olive oil in through the feed tube until you have a slightly fluid paste. Scrape down the sides of the food processor bowl and pulse a couple more times. Check the pesto for seasoning, adjust if necessary, and set aside.

  3. Preheat a grill to high. Cut the beets into halves (or into quarters if you like and don’t mind fussing with them on the grill). Place the cut beets in a medium bowl and toss them with olive oil, the smoked paprika, salt, and pepper. Once evenly coated, set aside.

  4. Using tongs, carefully place the beets on your preheated grill. Let them sit for about 4-5 minutes, or until there is some slight charring on the side facing the grill. Flip the pieces of beet over and grill for another 4-5 minutes to get slight charring on the other side. Remove the beets from the grill.

  5. To serve, spread the pesto out evenly on a dinner plate-sized platter. Arrange the grilled smoky beets on top. Top the beets with the chopped lettuce, the crumbled cheese (if using), some extra mint, a few twists of black pepper, and some extra capers if you like. Serve warm or at room temperature.

Notes

  • You could also roast the beets. Just fully dry the boiled beets, cut them into halves or quarters, and then toss them with olive oil, the smoked paprika, salt, and pepper before spreading out on a baking sheet. Roast at 400 for about 25 minutes or until you get some light caramelization on the edges.

  • If your beets came with beautiful greens, save them! I usually just sauté them with garlic, chili, and a splash of sherry vinegar at the end.

JENNY’S NOTE: I know I know, a jam recipe but no berries this week!?!?!  This is to prepare you for Saturday’s glean- Because all berries, despite signs of age, bugs, and weathering make a great jam.  

Making your own strawberry jam is as easy as one-two-three. The only ingredients you need to make this recipe are whole, hulled strawberries, sugar, and lemon juice. For a quick breakfast or snack, toast slices of country-style bread and top with ricotta cheese and a dollop of jam.

Yield:Makes 1 3/4 cups

1 quart hulled strawberries

1/2 cup sugar

2 tablespoons fresh lemon juice

In a food processor, process strawberries until coarsely chopped. Transfer to a large skillet and stir in sugar and lemon juice. Cook over medium-high, stirring frequently, until jam is thickened and bubbles completely cover surface, 9 to 10 minutes. Transfer jam to a jar and let cool to room temperature. (To store, seal jar and refrigerate, up to 10 days).