
P i c k l i s t
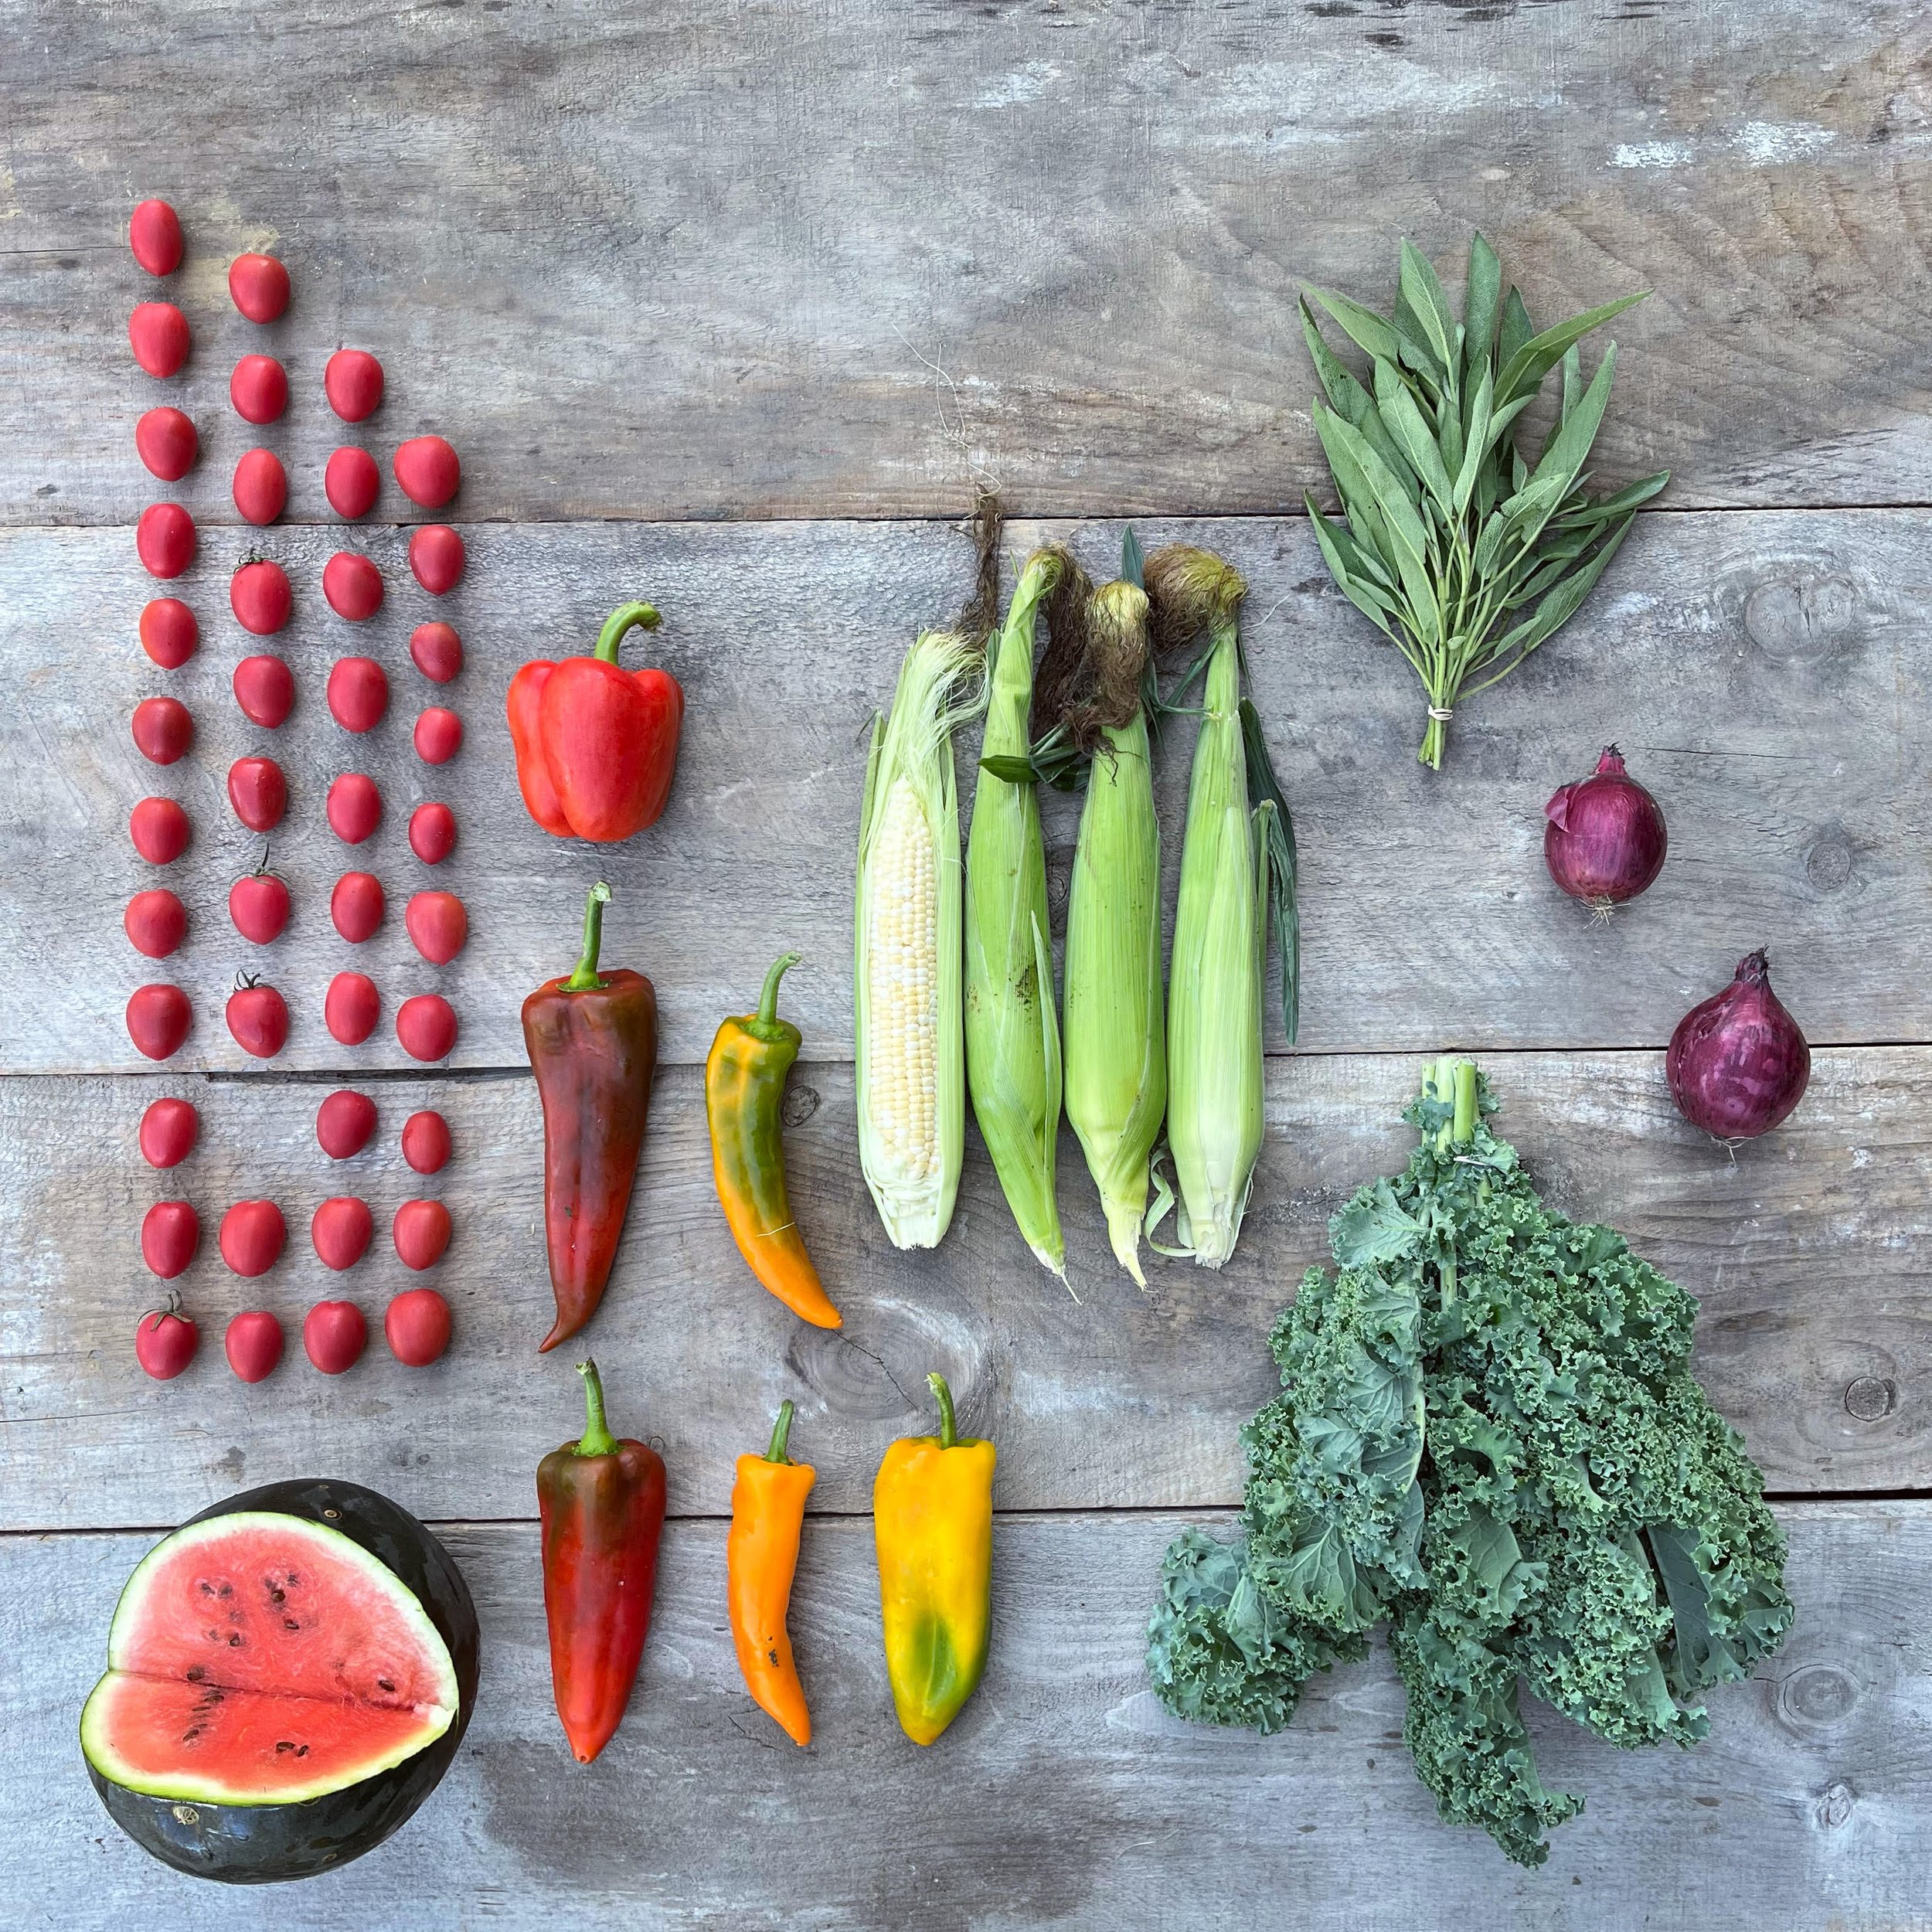
watermelon - cherry tomatoes - sweet peppers - sage - kale - onions - corn
THIS WEEK AT EDGEWATER…
I am overwhelmed with joy to announce the return of kale. On Monday I slogged my wet boots out into the field to pick you bunches upon bunches of collard greens. After last week’s box of pure bulk, I was missing something green and fluffy to pick and basque in. All the good fluffy crops have just absolutely failed this season- Lettuce, arugula, swiss chard, and kale have all taken such a hit. But alas! I peered towards the hill and to my total delight, I spied the return of the sweet green fluff, the old comeback kid. Kale is supposed to be the workhorse of vegetables- the one crop that never says die.* So we were all aghast back in early August, as we watched this patch of kale look so sickly. That week- we did our best, and used every trick we could. We stripped all the sad leaves off the plant, spread pelleted fertilizer, and looked to the sun praying to see her shiny face. A month and a half later, we have curly greens again. Woot! Woot!
Don’t get me wrong, I love a stand of collard greens. I’d be just as happy with collards as kale, But it’s been a minute since we all made kale chips and ate kale salad. As far as other greens go, we’ve been trying like hell to grow lettuce all season. However there is a woodchuck that continues to eat every last plant that we seed in the greenhouse, and if the lettuce makes it to the field, the deer are all over it. All that said, we have big plans for our Fall CSA. We planted up a whole greenhouse of lettuce starts, keeping the sides of the greenhouse down as much as possible. Tim (of field crew) volunteered to sleep in said greenhouse with a bow, an arrow, a jar of peanut butter and a nine iron. We’ll see if it comes to that.
Bottomline here, welcome back kale, but it is now my belief that Collard Greens are the real workhorse all star champ veg.
Other noteworthy crops of the week, SWEET COLORFUL ROBUST PEPPERS! The pepper fields are finally ripening with all the colors of the rainbow. Hopefully we can get a good flush out of the crop before the wind breaks all the plants, or we get the first hard frost. WHAT A SEASON!
*I am positive I mentioned this in a previous note back in late July, please forgive my broken record tendencies.
FARMY FOODIE PRO-TIPS:
I have no words for this recipe – it is definitely one of my all time favourites. This is hands down the ultimate crowd pleaser dish, and it doesn’t get much easier than this. Packed with creamy feta, rich olive oil, olives, fresh sage, toasted sesame seeds, sweet honey, a touch of orange zest and a hint of chili pepper, this dish is pure goodness. I mean, who wouldn’t want this?! If you are entertaining and need to get something on the table that looks sexy and tastes like heaven, this Baked Feta with Olives, Sesame, Sage & Honey dish is for you 😉
16oz Greek feta- pat dry
1/3 cup extra virgin olive oil
3 strips orange zest- around half an orange
1 tablespoon lightly toasted sesame seeds
1/3 cup castelvetrano olives
1/3 cup kalamata olives
Small handful of fresh sage- can also sub with fresh rosemary or thyme
2 tablespoons honey
Half cayenne chili pepper, thinly sliced
Flaky sea salt
Preheat the over to 400 degrees F.
In a small baking dish, place the feta, olives, orange zest, toasted sesame seeds, sliced chili peppers and olive oil.
Place into the preheated oven for 10-15 minutes.
Set the oven to broil and let broil for 3-5 minutes.
Remove, drizzle with honey, sprinkle Maldon sea salt and serve with crusty fresh bread.
Enjoy that Baked Feta!
I also implore you to eat the above sage feta with ROASTED PEPPERS!! YES PLEASE!
THE FOLLOWING ROASTED PEPPER NOTES ARE FROM bonappetit.com via Alex Delaney:
You don’t need much to make roasted red peppers. Peppers (duh). Olive Oil. And some kosher salt. That’s it. You have most of that stuff at home already, so grab some peppers and let's do this.
There are two ways to roast peppers. Both involve some form of aggressive heat followed by a more mellow, lower-heat method as needed. Whether you’re an oven person or a stovetop person, your cutlet sandwich will be stacked with red peppers in no time. Here’s how we do it:
The Oven Method: Turn on your broiler. Yes, the broiler. That fire thing you might be scared of. It’s cool. Broilers are our friends. We promise. Cut red bell peppers in half and remove the core and seeds. Toss the pepper halves in a tiny bit of olive oil and spread them on a sheet pan, with the cut sides down and skin sides up. Our goal here is to get the skin charred enough to be able to easily remove it. Put the peppers under the broiler for 12-14 minutes, until the skins are black. Remove the peppers and turn your oven to 250°.
The peppers won’t be cooked all the way through from that time under the broiler. But the skins should peel right off. Let them cool a bit until you feel comfortable handling them, then use your hands or the back of a knife to peel the charred skins off of the peppers and then place the skinless peppers back on the sheet pan. Throw them back in your oven for about half an hour, until the peppers are tender and cooked through. Take them out, let them cool, and slice them into strips. Look at you! You roasted red peppers! Amazing!
The Stovetop Method: You can also recreate the broiler effect by laying peppers directly over an open flame. We would not suggest using that BIC lighter in your junk drawer. The flame on your (gas) stove will work much better. (Sorry to those of you with electric burners—hopefully you have a broiler?) Turn the flame on medium, place the peppers on the burner so they're in direct contact with the heat, and use tongs to rotate as needed so the skin gets dark and charred all over. Repeat this with as many burners as you need for as many peppers as you have. Maybe it’s two. Maybe it’s 736. We don’t know how much you like roasted red peppers. When each one is finished charring, sling it into a bowl and cover with plastic wrap—you want to let those bad boys steam a bit once they come off the burner.
Once you've charred all the peppers and let them all hang out in that steamy covered bowl, take them out, pull out the stem and seedy parts, open the peppers kind of a like a book and place them (charred) skin side up on your cutting board. Using your hands or the back of a knife, scrape off the charred skin. (It's okay if some won't come off; it won't kill you.) At this point the peppers should be mostly cooked-through, but if you want them a little softer you can go ahead and cook them over low heat in a Dutch oven with a glug of olive oil, stirring every once in a while, until they've softened to your liking.
JENNY’S NOTE: i roast my peppers by charring on the grill :)
Storage Maneuvers: Whether you went the stove or oven route, you should be looking at some tender, skinless roasted red peppers. Nice job. You can eat them immediately if you’d like, but the secondary goal is to store them so they’re ready to use at a moment’s notice. Sprinkle the peppers with a bit of kosher salt and transfer them into a glass jar or plastic Tupperware. Pack them in tightly, then add olive oil until the peppers are fully submerged.
Keeping the peppers submerged in the liquid will make sure they don’t spoil in the fridge—they should keep for at least a week this way. And since these peppers can hang around in the fridge for a minute, we'd suggest roasting more than two. Maybe not 736, like we suggested earlier...but definitely more than two.